
Digital Camera User Manual


C2946M-D (6/08) 27
Camera Synchronization
Camera synchronization may affect installations that use two or more AC power supplies for multiple cameras. Due to different power phases,
a brief vertical roll may appear on the monitor when switching between cameras. To eliminate this vertical roll, adjust the phase control to
synchronize the cameras to one another.
It may be necessary for two people to communicate when synchronizing cameras, one at the camera and the other at the monitor, to observe the
vertical roll and the effect of any camera adjustments.
To synchronize cameras, complete the following steps:
1. Choose a reference camera to which all other cameras will be phased.
2. Access V-PHASE ADJ menu for a camera. Press the button up and down to adjust the vertical phase until the camera is synchronized to the
reference camera.
A dual trace oscilloscope is recommended, but not required, to adjust camera phase. Align the vertical sync pulses of the reference camera
to the selected camera.
3. After making each adjustment, switch back and forth between the adjusted camera and the reference camera. Repeat this process until the
roll between the cameras disappears completely.
4. Adjust the phase of all other cameras by repeating steps 2 and 3. Always adjust to the reference camera selected in step 1.
5. As soon as you finish customizing this and all other camera settings, save your custom settings into the CUSTOM profile. This protects
them if the camera loses power or if it must be restarted (refer to Profiles on page 18 for more information).
To adjust phase control:
1. Select LINE SYNC on the FUNCTION SETTINGS menu. The LINE SYNC menu appears.
2. Switch the LINE SYNC setting to AUTO.
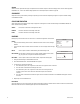
3. Select V-PHASE ADJ. The V-PHASE ADJ menu appears.
4. Press the button up or down to change the PHASE VALUE. On the C10CH-6 (NTSC) camera, the range is 0 (zero) to 52. On the C10CH-6X
(PAL) camera, the range is 0 (zero) to 62.
5. Press the center of the button to return to the LINE SYNC menu.
6. Select EXIT to close the setup menus.
7. As soon as you finish customizing this and all other camera settings, save your custom settings in the CUSTOM profile. This protects them
if the camera loses power or if it must be restarted (refer to Profiles on page 18 for more information).