DD5T Series Dome Drive Installation/ Operation Manual C1498M-A (7/99) UL ® LISTED Pelco • 300 W. Pontiac Way, Clovis • CA 93612-5699 USA • Pelco Online @ http://www.pelco.
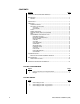
CONTENTS Section Page IMPORTANT SAFEGUARDS AND WARNINGS ................................................................ 3 DESCRIPTION ................................................................................................................... 3 MODELS .................................................................................................................... 3 INSTALLATION ..................................................................................................................
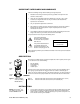
IMPORTANT SAFEGUARDS AND WARNINGS Observe the following warnings before installing and using this product. 1. Installation and servicing should only be done by qualified service personnel and conform to all local codes. 2. Unless the unit is specifically marked as a NEMA Type 3, 3R, 3S, 4, 4X, 6, or 6P enclosure, it is designed for indoor use only and it must not be installed where exposed to rain and moisture. 3. Only use replacement parts Pelco recommends. 4.
CAUTION: Make sure the dome drive locks into place. Pull down on the dome drive with moderate pressure to ensure that it stays in place. 2. Set the switches on the bottom of the dome drive. Refer to Table A for the settings for SW1, and Table B and Table C for SW2. 3. Install the dome drive in the back box. Line up the green tab and red tab on the dome drive with the green label and red label on the back box.
Table C. Switch Settings for SW2 – D-Type Control NOTE: For Coaxitron® controls, all switches on SW2 MUST be OFF. For P-type control systems, refer to Table B.
Table C. Switch Settings for SW2 – D-Type Control (Continued) NOTE: For Coaxitron® controls, all switches on SW2 MUST be OFF. For P-type control systems, refer to Table B.
Table C. Switch Settings for SW2 – D-Type Control (Continued) NOTE: For Coaxitron® controls, all switches on SW2 MUST be OFF. For P-type control systems, refer to Table B.
Table C. Switch Settings for SW2 – D-Type Control (Continued) NOTE: For Coaxitron® controls, all switches on SW2 MUST be OFF. For P-type control systems, refer to Table B.
Table C. Switch Settings for SW2 – D-Type Control (Continued) NOTE: For Coaxitron® controls, all switches on SW2 MUST be OFF. For P-type control systems, refer to Table B.
PAN AND TILT FUNCTIONS Use your controller’s joystick to control pan and tilt operation. • Fixed-Speed Controllers - Pan and tilt operation is at a fixed speed; the controller determines the speed. • Variable-Speed Controllers - Depending on the joystick’s position, standard pan operation ranges from 0.5 to 80 degrees per second (dps); standard tilt operation ranges from 0.5 to 40 dps. When performing preset operations, pan speed is 250 dps; tilt speed is 200 dps.
Software controls scan limit stops. When the dome reaches one, it immediately reverses direction. Refer to the Limit Stops section to program the scan limit stops. Program preset 96 (29) to stop a scan. Any pan and tilt or lens command also stops a scan. PARK If the dome does not receive any commands for a specified period, it goes to preset 1 and parks. The dome will not park if the time specified is zero or preset 1 has not been programmed. The default is zero minutes.
CM9750 1. Turn the KEY SWITCH to the ON position. 2. Press the PROG key. PROGRAM appears on the LCD screen. 3. Press the PRES key. The PRESET prompt appears. 4. Enter 95 and press the ENTER key. The main menu appears. 5. Turn the KEY SWITCH to the OFF position. CM9760 1. In the default menu, select DEF. The Define Submenu appears. 2. Enter your four-digit PIN. 3. Enter 95 and select PRST. The main menu appears on the monitor. 4. Select the Quit icon to return to the default menu.
Turning off power to the dome does not reset the camera. Camera settings are retained in memory, and when power is restored, the settings are the same as when the camera was turned off. To reset the camera: 1. 2. 3. 4. On the main menu, move the joystick up or down to position the cursor (>) beside Camera. Press the Iris Open button to enter the Camera submenu. Move the joystick up or down to position the cursor beside Reset Camera. Press the Iris Open button to reset the camera.
2. If the cursor (>) is not beside Camera, move the joystick up or down to position the cursor beside Camera. 3. Press the Iris Open button to enter the Camera submenu. 4. Move the joystick up or down to position the cursor beside Auto-Iris. 5. Press the Iris Open button. Another menu will appear with auto iris mode, level, and peak selections. 6. Move the joystick up or down to position the cursor beside one of the choices. Press the Iris Open button.
SHARPNESS The two modes for adjusting the picture sharpness are automatic and manual. To change the mode: 1. On the main menu, move the joystick up or down to position the cursor (>) beside Camera. 2. Press the Iris Open button to enter the Camera submenu. 3. Move the joystick up or down to position the cursor beside Next. 4. Press the Iris Open button to go to the next camera submenu. 5. Move the joystick up or down to position the cursor beside Sharpness. 6. Press the Iris Open button.
• Park – The dome moves to preset 1 when the power-up sequence finishes. The only text on the screen is the preset label (if any). • Scan Auto – The dome initiates scan mode when the power-up sequence finishes. Again, there is no text. • Scan Frame – The dome initiates a frame scan when the power-up sequence finishes. • Scan Rand – The dome initiates a random scan when the power-up sequence finishes. The default setting is Default. To select the power-up mode: 1.
NOTE: On power-up, the auto scan tilt angle will be whatever angle the camera was at when the right scan limit was set. SCAN LIMIT STOPS Refer to the documentation for your control system for programming presets, then do the following: 1. 2. 3. 4. 5. Make sure limit stops are turned ON (refer to the Limit Stops section), then exit the menu. Push the joystick left until you reach the limit you want the camera to go to on the left. Program preset 92 (25).
4. Remove the dome drive: Push in on the green drive eject tab on the side of the dome drive and gently rock the dome drive to release the latch. When the green latch releases, pull the dome down. 5. Do one of the following: • If your problem was that the unit would not operate: Proceed to step 6. • If your problem was that the fan would not operate: Make sure the connector for the fan is fully seated. Replace the dome drive. Turn on power.
SPECIFICATIONS MECHANICAL Pan Movement: 360° continuous pan rotation Vertical Tilt: Unobstructed +2° to -92° Manual Pan Speed: 0.5°-80°/sec manual operation, 150°/sec turbo Manual Tilt Speed: 0.
REGULATORY NOTICES NOTE: This equipment has been tested and found to comply with the limits of a Class A digital device, pursuant to part 15 of the FCC rules. These limits are designed to provide reasonable protection against harmful interference when the equipment is operated in a commercial environment. This equipment generates, uses, and can radiate radio frequency energy and, if not installed and used in accordance with the instruction manual, may cause harmful interference to radio communications.