
User's Manual

62 C1697M-B (11/08)
Assigning a Device Location
Cameras can be grouped into physical or logical groups to facilitate easier and more intuitive access. To create, change, or assign locations:
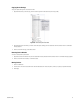
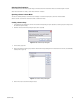
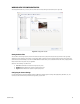
1. Click Location . The Set Location dialog box appears, displaying a hierarchical list of existing locations (refer to Figure 66).
2. Click the plus (+) to expose lower levels of the hierarchy or click the minus (–) to hide lower levels.
Figure 66. Selecting a Device Location
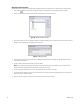
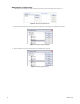
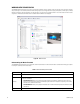
3. If the desired location does not exist, navigate to a place in the location hierarchy where you would like to add the new location, and then
click New. The Add Location dialog box appears (refer to Figure 67).
Figure 67. Adding a Location
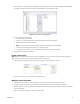
4. Enter a new location name, and then click OK. The new highlighted location appears in the hierarchy. You can also click Cancel to exit
without adding a new location.
5. To delete a location, select the location name, and then click Delete.
NOTE: If other devices have been assigned this location, this action deletes the location only for that device. If no other devices are
assigned this location, clicking Delete removes the location entirely from the system.
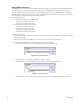
6. To rename a location, right-click the name. You can also click Rename, and then enter the new name.
7. To rearrange the list of locations, click and drag a location name to a new position. A dialog box appears asking you to confirm the move.
Click Yes to confirm, or click No to cancel.
8. Click OK to save your changes, or click Cancel to exit the dialog box without saving the changes.