
User's Manual


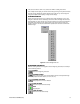

Table Of Contents
- CONTENTS
- DESCRIPTION
- INSTALLATION
- SOFTWARE INSTALLATION
- NETWORK CONNECTION
- UNINSTALLATION
- OPERATION
- RESTRICTIONS
- START A VIEWING SESSION
- END A VIEWING SESSION
- CONNECT TO A DVR
- ADD A RECORDER
- DISCONNECT FROM A DVR
- VIEW VIDEO
- CUSTOM DISPLAY
- PLAYBACK CONTROLS
- IMAGE INFORMATION
- DVR INFORMATION
- ALARM SEARCH
- BOOKMARKS
- MARK A VIDEO IMAGE
- BOOKMARKS A, B COMMAND
- PLAY BACK VIDEO
- COPY A VIDEO IMAGE
- PRINT A VIDEO IMAGE
- RENEW INFO
- SAVE A VIDEO IMAGE
- SET BASE SPEED FOR SEARCH PLAYBACK
- SEQUENCE CAMERAS
- SMOOTH THE VIDEO IMAGE
- TIME SEARCH
- ZOOM
- QUICK ZOOM
- ZOOM BOX
- TROUBLESHOOTING
- WARRANTY AND RETURN INFORMATION
- LIST OF ILLUSTRATIONS
- 1 Configuration Page
- 2 IP Address Page
- 3 DX3016RX Main Screen
- 4 Network Window
- 5 Main Screen with Video
- 6 Recorder Property Window
- 7 Camera Selection Buttons
- 8 Camera Assignment List
- 9 Image Information: Live Mode (Left) and Playback Mode (Right)
- 10 DVR Information: Live Mode (Left) and Playback Mode (Right)
- 11 Alarm List Window
- 12 Bookmarks Menu
- 13 Camera Selection List
- 14 Time Search Dialog Boxes
- 15 Quick Zoom Window
- 16 Zoom Box
8 Pelco Manual C689M (5/01)
00802
00785
ADD A RECORDER
To add a recorder to the Recorder List:
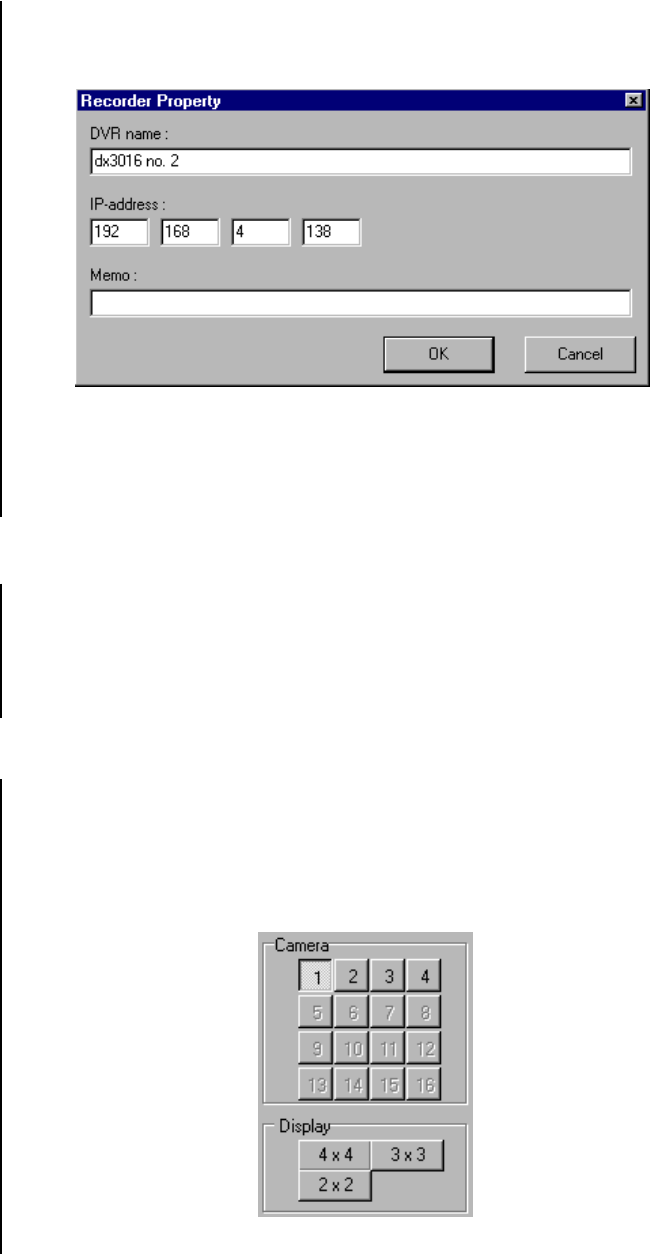
1. Click Network on the toolbar, and then click Add Recorder. The Recorder Property
window appears.
Figure 6. Recorder Property Window
2. Enter the DVR name and IP address in the Recorder Property window. Entering text in
the Memo line is optional.
3. Click OK.
DISCONNECT FROM A DVR
To disconnect from a DVR:
1. Click Network on the toolbar, and then click Disconnect.
2. If desired, use a ballpoint pen or similar instrument to press the REMOTE communica-
tion button on the DVR. The LOCK and REMOTE lights go out, and all the front panel
buttons and the RS-232C terminal are enabled for operating the DVR.
VIEW VIDEO
1. Click the Live button or Playback button.
2. Select a camera. For a full-screen view of a single camera, click a number in the Cam-
era box. For multiple-camera views, click 2 x 2 (four cameras), 3 x 3 (nine cameras),
or 4 x 4 (sixteen cameras) in the Display box. Repeated clicks of the 2 x 2 button will
cycle between camera groups 4a, 4b, 4c, and 4d. Repeated clicks of the 3 x 3 button
will cycle between camera groups 9a and 9b.
Figure 7. Camera Selection Buttons