
DVR - Video Recorder User Manual
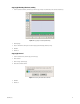


Table Of Contents
- DX4700/DX4800 Series Hybrid Video Recorder
- Contents
- List of Illustrations
- List of Tables
- Description
- Product Overview
- Operation
- Unit Startup
- Logging On and Logging Off
- Unit Shutdown
- About Basic System Defaults
- Quick Start to Working With the Unit
- Instant Recording and Playback
- PTZ in Live View
- Copying and Exporting Video
- Acknowledging an Alarm or Motion Event
- Displaying Video on the Main and Spot Monitors
- System Log List
- System Information
- Playback
- Search Video
- Formatting Media and Exporting Video
- Capturing a Video Scene
- Configuration
- Appendixes
- Appendix A: Overview of DX4700/DX4800 Setup Window and Operating Information
- Appendix B: Supported Media Devices
- Appendix C: Supported PTZ Protocols
- Appendix D: Supported IP Camera Resolutions
- Appendix E: Resolutions and Frame Rates (250 GB HDD)
- Appendix F: Troubleshooting
- Appendix G: Hardware and Software Upgrade Policy
- Appendix H: Recovering the Administrator Password
- Appendix I: Working with PTZ Devices Using the KBD300A Keyboard
- Appendix J: Factory Defaults
- Appendix K: Time Zone Conversion Chart
50 C4655M (2/11)
To configure the alarm input channels:
1. From the Setup menu, click the Linking submenu.
2. Click Alarm.
3. Click the Input Type box, and select the alarm state.
4. Click the Camera box, and select the desired channel.
5. Configure the remaining settings.
6. Repeat the previous steps (as necessary) to configure additional channels.
7. Click Close.
8. Click OK.
MOTION
The unit allows you to configure the following settings:
• Channel: Selects the motion channel (CH 01 to CH 16) for configuration.
• Sensitivity: Sets the motion sensitivity (OFF or 01 to 10). Select a lower value to decrease the sensitivity to motion; increase the value to
increase the sensitivity to motion.
NOTE: If sensitivity is set too low, the unit may not record a motion event. If sensitivity is set too high, the unit may record false motion
events.
• Relay Output: Sets the relay output: NONE, O1, 02, 03, or 04.
• Area: Allows you to configure the motion area.
To configure the motion channel:
1. From the Linking menu, click the Motion submenu.
2. Click the Motion Channel box, and select a channel.
3. Configure the remaining settings.
4. Drag the motion grid to set the motion area.
5. Repeat the previous steps (as necessary) to configure additional channels.
6. Click Close.
7. Click OK.