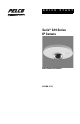
Q U I C K S T A R T Sarix® IL10 Series IP Camera Dome Camera Installation C3914M (2/13)
Important Notices LEGAL NOTICE SOME PELCO EQUIPMENT CONTAINS, AND THE SOFTWARE ENABLES, AUDIO/VISUAL AND RECORDING CAPABILITIES, THE IMPROPER USE OF WHICH MAY SUBJECT YOU TO CIVIL AND CRIMINAL PENALTIES. APPLICABLE LAWS REGARDING THE USE OF SUCH CAPABILITIES VARY BETWEEN JURISDICTIONS AND MAY REQUIRE, AMONG OTHER THINGS, EXPRESS WRITTEN CONSENT FROM RECORDED SUBJECTS.
Introduction The Sarix® IL10 Series dome cameras are high-definition, IP network cameras that offer a cost-effective solution for video security needs in small- and medium-sized businesses. The IL10 Series is part of Pelco’s Value (V) range of cameras. The IL10 Series dome camera is easy to install, offers ceiling mounting, and uses a standard Web browser for easy remote setup and administration. The IL10 Series easily connects to Pelco IP and hybrid systems such as Endura® version 2.
Product Overview Figure 1. Camera Connections (model IL10-DA shown) ì RJ-45 Network Port: Connects the camera to the IP network. Also supplies power, through the same connector, to the PoE model of the camera. î 1/4-inch x 20 Thread: Connects the camera to a mount. ï 24 VAC Port: Supplies power to the 24 VAC model of the camera. ñ Reset Button: Reboots the camera or restores the camera’s factory default settings. This button is recessed.
4. Tighten the two captive screws until the mount is held tightly to the ceiling. Figure 4. Tightening the Screws 5. Connect the power wiring to the camera using one of the following options: • Connect the network cable to the RJ-45 network port on the rear of the camera (refer to model IL10-DP). • If the camera is 24 VAC, also connect the 24 VAC power connector (supplied) to the rear of the camera (refer to model IL10-DA). Then connect to a 24 VAC power supply (not supplied).
7. Apply power to the camera. The camera will complete a configuration sequence. The LED below the lens will blink for several minutes while the camera system boots. The LED will turn off when the system boot cycle completes. NOTE: If the camera is not connected to a DHCP server and DHCP is enabled, the configuration sequence might take up to five minutes to complete. 8. If you do not know the camera’s IP address, install the Pelco Device Utility software available at www.pelco.com.
POWER WIRING CAT5 CABLE Connect a Cat5 cable (not supplied) to the RJ-45 network connector. The 8-pin connector includes video and PoE for the camera. PoE (IEEE 802.3af) injects power over the same cabling that carries the network data, eliminating the need for a separate power supply. This simplifies the installation and operation of the camera without affecting network performance. NOTE: The camera will autosense and configure itself to use either a crossover cable or a straight cable.
Operation IP ADDRESS SETTINGS If the camera is connected to a Dynamic Host Configuration Protocol (DHCP) network and DHCP is set to On, the server automatically assigns an IP address to the camera. The default setting for the camera is DHCP On. To set the camera’s IP address manually, set DHCP to Off. NOTES: • If the camera is not connected to a DHCP server but DHCP is set to On, the default IP address 192.168.0.20 on subnet mask 255.255.255.0 is automatically assigned to the camera.
Specifications CONSTRUCTION Camera Body Polycarbonate-ABS blend Bubble Polycarbonate, transparent CAMERA Imaging Device 1/6.9 inch Imager Type CMOS Imager Readout Progressive scan Aspect Ratio 16:9 Sensitivity Color (33 ms) Color (200 ms) f/2.0 3.0 lux, autoswitching 0.5 lux, autoswitching Signal-to-Noise Ratio 50 dB White Balance Range 2850° to 6500°K Video Motion Detection 3 zones, plus background zone Angle Adjustment Pan/tilt Lens f/2.0 Focal Length 1.
Pelco System Integration Endura 2.0 (or later); Digital Sentry 7.3 (or later); DX4700/DX4800 Open API Pelco API v1.0 or ONVIF Profile S ENVIRONMENTAL Operating Temperature –0° to 40°C (32° to 104°F) Storage Temperature –0° to 60°C (32° to 140°F) Operating Humidity 15% to 85%, RH (noncondensing) Storage Humidity 15% to 85%, RH (noncondensing) PHYSICAL Weight 0.264 kg (0.582 lb) NOTE: VALUES IN PARENTHESES ARE INCHES; ALL OTHERS ARE CENTIMETERS. 8.73 (3.44) 4.50 (1.77) 0.90 (0.35) 3.21 (1.
PRODUCT WARRANTY AND RETURN INFORMATION WARRANTY Pelco will repair or replace, without charge, any merchandise proved defective in material or workmanship for a period of one year after the date of shipment.
Pelco by Schneider Electric 3500 Pelco Way Clovis, California 93612-5699 United States USA & Canada Tel (800) 289-9100 Fax (800) 289-9150 International Tel +1 (559) 292-1981 Fax +1 (559) 348-1120 www.pelco.com www.pelco.