
User's Manual


Chapter Three: Maps and Administrator Features
12/97 9760-GUI 21
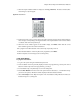
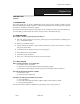
7. When the required button number is displayed, click Log. Alarm No. The Select window (illus-
trated in figure 3-6) will appear.
Figure 3-6: Select Window.
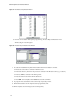
8. Position the mouse cursor over the digits in the Select window and press the left mouse button to
enter the digits corresponding to the logical number of the required alarm. If an incorrect number
is selected, click clear and repeat Step 8.
9. When the correct number appears in the number display, click Enter. Check that the correct
alarm number appears in the Current Alarm box.
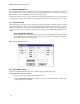
10. To program more alarms buttons on the current map, repeat Steps 6 to 10.
11. When all alarm buttons on this map have been programmed, click Done.
12. When complete, save the changes (refer to Saving Files).
3.5.3b Area Buttons
To program area buttons:
1. Log on to the system using the Administrator password.
2. If an area button on the map currently displayed needs to be programmed, go to Step 4. If an area
button on another map needs to be programmed, go to Step 3.
3. To load another map, complete Steps 3 to 6 from Loading Files.
4. Ensure Show Buttons from the Screen menu option has been selected (i.e., a checkmark will ap-
pear next to the option). All buttons will be displayed with their allocated number.
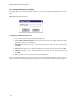
5. Select Area Setup from the Map menu option. The Area Button to Map Allocation window (il-
lustrated in figure 3-7) will appear.