® SD5BCBW Series Spectra II™ Color/Black & White Dome Systems Operation and Programming Manual C2423M (5/00) Pelco • 3500 Pelco Way • Clovis, CA 93612-5699 USA • www.pelco.
CONTENTS Section Page IMPORTANT SAFEGUARDS AND WARNINGS ................................................................ 3 OPERATION ...................................................................................................................... 4 POWER-UP DISPLAY ............................................................................................... 4 OPERATING YOUR SPECTRA II COLOR/BLACK & WHITE DOME ........................ 4 OPERATING NOTES ...............................................
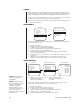
IMPORTANT SAFEGUARDS AND WARNINGS Prior to installation and use of this product, the following WARNINGS should be observed. 1. Installation and servicing should only be done by qualified service personnel and conform to all local codes. 2. Unless the unit is specifically marked as a NEMA Type 3, 3R, 3S, 4, 4X, 6, or 6P enclosure, it is designed for indoor use only and it must not be installed where exposed to rain and moisture. 3. Only use replacement parts recommended by Pelco. 4.
OPERATION POWER-UP DISPLAY When the Spectra II™ dome is powered up, the selected protocol, revision number, and other information is displayed on the monitor. For example, the screen might show the following information: PELCO SPECT II 4.0 CONFIGURE DONE Protocol C The information displayed depends on the selected protocol (C, D, or P) and the menu selection for powerup mode. (Refer to the Power-Up Mode in the Programming section). The information remains on the monitor until the dome is moved.
OPERATING NOTES PAN AND TILT FUNCTIONS Controller Type Fixed speed Variable speed Turbo Mode Preset Mode Pan Speed determined by controller 0.1 to 80° per second, depending on joystick position 150° per second 250° per second Tilt Speed determined by controller 0.
PATTERNS NOTE: The dome cannot do electronic zoom in a pattern. Optical zoom will operate in a pattern. The Spectra II dome can do either one full pattern (1.5, 3, or 6 minutes long) or two half patterns (.75, 1.5, or 3 minutes long). This pattern can consist of any standard pan and tilt or lens command. Presets, flip, and turbo are not allowed in a pattern. Zone scan can be enabled while running a pattern. Refer to the documentation for your control system to program and run patterns.
AUXILIARY OUTPUTS An AUX 1 command from the controller will activate the relay in the dome and operate the device that is connected to the relay. The relay will remain latched until a clear command is issued. An AUX 2 command from the controller will place a ground at the output of AUX 2 to operate the device that is connected to it. The output will remain latched until a clear command is issued. The output relay can also be programmed so that it is activated when any alarm input is activated.
PROGRAMMING Programming Guide - Spectra II Color/Black & White Gain/AGC Menu 1. 2. Access main menu (preset 95). Make main menu selections. Joystick: Move up or down to position cursor or to toggle between selections.
ACCESSING MAIN MENU (PRESET 95) NOTE: For American Dynamics controllers with only 32 presets, set switch SW1-7 on the dome drive in the ON position. When SW1-7 is ON, preset 99 becomes 32 98 becomes 31 97 becomes 30 96 becomes 29 95 becomes 28 93 becomes 26 92 becomes 25 91 becomes 24 90 becomes 23 89 becomes 22 88 becomes 21 If the limit stops are turned off (refer to the Limit Stops section), presets 23-26 can be used as regular presets.
ALARMS The Spectra II dome has seven alarm inputs, which can be designated as either high or low priority. The high priority setting is significant when more than one alarm is activated. If priority in alarms is not required, leave all alarms in the low setting. Refer to the Alarm Priority section. If presets 1-7 are not used for alarms, they can be used as regular presets. However, if they are being used for alarms, they should not be used for anything else.
NOTE: The Spectra II Color/Black and White camera cannot do electronic zoom in a pattern. Optical zoom will operate in a pattern. 6. 7. 8. 9. Position the cursor (>) beside the number of the alarm input for which you want to set the pattern. Press the Iris Open button. The cursor moves to the right, beside the words Full Pat, Half Pat 1, Half Pat 2, or No Pattern. Move the joystick up or down to toggle between the choices. SELECT - Press the Iris Open button on your keyboard to select your choice.
AUTO FLIP Main Menu Other Menu EXIT Auto flip On Proportional pan On Limit stops Off Park time minutes 0 Scan speed deg/s 25 Pattern length 1.5 min Exit There are two auto flip modes: On - Auto flip mode is enabled. Off - Auto flip mode is disabled. To change the auto flip mode: 1. Program preset 95 (28). The main menu appears. 2. Position the cursor (>) beside Other. 3. Press the Iris Open button to enter the Other menu. 4.
AUTO IRIS Main Menu EXIT Camera Menu Backlight comp Zoom limit Reset camera Exit Auto-Iris Menu Off x72 Auto-iris mode Auto-iris level Exit Auto 7 The following are the settings for auto iris: Mode Level To change the settings for auto iris: 1. Program preset 95 (28). The main menu appears. 2. Position the cursor (>) beside Camera. 3. Press the Iris Open button to enter the Camera menu. 4.
AUTO IR LEVEL Main Menu Camera Menu EXIT Backlight comp Zoom limit Reset camera Exit Next Menu Off x72 Slow shutter mode Shutter speed Auto focus mode Previous Exit IR Filter Menu Auto Auto Auto IR Filter mode Auto IR Level Exit Auto Dusk The IR level setting determines when the IR filter will switch IN or OUT.
4. 5. 6. 7. Move the joystick up or down to position the cursor next to either Aux 1 mode or Aux 2 mode. Press the Iris Open button. The cursor moves to the right, beside the word Normal, Latching, or Alarm. Move the joystick up or down to toggle between Normal, Latching, or Alarm. SELECT - Press the Iris Open button on your keyboard to select your choice. CANCEL - Press the Iris Close button if you do not want to change the setting.
GAIN/AGC Main Menu EXIT Camera Menu Backlight comp Zoom limit Reset camera Exit Gain/AGC Menu Off x72 AGC mode Gain Exit Auto 6 Gain - The amount of amplification the camera places on its video information in order to obtain a full 1-volt peak-to-peak video signal out. AGC - Automatic Gain Control. AGC MODE There are two AGC settings : Auto Mode - Automatically adjusts the gain.
IR FILTER MODE Main Menu Camera Menu EXIT Backlight comp Zoom limit Reset camera Exit Next Menu Off x72 Slow shutter mode Shutter speed Auto focus mode Previous Exit IR Filter Menu Auto Auto Auto IR Filter mode Auto IR Level Exit Auto Dusk There are two settings for the IR filter mode: Auto - IR filter switches in and out automatically.
TURNING LIMIT STOPS ON OR OFF To change the limit stop mode: 1. Program preset 95 (28). The main menu appears. 2. Position the cursor (>) beside Other. 3. Press the Iris Open button to enter the Other menu. 4. Position the cursor (>) beside Limit Stops. 5. Press the Iris Open button. The cursor moves to the right, beside the word On or Off. 6. Move the joystick up or down to toggle between On and Off. 7. SELECT - Press the Iris Open button on your keyboard to select your choice.
LINE SYNC PHASE - The cursor moves to a numeric value. Move the joystick up or down to change the value. Press the Iris Open button to select the choice. The value represents the phase angle in tenths of a degree between 0 degrees and 359 degrees. For example, 900 is 90 degrees, 1200 is 120 degrees, and 2400 is 240 degrees. Press the Iris Open button on your keyboard to select your choice. The Line Sync setting will change to ON.
POWER-UP MODE Main Menu EXIT Power-Up Menu Power Up Exit Default This feature lets the dome resume a desired condition following power-up. The menu includes the following choices. Default On power-up, the dome goes through a configuration cycle and stops at zero reference, showing “Configuration Done,” address, and mode settings on the screen. Park The dome moves to preset 1 when the power-up sequence finishes.
3. 4. 5. 6. 7. Press the Iris Open button to enter the Other menu. Position the cursor (>) beside Proportional Pan. Press the Iris Open button. The cursor moves to the right, beside the word On or Off. Move the joystick up or down to toggle between On and Off. SELECT - Press the Iris Open button on your keyboard to select your choice. CANCEL - Press the Iris Close button if you do not want to change the setting.
SCAN SPEED Main Menu Other Menu EXIT Auto flip On Proportional pan On Limit stops Off Park time minutes 0 Scan speed deg/s 25 Pattern length 1.5 min Exit The scan speed is adjustable from 1-40 degrees per second. This occurs in three scan modes: auto, random, and frame scan. To change the scan speed: 1. Program preset 95 (28). The main menu appears. 2. Position the cursor (>) beside Other. 3.
SHUTTER SPEED Main Menu EXIT Camera Menu Backlight comp Zoom limit Reset camera Exit Next Menu Off x72 Slow shutter mode Auto Shutter speed Auto Auto focus mode Auto Previous Exit There are several electronic shutter speed settings: Auto 1/4 1/8 1/15 1/30 1/60 1/125 1/180 1/250 1/500 1/1000 1/2000 1/4000 1/10,000 In the Auto setting the camera controls the shutter s
SLOW SHUTTER MODE Main Menu EXIT Camera Menu Backlight comp Zoom limit Reset camera Exit Next Menu Off x72 Slow shutter mode Auto Shutter speed Auto Auto focus mode Auto * Previous Exit Slow shutter mode slows the frame rate, producing a digital color picture sensitive to low light conditions.
WHITE BALANCE Main Menu EXIT Camera Menu Backlight comp Zoom limit Reset camera Exit Next Menu Off x72 Slow shutter mode Shutter speed Auto focus mode Previous Exit White Balance Menu Auto Auto Auto Auto white bal Red bal level Blue bal level Exit On --- The settings for white balance are as follows: Auto white bal Red bal level Blue bal level To change the white
ZONE BLANK Main Menu Alarms, Zone Blank Menu EXIT Alarm resume Alarm dwell sec Exit Off 5 Zone Blank Menu Video Blank Zone 1Off 2Off 3Off 4Off 5Off 6Off 7Off 8Off Exit This feature lets you define any of eight zones as blanked for video when the camera pans into the zone area. There are two choices: On - Enables video blanking. Off - Disables video blanking.
MAINTENANCE DOME CLEANING Clean the acrylic dome as necessary to maintain a clear picture. Be careful not to scratch the surfaces of the dome. Exterior Surface - Clean the dome’s exterior surface with a nonabrasive cleaning cloth and cleaning agent that is safe for acrylic. Either liquid or spray cleaner/wax suitable for fine furniture is acceptable. Interior Surface (Except Chrome or Gold) - Clean the same as the exterior surface.
Effective Pixels NTSC: PAL: Horizontal Resolution: Lens Minimum f-stop: Focal Length: Zoom Ratio: Digital Slow Shutter: Horizontal Angle of View: MTBF: Focus: Sensitivity: Sync System: White Balance: Shutter Speed NTSC: Color/B&W PAL: Iris Control: Gain Control: Video Output NTSC: PAL: Signal to Noise Ratio: 768 (H) x 494 (V) 752 (H) x 582 (V) >470 TV lines F1.4 4.1 mm to 73.8 mm optical 18X optical zoom, 4X electronic zoom Auto/manual speed selection 48° (at 4.1 mm wide zoom), 2.7° (at 73.