
Instruction Manual
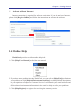
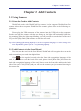
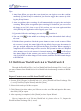

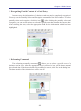
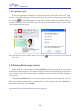
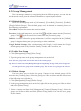
Table Of Contents
- Chapter 1 Getting Started
- 1.1 Installation
- Chapter 2 Add Contacts
- Chapter 3 Edit Contacts
- Chapter 4 Manage Contacts
- Chapter 5 Sync, Import, Export
- Chapter 6 Use Contact Information
- Chapter 7 Advanced Functions
- Chapter 8 Scan Manager
- Chapter 9
- Sync and Share WorldCard Contacts with Mobile Devices
- Appendix User Interface Introduction

4-1
Chapter 4 Manage Contacts
Chapter 4 Manage Contacts
4.1 Add New Contacts
4.1.1 Add a Contact Manually
Click [Management/Contact/Add a Concact - Manually] from the menu on
the main screen. This will open the Editing window. Then, type your new contacts
information into the elds. How to edit the contact, please refer to 3.1, Editing Page.
4.1.2 Add a Contact from the Same Company
Select a contact in the list and execute [Management/Contact/Add a Concact -
from the same company], then it will open a new contact in the editing window. The
application will automatically ll in the same company name, address, phone number, fax
number and website link with the contact you selected. You need to ll in the contact’s
name, position, department, etc.
4.1.3 Add a Contact from an eSignature
WorldCard can recognize your eSignature in the email, click [Management]/
[Contact]/[Add a Contact - eSignature] to open the [E-Signature] dialogue window. Then
copy the signature in the email and paste in the text area of the E-Signature dialogue
window (shown as below). Click [Recognize] button and you can see the recognized
contact information in the editing page.