
Instruction Manual
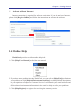
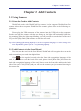

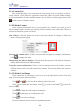
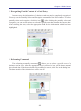
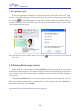
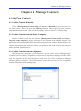
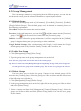
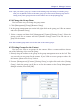
Table Of Contents
- Chapter 1 Getting Started
- 1.1 Installation
- Chapter 2 Add Contacts
- Chapter 3 Edit Contacts
- Chapter 4 Manage Contacts
- Chapter 5 Sync, Import, Export
- Chapter 6 Use Contact Information
- Chapter 7 Advanced Functions
- Chapter 8 Scan Manager
- Chapter 9
- Sync and Share WorldCard Contacts with Mobile Devices
- Appendix User Interface Introduction

4-2
4-3
Chapter 4 Manage Contacts
Note: After you delete a group, if a contact in the deleted group also belongs to another group,
then you can nd the contact in the other group. If a contact in the deleted group doesn’t
belong to any other group, then the contact will be move to the [Unled] group.
4.2.4 Change the Group Name
You have three ways to change the group name:
1. Click [Management]/[Group]/[Rename Group].
2. In the group management area on the left, right-click on the group you’d like to rename
and select [Rename Group].
3. Select a contact and then click [Management]/[Contact]/[Setting Group]. Select the
groups you’d like to rename and click [Rename Group] button. You can also set a
group for the contact.
Note: The renamed group name can’t be the same as the existed groups.
4.2.5 Setting Groups for the Contact
You have two ways to set groups for the contact. Select a contact and then choose
one of the following ways to set the group:
1. Directly drag the contact to the group in the group management area on the left. This
way can only set one group for the contact. If you’d like to set two groups or above for
the contact, please refer to way 2 below.
2. Execute [Management]/[Contact]/[Setting Group] or right-click and select [Setting
Group], check the groups you’d like to set for the contact on the Group Management
dialogue window, then click [OK].