
Instruction Manual
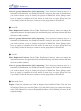
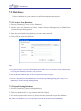
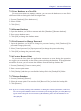

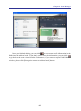
Table Of Contents
- Chapter 1 Getting Started
- 1.1 Installation
- Chapter 2 Add Contacts
- Chapter 3 Edit Contacts
- Chapter 4 Manage Contacts
- Chapter 5 Sync, Import, Export
- Chapter 6 Use Contact Information
- Chapter 7 Advanced Functions
- Chapter 8 Scan Manager
- Chapter 9
- Sync and Share WorldCard Contacts with Mobile Devices
- Appendix User Interface Introduction

8-2
WorldCard
8-3
8.2 Scan business cards
8.2.1 Scan and Edit business cards
1. Insert a business card and click the Scan button to scan it.
Tip: The WorldCard software will require you to calibrate the scanner when you use
the scanner for the rst time. Whenever there is color difference after scanning
the card, you can calibrate the scanner by clicking Calibration.
2. Editing Recognition:
Language: Select the language of the business card.
Chinese character option: Select Traditional Chinese or Simplied Chinese for the
output characters. If the characters include Hong Kong characters, select Recognize
Hong Kong character.
Capitalize the rst letter of name: Check Capitalize the rst letter of name to
recognize the rst letter of the contact's name to a capital letter. The other letters of the
name will be recognized to lowercase letters.
Auto recognition after scanning: Select Auto recognition after scanning to recog-
nize contacts after scanning. If this option is not selected, you need to click Recognize
content to address book after scanning.
Advanced editing: Select Advanced editing to edit contact data before exporting
them into address book.
It is recommended that you select Advanced editing to edit contact data before ex-
porting contact data into address book. Regarding the editing functions, please refer to
Chapter 3.