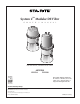
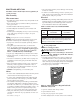
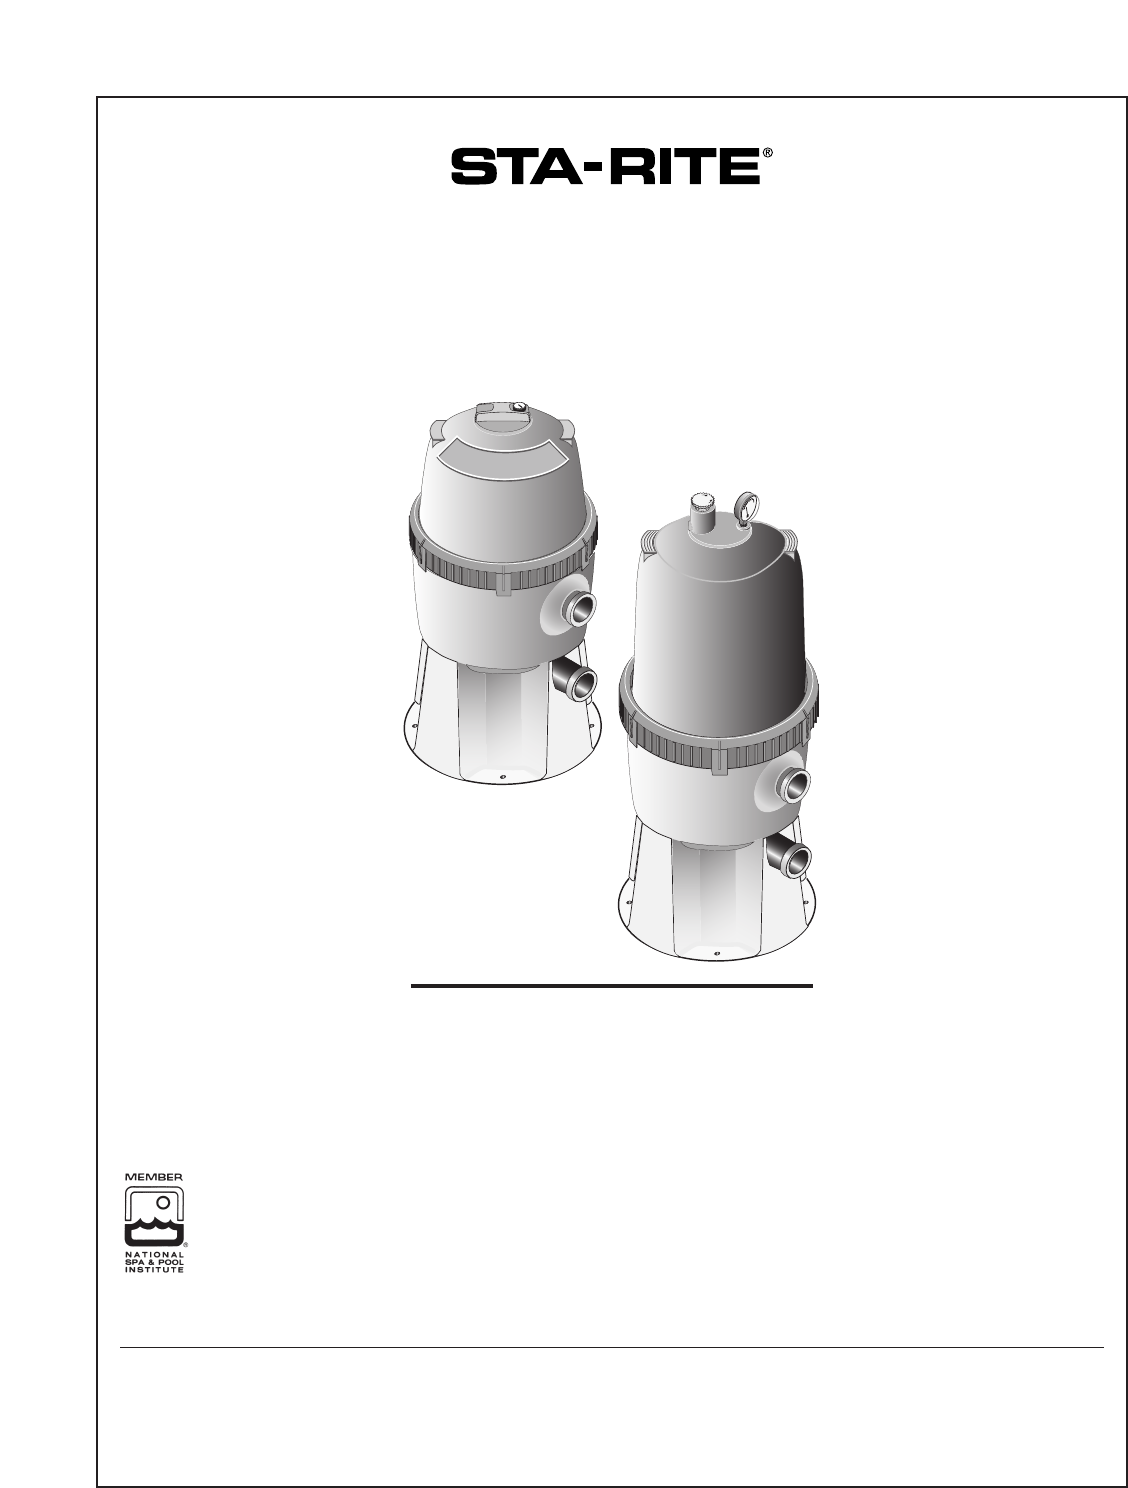
System 2TM Modular DE Filter O W N E R’ S M A N U A L CL E OS OP EN INSTALLATION, OPERATION & PARTS MODELS PLDE36 PLDE48 This manual should be furnished to the end user of this filter; its use will reduce service calls and chance of injury and will lengthen filter life. Sta-Rite Pool/Spa Group 293 Wright Street, Delavan, WI 53115 International: 262-728-5551, FAX: 262-728-7550 www.starite.com Union City, TN • Delavan, WI • Mississauga, Ont.
Table of Contents READ AND FOLLOW SAFETY INSTRUCTIONS! Safety Instructions .........................................................2 General Information......................................................3 This is the safety alert symbol. When you see this symbol on your filter or in this manual, look for one of the following signal words and be alert to the potential for personal injury. Specifications ...............................................................4 Installation.....................
GENERAL INFORMATION • Make sure that Posi-Lok™ Ring is securely locked in place before operating filter. • Maintain pressure gauge in good working order. Replace a damaged gauge immediately. • Cleaning interval is based on pressure rise, not on length of time filter is operated. Different water conditions will have different normal cleaning intervals. • Clean a new pool as well as possible before filling pool and operating filter.
SPECIFICATIONS 20 Pressure drop (PSI) 45.25 (1150) Inlet 36 (914) 7-13/16 (198) Outlet 15 PLDE36 PLDE48 10 5 9-3/16 (233) 18.5 (470) 0 20 18.5 (470) 40 60 80 100 Flow (GPM) FIGURE 1A – Dimensions in inches (mm) FIGURE 2 – Pressure Drop Curve Normal Operation Table 1 - Recommended DE Manufacturers Water Inlet pumped from pool Johns Manville GREFCO, Inc. Eagle-Picher Minerals, Inc.
INSTALLATION • Use care before assembly not to damage union sealing surfaces or O-Ring. • To allow recirculation during precoat (if precoat pot is used), install a recirculation line with shut-off between pad return line and pump suction. Installation of filter should only be done by qualified, licensed personnel. Filter Assembly Filter mount must: Electrical: • BE SURE filter grounding and bonding meets local and National Electrical Code standards.
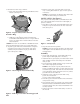
valve, close the valve. NOTICE: Leaking around the Posi-Lok™ ring may indicate that the ring is not fully locked. In this case, proceed as follows: a. Stop the pump, close the isolation valves, and open the air release valve to release any pressure within the filter. b. Remove the drain plug and drain all water from the filter. c. Push down on the top of the filter to fully seat the upper tank shell. d. Rotate the Posi-Lok™ clockwise until it locks behind the safety latch (see Figure 3). e.
5. Remove Posi-Lok™ ring as follows: a. Press safety latch (below the ring) toward the tank to release it (see Figure 4). 7. Remove O-ring from upper tank shell. Inspect for cuts, cracking, deformation or signs of wear; replace if necessary. NOTICE: To avoid strain or damage, allow filter module to drain before lifting it out of the tank. SAFETY LATCH (See Figure 7) The purpose of the safety latch is to hold the Posi-Lok™ ring in the locked position. If the latch is damaged, replace it as follows: 1.
MODULE CLEANING PROCEDURE Special Cleaning Instructions: Use this procedure to clean scale or oils which are not removed by hosing down module. Be sure to dispose of spent chemicals according to all applicable codes and waste disposal ordinances. Use a soft stream nozzle to minimize flying water and spray. Risk of chemical burns. Do not attempt to acid clean the filter or module. If the filter requires acid cleaning, have a trained pool professional do the job.
SYSTEM INSPECTION WINTERIZING General: Explosion hazard. Purging the system with compressed air can cause components to explode, with risk of severe injury or death to anyone nearby. Use only a low pressure (below 5 PSI), high volume blower when air purging the pump, filter, or piping. NOTICE: The filter outlet piping will not empty through the filter drain. Make sure that the outlet piping has a separate drain for winterizing. NOTICE: Protect the filter from freezing.
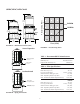
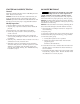
EXPLODED VIEW 2 1 CL E OS OP EN 3 6A PLDE 48 2 6 3 PLDE 36 4 4 5 10 7 9 8 12 11 REPAIR PARTS LIST Key No. 1 2 3 4 5 6 6A 7 8 9 10 11 12 Part Description Posi-Lok™ Ring Air Release Valve with O-ring Presure Gauge Tank Upper Half with Air Relief Valve Tank O-Ring Filter Module Air Bleed Assembly Diverter Tank Lower Half* Drain Plug Safety Latch Tank Support Base 2" Union Adapter Package (includes 2) * Includes Key Nos. 7, 8, 9, 10. 10 Qty.
TROUBLESHOOTING GUIDE 1. Short Cycle Time: C. Water is chemically out of balance; consult pool professional. D. Excessive air in filter; non-precoated areas may plug. Vent air from tank and check for pump suction pipe leaks. Clean air bleed filter in grid assembly with a hose and soft flow nozzle. E. Filter is too small. Install an additional filter. F. Pool water contains iron. See “Special Cleaning Instructions”, Page 8. G. Algae in pool.
STA-RITE LIMITED WARRANTY Pumps, filters, skimmers, underwater lights (excluding bulbs), accessories and fittings manufactured by Sta-Rite are warranted to be free of defects in material and/or workmanship for one (1) year from the original date of installation. The foregoing warranties relate to the original consumer purchaser (“Purchaser”) only. Sta-Rite Industries shall have the option to repair or replace the defective product, at its sole discretion.
Filtro modular de tierra de diatomeas “System 2TM” MANUAL DEL PROPIETARIO CL E OS OP EN INSTALACIÓN, OPERACIÓN Y REPUESTOS MODELOS PLDE36 PLDE48 Este manual se debe entregar al usuario final de este filtro; su uso reducirá las llamadas de servicio y la posibilidad de lesiones, y alargará la vida útil del filtro. Sta-Rite Pool/Spa Group 293 Wright Street, Delavan, WI 53115 Internacional: 262-728-5551, FAX: 262-728-7550 www.starite.com Union City, TN • Delavan, WI • Mississauga, Ont.
Índice ¡LEA Y SIGA LAS INSTRUCCIONES DE SEGURIDAD! Instrucciones de seguridad ............................................2 Información general ......................................................3 Este es el símbolo de alerta de seguridad.
INFORMACIÓN GENERAL • Verifique que el Aro Posi-LokTM esté debidamente fijado en posición antes de operar el filtro. • Mantenga el manómetro en buen estado de funcionamiento. Reemplace un manómetro averiado inmediatamente. • Los intervalos de limpieza se basan en el aumento de presión y no en el tiempo de operación del filtro. Aguas de diferentes condiciones requerirán intervalos de limpieza normales diferentes. • Limpie una piscina nueva a fondo antes de llenarla y hacer funcionar el filtro.
ESPECIFICACIONES 20 Caída de presión (psi) Pressure drop (PSI) 45.25 (1150) Admisión Inlet 36 (914) 7-13/16 (198) Salida Outlet 15 PLDE36 PLDE48 10 5 9-3/16 (233) 18.5 (470) 0 20 18.5 (470) 40 60 80 100 Flujo (GPM) (gpm) Flow FIGURA 1A – Dimensiones en pulgadas (mm) FIGURA 2 – Curva de la caída de presión Operación normal Cuadro 1 - Fabricantes de tierra de diatomeas recomendados Admisión de agua Water Inlet pumped bombeada desde la from pool piscina Johns Manville GREFCO, Inc.
INSTALACIÓN • Antes del ensamblaje, tenga cuidado de no dañar las superficies de sellado de las uniones ni el aro tórico. • Para permitir la recirculación durante la colocación de la capa filtrante, instale una tubería de recirculación con cierre entre la línea de regreso de atenuación y la aspiración de la bomba. La instalación del filtro debe ser realizada sólo por personas calificadas y competentes.
c. Si la presión es aún más de 10 PSI (69kPa) por encima de la presión inicial de operación, retrolave el filtro (ver a continuación). 2. Limpie a fondo la unidad de purga de aire en la parte superior del módulo filtrante CADA vez que abra el filtro. Asegúrese de eliminar toda la suciedad de la malla. Reemplace la malla si está averiada. 3. Al menos dos veces al año, limpie el módulo filtrante a mano, según las instrucciones que aparecen en la Página 8.
7. Saque el aro tórico de la mitad superior de la estructura del tanque. Verifique que no tenga cortes, rajaduras, deformaciones o señales de desgaste, y reemplace de ser necesario. AVISO: Para evitar ejercer presión o causar daños, deje que el módulo filtrante se drene antes de sacarlo del tanque. 5. Saque el aro Posi-LokTM de la siguiente manera: a. Oprima el pasador de seguridad (debajo del aro) hacia el tanque para aflojarlo (consulte la Figura 4).
PROCEDIMIENTO DE LIMPIEZA DEL MÓDULO Instrucciones especiales para la limpieza: Use este procedimiento para limpiar la oxidación o los aceites que no se pueden eliminar simplemente lavando el módulo con una manguera. Asegúrese de eliminar los producto químicos usados según los códigos y las normas de eliminación de desechos que correspondan. Use una boquilla de chorro suave para reducir los salpicones de agua y el rocío. ADVERTENCIA Riesgo de quemaduras de índole química.
INSPECCIÓN DEL SISTEMA ACONDICIONAMIENTO PARA EL INVIERNO General: ADVERTENCIA Peligro de explosión. Si se purga el sistema con aire comprimido, existe el peligro de que los componentes exploten y provoquen lesiones graves o muerte a las personas que estén en su cercanía. Use sólo un soplador de gran volumen y baja presión (debajo de 5 PSI), cuando purgue el aire de la bomba, del filtro o de la tubería. AVISO: La tubería de salida del filtro no se vaciará por el desagüe del filtro.
VISTA DETALLADA 2 1 CL E OS OP EN 3 6A PLDE 48 2 6 3 PLDE 36 4 4 5 10 7 9 8 12 11 LISTA DE PIEZAS DE REPUESTO Clave No. Descripción Cant.
GUÍA PARA LA LOCALIZACIÓN DE FALLAS 1. Tiempo de ciclo corto: C. Incorrecto equilibrio químico del agua; consulte con un profesional de piscinas. D. Demasiado aire en el filtro; las áreas sin capa filtrante se pueden tapar. Ventile el aire del tanque y verifique que la tubería de aspiración de la bomba no tenga fugas. Limpie el filtro de purga de aire en la unidad de rejilla con una manguera y una boquilla de flujo suave. E. El filtro es demasiado pequeño. Instale un filtro adicional. F.
GARANTÍA LIMITADA DE STA-RITE Las bombas, los filtros, espumadores, las luces submarinas (excluyendo los focos), y los accesorios fabricados por Sta-Rite están cubiertos por una garantía contra defectos en material y/o mano de obra por un (1) año desde la fecha inicial de instalación. Las garantías que anteceden sólo le corresponden al consumidor comprador inicial (“Comprador”). Sta-Rite Industries tendrá la opción de reparar o de reemplazar el producto defectuoso, a su solo juicio.