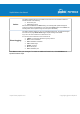
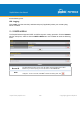
Action This setting specifies the action to be taken by the router upon encountering traffic that matches the both of the following: ● Source IP & port ● Destination IP & port With the value of Allow for the Action setting, the matching traffic passes through the router (to be routed to the destination). If the value of the Action setting is set to Deny, the matching traffic does not pass through the router (and is discarded). This setting specifies whether or not to log matched firewall events.
To change a rule’s priority, simply drag and drop the rule: ● Hold the left mouse button on the rule. ● Move it to the desired position. ● Drop it by releasing the mouse button. To remove a rule, click the button. Rules are matched from top to the bottom. If a connection matches any one of the upper rules, the matching process will stop. If none of the rules match the connection, the Default rule will be applied. The Default rule is Allow for both outbound and inbound access.
● ● o Xmas tree o Another Xmas tree o Null scan o SYN/RST o SYN/FIN SYN flood prevention Ping flood attack prevention 10.12.2 Content Blocking https://www.peplink.
https://www.peplink.
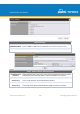
Application Blocking Choose applications to be blocked from LAN/PPTP/PepVPN peer clients' access, except for those on the Exempted User Groups or Exempted Subnets defined below. Web Blocking Defines web site domain names to be blocked from LAN/PPTP/PepVPN peer clients' access except for those on the Exempted User Groups or Exempted Subnets defined below. If "foobar.com" is entered, any web site with a host name ending in foobar.com will be blocked, e.g. www.foobar.com, foobar.com, etc. However, "myfoobar.
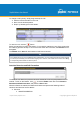
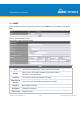
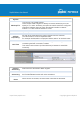
access blocking rules. URL Logging Click enable, and the enter the ip address and port (if applicable) where your remote syslog server is located. 10.13 OSPF & RIPv2 The Peplink Balance supports OSPF and RIPv2 dynamic routing protocols. Click the Network tab from the top bar, and then click the OSPF & RIPv2 item on the sidebar to reach the following menu: OSPF Router ID Area This field determines the ID of the router. By default, this is specified as the LAN IP address.
OSPF Settings Area ID Link Type Authentication Interfaces Determine the name of your Area ID to apply to this group. Machines linked to this group will send and receive related OSPF packets, while unlinked machines will ignore it. Choose the network type that this area will use. Choose an authentication method, if one is used, from this drop-down menu. Available options are MD5 and Text. Enter the authentication key next to the drop-down menu.
RIPv2 Settings Authentication Interfaces Choose an authentication method, if one is used, from this drop-down menu. Available options are MD5 and Text. Enter the authentication key next to the drop-down menu. Determine which interfaces this group will use to listen to and deliver RIPv2 packets. OSPF & RIPv2 Route Advertisement PepVPN Route Isolation Isolate PepVPN peers from each other. Received PepVPN routes will not be forwarded to other PepVPN peers to reduce bandwidth consumption..
10.14 BGP Click the Network tab from the top bar, and then click the BGP item on the sidebar to configure BGP. Click "x" to delete a BGP profile Click "Add" to add a new BGP profile BGP Name This field is for specifying a name to represent this profile. Enable When this box is checked, this BGP profile will be enabled. Otherwise, it will be disabled.
System Multihop/TTL Password AS-Path Prepending: Hold Time Time-to-live (TTL) of BGP packet. Leave it blank if BGP neighbor is directly connected, otherwise you must specify a TTL value. Accurately, this option should be used if the configured neighbor IP address does not match the selected Interface’s network subnets. TTL value must be between 2 to 255. Optional password for MD5 authentication of BGP sessions. AS path to be prepended to the routes received from this neighbor.
Filter Mode This option selects the route import filter mode. None: all BGP routes will be accepted. Accept: Routes in "Restricted Networks" will be accepted, routes not in the list will be rejected. Reject: Routes in "Restricted Networks" will be rejected, routes not in the list will be accepted. Restricted Networks This specifies the network in the “route import” entry Exact Match: When this box is checked, only routes with the same Networks and Subnet Mask will be filtered.
Remote User Access Settings Enable Click the checkbox to enable Remote User Access. VPN Type Determine whether remote devices can connect to the Balance using L2TP with IPsec or PPTP. For greater security, we recommend you connect using L2TP with IPsec. Preshared Key Enter your preshared key in the text field. Please note that remote devices will need this preshared key to access the Balance.
Click the format. button to switch to enters user accounts by pasting the information in.CSV 10.16 Misc. Settings 10.16.1 High Availability The Peplink Balance supports high availability (HA) configurations via an open standard virtual router redundancy protocol (VRRP, RFC 3768). In an HA configuration, two same-model Peplink Balance units provide redundancy and failover in a master-slave arrangement. In the event that the master unit is down, the slave unit becomes active.
● In the event that no heartbeat signal from the master Peplink Balance unit is received in 3 seconds (or longer) since the last heartbeat signal, the slave Peplink Balance unit becomes active. ● The slave Peplink Balance unit initiates the WAN connections and binds to a previously configured LAN IP address. ● At a subsequent point when the master Peplink Balance unit recovers, it will once again become active. You can configure high availability at Network>Misc. Settings>High Availability.
Virtual IP The HA pair must share the same Virtual IP. The Virtual IP and the LAN Administration IP must be under the same network. LAN Administration IP This setting specifies a LAN IP address to be used for accessing administration functionality. This address should be unique within the LAN. Subnet Mask This setting specifies the subnet mask of the LAN. Important Note For Balance routers in NAT mode, the virtual IP (VIP) should be set as the default gateway for all hosts sitting on the LAN segment.
Please note that the drop-in WAN cannot be configured as a LAN bypass port while it is configured for high availability. 10.16.2 Certificate Manager This section allows you to assign certificates for local VPN and web admin SSL. The local keys will not be transferred to another device by any means. 10.16.3 Service Forwarding Service forwarding settings are located at Network>Misc. Settings>Service Forwarding. https://www.peplink.
Service Forwarding SMTP Forwarding When this option is enabled, all outgoing SMTP connections destined for any host at TCP port 25 will be intercepted. These connections will be redirected to a specified SMTP server and port number. SMTP server settings for each WAN can be specified after selecting Enable. Web Proxy Forwarding When this option is enabled, all outgoing connections destined for the proxy server specified in Web Proxy Interception Settings will be intercepted.
SMTP Forwarding Some ISPs require their users to send e-mails via the ISP’s SMTP server. All outgoing SMTP connections are blocked except those connecting to the ISP’s. The Peplink Balance supports the interception and redirection of all outgoing SMTP connections (destined for TCP port 25) via a WAN connection to the WAN’s corresponding SMTP server. To enable the feature, select Enable under SMTP Forwarding Setup. Check Enable Forwarding for the WAN connection(s) that needs forwarding.
set here. If forwarding is disabled for a WAN, then web proxy connections for that WAN will simply be forwarded to the connection’s original destination. DNS Forwarding When DNS forwarding is enabled, all clients’ outgoing DNS requests will also be intercepted and forwarded to the built-in DNS proxy server.
SIP Session initiation protocol, aka SIP, is a voice-over-IP protocol. The Peplink Balance can act as a SIP application layer gateway (ALG) which binds connections for the same SIP session to the same WAN connection and translate IP address in the SIP packets correctly in NAT mode. Such passthrough support is always enabled and there are two modes for selection: Standard Mode and Compatibility Mode.
AP Controller AP Management Support Remote AP Permitted AP The AP controller for managing Pepwave APs can be enabled by checking this box. When this option is enabled, the AP controller will wait for management connections originating from APs over the LAN on TCP and UDP port 11753. It will also wait for captive portal connections on TCP port 443. An extended DHCP option, CAPWAP Access Controller addresses (field 138), will be added to the DHCP server.
defined and managed in this section. After defining a wireless network, users can choose the network in AP Profiles. Click the button New SSID to create a new network profile, or click the existing network profile to modify its settings. SSID Settings SSID This setting specifies the SSID of the virtual AP to be scanned by Wi-Fi clients. Enable Choose an operating schedule for this SSID.
IGMP Snooping A To allow the Peplink Balance to listen to internet group management protocol (IGMP) network traffic, select this option. DHCP Option 82 A If you use a distributed DHCP server/relay environment, you can enable this option to provide additional information on the manner in which clients are physically connected to the network.
Mode MAC Address List Authentication. When WPA/WPA2 - Enterprise is configured, RADIUS-based 802.1 x authentication is enabled. Under this configuration, the Shared Key option should be disabled. When using this method, select the appropriate version using the V1/V2 controls. The security level of this method is known to be very high. When WPA/WPA2- Personal is configured, a shared key is used for data encryption and authentication. When using this configuration, the Shared Key option should be enabled.
Guest Protect Block All Private IP Custom Subnet Block Exception Block PepVPN Check this box to deny all connection attempts by private IP addresses. To create a custom subnet for guest access, enter the IP address and choose a subnet mask from the drop-down menu. To add the new subnet, click click . . To delete a custom subnet, To block access from a particular subnet, enter the IP address and choose a subnet mask from the drop-down menu. To add the new subnet, click click . .
Client Upstream Limit Enter a value in kpbs to limit connected clients’ upstream bandwidth. Enter 0 to allow unlimited upstream bandwidth. Client Downstream Limit Enter a value in kpbs to limit connected clients’ downstream bandwidth. Enter 0 to allow unlimited downstream bandwidth. Max Number of Clients Enter the maximum number of clients that can simultaneously connect to the wireless network or enter 0 to allow an unlimited number of connections.
Port UDP traffic on any port. Choose Single Port and then enter a port number in the provided field to allow or block TCP or UDP traffic from that port only. You can also choose Port Range and enter a range of ports in the provided fields to allow or deny TCP or UDP traffic from the specified port range. IP Address / Subnet Mask If you have chosen IP Address as your firewall rule type, enter the IP address and subnet mask identifying the subnet to allow or deny.
AP Settings (part 2) Protocol This option allows you to specify whether 802.11b and/or 802.11g client association requests will be accepted. Available options are 802.11ng and 802.11na. By default, 802.11ng is selected. Channel Width Available options are 20 MHz, 40 MHz, and Auto (20/40 MHz) . Default is Auto (20/40 MHz), which allows both widths to be used simultaneously. Channel This option allows you to select which 802.11 RF channel will be utilized. Channel 1 (2.412 GHz) is selected by default.
Advanced AP Settings Management VLAN ID Operating Schedule Beacon Rate A Beacon Interval A This field specifies the VLAN ID to tag to management traffic, such as communication traffic between the AP and the AP Controller. The value is zero by default, which means that no VLAN tagging will be applied. NOTE: Change this value with caution as alterations may result in loss of connection to the AP Controller. Choose from the schedules that you have defined in System>Schedule.
Slot Time A ACK Timeout A Frame Aggregation A A This field is for specifying the unit wait time before transmitting a packet. By default, this field is set to 9 µs. This field is for setting the wait time to receive an acknowledgement packet before performing a retransmission. By default, this field is set to 48 µs. This option allows you to enable frame aggregation to increase transmission throughput. - Advanced feature, please click the https://www.peplink.
Web Administration Settings Enable Ticking this box enables web admin access for APs located on the WAN. Web Access Protocol Determines whether the web admin portal can be accessed thorugh HTTP or HTTPS Management Port Determines the port at which the management UI can be accessed. Admin Username Determines the username to be used for logging into the web admin portal Admin Password Determines the password for the web admin portal on external AP. 11.2 AP Controller Status 11.2.
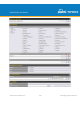
AP Controller License Limit This field displays the maximum number of AP your Balance router can control. You can purchase licenses to increase the number of AP you can manage. Frequency Underneath, there are two check boxes labeled 2.4 Ghz and 5 Ghz. Clicking either box will toggle the display of information for that frequency. By default, the graphs display the number of clients and data usage for both 2.4GHz and 5 GHz frequencies. SSID The colored boxes indicate the SSID to display information for.
11.2.2 Access Points (Usage) A detailed breakdown of data usage for each AP is available at AP> Access Point. Usage AP Name/Serial Number Online Status This field enables you to quickly find your device if you know its name or serial number. Fill in the field to begin searching. Partial names and serial numbers are supported. This button toggles whether your search will include offline devices.
Click the icon to configure each client For easier network management, you can give each client a name and designate its location. You can also designate which firmware pack (if any) this client will follow, as well as the channels on which the client will broadcast. Click the icon to see a graph displaying usage: Click any point in the graphs to display detailed usage and client information for that device, using that SSID, at that point in time. On the Data Usage by menu, you can https://www.peplink.
display the information by SSID or by AP send/receive rate. Click the Event tab next to Wireless Usage to view a detailed event log for that particular device: 11.2.3 Wireless SSID In-depth SSID reports are available under AP > SSID. https://www.peplink.
Click the blue arrow on any SSID to obtain more detailed usage information on each SSID. 11.2.4 Wireless Client You can search for specific Wi-Fi users by navigating to AP > Wireless Client. Here, you will be able to see your network’s heaviest users as well as search for specific users. Click the icon to bookmark specific users, and click the icon for additional https://www.peplink.
details about each user: 11.2.5 Nearby Device A listing of near devices can be accessed by navigating to AP > Controller Status > Nearby Device. https://www.peplink.
Nearby Devices Hovering over the device MAC address will result in a popup with information on how this device was detected. Click the icons and the device will be moved to the bottom table of identified devices. 11.2.6 Event Log You can access the AP Controller Event log by navigating to AP > Controller Status > Event Log. https://www.peplink.
Events This event log displays all activity on your AP network, down to the client level. Use to filter box to search by MAC address, SSID, AP Serial Number, or AP Profile name. Click View Alerts to see only alerts, and click the More… link for additional records. 11.3 Toolbox Additional tools for managing firmware packs, power adjustment, and channel assignment can be found at AP>Toolbox. Firmware Packs This is the first menu that will appear. Here, you can manage the firmware of your AP.
12 System Tab 12.1 System 12.1.1 Admin Security Admin Settings Router Name Admin User Name This field allows you to define a name for this Peplink Balance unit. By default, Router Name is set as Balance_XXXX, where XXXX refers to the last 4 digits of the serial number of that balance unit. Admin User Name is set as admin by default, but can be changed, if desired. https://www.peplink.
Admin Password This field allows you to specify a new administrator password. Confirm Admin Password This field allows you to verify and confirm the new administrator password. Read-only User Name Read-only User Name is set as user by default, but can be changed, if desired. User Password This field allows you to specify a new user password. Once the user password is set, the read-only user feature will be enabled.
Restricted Admin Access CLI SSH & Console CLI SSH Port Check this box to restrict management to administrators connected to the management port. The CLI (command line interface) can be accessed via SSH. It can also be accessed from the serial console port on some Peplink Balance models. This field enables CLI support. For additional information regarding CLI, please refer to Section 22.5. This field determines the port on which clients can access CLI SSH.
There are two ways to upgrade the unit. The first method is through an online download. The second method is to upload a firmware file manually. To perform an online download, click on the Check for Firmware button. The Peplink Balance will check online for new firmware. If new firmware is available, the Peplink Balance will automatically download the firmware. The rest of the upgrade process will be automatically initiated.
synchronized with a specified time server. The settings for time server configuration are located at System>Time. Time Settings Time Zone Time Server This specifies the time zone (along with the corresponding Daylight Savings Time scheme) in which Peplink Balance operates. The Time Zone value affects the time stamps in the event log of the Peplink Balance and e-mail notifications. Check Show all to show all time zone options.
https://www.peplink.
Edit Schedule Profile Enabling Name Click this checkbox to enable this schedule profile. Note that if this is disabled, then any associated features will also have their scheduling disabled. Enter your desired name for this particular schedule profile. Schedule Click the drop-down menu to choose pre-defined schedules as your starting point. Please note that upon selection, previous changes on the schedule map will be deleted.
SMTP Server SSL Encryption This setting specifies the SMTP server to be used for sending email. If the server requires authentication, check Require authentication. Check the box to enable SMTPS. When the box is checked, SMTP Port will be changed to 465 automatically. SMTP Port This field is for specifying the SMTP port number. By default, this is set to 25; when SSL Encryption is checked, the default port number will be set to 465. You may customize the port number by editing this field.
12.1.6 Event Log Event log functionality enables event logging at a specified remote syslog server. The settings for configuring the remote system log can be found at System>Event Log. Remote Syslog Settings Remote Syslog This setting specifies whether or not to log events at the specified remote syslog server. Remote Syslog Host This setting specifies the IP address or hostname of the remote syslog server.
12.1.7 SNMP SNMP or simple network management protocol is an open standard that can be used to collect information about the Peplink Balance unit. SNMP configuration is located at System>SNMP. SNMP Settings SNMP Device Name SNMP Port This field shows the router name defined at System>Admin Security. This option specifies the port which SNMP will use. The default port is 161. SNMPv1 This option allows you to enable SNMP version 1. SNMPv2 This option allows you to enable SNMP version 2.
To add a community for either SNMPv1 or SNMPv2, click the Add SNMP Community button in the Community Name table, upon which the following screen is displayed: SNMP Community Settings Community Name Allowed Source Subnet Address This setting specifies the SNMP community name. This setting specifies a subnet from which access to the SNMP server is allowed. Enter subnet address here (e.g., 192.168.1.0) and select the appropriate subnet mask.
● MD5 ● SHA When MD5 or SHA is selected, an entry field will appear for the password. Privacy Protocol This setting specifies via a drop-down menu one of the following valid privacy protocols: ● NONE ● DES When DES is selected, an entry field will appear for the password. 12.1.8 InControl InControl is a cloud-based service which allows you to manage all of your Peplink and Pepwave devices with one unified system.
12.1.9 Configuration Backing up Peplink Balance settings immediately after successful completion of initial setup is strongly recommended. The functionality to download and upload Peplink Balance settings is found at System>Configuration. Configuration Restore Configuration to Factory Settings The Restore Factory Settings button is to reset the configuration to factory default settings.
from High Availability Pair 12.1.10 counterpart. Feature Add-ons Some balance models have features that can be activated upon purchase. Once the purchase is complete, you will receive an activation key. Enter the key in the Activation Key field, click Activate, and then click Apply Changes. 12.1.11 Reboot This page provides a reboot button for restarting the system. For maximum reliability, the Peplink Balance Series can equip with two copies of firmware, and each copy can be a different version.
12.2 Tools 12.3 Ping The ping test tool sends pings through a specific Ethernet interface or a SpeedFusionTM VPN connection. You can specify the number of pings in the field Number of times to a maximum number of 10 times. Packet Size can be set to a maximum of 1472 bytes. The ping utility is located at System>Tools>Ping, illustrated below: Tip A system administrator can use the ping utility to manually check the connectivity of a particular LAN/WAN connection. 12.
Tip A system administrator can use the traceroute utility to analyze the connection path of a LAN/WAN connection. 12.5 Wake-on-LAN Peplink routers can send special “magic packets” to any client specified from the Web UI. To access this feature, navigate to System > Tools > Wake-on-LAN Select a client from the drop-down list and click Send to send a “magic packet” 12.6 CLI (Command Line) Support The serial console connector on some Peplink Balance units is RJ-45.
13 Status Tab 13.1 Status 13.1.1 Device System information is located at Status>Device. https://www.peplink.
https://www.peplink.
System Information Router Name Model Hardware Revision Serial Number Firmware Uptime System Time This is the name specified in the Router Name field located at System>Admin Security. This shows the model name and number of this device. This shows the hardware version of this device. This shows the serial number of this device. This shows the firmware version this device is currently running. This shows the length of time since the device has been rebooted. This shows the current system time.
This screen displays the number of sessions initiated by each application. Click on each service listing for additional information. This screen also indicates the number of sessions initiated by each WAN port. Finally, you can see which clients are initiating the most sessions. https://www.peplink.
In addition, you can also perform a filtered search for specific sessions. You can filter by subnet, port, protocol, and interface. To perform a search, navigate to Status>Active Sessions>Search. This Active Sessions section displays the active inbound / outbound sessions of each WAN connection on the Peplink Balance. A filter is available to help sort out the active session information. Enter a keyword in the field or check one of the WAN connection boxes for filtering. 13.1.
If the PPTP server SpeedFusionTM, or AP controller is enabled, you may see the corresponding connection name listed in the Name field. 13.1.4 WINS Clients The WINS client list table is located at Status>WINS Client. The WINS client table lists the IP addresses and names of WINS clients. This option will only be available when you have enabled the WINS server The names of clients retrieved will be automatically matched into the Client List (see previous section).
13.1.7 SpeedFusion Status Current SpeedFusionTM status information is located at Status>SpeedFusionTM. Details about SpeedFusionTM connection peers appears as below: https://www.peplink.
Click on the corresponding peer name to explore the WAN connection(s) status and subnet information of each VPN peer. Click the button for a chart displaying real-time throughput, latency, and droprate information for each WAN connection. https://www.peplink.
When pressing the button, the following menu will appear: After clicking the icon, the following menu appears: Select the L2 protocol (TCP/UDP), direction, and duration and click the Start button to begin the general throughput test. https://www.peplink.
The bandwidth bonding feature of PepVPN occurs when multiple WAN lines from one end merge with multiple WAN lines from the other end. For this to happen, each WAN line needs to form a connection with all the WAN lines on the opposite end. The function of the PepVPN analyzer is to report the throughput, packet loss, and latency of all possible combinations of connections. Please note that the PepVPN Analyzer will temporarily interrupt VPN connectivity and will restore after test.
"O" indicates that specific WAN / Tunnel is active for that particular test. "Tx Avg." is the averaged throughput across the full 10 seconds time, while "Tx Max." is the averaged throughput of the fastest 30% of time. 13.1.8 Event Log Event log information is located at Status>Event Log. https://www.peplink.
Device Event Log The log section displays a list of events that has taken place on the Peplink Balance unit. Check Auto Refresh to refresh log entries automatically. Click the Clear Log button to clear the log. IPsec Event Log This section displays a list of events that has taken place within an IPsec VPN connection. Check the box next to Auto Refresh and the log will be refreshed automatically. For an AP event log, navigate to AP>Info. 13.
Bandwidth usage at the LAN while the device is switched off (e.g., LAN bypass) is neither recorded nor shown. 13.2.1 Real-Time The Data transferred since installation table indicates how much network traffic has been processed by the device since the first bootup. The Data transferred since last reboot table indicates how much network traffic has been processed by the device since the last bootup. https://www.peplink.
13.2.2 Hourly This page shows the hourly bandwidth usage for all WAN connections, with the option of viewing each individual connection. Select the desired connection to check from the drop-down menu. 13.2.3 Daily This page shows the daily bandwidth usage for all WAN connections, with the option of viewing each individual connection. Select the connection to check from the drop-down menu. If you have enabled the Bandwidth Monitoring feature as shown in Section 13.
(GB). Status https://www.peplink.
Click on a specific date to receive a breakdown of all client usage for that date. https://www.peplink.
13.2.4 Monthly This page shows the monthly bandwidth usage for each WAN connection. If you have enabled Bandwidth Monitoring feature as shown in Section 13.4, you can check the usage of each particular connection and view the information by Billing Cycle or by Calendar Month. Click the first two rows to view the client bandwidth usage in the last two months. This feature is not available if you have chosen to view the bandwidth of an individual WAN connection.
Appendix A. Restoration of Factory Defaults To restore the factory default settings on a Peplink Balance unit, perform the following: For Balance models with a reset button: 1. Locate the reset button on the Peplink Balance unit. 2. With a paper clip, press and keep the reset button pressed for at least 10 seconds, until the unit reboots itself.
B.2 Routing Via IP Forwarding When the Peplink Balance is operating under IP forwarding mode, the IP addresses of IP packets are unchanged; the Peplink Balance forwards both inbound and outbound IP packets without changing their IP addresses. The following figure shows the packet flow in IP forwarding mode: https://www.peplink.
Appendix C. Case Studies MPLS Alternative Our SpeedFusion enabled routers can be used to bond multiple low-cost/commodity Internet connections to replace an expensive managed business Internet connection, private leased line, MPLS, and frame relay without sacrificing reliability and availability. Belows are typical deployment for using our Balance routers to replace expensive MPLS connection with commodity connections, such as ADSL, 3G, and 4G LTE links.
Option 1: MPLS Supplement Affordably increase your bandwidth by adding commodity ADSL links to your MPLS connection. SpeedFusion technology bonds all your connections together, enabling session-persistent, usertransparent hot failover. QoS support, bandwidth control, and traffic prioritization gives you total control over your network. https://www.peplink.
Option 2: MPLS Alternative Achieve faster speeds and greater reliability while paying only 20% of MPLS costs by connecting multiple ADSL, 3G, and 4G LTE links. Choose a topology that suits your requirements: a hub-andspoke topology maximizes control over your network, while a meshed topology can reduce your bandwidth overhead by enabling your devices to form Unbreakable VPN connections directly with each other. https://www.peplink.
Here is an example of to supplement of existing Multi-Office MPLS network with DSL bonding through SpeedFusion using a Balance 580 at the headquarters and Balance 210/310 at branch offices. Environment: This organization has one head office with and two branch offices, with most of the crucial information stored in a server room at the head office. They are connecting the offices together using a managed MPLS Solution.
- The DSLs at head office can be used for direct internet access providing lots of cheap internet bandwidth. Head office can use outbound policies to send internet traffic out over the DSLs and only use the MPLS connection for speedfusion, freeing up bandwidth. Devices Deployed: Balance 210, Balance 310, Balance 580 Harrington Industrial Plastics Overview Harrington Plastics, the US’s largest industrial plastics distributor, was looking to upgrade its network equipment.
- Peplink Balance 380 Unbreakable VPN Benefits Extreme savings of $100,000 per year 4x the bandwidth Seamless hardware failover Highly available network due to WAN diversity Highly cost-effective compared to competing solutions Easy resilience achieved by adding 4G USB modems Time For An Upgrade Harrington Industrial Plastics decided it was time to upgrade its network equipment. Its existing solution used redundant MPLS for site-to-site traffic and broadband connections for Internet access.
The corporate office houses a pair of redundant Balance 1350s for hardware resilience. Served by 4 separate links from multiple service providers, the network’s chance of an outage is practically zero. All 43 branches are now equipped with a fleet of Balance 380s, bonding a combination of DSL, cable and fiber-optic links together with an additional 4G USB modem for added resilience.
Harrington Industrial Plastics couldn’t be happier. They now benefit from an extremely reliable and cost-effective network. Supplying additional resilience is as easy as plugging in a 4G USB modem. Where the MPLS 768kb deployed previously had cost them $192000 a year for all 40 sites, their new solution is now only costing them $92000. Their total bandwidth has been bumped from 36 Mbps to 138 Mbps.
Steve found the solution Pluss needed in Peplink products, especially the Balance series of high-performance enterprise routers and SpeedFusion bonding technology. Pluss now powers its entire WAN infrastructure with simple-to-install, highly reliable, and cost-effective Peplink gear, which allows it to aggregate DSL and other commodity connections and replace expensive leased lines.
Despite being equipped with iPads, teachers and students alike were not making use of them. The reason for this was because of the slow network access speeds. Apps would not download and course contents were inaccessible. Often, having more than a couple students connected to the same Wi-Fi access point was enough to bring it to its knees. Colégio Next needed a unique solution, so they contacted Peplink.
- Students are far more engaged and teachers rely on their iPads all day https://www.peplink.
Performance Optimization Scenario In this scenario, email and web browsing are the two main Internet services used by LAN users. The mail server is external to the network. The connections are ADSL (WAN1, with slow uplink and fast downlink) and Metro Ethernet (WAN2, symmetric). Solution For optimal performance with this configuration, individually set the WAN load balance according to the characteristics of each service. ● Web browsing mainly downloads data; sending e-mails mainly consumes upload bandwidth.
higher application compatibility but may inhibit the load balancing function unless there are many clients using the Internet. Settings Set persistence in at Advanced>Outbound Policy. Click Add Rule, select HTTP (TCP port 80) for web service, and select Persistence. Click Save and then Apply Changes, located at the top right corner, to complete the process. Tip A network administrator can use the traceroute utility to manually analyze the connection path of a particular WAN connection.
bind the host to the WAN connection(s) of your choice. To begin, navigate to Network>NAT Mappings. In this example, the host with an IP address of 192.168.1.102 is bound to 10.90.0.75 of WAN1: Click Save and then Apply Changes, located at the top right corner, to complete the process. Inbound Access Restriction Scenario A firewall is required in order to protect the network from potential hacker attacks and other Internet security threats. Solution Firewall functionality is built into the Peplink Balance.
unrestricted. Enabling a basic level of protection involves setting up firewall rules. For example, in order to protect your private network from external access, you can set up a firewall rule between the Internet and your private network. To do so, navigate to Advanced>Firewall>Access Rules. Then click the Add Rule button in the Inbound Firewall Rules table and change the settings according to the following screenshot: After the fields have been entered as in the screenshot, click Save to add the rule.
After the fields have been entered as in the screenshot, click Save to add the rule. Click Apply Changes on the top right corner to complete the process. https://www.peplink.
Appendix D. Troubleshooting Problem 1 Outbound load is only distributed over one WAN connection. Solution Outbound load balancing can only be distribute traffic evenly between available WAN connections if many outbound connections are made. If there is only one user on the LAN and only one download session is made from his/her browser, the WAN connections cannot be fully utilized. For a single user, download management applications are recommended.
Keep Alive. For example, try http://private.dnsstuff.com/tools/aboutyou.ch. (This third-party web site is provided only for reference. Peplink has no association with the site and does not guarantee the site's validity or availability.) Problem 4 What can I do if I suspect a problem on my LAN connection? Solution You can test the LAN connection using ping. For example, if you are using DOS/Windows, at the command prompt, type ping 192.168.1.1.
CAUTION: RISK OF EXPLOSION IF BATTERY IS REPLACED BY AN INCORRECT TYPE. DISPOSE OF USED BATTERIES ACCORDING TO THE INSTRUCTIONS Federal Communication Commission Interference Statement This equipment has been tested and found to comply with the limits for a Class A digital device, pursuant to part 15 of the FCC Rules. These limits are designed to provide reasonable protection against harmful interference when the equipment is operated in a commercial environment.
EU Declaration of Conformity Name of manufacturer: PISMO LABS TECHNOLOGY LIMITED Address of the manufacturer: FLAT/RM A5 5/F HK SPINNERS IND BLDG PHASE 6, 481 CASTLE PEAK ROAD CHEUNG SHA WAN, Kowloon, Hong Kong We affirm the electrical equipment manufactured by us fulfils the requirements of the Radio Equipment Directive 2014/53/EU.
Operations in the 5.15-5.35GHz band are restricted to indoor usage only. Česky [Czech] [Jméno výrobce] tímto prohlašuje, že tento [typ zařízení] je ve shodě se základními požadavky a dalšími příslušnými ustanoveními směrnice 1999/5/ES. Dansk [Danish] Undertegnede [fabrikantens navn] erklærer herved, at følgende udstyr [udstyrets typebetegnelse] overholder de væsentlige krav og øvrige relevante krav i direktiv 1999/5/EF.
Italiano [Italian] Con la presente [nome del costruttore] dichiara che questo [tipo di apparecchio] è conforme ai requisiti essenziali ed alle altre disposizioni pertinenti stabilite dalla direttiva 1999/5/CE. Latviski [Latvian] Ar šo [name of manufacturer / izgatavotāja nosaukums] deklarē, ka [type of equipment / iekārtas tips] atbilst Direktīvas 1999/5/EK būtiskajām prasībām un citiem ar to saistītajiem noteikumiem.