
Instructions / Assembly


7
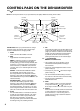
REMOVING THE COLLECTED WATER: 2 OPTIONS
OPTION 1: USE THE BUCKET
A dehumidier operating in one room will have little or no eect in
drying an adjacent enclosed area, such as a closet, or other room
unless there is adequate circulation in the area.
• If the bucket is full when the unit is OFF, the unit will beep 8 times,
the Full indicator light will ash and the display will show P2.
• If the bucket is full when the unit is ON, the compressor will turn
o followed by the fan 30 seconds later. The unit will then beep 8
times, the full indicator light will ash and the display will show P2.
• Unplug the unit before removing the bucket. Slowly pull out the
bucket. Grip the left and right sides securely, and carefully pull
out straight so water does not spill. Use the handle to carry the
bucket. DO NOT put the tank on the oor because the bottom of the
bucket is uneven. The bucket will fall and cause the water to spill.
• Throw away the water and replace the bucket. The bucket must be
in place securely for the dehumidier to operate. (DO NOT drink the water.)
• The unit will re-start 3 minutes after the bucket is placed in its correct position.
NOTES:
• When you remove the bucket, do not touch any parts inside of the unit. Doing so may damage the unit.
• Be sure to push the bucket gently all the way into the unit. Improper installation or failing to push it in securely may
cause the unit not to operate.
• When you remove the bucket, be sure to wipe away any excess moisture found inside the unit.
OPTION 2: CONTINUOUS DRAINING
Water can be automatically emptied into a oor drain by attaching
a water hose, garden hose, or dehumidier drain hose to the
dehumidier. (Garden hose must have a female threaded end. Hose
not included.)
• If not already assembled, put together the “Drain Tube
Subassembly” by securely connecting the drain tube (included) to
the garden hose adapter (included). (See Fig. 9.) Drain tube and
adapter can be found inside the bucket.
• Remove the rubber plug from the drain outlet on the back of the
unit and set aside or in the bucket for safe keeping. Remove
bucket to access connector. Insert the drain hose through the
unit’s drain outlet (from the back of the unit going forward) and
securely press into the connector on the inside of the unit. (Fig. 10
& 11)
• Tighten the garden hose adapter to the unit by using the two
4x5/8” screws provided, which can be found inside a pouch in the
packaging with this user manual.
• Install the female threaded end of the water hose, garden hose,
or dehumidier drain hose into the garden hose adapter (Fig. 12);
Then lead the water hose to the oor drain or a suitable
drainage facility.
• A hose length of no more than 6 ft. is recommended as the hose
must allow the water to continuously travel downward into the drain.
• Make sure the hose is secure to avoid leakage.
• Direct the hose down toward the drain, making sure that there are
no kinks that will stop the water ow.
• Place the end of the hose into the drain and make sure the end of
the hose is level or down to let the water ow smoothly. NEVER LET
DRAIN HOSE GO UPWARD AGAINST GRAVITY.
• Place the bucket back in the unit in the proper position. The unit
will not run if the bucket is not in the proper place.
• Select the desired humidity setting and fan speed on the unit for
continuous draining to start.
NOTES:
• CONTINUOUS mode and continuous draining are dierent. You
do not need to be on CONTINUOUS mode to do continuous draining. See pg. 3 for details about
CONTINUOUS
mode.
• To eliminate the use of the drain tube adapter assembly and still drain to the oor you may use tubing (5/8” O.D. 1/2”
I.D.) in the length required (up to 6 ft.) to go directly from the unit to oor drain.
OPTION 1: USE THE BUCKET
FIG. 7 FIG. 8
1. Pull the bucket
out slightly.
3. Dispose of water; replace bucket into proper position.
2. Hold both sides of the bucket
with even strength and pull it
out from the unit.
OPTION 2: CONTINUOUS DRAINING
FIG. 9: Drain Tube Subassembly
FIG. 10
FIG. 11
FIG. 12
Drain tube
Rubber plug
Rubber plug
Water hose
Female threaded end of water
hose connected to the
garden hose adapter
Connector
Drain tube
Drain tube
subassembly
Garden Hose
Adapter
NOTE: When the continuous drain feature is not being used,
remove the garden hose adapter and drain tube from the
outlet and insert drain plug. Failure to re-insert the drain
plug will result in unit malfunction and possible error codes.