
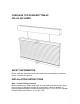
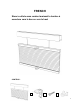
Installation Guide
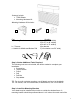

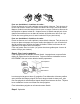
Wider shades have two handles. To precisely determine the correct position for
each handle, divide the total width of the shade by 4, and then attach one handle
that distance from each outside edge of the shade. Always grasp both handles
when lifting and lowering the shade.
Attach the second handle to the middle rail as illustrated.
Step 5. Properly Operate and Care For Your Shade
IMPORTANT: READ CAREFULLY
Make sure the handles have been attached to the rails as described in
step four.
To maintain optimal performance of the springs that make your cordless
shade function, lift and lower the shade through its full range of motion—
all the way up and down—every day if possible.
For shades with single handle, which must be centered on the rails, lift or
lower the shade slowly and evenly, keeping the rails level, until the shade
is positioned as desired.
For wider shades with a double set of handles, grasp the handles using
both hands and lift the shade slowly and evenly, making sure to keep the
rails level.
To raise and lower the shade from the bottom, follow the directions above.
To lower and raise the shade from the top, grip the middle rail handle(s)
and slowly pull straight down/up.
Trouble lifting your cordless shade?
If the shade is left in one position for a long period of time, it might be
necessary to lift and lower the shade several times to restore normal
function.
If the shade has been fully raised for a long period of time, it might tend to
spring back or rebound slightly from the desired length position. This can
also be remedied by lifting and lowering the shade several times.
CLEANING INSTRUCTIONS
The vinyl head rail, middle rail, and bottom rail can be wiped clean with a damp
sponge. To clean the fabric, use a feather duster or vacuum lightly using a soft
brush attachment.
REPLACEMENT PARTS
4