
Operation Manual


‘..‘
7’.”-,
‘•IILJ
IIIdIiIIIIe
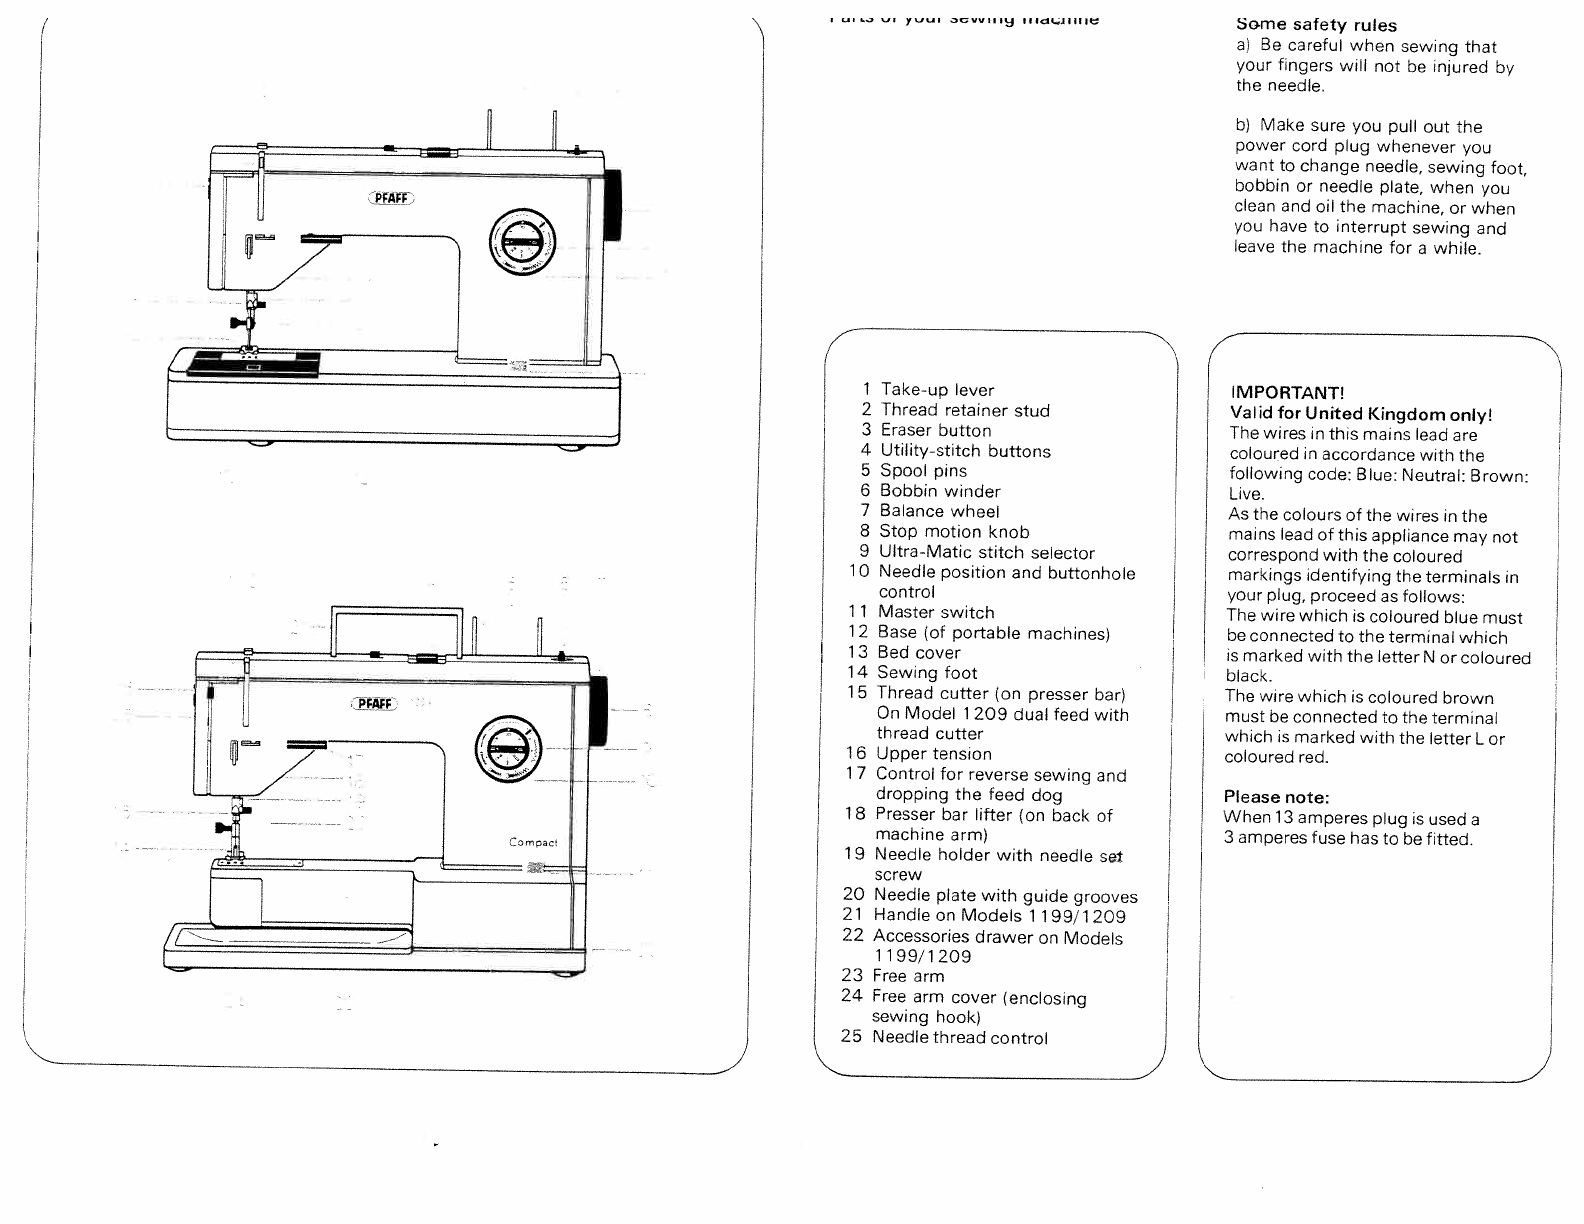
1
Take-up
lever
2
Thread
retainer
stud
3
Eraser
button
4
Utility-stitch
buttons
5
Spool
pins
6
Bobbin
winder
7
Balance
wheel
8
Stop
motion
knob
9
Ultra-Matic
stitch
selector
1
0
Needle
position
and
buttonhole
control
11
Master
switch
1
2
Base
(of
portable
machines)
1
3
Bed
cover
14
Sewing
foot
1
5
Thread
cutter
(on
presser
bar)
On
Model
1
209
dual
feed
with
thread
cutter
1
6
Upper
tension
1
7
Control
for
reverse
sewing
and
dropping
the
feed
dog
1
8
Presser
bar
lifter
(on
back
of
machine
arm>
1
9
Needle
holder
with
needle
set
screw
20
Needle
plate
with
guide
grooves
21
Handle
on
Models
11
99/1209
22
Accessories
drawer
on
Models
1199/1209
23
Free
arm
24
Free
arm
cover
(enclosing
sewing
hook)
25
Needle
thread
control
4
Some
safety
rules
a)
Be
careful
when
sewing
that
your
fingers
will
not
be
injured
by
the
needle.
b)
Make
sure
you
pull
out
the
power
cord
plug
whenever
you
want
to
change
needle,
sewing
foot,
bobbin
or
needle
plate,
when
you
clean
and
oil
the
machine,
or
when
you
have
to
interrupt
sewing
and
leave
the
machine
for
a
while.
IMPORTANT!
Valid
for
United
Kingdom
only!
The
wires
in
this
mains
lead
are
coloured
in
accordance
with
the
following
code:
Blue:
Neutral:
Brown:
Live.
As
the
colours
of
the
wires
in
the
mains
lead
of
this
appliance
may
not
correspond
with
the
coloured
markings
identifying
the
terminals
in
your
plug,
proceed
as
follows:
The
wire
which
is
coloured
blue
must
be
connected
to
the
terminal
which
is
marked
with
the
letter
N
or
coloured
black.
The
wire
which
is
coloured
brown
must
be
connected
to
the
terminal
which
is
marked
with
the
letter
L
or
coloured
red.
Please
note:
When
13
amperes
plug
is
used
a
3
amperes
fuse
has
to
be
fitted.