
Instruction Manual

Chapter 10: Working With Audio
258
Once the song is saved, the wave file will be called with the same name as the song, which is MY FIRST
SONG.WAV. If you ever need to work with the .WAV file in another program, you can just directly edit the wave
file. If you do this, make sure the .WAV stays a 44K mono .WAV file.
Edit the Audio File
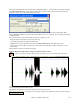
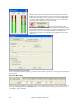
In the Audio Edit window you can edit audio data using Copy, Cut, and Paste. Launch the Audio Edit window by
the Audio | Audio Edit Window menu item or pressing the Ctrl+Shift+A keys.
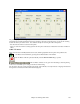
You can see the dB (decibel) scale at the left of the Audio Edit window.
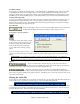
To select a region of the Audio Edit window, you can Shift+click on the end point to easily select a large area.
- Click on the starting bar.
- Shift-click on the ending bar.
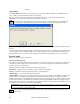
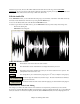
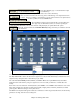
Audio Edit Window Toolbar
These buttons zoom in and out to the audio window.
The 100% button sets the Audio Window to display about 8 bars per screen.
This button zooms to the sample level so that you can see the actual sine waves present. The
[100%] button restores the wave view.
This setting allows you to select audio by snapping to a 16
th
note (or a triplet in swing styles).
This button plays the selected area, and then stops. The other instruments are all muted;
you just hear the audio.
This button selects the whole track, useful for applying one of the built-in audio plug-ins.
Non-Destructive Audio Track Editing
The changes you make to the audio track are non-destructive and only become permanent if you save the file.
If you have a song file called MySong.MGU, the audio track is stored in a MySong.WAV file. If you are editing the
audio, the edits are now made to a temporary WAV file called TEMPMAIN.WAV, and not to MySong.WAV. If