
User Guide

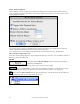
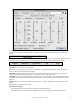


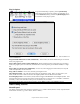


Table Of Contents
- PG Music Inc. License Agreement
- Table of Contents
- Chapter 1: Welcome to Band-in-a-Box!
- Chapter 2: QuickStart Tutorial
- Chapter 3: Band-in-a-Box 2010.5 for Macintosh
- Welcome to Band-in-a-Box 2010.5
- New Features in Band-in-a-Box 2010
- More New RealTracks
- QuickStart Tutorial
- Quick Song Settings
- Save Default Mix
- Improved Audio Rendering
- DAW Plug-in Mode
- Freeze Tracks
- RealTracks Enhancements
- New Favorite Songs/Styles Dialog
- Rendering Tracks
- StylePicker Enhancements
- New in the StyleMaker
- Chapter 4: The Main Screen
- Chapter 5: Guided Tour of Band-in-a-Box
- Chapter 6: Band-in-a-Box PowerGuide
- RealTracks
- RealDrums
- Song Settings
- The Chordsheet
- Chord Preview/Builder
- MIDI file “Chord Wizard”
- Applying Styles
- The StylePicker
- Playing, Pausing, and Stopping Songs
- Changing Volume, Panning, Reverb, Chorus, Bank
- Freeze Tracks
- Saving Songs
- Preferences – User Settings
-
- Show Chords with push/rest chars
- Metronome During Recording
- Harmony Volume Adjust
- OK to Load Style with songs
- Write Guitar part on 6 channels
- Turn External Keyboard’s Local On at end of session
- OK to beep with messages
- OK to prompt to reduce/expand
- For Roman Numerals in minor keys, use relative major
- Save Button on main screen works as Save As
- Name MIDI files with .MID extension
- Allow larger fonts on Chordsheet
- Color for Chordsheet Area
-
- Other Editing Features
- MIDI Setup
- The JukeBox
- Chapter 7: Notation and Printing
- Chapter 8: Automatic Music Features
- Chapter 9: Recording Tracks
- Chapter 10: Audio Features
- Chapter 11: Wizards, Tutors, and Fun
- Chapter 12: User Programmable Functions
- Chapter 13: CoreMIDI and Apple DLS Synth
- Chapter 14: Reference
- PG Music Inc.
- Index
- Registration Form
Chapter 6: Band-in-a-Box PowerGuide
125
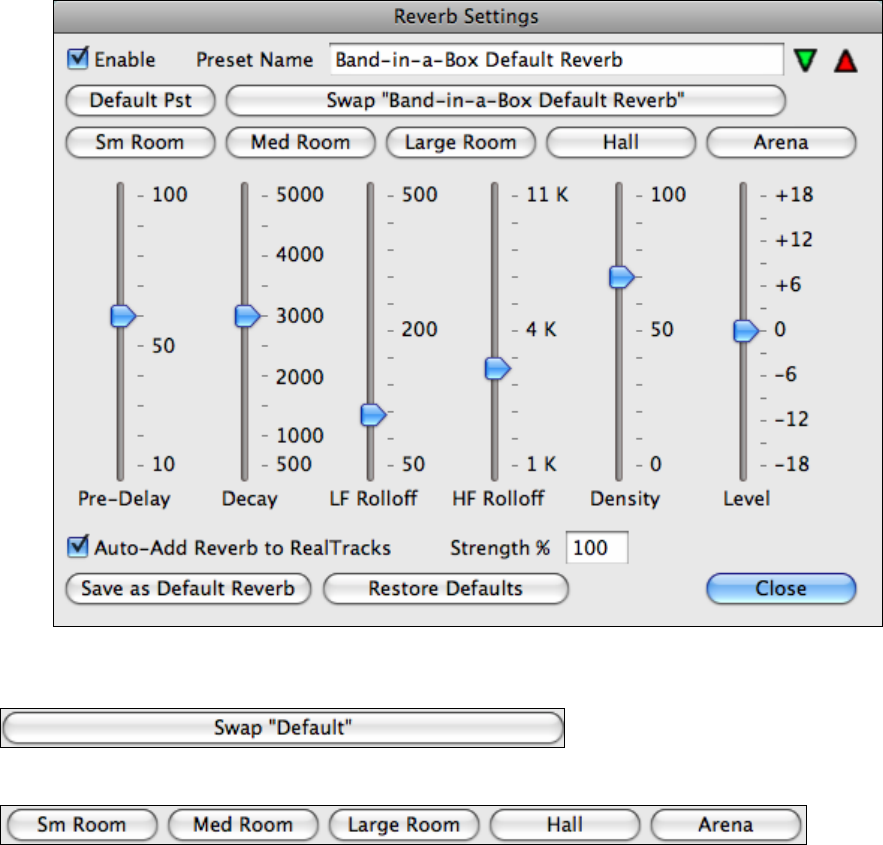
As you adjust the settings, they will be applied to the current song. The [Swap “Default”] button toggles between
your current settings and the default settings. This allows you to hear the effect of the changes you make to the
settings.
Use the row of “room” buttons to load typical settings for different types of spaces. These buttons are a convenient
way either to apply a particular effect or to load settings that you can then tweak to make your own preset.
Reverb Parameters
Pre-Delay is the time delay of first reflections.
Decay is the time it takes for reverb to decay. Reverb time is measured as RT60, the time it takes for reverb to
decay to a level -60 dB below the dry signal level.
LF Rolloff gradually reduces the bass frequencies. If you can’t add enough reverb because the sound gets too
muddy, try increasing the LF Rolloff slider. It is adjustable between 50 Hz and 500 Hz.
HF Rolloff is the rate at which the high frequencies die away as the reverb decays. Rooms with hard surfaces are
typically bright, but rooms with soft surfaces are usually darker. It is adjustable between 1 KHz (dark) to 11 KHz
(bright).
Density is the density of low-level echoes near the end of the reverb tail. High Density settings add sheen to the
sound.
Level adjusts the final level of the plug-in.
Typical Reverb Settings
- A large hall might have long Pre-Delay, long Decay, and moderate Density.
- A hard large space, such as a gymnasium, might have long Pre-Delay, high Density and high HF Rolloff.