
User Guide
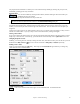

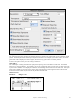

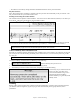


Table Of Contents
- PG Music Inc. License Agreement
- Table of Contents
- Chapter 1: Welcome to Band-in-a-Box!
- Chapter 2: QuickStart Tutorial
- Chapter 3: Band-in-a-Box 2010.5 for Macintosh
- Welcome to Band-in-a-Box 2010.5
- New Features in Band-in-a-Box 2010
- More New RealTracks
- QuickStart Tutorial
- Quick Song Settings
- Save Default Mix
- Improved Audio Rendering
- DAW Plug-in Mode
- Freeze Tracks
- RealTracks Enhancements
- New Favorite Songs/Styles Dialog
- Rendering Tracks
- StylePicker Enhancements
- New in the StyleMaker
- Chapter 4: The Main Screen
- Chapter 5: Guided Tour of Band-in-a-Box
- Chapter 6: Band-in-a-Box PowerGuide
- RealTracks
- RealDrums
- Song Settings
- The Chordsheet
- Chord Preview/Builder
- MIDI file “Chord Wizard”
- Applying Styles
- The StylePicker
- Playing, Pausing, and Stopping Songs
- Changing Volume, Panning, Reverb, Chorus, Bank
- Freeze Tracks
- Saving Songs
- Preferences – User Settings
-
- Show Chords with push/rest chars
- Metronome During Recording
- Harmony Volume Adjust
- OK to Load Style with songs
- Write Guitar part on 6 channels
- Turn External Keyboard’s Local On at end of session
- OK to beep with messages
- OK to prompt to reduce/expand
- For Roman Numerals in minor keys, use relative major
- Save Button on main screen works as Save As
- Name MIDI files with .MID extension
- Allow larger fonts on Chordsheet
- Color for Chordsheet Area
-
- Other Editing Features
- MIDI Setup
- The JukeBox
- Chapter 7: Notation and Printing
- Chapter 8: Automatic Music Features
- Chapter 9: Recording Tracks
- Chapter 10: Audio Features
- Chapter 11: Wizards, Tutors, and Fun
- Chapter 12: User Programmable Functions
- Chapter 13: CoreMIDI and Apple DLS Synth
- Chapter 14: Reference
- PG Music Inc.
- Index
- Registration Form
Chapter 7: Notation and Printing
145
- The Channel # and Velocity settings determine the MIDI channel and velocity of inserted notes.
Play Inserted Notes
If the “Play Inserted Notes” checkbox is checked, notes that you insert will sound briefly as they are inserted. This
lets you hear that the note you inserted sounds correct.
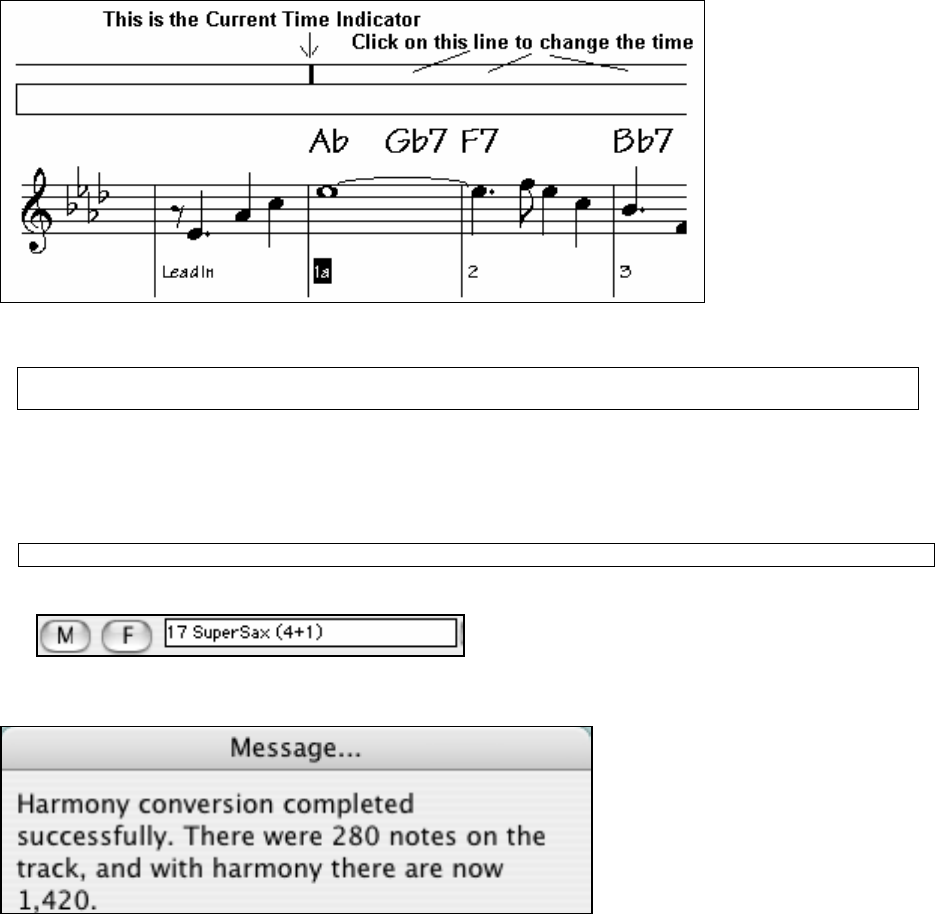
Entering Chords Using the Notation Window
This is identical to the operation of the Chordsheet. You use the Current Time Indicator (time bar) to see where you
are in the bar. Then type in the chords as you do in Band-in-a-Box.
To type the Ab that you see here, type Ab. Then to move to the Gb7 that is on beat 3, press the RIGHT CURSOR
Key. To enter an Ab chord on beat 1 and a Db7 beat 2, type Ab,Db7 (i.e. 2 chords separated by a comma ).
Note: You can also use Option+Z or select Chord Settings option from the Edit menu to enter chords. This pops up a
dialog box that lets you type in the chords, and also sets options like pushes, rests, and shots.
Convert Harmony Part to Notation track.
Previously if you added a harmony the harmony parts wouldn't be seen on the notation, you would only see the lead
part. Now you can write the harmony part directly to the notation track, so you can see it and print it out, just like
any other part.
Note: These features are all described for the Melody track, but apply equally to the Soloist (or THRU) part.
To convert a melody (or Soloist) track to a Harmony, do the following:
1.
Select the Harmony that you want to use.
2. Choose the menu item Melody | Convert Harmony to Melody Track.
3. Your harmony will now be written to the track, and you'll get a confirmation dialog.
The harmony may be removed from the
track at any time, even after you've
saved and re-loaded the song. This is
done from the menu item MEL |
Remove Harmony (or guitar solo) from
Melody Track.
Printing
Band-in-a-Box prints Lead Sheet style notation with chords and melodies. It will also print instrument parts from
your Band-in-a-Box arrangements, a great way to get charts for individual practice, group rehearsal, or live
performance.