
User Guide
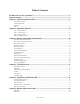
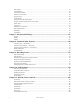
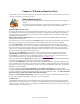
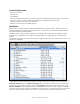

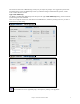
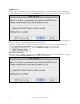
Table Of Contents
- PG Music Inc. License Agreement
- Table of Contents
- Chapter 1: Welcome to Band-in-a-Box!
- Chapter 2: QuickStart Tutorial
- Chapter 3: Band-in-a-Box 2010.5 for Macintosh
- Welcome to Band-in-a-Box 2010.5
- New Features in Band-in-a-Box 2010
- More New RealTracks
- QuickStart Tutorial
- Quick Song Settings
- Save Default Mix
- Improved Audio Rendering
- DAW Plug-in Mode
- Freeze Tracks
- RealTracks Enhancements
- New Favorite Songs/Styles Dialog
- Rendering Tracks
- StylePicker Enhancements
- New in the StyleMaker
- Chapter 4: The Main Screen
- Chapter 5: Guided Tour of Band-in-a-Box
- Chapter 6: Band-in-a-Box PowerGuide
- RealTracks
- RealDrums
- Song Settings
- The Chordsheet
- Chord Preview/Builder
- MIDI file “Chord Wizard”
- Applying Styles
- The StylePicker
- Playing, Pausing, and Stopping Songs
- Changing Volume, Panning, Reverb, Chorus, Bank
- Freeze Tracks
- Saving Songs
- Preferences – User Settings
-
- Show Chords with push/rest chars
- Metronome During Recording
- Harmony Volume Adjust
- OK to Load Style with songs
- Write Guitar part on 6 channels
- Turn External Keyboard’s Local On at end of session
- OK to beep with messages
- OK to prompt to reduce/expand
- For Roman Numerals in minor keys, use relative major
- Save Button on main screen works as Save As
- Name MIDI files with .MID extension
- Allow larger fonts on Chordsheet
- Color for Chordsheet Area
-
- Other Editing Features
- MIDI Setup
- The JukeBox
- Chapter 7: Notation and Printing
- Chapter 8: Automatic Music Features
- Chapter 9: Recording Tracks
- Chapter 10: Audio Features
- Chapter 11: Wizards, Tutors, and Fun
- Chapter 12: User Programmable Functions
- Chapter 13: CoreMIDI and Apple DLS Synth
- Chapter 14: Reference
- PG Music Inc.
- Index
- Registration Form

Chapter 1: Welcome to Band-in-a-Box!
8
Band-in-a-Box External USB Hard Drive
Band-in-a-Box, RealTracks, and RealDrums are pre-installed on the portable hard drive. You have three basic
choices for how to run Band-in-a-Box.
1. Run Band-in-a-Box directly from hard drive.
You can run Band-in-a-Box directly from this hard drive, and not copy anything to your computer's internal
hard drive. (0 GB disk space required.)
To do this, first run the "Band-in-a-Box Setup" installer located on the root level of the hard drive. This will
install the PG Music fonts on your computer, necessary for viewing the Notation Window. You don't need to
select the option to install BIAB to your internal hard drive.
You can use Band-in-a-Box simply by double-clicking on the Band-in-a-Box application in the
\Applications\Band-in-a-Box folder on this hard drive. You can make an alias for it (Command+L) or add it to
the dock if you wish.
2. Install only the Band-in-a-Box program to your computer.
You can install Band-in-a-Box on your computer's hard drive, but leave the RealTracks and RealDrums on the
USB hard drive. (4 GB free disk space required.)
To do this, run the "Band-in-a-Box Setup" installer located on the root level of the hard drive, and select the
option to install BIAB to your internal hard drive. Band-in-a-Box will be installed to the /Applications/Band-
in-a-Box folder. Note that you will need to specify a custom location in the RealTracks and RealDrums
Settings dialogs within Band-in-a-Box - that is, point to the 'Drums' and 'RealTracks' folders in the Band-in-a-
Box folder on the USB drive.
This choice is useful because it allows you to keep a backup of the factory Band-in-a-Box program files on the
USB drive, but save space on your Macintosh hard drive by not copying the 'real files'.
3. Install the full program with RealTracks and RealDrums to your computer.
You can install Band-in-a-Box, RealTracks, and RealDrums on your computer's hard drive, and leave the USB
hard drive entirely for backup. (About 80 GB free disk space required.)
To do this, run the "Band-in-a-Box Setup" installer located on the root level of the hard drive, and select the
option to install BIAB to your internal hard drive. Band-in-a-Box will be installed to the /Applications/Band-
in-a-Box folder, like option #2.
You'll then need to copy the 'RealTracks' and 'Drums' folders manually from the USB drive. They aren't
installed automatically. Note that you only need to copy those two folders - 'Drums', and 'RealTracks' - nothing
else. The Band-in-a-Box Setup installer will have taken care of all the other files.
Note that copying the RealDrums and RealTracks to your Macintosh hard drive may take 60 minutes or longer to complete,
depending on how fast your computer is, and requires over 80 GB of free hard disk space.
Using the USB Hard Drive
When you plug the hard drive into a USB port, it should be mounted on your desktop automatically. Before
disconnecting the drive, make sure to “eject” it first. To do this, either drag the icon to the trash, or click on it and
press Command+E.
The hard drive may have a “Y” cable with two USB connectors on one end. The large connector is the main data
connector and needs to be plugged in. The smaller connector is for extra power, in case a single USB port on your
computer doesn't supply enough power for the drive. If you are having trouble with the drive, and you have another
empty USB port, plug that second cable in.
Setup
Band-in-a-Box automatically sets up to default settings that use the built-in Macintosh audio input and output, and
the Apple DLS Music Device as the General MIDI synthesizer. For many users, these settings do not need to
change.
For users with more elaborate setups and additional outboard audio or MIDI equipment, Band-in-a-Box offers the
ability to customize both audio and MIDI settings through the Apple Audio MIDI Setup dialog and through its own
dialogs.
MIDI and Audio Setup
The MIDI and audio settings for playing your music in Band-in-a-Box are made in the MIDI menu.
MIDI Settings