
User Guide


Chapter 7: Notation and Printing
151
- The Channel # and Velocity settings determine the MIDI channel and velocity of
inserted notes.
Play Inserted Notes
If the “Play Inserted Notes” checkbox is checked, notes that you insert will sound briefly
as they are inserted. This lets you hear that the note you inserted sounds correct.
Entering Chords Using the Notation Window
This is identical to the operation of the chordsheet. You use the Current Time Indicator
(time bar) to see where you are in the bar. Then type in the chords as you do in Band-in-
a-Box.
To type the Ab that you see here, type Ab. Then to move to the Gb7 that is on beat 3,
press the RIGHT CURSOR Key. To enter an Ab chord on beat 1 and a Db7 beat 2, type
Ab,Db7 (i.e. 2 chords separated by a comma ).
Note: You can also use Option+Z or select Chord Settings option from the Edit
menu to enter chords. This pops up a dialog box that lets you type in the chords,
and also sets options like pushes, rests, and shots.
Convert Harmony Part to Notation track.
Previously if you added a harmony the harmony parts wouldn't be seen on the notation,
you would only see the lead part. Now you can write the harmony part directly to the
notation track, so you can see it and print it out, just like any other part.
Note: These features are all described for the Melody track, but apply equally to the
Soloist (or THRU) part.
To convert a melody (or Soloist) track to a Harmony, do the following:
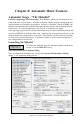
1.
Select the Harmony that
you want to use.
2. Choose the menu item Melody | Convert Harmony to Melody Track.
3. Your harmony will now be written to the track, and you'll get a confirmation dialog.
The harmony may be removed from the track at any time, even after you've saved and re-
loaded the song. This is done from the menu item Melody | Remove Harmony (or guitar
solo) from Melody Track.