
User Guide

Chapter 8: Notation and Printing
235
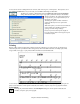
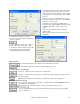
In the Preview Options you can set the exact number
of pixels to display for the print preview, the same
settings are also used if you choose to save the pages
to a graphics file in the popular .JPG, .TIF, or .BMP
file types.
Printing your song to a graphics file allows you to
embed your notation in a document, or in an HTML
file for use on your web site.
This feature is only limited by available memory.
This allows high resolution BMP’s like 2400 x 3000.
A BMP of 2400x3000 is 300 dpi for an 8”x10”
image.
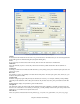
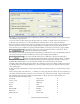
When saving to a JPG file there are additional
quality settings.
When you have selected your file options press the
[OK] button.
You will then see a high-res graphic on
screen, and you can save that to a BMP using
the [Save…] button.
To save a JPG file press the [Save…] button
and then select “Save to File Type:” JPG.
You can then see the estimated size of the file,
and can change settings by pressing the
Low/Medium/High resolution buttons.
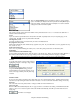
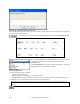
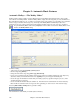
Display Options
Use this button to display the notation across the full width of the screen.
This button will shrink the notation to display a full page at a time.
Saving the page(s) as Graphics files
The [Save…] button saves the current page as a Graphics file.
The [Save + +] button saves all of the pages to graphics files named songnamexxx.bmp, where xxx
is the page number.
With the clipboard button you can quickly copy a bitmap to paste into other applications.
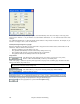
Printing from the Print Preview
You can print the page(s) by pressing the [Print…] button to return to the Print Options and then
pressing the [OK – Print] button.
In the Print Options you can set the number of copies to print.
Press the [PrintPage] button to enter a page number and print only that page, not the complete
song or a full chorus.