
User Guide


Chapter 9: Automatic Music Features
247
You can choose which instruments to include in the arrangement.
Use the [Play] and [Stop] buttons to hear the work-in-progress. You can also loop the song
playback.
Now, generate your SoundTrack file. This will save a file in
WAV, WMA, or MP3 format.
Set Fade-in, Fade-Out options in seconds for the audio clip.
You can hear your finished audio clip by pressing the [Preview]
button.
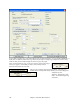
Automatic Solo Generation – “The Soloist”
To select a pre-made Soloist, click on the [Soloist] button on the toolbar, or press Shift+F4, or
choose Soloist | Generate and Play a Solo. The “Select Soloist” window opens.
Pick a type of Soloist in the “Soloist type” list box and choose the appropriate style, or enable the “Auto” checkbox
and press the [Suggest] button next to it. This brings up a list of Soloists in that style; simply choose which one you
like.
You can select genres of soloists (e.g. Modern Jazz) and see only soloists in that genre. To do this, de-select the
“All Genres” checkbox, and then check on the genre that you are interested in.
The [Fav] button on the Select Soloist window brings up a
list of the most recently used (favorite) 50 Soloists. The
Soloists that you use most often will likely be at or near the
top of this list, making it easier to select the Soloist you want
than scrolling through your entire list of available Soloists.
Select the “Double Time?” checkbox (set to “true”) if you
want a double-time solo; 16th notes instead of 8ths.
You can also filter to show/not show soloists from Soloist sets that you don’t have.
If you can’t find the Soloist you’re looking for, try pressing the [Search] button to type in part of
a name to search for.
Go To# box allows you to select from the list exactly which Soloist to choose (if known).
The “Memo” field has a brief description of the Soloist style, and the name of the current database is shown.