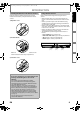
Cover.fm Page 1 Tuesday, May 31, 2011 11:43 AM Owner’s Manual INTRODUCTION CONNECTIONS NB500MG1F Blu-ray Disc Player PLAYBACK OTHERS © 2011 Funai Electric Co., Ltd. FUNCTION SETUP Read your Owner’s Manual first for quick tips that make using your Magnavox product more enjoyable. If you have read assistance, you may access our online help at http://www.funai-corp.
E5P00UD_01UD_EN.book Page 2 Friday, September 11, 2009 10:03 AM INTRODUCTION Safety Instructions The model and serial numbers of this unit may be found on the cabinet. You should record and retain those numbers for future reference. Model No.: Serial No.: WARNING: TO REDUCE THE RISK OF FIRE OR ELECTRIC SHOCK, DO NOT EXPOSE THIS APPARATUS TO RAIN OR MOISTURE. APPARATUS SHALL NOT BE EXPOSED TO DRIPPING OR SPLASHING AND NO OBJECTS FILLED WITH LIQUIDS, SUCH AS VASES, SHALL BE PLACED ON THE APPARATUS.
E5P00UD_01UD_EN.book Page 3 Friday, September 11, 2009 10:03 AM INTRODUCTION CONNECTIONS LASER SAFETY This apparatus employs a laser. Only a qualified service person should remove the cover or attempt to service this apparatus, due to possible eye injury. CAUTION: Use of controls or adjustments or performance of procedures other than those specified herein may result in hazardous radiation exposure. CAUTION: Visible and invisible laser radiation when open and interlocks defeated. Do not stare into beam.
E5P00UD_01UD_EN.book Page 4 Friday, September 11, 2009 10:03 AM INTRODUCTION Contents INTRODUCTION Safety Instructions ........................................................................2 Supplied Accessories ...................................................................5 Trademark Information ...............................................................5 Features ............................................................................................6 Symbols Used in this Manual ..........
E5P00UD_01UD_ENTOC.fm Page 5 Tuesday, May 31, 2011 11:42 AM INTRODUCTION INTRODUCTION Supplied Accessories Owner’s Manual owner’s manual (EN/ES) CONNECTIONS RCA audio / video cables remote control × 1 (NB950UD/NB900UD) AAA (1.5V DC) battery × 2 quick start guide (EN/ES) Trademark Information “Blu-ray Disc” and Java and all other Java trademarks and logos are trademarks or registered trademarks of Sun Microsystems, Inc. in the United States and / or other countries.
E5P00UD_01UD_EN.book Page 6 Friday, September 11, 2009 10:03 AM INTRODUCTION Features Full high-definition video playback Watch movies in the highest picture quality available for your HDTV. This unit offers full high-definition video playback up to 1080p resolution for an amazing viewing experience. A highly detailed picture and increased sharpness delivers a more trueto-life picture.
E5P00UD_01UD_EN.book Page 7 Friday, September 11, 2009 10:03 AM INTRODUCTION INTRODUCTION Front Panel 1 2* 3 4 DISC IN 6* 7 STOP 8 9 PLAY CONNECTIONS OPEN/ CLOSE 5 STANDBY-ON SD card 10 7. PLAY indicator • This indicator lights up in green when discs or SD card play back. 8. STANDBY-ON indicator • This indicator lights up in red when the power is in the standby mode. 9. Q STANDBY-ON button • Press to turn on the unit, or to turn the unit into the standby mode.
E5P00UD_01UD_EN.book Page 8 Friday, September 11, 2009 10:03 AM INTRODUCTION Remote Control 1 13* 2 3 14 4 15 5 16 6 17 8 9 18 19 20 7* 10 21 11 12 22 23 24 25 (*) The unit can also be turned on by pressing these buttons. 1. STANDBY-ON Q button • Press to turn on the unit, or to turn the unit into the standby mode. (To completely turn off the unit, you must unplug the AC power cord.) 2. RED / GREEN / BLUE / YELLOW button • Press to select items on some BD menus.
E5P00UD_01UD_EN.book Page 9 Friday, September 11, 2009 10:03 AM INTRODUCTION 1) Open the cover. 1 DISC IN STOP PLAY STANDBY-ON SD card 30˚ 16 feet (5 m) 23 feet (7 m) 30˚ 16 feet (5 m) FUNCTION SETUP OPEN/ CLOSE Line of sight: Either side of t Above: Below: PLAYBACK 2) Insert batteries. CONNECTIONS 2 Using a Remote Control Keep in mind the following when using the remote control: • Make sure that there are no obstacles between the remote control and the infrared sensor window on the unit.
E5P00UD_01UD_EN.book Page 10 Friday, September 11, 2009 10:03 AM CONNECTIONS Connection to the TV 1 Choose the appropriate connection, then proceed to the corresponding instruction (A, B or C) on the next page. Best (Supports up to 1080i / 1080p, 1080p24 resolution.) Your TV Video Audio HDMI cable HDMI IN High Definition TV Go To A No analog audio connection required. No supplied cables are used in this connection: Please purchase the necessary cables at your local store.
E5P00UD_01UD_EN.book Page 11 Friday, September 11, 2009 10:03 AM CONNECTIONS Connect the cables by following the descriptions below. HDMI Video / Audio Connection 9 , Your TV CONNECTIONS A INTRODUCTION 2 02 #2 ($-)/54 0" #" #/!8)!, 2 $)')4!, /54 0#- ")4342%!- !5$)/ /54 6)$%/ /54 #/-0/.%.4 6)$%/ /54 HDMI IN HDMI cable PLAYBACK Note • Do not tilt the connector when inserting it into the HDMI jack, and make sure the shapes of the jack and the connector are matched.
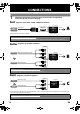
E5P00UD_01UD_EN.book Page 12 Friday, September 11, 2009 10:03 AM CONNECTIONS Connection to an Audio System • When you change the connections, all devices should be turned off. • Refer to the manual accompanying external devices for more information.
E5P00UD_01UD_EN.book Page 13 Friday, September 11, 2009 10:03 AM CONNECTIONS Finding the Video Channel on Your TV After you have made all the necessary connections, press [STANDBY-ON Q] to turn on the unit. 2 3 Turn on your TV. CONNECTIONS 1 INTRODUCTION After you have completed all the connections, you must find the correct video channel (external input channel) on your TV. PLAYBACK Press the button on the TV’s remote control that accesses the external input channel.
E5P00UD_01UD_EN.book Page 14 Friday, September 11, 2009 10:03 AM PLAYBACK Information on Playback Before you start playing back a disc, read the following information. Readable cards Playable Discs and Files This unit is compatible to play back the following discs / files. To play back a disc / file, make sure that it meets the requirements for region codes and color systems as described below. You can play back discs that have the following logos. Other disc types are not guaranteed to play back.
E5P00UD_01UD_EN.book Page 15 Friday, September 11, 2009 10:03 AM PLAYBACK On-Screen Display You can check information about the current disc by pressing [DISPLAY].
E5P00UD_01UD_EN.
E5P00UD_01UD_EN.book Page 17 Friday, September 11, 2009 10:03 AM PLAYBACK Use [K / L] to select “SD Card”, then press [OK]. Press [OPEN/CLOSE A] to open the disc tray. Media Select Place the disc on the disc tray with its label side facing up. Align the disc to the disc tray guide. Disc SD Card Use [K / L] to select a desired track, folder or file, then press [OK]. Use [s / B] to go back and forward between the hierarchies. • If you press [OK] on the desired file, playback will start.
E5P00UD_01UD_EN.book Page 18 Friday, September 11, 2009 10:03 AM PLAYBACK “Media Select” is available only when an SD Memory Card is Selecting the Media Mode For the playback media to be read by this unit, the correct media mode should be selected. You can switch the media mode by following the steps below. “Media Select” is available only when an SD Memory Card is inserted. 1 2 In stop mode, press [SETUP]. Use [K / L] to select [OK] .
E5P00UD_01UD_EN.book Page 19 Friday, September 11, 2009 10:03 AM PLAYBACK INTRODUCTION Playing Back (BD / DVD) Press [STANDBY-ON Q]. Turn on the TV and select the appropriate input on the TV to which the unit is connected. Insert a disc (refer to page 17 on how to insert a disc). CONNECTIONS Playback may start automatically. If not, press [B (play)]. Some discs may show a title or a disc menu. In such case, refer to “Using the Title / Disc / Pop-up Menu” on page 20.
E5P00UD_01UD_EN.book Page 20 Friday, September 11, 2009 10:03 AM PLAYBACK Using the Title / Disc / Pop-up Menu Many of BD-video and DVD-video discs contain title menu (BD-video / DVD-video), disc menu (DVD-video) or pop-up menu (BD-video) which guides you through the available functions in the disc. The contents of the menus may differ depending on the discs. Title menu (BD-video / DVD-video) Playing Back (Audio CD / JPEG Files) Before you begin, make sure the correct media mode is selected.
E5P00UD_01UD_EN.book Page 21 Friday, September 11, 2009 10:03 AM PLAYBACK 2 3 4 File information Current page / Total page number Operation guide: Press [BLUE] to go to the previous page. Press [YELLOW] to go to the next page. Playback status 2 Use [K / L / s / B] to select a desired file to be played back, then press [B (play)] or [OK]. • Do not delete the folders or files in the SD Memory Card with your computer. This unit may not read the SD Memory Cards formatted on a computer.
E5P00UD_01UD_EN.book Page 22 Friday, September 11, 2009 10:03 AM PLAYBACK Fast Forward / Fast Reverse 1 During playback, press [D (forward)] Step by Step Playback 1 In pause mode, press [F (pause)] repeatedly. repeatedly for fast forward. During playback, press [E (reverse)] repeatedly for fast reverse. Every time you press [D (forward)] or [E (reverse)], the playback speed will change. 2 Press [B (play)] to return to normal playback. Note • For BD, the approximate speed for the fast forward is 1 (1.
E5P00UD_01UD_EN.book Page 23 Friday, September 11, 2009 10:03 AM PLAYBACK Before you begin • The program playback will start. 2 / 16 You can play back the disc/card in your desired order. 3 4 5 6 - - / 16 Total 2 4 9 11 12 14 8 0:36 1:14 0:45 0:50 0:53 0:20 0:54 Page Down 0 : 26 : 24 1:14 0:50 1:14 0:50 0:53 0:54 0:36 Page Prev Page Down To exit from the program playback mode: • Press [RETURN] in stop mode.
E5P00UD_01UD_EN.book Page 24 Friday, September 11, 2009 10:03 AM PLAYBACK Random Playback Rapid Playback This function shuffles the playback order of tracks / files. 1 In stop mode, press [MODE] twice. 1 2 3 4 5 6 1 During playback, press [MODE] repeatedly - - / 16 Random CD_DA 1 2 3 4 5 6 7 Total 0:36 1:14 0:45 0:50 0:53 0:20 0:54 Off 2 Press [OK] or [s / B] to switch e.g.) audio CD 2 3 4 5 6 until the Rapid playback setting appears.
E5P00UD_01UD_EN.book Page 25 Friday, September 11, 2009 10:03 AM PLAYBACK Reduces the noise of the playback picture. PIP (BONUSVIEW) Setting Some BD-video have the PIP function which enables you to display the secondary video in the primary video. You can call up the secondary video by pressing [MODE] whenever the scene contains the secondary video. 3 Press [RETURN] to exit. CONNECTIONS “Off” : Shows the original picture as recorded.
E5P00UD_01UD_EN.book Page 26 Friday, September 11, 2009 10:03 AM PLAYBACK Using [Number buttons] (Direct Search) Search Title Search Using [H / G (skip)] 1 During playback, press [G (skip)] to move to the next track / title / chapter / file. Press it repeatedly to skip to subsequent tracks. Press [H (skip)] once to go back to the beginning of the current track. Press it repeatedly to go to the previous tracks. • For JPEG files, press [H (skip)] to go back to the previous file.
E5P00UD_01UD_EN.book Page 27 Friday, September 11, 2009 10:03 AM PLAYBACK Switching Subtitles Switching Audio Soundtrack Some BD and DVD contain multiple audio streams. Those are often in different audio languages or audio formats. For BD, available audio varies depending on “BD Audio Mode” setting. Refer to page 34 for more information. 1 During playback, press [SUBTITLE]. 2 Use [K / L] to select “Primary Subtitle”, 1 During playback, press [AUDIO].
E5P00UD_01UD_EN.book Page 28 Friday, September 11, 2009 10:03 AM PLAYBACK Note • The secondary audio will not be output when the secondary video is not displayed or when “BD Audio Mode” is set to “HD Audio Output”. (For some BD, secondary audio will be output even when secondary video is off.) • The sound mode cannot be changed during playback of discs not recorded in multiple audio. • Some discs allow changing the audio language setting on the disc menu. (Operation varies depending on the discs.
E5P00UD_01UD_EN.book Page 29 Friday, September 11, 2009 10:03 AM FUNCTION SETUP In the setup menu you can change the setting for audio, video, language, etc. You cannot change the setting during playback. Setting items displayed in gray indicates they are not available under the conditions at the time. CONNECTIONS Quick “ “ Quick” menu contains setting items extracted from Custom” menu which may be used frequently. In stop mode, press [SETUP]. Use [K / L] to select [OK].
E5P00UD_01UD_EN.book Page 30 Friday, September 11, 2009 10:03 AM FUNCTION SETUP Custom “ Custom” menu contains all the setting items. 1 2 3 In stop mode, press [SETUP]. Use [K / L] to select [OK]. , then press Use [K / L] to select your desired setting category, then press [OK]. : Language : Video : Audio : Parental : Others • For “Parental” menu, follow the procedure on page 39. 4 5 Use [K / L] to select your desired setting items. Follow the procedure below depending on the setting items.
E5P00UD_01UD_EN.book Page 31 Friday, September 11, 2009 10:03 AM FUNCTION SETUP S INTRODUCTION Language Language Original Subtitle Off Disc Menu English Player Menu English CONNECTIONS Audio Setting items Audio Sets the language for audio. Disc Menu Sets the language for disc menu or pop-up menu. Auto(XXXX)*1 / English* / Français / Español OTHERS Player Menu Sets the language for OSD (on-screen display).
E5P00UD_01UD_EN.book Page 32 Friday, September 11, 2009 10:03 AM FUNCTION SETUP S Video Video TV Aspect 16:9 Wide HDMI Video Resolution Auto HDMI Deep Color Auto Component Output 480i Progressive Mode Auto Still Mode Auto • To select the setting items and options, refer to “ Custom” on page 30. • “ Quick” menu consists of the setting menus frequently used, and they are accompanied with . Setting items TV Aspect Sets the picture size according to aspect ratio of the connected TV.
E5P00UD_01UD_EN.book Page 33 Friday, September 11, 2009 10:03 AM FUNCTION SETUP 33 OTHERS EN FUNCTION SETUP • Even if you set “HDMI Video Resolution” setting to “Auto”, when this unit is connected to a DVI compatible display devices with an HDMI-DVI cable, 480p signal will be output. • Video and audio signals may be distorted temporarily when switching to / from the HDMI output mode. • You cannot change the video resolution during Blu-ray Disc playback. To change the resolution, stop playback.
E5P00UD_01UD_EN.book Page 34 Friday, September 11, 2009 10:03 AM FUNCTION SETUP S Audio Audio BD Audio Mode Mix Audio Output HDMI Audio Out HDMI Multi(Normal) Down Sampling On DRC Off • To select the setting items and options, refer to “ Custom” on page 30.
E5P00UD_01UD_EN.book Page 35 Friday, September 11, 2009 10:03 AM FUNCTION SETUP When using HDMI connections make “HDMI Audio Out” setting in “Audio” menu according to the specifications of the device to be connected. Refer to page 34. Normally, set it to “HDMI Multi(Normal)” so that the unit automatically picks and outputs the best audio format suited to your connected device.
E5P00UD_01UD_EN.book Page 36 Friday, September 11, 2009 10:03 AM FUNCTION SETUP Digital Out setting When “Audio Mute” is selected in “HDMI Audio Out” setting, HDMI audio signal will be mute and the audio signals output from DIGITAL OUT jack changes depending on “Digital Out” setting.
E5P00UD_01UD_EN.book Page 37 Friday, September 11, 2009 10:03 AM FUNCTION SETUP INTRODUCTION Speaker setting (Available when you have HDMI cable connected to HDMI OUT jack) This unit allows you to enjoy multi-channel surround sound such as 7.1-channel / 5.1-channel surround. To make the most of its feature, set up your speakers appropriately by referring to the following table.
E5P00UD_01UD_EN.book Page 38 Friday, September 11, 2009 10:03 AM FUNCTION SETUP Menu Channel Level Tests or sets the volume for each speaker. Setting items Test Tone: “Test Tone” is the test tone which can be output from the speakers so you can adjust the volume for each speaker. Front Lch Center Subwoofer Front Rch Surround Rch Surround Back Rch Surround Back Lch Surround Lch Options Off* Manual Auto Descriptions Select “Off” to deactivate “Test Tone”.
E5P00UD_01UD_EN.book Page 39 Friday, September 11, 2009 10:03 AM FUNCTION SETUP S INTRODUCTION Parental For the first time use Ratings control allows you to set a limit, which prevents your children from viewing inappropriate materials. Playback will be stopped if the ratings exceed the levels you set, and it will require you to enter a password before playing back the disc.
E5P00UD_01UD_EN.book Page 40 Friday, September 11, 2009 10:03 AM FUNCTION SETUP S Others Others Angle Icon On Auto Power Off On HDMI CEC Off Media Select Disc Software Update • To select the setting items and options, refer to “ Custom” on page 30. • “ Quick” menu consists of the setting menus frequently used, and they are accompanied with . Setting items Options On*: The angle icon appears on the TV screen when playing back the scene with various angle.
E5P00UD_01UD_EN.book Page 41 Friday, September 11, 2009 10:03 AM FUNCTION SETUP HDMI CEC allows integrated system control over HDMI and is part of the HDMI standard. This function may not work properly depending on a device to be connected. When “HDMI CEC” setting is set to “On”, functions listed below will be available. FUNCTION SETUP S Current Version You can confirm the current software version. 1 Use [K / L] to select , then press [OK]. 2 Use [K / L] to select “Software Update”, then press [OK].
E5P00UD_01UD_EN.book Page 42 Friday, September 11, 2009 10:03 AM FUNCTION SETUP S Software Update This unit lets you update the firmware yourself using a firmware update disc. To update the firmware, you must first download the latest firmware to a disc, then execute “Software Update”. 1 Prepare a firmware update disc: Please access www.magnavox.com, and download the latest firmware to a blank disc by following the direction described on the site. • Use a blank disc and download one firmware per disc.
E5P00UD_01UD_EN.book Page 43 Friday, September 11, 2009 10:03 AM FUNCTION SETUP INTRODUCTION 7 Use [s / B] to select “Yes”, then press [OK]. • Loading of the firmware will start. Software Update Current Version : 1.000 Insert Version : 1.001 The indicators blinks for this procedure. 1. Start Select ‘Yes’ and press ‘OK’ button to start updating. Press ‘No’ to exit software update. PLAY CONNECTIONS DISC IN STANDBY-ON No Yes Software Update 2. Loading / Updating 2. Updating 1.
E5P00UD_01UD_EN.book Page 44 Friday, September 11, 2009 10:03 AM FUNCTION SETUP Initialize Initialize the setting or SD Memory Card. 1 2 3 In stop mode, press [SETUP]. Use [K / L] to select [OK]. , then press Use [K / L] to select a desired option, then press [OK]. “Setup”: Resets the setup menu to the default. “Format SD Card” (Available only when an SD Memory Card is inserted.): Initializes the SD Memory Card. After confirmation message appears, use [K / L] to select “Yes”, then press [OK].
E5P00UD_01UD_EN.book Page 45 Friday, September 11, 2009 10:03 AM OTHERS If the unit does not perform properly when operated as instructed in this manual, check the unit, consulting the following checklist.
E5P00UD_01UD_EN.book Page 46 Friday, September 11, 2009 10:03 AM OTHERS Glossary Analog Audio Dolby TrueHD An electrical signal that directly represents sound. Compare this to digital audio which can be an electrical signal, but is an indirect representation of sound. See also “Digital Audio”. Dolby TrueHD is a lossless coding technology developed for next generation optical discs. Blu-ray Disc supports 7.1 multi-channel surround sound output.
E5P00UD_01UD_EN.
E5P00UD_01UD_EN.book Page 48 Friday, September 11, 2009 10:03 AM OTHERS Signal system Power requirements Power consumption Dimensions (width x height x depth) Weight Operating temperature Operating humidity General NTSC color 120 V AC, 60 Hz 20 W (standby: 0.5 W) 14-3/16 x 2 x 8-16/8 inches (360 x 50 x 215mm) 4.2 lbs. (1.
E5P00UD_01UD_EN.book Page 49 Friday, September 11, 2009 10:03 AM OTHERS FUNCTION SETUP Cleaning discs • When a disc becomes dirty, clean it with a cleaning cloth. Wipe the disc from the center to out. Do not wipe in a circular motion. • Do not use solvents such as benzine, thinner, commercially available cleaners, detergent, abrasive cleaning agents or antistatic spray intended for analog records.
E5P00UD_01UD_EN.
E5P00UD_01UD_EN.
Back Cover.fm Page 48 Tuesday, May 31, 2011 11:41 AM LIMITED WARRANTY FUNAI CORP. will repair this product, free of charge in the USA in the event of defect in materials or workmanship as follows: DURATION: PARTS: FUNAI CORP. will provide parts to replace defective parts without charge for one (1) year from the date of original retail purchase. Certain parts are excluded from this warranty. LABOR: FUNAI CORP.