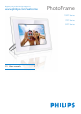
Register your product and get support at www.philips.
1. 1.1 1.2 1.3 Important Safety precautions and maintenance Care of the PhotoFrame Recycling 3 3 3 4 2. 2.1 2.1.1 2.1.2 2.1.3 2.2 Your PhotoFrame Product Overview What’s in the box Control Buttons Connections Product highlights 5 5 5 6 6 7 3. 3.1 3.2 3.3 3.4 3.5 3.5.1 3.5.2 3.5.3 3.5.
Content
ENGLISH Introduction Philips digital PhotoFrame can be placed either vertically or horizontally to fit the photos on display. Its internal rechargeable battery provides you with the freedom to pass it around and show photos without the power cord. Or, you can place it somewhere in a room for a continuous display by connecting it to the mains power supply. 1. Important 1.
5 Battery charging For first time use, fully charge your PhotoFrame (Battery LED will be off when battery is fully charged). This process may take up to 3 hours or more. PhotoFrame starts fully recharging its internal battery only when the battery level is below certain value. This is designed to extend your PhotoFrame battery life by reducing unnecessary battery charging. Note: Only the 7” and 10” PhotoFrame models have built in battery, the 5” model does not.
Your PhotoFrame 2.1 Product Overview 2.1.1 What’s in the box ENGLISH 2.
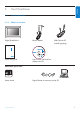
2.1.2 Control Buttons 2.1.3 Connections Memory Card 1 Photo display (underside) 2 3 4 5 1. Play/Stop | Slideshow 2. Navigation controller | OK 3. Menu 4. Reset Button 5. Power ON/OFF • Use your PhotoFrame by pressing the control buttons in the back. • The control buttons and instructions are shown at the bottom of the menu screen. A. CF Card B. SD/ MMC /MS / xD Card Inserting a memory card: • Insert the memory card into the slot in the frame.
Note: To be able to delete photos on the memory card this function on the memory card must be allowed. To do so read the “Setup- Memory card” section. USB Connections For Windows PC (XP & Vista): • To copy photos from PC to PhotoFrame, install Auto Run software PhotoFrame manager on PC. • For installation and more details about his application, follow instrustions in user manual on CD. For Mac System: (OS X): • Connect PhotoFrame to the Mac via USB cable. (it will be recognized as a mass storage device.
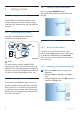
3. Getting started 3.1 Placing the product 3.4 Turning on your PhotoFrame Press the power ON/OFF button. The power LED will be blue and a slide show will play. The PhotoFrame should be placed on a flat surface and close to a power socket. Keep it away from high temperatures and high levels of moisture 3.2 Connecting to the mains Connect the supplied power cable from PhotoFrame to a power outlet. Click 3.5 Initial Setup 3.5.
3.5.3 Set Time, Date and Clock Use this function to set the time and date of the PhotoFrame 1 • • • Press the menu button to access the Main Menu. Navigate down to highlight the setup icon. Navigate right or press the OK button to access the setup menu. 3 • Navigate right to enter the language menu.
Date: • Navigate up and down to select the date. • Navigate left and right to move between days, months and years. • Press the OK button to confirm selection. 2 • Navigate down to Clock. • Navigate right to access the Time settings. Press Play Slideshow to leave this menu and play the slideshow. Note 1: The time and date must be set before the Event Reminder and Auto on/off functions can be set.
Using your PhotoFrame 4.1 View Photos 4.1.1 View pre-stored photos Pre-stored photos can be viewed as either a slideshow or through the photo menu. 1 In the main menu select photos, select the source as Photo Frame. 2 Select an album. 3 Navigate through the album and view the images on the right of the screen or press the play slideshow button. 4.1.
4.2.3 Thumbnail Access and Navigation A large number of Photos can be viewed quickly using thumbnails. 4 • Navigate left and right to move between photos. • Navigate up and down to move to the n ext 16 images. 1 • Press the menu button to access the Main Menu. • Navigate right or press the OK button to access the Photo menu. Note: If you press left on the first photo you will return to the previous menu. 2 • Navigate down to select the photo source to browse.
Using the method below you can select either single, multiple or all 16 photos. 1 • Press the menu button to access the Main Menu. • Navigate right or press the OK button to access the Photo menu. 4 • Navigate left, right, up and down to move between photos. • Press OK to select individual images. (Select more than one picture by moving to a second picture and pressing OK again. To unselect a picture press OK again on the selected picture. • Press OK for 3 seconds to select all visible thumbnails.
4.3 View a slideshow or Album 3 Press slideshow to start playing the slideshow. 4.3.1 Play All albums or selected slideshow To play all the albums in the PhotoFrame follow the instructions below. 1 • Press the menu button to access the Main Menu. • Navigate down to highlight the setup icon. • Navigate right or OK button to access the slideshow menu. Press Play Slideshow to leave this menu and play the slideshow 4.4 2 • Slideshow menu shows the settings available for slideshows.
Copy from a Memory Card Insert the memory card into PhotoFrame and follow instructions below. 1 • Press the menu button to access the Main Menu. • Select the Photo icon and navigate right or press the OK button to access the Photo menu. 4 • Navigate left and right to move between photos. Note: If you navigate left on slide 1 you will return to the previous menu. • Navigate up and down to move to the next 16 images. • Press OK to select individual images.
6 • Navigate down to select the media to copy to. • Navigate right to select which album to copy to. • Press the OK button to begin copying. PC Folder: is the combination of all the pictures copied from a PC to the memory card. (Only JPEG format are recognized) Camera Folder: is the combination of all the pictures created from a camera. If a warning message shows up indicating no free space for more photos, you may need to remove some already stored photos first before copying more photos.
Copy the photos on PhotoFrame to PC/MAC the same way you transfer the contents of a digital camera to PC/MAC. All photos are stored in the sub-directories of the \DCIM\on the PhotoFrame drive. 2 • Navigate down to select the source to browse. • Navigate right to enter the required album. ENGLISH 4.4.3 Copy from a Photoframe to a PC/MAC 3 Navigate right to view the photos in the chosen album. 4.
5 • Navigate down to select Yes delete. • Press OK to confirm delete. 6 When you delete a photo, PhotoFrame will show the status and return to the album after completion. Press Play Slideshow to leave this menu and play the slideshow or navigate left to move back through the menus. Note 1: You may delete photos one by one or several photos at once. Note 2: To delete a Photo from a memory card Go to Setup Menu > Memory Card > Album Creation > Delete Function.
Use more of your PhotoFrame 5.1 Rotating 1 • Press the menu button to access the Main Menu. • Navigate right or press the OK button to access the slideshow menu. Menu Navigation The menu is navigated using the navigation controller and the menu buttons. When in a menu follow the onscreen instructions in the bottom right of the screen for details on how to navigate. • Navigate the controller left and right to cycle through the menus. • Navigate down and up to select options.
4 • Use the navigation buttons to select the photo. • Press the menu button to enter the photo menu. • Navigate down to go to Rotate and Crop. • Navigate right to go to the orientation. Zooming and Cropping Note 1: To retain image quality it is recommended that zooming and cropping is carried out before the image is stored in an album. This function only applies to original photos not those processed by the PhotoFrame.
5.2.2 Move Photos Photos can only be moved between albums created by PhotoFrame on internal memory or external memory card. 1 • Press the menu button to access the Main Menu. • Navigate right or press the OK button to access the Photo menu. 4 • Use the zoom + button decrease the crop frame. • Use the Navigation button to move the frame around the image. 2 • Navigate down to select the media to browse. • Navigate right to enter the required album. 5 Press OK to confirm crop.
4 • Press the navigation buttons to move between photos. • Press the OK button to select individual images. • Press OK button for 3 seconds to select all visible thumbnails. • Once all required photos have been selected press the menu button. 5 • Press the menu button to access the Photo Menu. • Navigate down to Move to Album. 6 Navigate down to select the storage source and then the Album and press OK to move. 5.2.3 Photo Effects 1 • Press the menu button to access the Main Menu.
5.2.4 Frames 1 • Press the menu button to access the Main Menu. • Navigate right or press the OK button to access the Photo menu. 5 • Press the menu button to access the Photo Menu. • Navigate down to go to Photo Effects. (select between No Effect, Black and White or Sepia.) 2 • Navigate down to select the media to browse. • Navigate right to enter the required album. 6 Press OK to apply effect. 3 Navigate right to view the photos in the chosen album.
4 Press the OK button to select the photo to add the frame to. 5.3 Create and manage Photo Albums 5.3.1 Create an Album To organize your photos you can create photo albums on your PhotoFrame or memory card and select which albums to be used in slide shows. There is a limit of 500 albums that can be created. 5 Navigate down to select the desired frame. 1 • Press the menu button to access the Main Menu. • Navigate right or press the OK button to access the Photo menu. 6 Press OK to apply the frame.
2 • Navigate down to select the media to browse. • Navigate right to enter the required album. ENGLISH 3 • Use the navigation buttons and OK to enter the name of the album to be created, up to maximum of 24 characters. • Highlight ENTER and press the OK button to confirm the name and return to the PhotoFrame menu. 3 Press the menu button to access the album menu. Press Play Slideshow to leave this menu and play the slideshow. 5.3.
5 • Use the navigation buttons and OK to enter the name of the album to be created, up to maximum of 24 characters. • Highlight ENTER and press the OK button to confirm the name and return to the PhotoFrame menu. 2 • Navigate down to select the source to browse. • Navigate right to enter the required album. 3 Press the menu button to access the album menu. Press Play Slideshow to leave this menu and play the slideshow. 5.3.
Copy Photos between Albums You can move or copy photos from one album to other album. 4 Navigate right and down to choose the album, and then press OK. Photos copies will be created then pasted at the end of the album in sequence. 1 • Press the menu button to access the Main Menu. • Navigate right or press the OK button to access the Photo menu. 5.4 2 When in the thumb nail mode, navigate to move to the photo, and then press OK to select. Repeat this to select multiple photos if needed.
2 • Slideshow menu shows the settings available for slideshows. • Navigate down and right to select the media. • Use the navigation buttons and OK to enter the name of the album to be created, up to maximum of 24 characters. • Highlight ENTER and press the OK button to confirm the name and return to the PhotoFrame menu. 3 • The new slideshow name appears in the list then press menu to add album to the slideshow. • Navigate right to pick up the album to be added to the slideshow. • Press OK to add.
5.4.3 Remove Album from slideshow This function removes the selected album from the slideshow. It does not delete the album. To delete the album permanently see the Delete Album section. 1 • Press the menu button to access the Main Menu. • Navigate down to highlight the Slideshow icon. • Navigate right or press the OK button to access the slideshow menu. 5 Navigate right to pick the album to be added and press OK to add. 2 Navigate right to access the storage menu.
4 Navigate down to go to the slideshow. 5.4.4 Rename a slideshow A slideshow can be renamed at any time by following the instructions below. 1 • Press the menu button to access the Main Menu. • Navigate down to highlight the Slideshow icon. • Navigate right or press the OK button to access the slideshow menu. 5 • Navigate right and down to go to Remove Album. • Navigate down to select the album to be removed. • And press OK to remove the album 2 Navigate right to access the source list.
5.4.5 Delete a slideshow Deleting a slideshow will NOT remove the images from the PhotoFrame, simply remove the slideshow name and list. 1 • Press the menu button to access the Main Menu. • Navigate down to highlight the Slideshow icon. • Navigate right or press the OK button to access the slideshow menu. 5 Navigate down to access rename slideshow and press OK to enter the on screen keyboard. 2 Navigate right to access the storage menu.
4 Navigate down to go to the slideshow you want to delete and press the menu button. 5.4.6 Slideshow Sequence Slideshows can be played in one of two ways randomly or sequentially. 1 • Press the menu button to access the Main Menu. • Navigate down to highlight the setup icon. • Navigate right or OK button to access the slideshow menu. 5 • Navigate down to go to Delete slideshow, • Navigate right to go to Yes or No. • Navigate down to go to Yes and press OK to validate.
Transition Effects The photos can appear on the screen in one of 3 ways Fade, Slide or Scroll. 1 • Press the menu button to access the Main Menu. • Navigate down to highlight the Slideshow icon. • Navigate right or press the OK button to access the slideshow menu. Press Play Slideshow to leave this menu and play the slideshow. Note 1: This function applies to all the slideshows stored on all media. Note 2: Random plays different effects out of sequence during the slideshow transition. 5.4.
3 Navigate Right. 5.4.9 Collage To show multiple photos arranged on the screen at the same time select collage. Note: Photos formatted in such a way as not to fit the PhotoFrame display normally appear with a black border. Collage automatically fills these borders with multiple displays of the same photo. 4 Navigate down to move to the required transition time. 1 • Press the menu button to access the Main Menu. • Navigate down to highlight the slideshow icon.
5.4.10 Background Color Use this function to select the background border color for photos that are smaller than the PhotoFrames display (these photos appear with black borders). 4 • Navigate down to select the preferred layout • Press OK to confirm selection. 1 • Press the menu button to access the Main Menu. • Navigate down to highlight the slideshow icon. • Navigate right or press the OK button to access the slideshow menu 2 Navigate down to access the background color menu.
4 Navigate up and down to select the color (select between Black or White) and press OK to confirm selection. 2 Navigate down to access the show clock menu. 3 Navigate right to access Yes/No Press Play Slideshow to leave this menu and play the slideshow. 5.4.11 Show Clock You can have a clock displayed on the screen on the top of your pictures in Slideshow and browse mode. 1 • Press the menu button to access the Main Menu. • Navigate down to highlight the Slideshow icon.
Event Reminder Use this function to set reminders for special days.You can select the Photo to be displayed at a selected time and date. 5.5.1 3 • Navigate right to go to New Alarm reminder. • Press the OK button. ENGLISH 5.5 Create an Event Reminder Step 1 Create New Alarm Event Reminder 1 • Press the menu button to access the Main Menu. • Navigate down to highlight the setup icon. • Navigate right or press the OK button to access the setup menu.
Step 2 Event Reminder Photo 4 • Navigate to select photo. • Press OK to confirm. Select the Photo that will be displayed when the reminder starts. 1 • Navigate right and down to go to Photo. • Press the OK button to confirm selection. Step 3 Event Reminder Time Define the time of the day when the reminder will start. 2 • Navigate down to select photo. • Navigate right to go to the album list. 1 • Navigate right and down to go to Time. • Press the OK button to confirm selection.
5.5.2 Delete an Event Reminder ENGLISH Step 4 Event Reminder Date Deleting an event reminder Select the date when the Event reminder will start. 1 • Navigate right and down to go to Date. • Press the OK button to confirm selection. 2 • You can choose to have this alarm every day or to schedule a specific date. • Navigate left and right to select the days, months, years. • Navigate up and down to move between days, months and years. 1 • Press the menu button to access the Main Menu.
4 • Navigate up and down to select either yes or no. • Press the OK button to confirm selection. Press Play Slideshow to leave this menu and play the slideshow. 5.5.3 2 • Navigate down to Alarm. • Navigate right and down to go to snooze. 3 • Navigate right and down to go to select between ON/ Off, 5 minutes or 10 minutes. • Press the OK button to confirm selection. Event Reminder Snooze A snooze function is available so that the reminder can be temporarily turned off.
1 • Press the menu button to access the Main Menu. • Navigate down to highlight the setup icon. • Navigate right or press the OK button to access the setup menu. Connected media: (Lists all memory cards connected to PhotoFrame). Firmware: (PhotoFrame software version). Connected media free space: (remaining free memory in MB). Press the menu button again to leave this menu. 2 • Navigate down to go to status. Main Menu. • The status of the PhotoFrame is shown in the right window.
6. Settings Use this section to setup PhotoFrame brightness levels, Time and date settings, turning off the beep sound, checking the PhotoFrame status and on-screen information display language and enable the delete function on your memory card. In addition, you can set your daily automatic turn-off and turn-on time for PhotoFrame, set an event reminder and decide if you want to show a time clock on the display. 6.
6.3 Memory Card Use this feature to allow the delete function on the inserted memory card. Delete Permission 3 • Navigate right to enter the language menu. • Navigate up and down to select your preferred language (select between English, French, Spanish, Italian, Dutch, Danish, Chinese and Japanese). • Press the OK button to access the setup menu. The new setting will be effective immediately. 1 • Press the menu button to access the Main Menu. • Navigate down to highlight the setup icon.
Press Play Slideshow to leave this menu and play the slideshow. 6.4 3 • Navigate right to go to Time. • Navigate right and down to go to Date. Time, Date and Clock Use this function to set the time and date of the PhotoFrame. 1 • Press the menu button to access the Main Menu. • Navigate down to highlight the setup icon. • Navigate right or press the OK button to access the setup menu. 4 Time: • Navigate up and down to select the time. • Navigate left and right to move between hours, minutes and AM/PM.
6.5 2 • Navigate down to select the Auto On/Off function. • Navigate right to select the weekday. Timer function (Auto On/Off) Use this function to select when the PhotoFrame turns on for both weekdays and weekends. Depending on your lifestyle and schedule, you may want to have the PhotoFrame to automatically turn ON and OFF the different time during the weekdays and when you are at work during a week day and at different time during the weekend. 3 Navigate right to select the Time period.
5 Navigate right to select either set On or Off. Weekend – Saturday 00:00 to Sunday 23:59 1 • Press the menu button to access the Main Menu. • Navigate down to highlight the setup icon. • Navigate right or press the OK button to access the setup menu. 6 • Navigate down to go to Auto On. • Navigate up and down to change the time. Navigate right to move between the hours and minutes. • Press the OK button to confirm. • Repeat to change Auto Off. 2 • Navigate down to select the Auto On/Off function.
6.6 Rotate Function (Auto Tilt) With this function your photos will automatically be properly positioned no mater whether you have the PhotoFrame positioned horizontally or vertically. 1 • Press the menu button to access the Main Menu. • Navigate down to highlight the setup icon. • Navigate right or press the OK button to access the setup menu. Press Play Slideshow to leave this menu and play the slideshow.
6.7 Beep On/Off Turning the button sounds ON or OFF. 1 • Press the menu button to access the Main Menu. • Navigate down to highlight the setup icon. • Navigate right or press the OK button to access the setup menu. 2 • Navigate down to go to beep. • Navigate right to go to On or Off. • Navigate down or Press OK to confirm selection. Press Play Slideshow to leave this menu and play the slideshow.
Technical data Picture/Display 10ff2 • Effective viewing area: 199.8 x 132.48 mm • Resolution: 800 x 480 pixels (viewing area 720 x 480) • Viewing angle: @ C/R > 10, 120º (H) / 110º(V) • Lifetime, to 50% brightness: 20000 hr • Brightness: 300 cd/m² • Aspect ratio: 3:2 • Panel resolution: 800x480 • Pixel density: 91.5 ppi 7ff2 • Effective viewing area: 137.16 x 91.
5ff2 • Power consumption: (System on) 4.3 W • Power LED indicator: Operation - Blue • Power mode supported: AC powered • Other convenience: Kensington lock compatible Note: Only the 7” and 10” PhotoFrame models have a built-in battery the 5” model does not.
Frequently asked questions Is the LCD screen touch-enabled? The LCD screen is not touch-enabled. Use the buttons on the back to control Digital PhotoFrame. Can I switch between different slideshows photos by using different memory cards? Yes. When a memory card is connected to the Digital PhotoFrame, it’ll slideshow photos stored on that specific card. How can I quick-charge my PhotoFrame? Charge it with the system in OFF status.
Why doesn’t my Digital PhotoFrame go into Auto-off status after I set it? First, make sure you set Current Time, Auto-off at, and Auto-on at correctly. Digital PhotoFrame will automatically turn off its display exactly at the Auto-off time. If the time has already passed for the day, it will start entering Auto-off status at the specified time from the next day. I’m trying to upload pictures from my PC directly to the PhotoFrame using the USB connection, but I cannot get it working.
Service and Warranty Recycling Information for Customers Philips establishes technically and economically viable objectives to optimize the environmental performance of the organization’s product, service and activities. From the planning, design and production stages, Philips emphasizes the important of making products that can easily be recycled.
Federal Communications Commission (FCC) Notice (U.S. Only) Note: This equipment has been tested and found to comply with the limits for a Class B digital device, pursuant to Part 15 of the FCC Rules. These limits are designed to provide reasonable protection against harmful interference in a residential installation. This equipment generates, uses and can radiate radio frequency energy and, if not installed and used in accordance with the instructions, may cause harmful interference to radio communications.
Caution: Toutes modifications n’ayant pas reçu l’approbation des services compétents en matière de conformité est susceptible d’interdire à l’utilisateur l’usage du présent équipement. EN 55022 Compliance (Czech Republic Only) ENGLISH les consignes données, peuvent causer des interférences nuisibles aux communications radio. Cependant, rien ne peut garantir l’absence d’interférences dans le cadre d’une installation particulière.
• To completely switch off the equipment, the power supply cable must be removed from the power supply socket, which should be located near the equipment and easily accessible. • A protection mark “B” confirms that the equipment is in compliance with the protection usage requirements of standards PN-93/T-42107 and PN-89/E-06251. North Europe Information (Nordic Countries) VARNING: FÖRSÄKRA DIG OM ATT HUVUDBRYTARE OCH UTTAG ÄR LÄTÅTKOMLIGA, NÄR DU STÄLLER DIN UTRUSTNING PÅPLATS.
ENGLISH Waste Electronics and Electrical Equipment (WEEE) This product is labelled with this symbol in accordance with European Directive 2002/96/ EG to indicate that it must not be disposed of with your other household waste. Please check your local city office or waste disposal service for the return and recycling of this product. End of life directives - Recycling Your new TV contains several materials that can be recycled for new uses.
©2007 Koninklijke Philips N.V. All rights reserved.