LCD TV Directions for Use Important! Return your Warranty Registration Card within 10 days. See why inside. Need help? Call us! Philips representatives are ready to help you with any questions about your new product. We can guide you through Connections, First-time Setup, or any of the Features. We want you to start enjoying your new product right away! FOR FAST HELP PLEASE CALL, 1-800-531-0039 or Visit us on the web at www.philips.
Return your Warranty Registration card today to ensure you receive all the benefits you’re entitled to. Once your PHILIPS purchase is registered, you’re eligible to receive all the privileges of owning a PHILIPS product. So complete and return the Warranty Registration Card enclosed with your purchase at once. And take advantage of these important benefits.
IMPORTANT SAFETY INSTRUCTIONS Read before operating equipment 1. 2. 3. 4. 5. 6. 7. 8. 9. 10. 11. 12. 13. 14. 15. 16. Read these instructions. Keep these instructions. Heed all warnings. Follow all instructions. Do not use this apparatus near water. Clean only with a dry cloth. Do not block any of the ventilation openings. Install in accordance with the manufacturers instructions.
PRECAUTIONS Additional Safety Precautions: • Do not shift or move the LCD TV around when it is powered on. • Do not connect any AC/DC adapter to your LCD TV that does not originally come with the television. Only use the recommended part or parts that are approved by Philips Consumer Electronics. • Caution: Do not use any cover or enclose the AC/DC adapter with any objects like a cloth or box which might shorten the life of the equipment.
CONTENTS Introduction HD (High Definition) Mode Welcome/Registration of Your TV . . . . . . . . . . . . . . . . . . . .2 Safety Instructions . . . . . . . . . . . . . . . . . . . . . . . . . . . . . . . .3 Precautions . . . . . . . . . . . . . . . . . . . . . . . . . . . . . . . . . . . . . .4 Table of Contents . . . . . . . . . . . . . . . . . . . . . . . . . . . . . . . . .5 How to use the HD Mode and it’s Features . . .53-56 PC Mode How to use the PC Mode Features . . . . . . . . . .
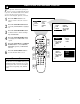
HOW TO USE THE LANGUAGE CONTROL F or or Spanish- and French-speaking TV owners, an onscreen LANGUAGE option is present. The LANGUAGE control enables you to set the TV’s onscreen menu to be shown in either English, Spanish, or French. 1 2 3 4 5 6 Press the MENU button on the remote control to show the onscreen menu. Press the CURSOR DOWN button repeatedly until INSTALL is highlighted.
HOW TO USE THE TUNER MODE CONTROL T he TUNER MODE allows you to change the TV’s signal input to CABLE, ANTENNA, or AUTO mode. It’s important for the TV to know if you want to receive channels from a cable TV signal or a normal antenna signal. NOTE: The AUTO mode setting helps the TV determine the type of signal or channels being received when AUTO PROGRAM is activated. 1 2 3 4 5 6 Press the MENU button on the remote control to show the onscreen menu.
HOW TO AUTO PROGRAM TV CHANNELS Y our TV can automatically set itself for local area (or cable TV) channels. This makes it easy for you to select only the TV stations in your area by pressing the CHANNEL (+) or (–) button. 1 2 3 4 5 6 Press the MENU button on the remote control to show the onscreen menu. BRIGHTNESS COLOR PICTURE SHARPNESS TINT PICTURE SOUND FEATURES INSTALL Press the CURSOR DOWN button repeatedly until INSTALL is highlighted.
HOW TO ADD OR DELETE CHANNELS (CHANNEL EDIT CONTROL) C HANNEL EDIT makes it easy for you to add or delete channels from the list of channels stored in the TV’s memory. 1 2 3 4 5 6 Press the MENU button on the remote control to show the onscreen menu. Press the CURSOR DOWN button repeatedly until INSTALL is highlighted. BRIGHTNESS COLOR PICTURE SHARPNESS TINT PICTURE SOUND FEATURES INSTALL Press the CURSOR RIGHT button to shift the menu to the left. LANGUAGE will be highlighted.
HOW TO USE THE AUTOCHRON™ CONTROL A utoChronTM can automatically set the TV’s onscreen clock. Because the time is received from a broadcast signal, you must be sure that a cable TV or antenna signal is present before you attempt to use the AutoChronTM feature. 1 2 3 4 5 6 7 8 9 BRIGHTNESS COLOR PICTURE SHARPNESS TINT PICTURE SOUND FEATURES INSTALL PICTURE SOUND FEATURES INSTALL Press the MENU button on the remote to show the onscreen menu.
HOW TO USE THE NAME CONTROL (CHANNEL LABEL) T he channel NAME feature allows you to list the “call” letters of your favorite stations beside their channel numbers when they appear on the screen. The TV has in memory a list of the 50 most popular channel names (for example, ABC, NBC, FOX, etc.). You also can enter a custom name (up to five characters).
HOW TO USE THE PICTURE ADJUSTMENT CONTROLS T o adjust your TV picture controls, select a channel and follow these steps. 1 2 3 4 Press the MENU button on the remote control to show the onscreen menu. PICTURE will be highlighted. Press the CURSOR RIGHT and the menu will shift to the left. BRIGHTNESS will be highlighted and an adjustment bar will be shown to the right. PICTURE BRIGHTNESS COLOR PICTURE SHARPNESS TINT Use the CURSOR LEFT or RIGHT to adjust the BRIGHTNESS level of the picture.
HOW TO USE THE EQUALIZER CONTROLS The Equalizer Controls allow you to adjust the sound frequencies to suit the type of programming be watched. 1 2 3 4 5 6 7 Press the MENU button on the remote control to show the onscreen menu. Press the CURSOR DOWN button repeatedly until SOUND in highlighted. Press the CURSOR RIGHT button to shift the menu to the left. EQUALIZER will be highlighted.
HOW TO USE THE BALANCE CONTROL T he Balance Control will allow you to adjust the sound levels between the right and left speaker output. 1 2 3 4 5 6 Press the MENU button on the remote control to show the onscreen menu. PICTURE will be highlighted. Press the CURSOR DOWN button repeatedly until SOUND in highlighted. BRIGHTNESS COLOR PICTURE SHARPNESS TINT PICTURE SOUND FEATURES INSTALL Press the CURSOR RIGHT button to shift the menu to the left. EQUALIZER will be highlighted.
HOW TO USE THE AVL CONTROL I n most cases, the volume levels coming from broadcast programming or commercials are never the same. With the AVL (Audio Volume Leveler) control turned ON, you can have the TV level out sound that is being heard. This makes for a more consistent sound by reducing the peaks and valleys that occur during program changes or commercial breaks. To turn the AVL ON, follow these steps. 1 2 3 4 5 6 Press the MENU button on the remote control to show the onscreen menu.
HOW TO USE THE INCREDIBLE SURROUND CONTROL T he Incredible Surround feature adds greater depth and dimension to both monaural (MONO) and stereo TV sound. With the control set to INCR. SURROUND (Incredible Surround), the TV’s speakers can add even wider sound separation to normal broadcasts. 1 2 3 4 5 Press the MENU button on the remote control to show the onscreen menu. Press the CURSOR RIGHT and the menu will shift to the left.
HOW TO SET THE TV TO RECEIVE STEREO PROGRAMMING Y ou can receive broadcast stereo TV programs. The TV has both an amplifier and twin speakers through which the stereo sound can be heard. 1 2 3 4 5 6 Press the MENU button on the remote control to show the onscreen menu. BRIGHTNESS COLOR PICTURE SHARPNESS TINT PICTURE SOUND FEATURES INSTALL Press the CURSOR DOWN to highlight SOUND. PICTURE SOUND FEATURES INSTALL Press the CURSOR RIGHT and the menu will shift to the left.
HOW TO SET THE TV TO RECEIVE SAP (SECONDARY AUDIO PROGRAMMING) S AP is an additional part of the stereo broadcast system. Sent as a third audio channel, an SAP can be heard apart from the current TV program sound. TV stations are free to use SAP for any number of purposes. 1 2 3 4 5 Press the MENU button on the remote control to show the onscreen menu. Press the CURSOR DOWN to highlight SOUND. PICTURE SOUND FEATURES INSTALL Press the CURSOR RIGHT and the menu will shift to the left.
HOW TO USE THE AUDIO OUT CONTROL I f you have connected the TV’s AUDIO OUTPUT jacks to the AUDIO INPUT jacks on a stereo receiver (see the Quick Use Guide for connection instructions), set AUDIO OUT to either VARIABLE or FIXED to determine whether you adjust the volume at the stereo or at the TV. If you select VARIABLE, change the volume at the TV using the TV’s remote control. If you select FIXED, adjust the volume at the stereo using the stereo’s controls.
HOW TO TURN THE TV SPEAKERS ON OR OFF U sing the TV’s Audio (Monitor) Output jacks or the External Speaker connections, the TV speakers can be turned off allowing the television sound to be heard only from the external audio system or the external speakers. 1 2 3 4 5 6 Press the MENU button on the remote control to show the onscreen menu. Press the CURSOR DOWN to highlight SOUND.
HOW TO USE THE TIMER CONTROLS Y our television comes with an on-screen clock. The TV also can be set to turn on or off at a specific time and tune to a specific channel when it powers its self on. 1 2 3 4 Press the CLOCK button on the remote control to show the TIMER onscreen menu. Press the CURSOR RIGHT button and the TIMER options will shift to the left. TIME will be highlighted.
HOW TO USE THE MODE SELECT CONTROL T he Mode Select Control will allow you to use set the TV into the TV, FM, HD, or PC Modes. Depending on how the TV will be used, these modes may have their own onscreen menus controls to optimize there use when used with computers, radios, or highdefinition receivers. 1 2 3 4 5 6 7 8 Press the MENU button on the remote control to show the onscreen menu.
HOW TO SET THE ACTIVE CONTROL T he Active Control monitors and adjusts incoming video signals to help provide the best picture quality. When you choose to turn the Active Control ON, the picture sharpness and noise reduction are controlled automatically. Active Control adjusts these picture settings continuously and automatically.
UNDERSTANDING THE AUTOLOCK™ CONTROLS T he AutoLock™ feature receives and processes data sent by broadcasters or other program providers that contain program content advisories. When programmed by the viewer, a TV with AutoLock™ can respond to the content advisories and block program content that may be found objectionable (such as offensive language, violence, sexual situations, etc.). This is a great feature to censor the type of programming children may watch.
SETTING UP THE AUTOLOCK™ ACCESS CODE A utoLockTM allows parents to block out or “censor” any channels they think children should not watch. A channel blocked by the AutoLockTM control cannot be viewed until a correct access code is used to unlock the channel for viewing. First, let’s set your AutoLock access code. 1 2 3 4 5 6 7 8 9 10 BRIGHTNESS COLOR PICTURE SHARPNESS TINT PICTURE SOUND FEATURES INSTALL Press the MENU button on the remote control to show the onscreen menu.
HOW TO BLOCK CHANNELS USING AUTOLOCK™ A fter your personal access code has been set (see the previous page), you are ready to select the channels or inputs you want to block out or censor. 1 2 3 4 5 6 7 8 9 Press the MENU button on the remote control to show the onscreen menu. PICTURE SOUND FEATURES INSTALL TIMER MODE SELECT Auto Lock CLOSED CAP WIDE SCREEN Press the CURSOR DOWN button to highlight FEATURES. FEATURES Press the CURSOR RIGHT button and the menu will shift to the left.
HOW TO CLEAR ALL BLOCKED CHANNELS AT THE SAME TIME V arious onscreen messages will appear when someone tries to view blocked programming. The message is determined by how the current programming is blocked. You may view the blocked programming and turn OFF the AutoLock™ feature by using the Clear All control or by entering your access code 1 2 3 4 5 6 Press the MENU button on the remote control to show the onscreen menu.
BLOCKING PROGRAMS A fter your personal access code has been set, you can select specific movie ratings that you want to censor. 1 2 3 4 5 6 BASED ON BRIGHTNESS COLOR PICTURE SHARPNESS TINT PICTURE SOUND FEATURES INSTALL Press the MENU button on the remote control to show the onscreen menu. MOVIE RATINGS PICTURE SOUND FEATURES INSTALL Press the CURSOR DOWN button to highlight FEATURES. Press the CURSOR RIGHT button and the menu will shift to the left. TIMER will be highlighted.
BLOCKING PROGRAMS Y ou can select specific TV ratings that you want to censor by following these steps. 1 2 3 4 5 6 7 8 9 10 RATINGS BRIGHTNESS COLOR PICTURE SHARPNESS TINT PICTURE SOUND FEATURES INSTALL Press the MENU button on the remote control to show the onscreen menu. PICTURE SOUND FEATURES INSTALL Press the CURSOR DOWN button to highlight FEATURES. Press the CURSOR RIGHT button and the menu will shift to the left. TIMER will be highlighted.
OTHER AUTOLOCK™ BLOCKING OPTIONS T he BLOCKING control is what can be thought of as the “master switch” for AutoLock™. This control affects the settings you have chosen for blocking programs according to movie ratings or TV ratings, or for blocking programs that have no rating. When the BLOCKING control is OFF, the blocking or censoring of programs is disabled. When the BLOCKING control is ON, blocking will occur according to the settings you have chosen. Follow these steps to toggle BLOCKING OFF or ON.
USING THE AUTOLOCK™ REVIEW SCREEN T o remind you which ratings you have blocked and which Block Options you have selected, a review screen is available to review your AutoLockTM settings. To access this screen follow the steps below. 1 MOVIE RATING Press the STATUS/EXIT button on your remote control TWICE. Your AutoLockTM settings will appear on the screen.
HOW TO USE THE CLOSED CAPTIONING CONTROLS C losed Captioning (CC) allows you to read the voice content of television programs on the TV screen. Designed to help the hearing impaired, this feature uses onscreen “text boxes” to show dialogue and conversations while the TV program is in progress. 1 2 3 4 5 6 7 8 9 BRIGHTNESS COLOR PICTURE SHARPNESS TINT PICTURE SOUND FEATURES INSTALL PICTURE SOUND FEATURES INSTALL Press the MENU button on the remote control to show the on-screen menu.
HOW TO USE THE WIDESCREEN (FORMAT) CONTROL Y ou can change the screen format size to match the type of program you’re watching. Select the normal 4:3, or the Zoom 14:9, Zoom 16:9, Subtitle Zoom, Super Wide, Widescreen, or Full Screen aspect ratios. 1 2 3 4 5 6 BRIGHTNESS COLOR PICTURE SHARPNESS TINT PICTURE SOUND FEATURES INSTALL Press the MENU button on the remote control to show the on-screen menu.
HOW TO USE THE PROGRAM LIST CONTROL T he Program List Control will allow you to quickly overview all the programmed channels that have been placed into the televisions memory (see the Auto Programming section of this manual for more details). Program List will let you easily select the desired channels your looking for. Program List will display the channel number, the name of the channel if you have given it one, and whether it have AutoLock turn on or off.
HOW TO SET THE SLEEPTIMER CONTROL H ave you ever fallen asleep in front of the TV, only to have it wake you up at two in the morning with a test pattern sound screeching in your ears? Well, your TV can enable you to avoid that discomfort by automatically turning itself off.
HOW TO USE THE AUTOPICTURE™ CONTROL W hether you’re watching a movie or a video game, your TV has automatic video control settings that will match with your current program source or content. AutoPicture™ quickly resets your TV’s video controls for a number of different types of programs and viewing conditions that you may have in your home.
HOW TO USE THE AUTOSOUND™ CONTROL A utoSound™ allows you to select from three factory-set controls and a personal control that you set according to your own preferences through the onscreen Sound menu. The three factory-set controls (Voice, Music, and Theatre) enable you to tailor the TV sound so as to enhance the particular program you are watching. Follow these steps to select any of the options. 1 2 PERSONAL -11 -2 0 6 3 120HZ 500HZ 1500HZ 5KHZ 10KHZ Press the SOUND button on the remote control.
HOW TO USE THE SURF CONTROL A list or series of previously viewed channels can be selected with the SURF button on your remote control. With this feature, you can easily switch between different TV channels that currently interest you. The SURF control allows you to set up to ten channels in its quick viewing list. 1 2 Press the CHANNEL(+) or (–) button (or the numbered buttons) to select a channel to add to the SURF list.
REMOTE CONTROL USE WITH ACCESSORY DEVICES - DIRECT METHOD Y our remote control is set to work your TV and many infrared remote (IR) control VCRs, Cable Boxes, Satellite Systems, DBS, DVD, etc. However, an easy onetime step may be necessary before the remote will work your VCR. Try this initial Direct Access Method to see if going on to the following section is necessary. 1 2 1 Place the TV/DVD/ACC Mode Switch in the proper position. Point the remote control at the device and press the POWER button.
REMOTE CONTROL USE WITH ACCESSORY DEVICES - CODE ENTRY METHOD N ow that you have looked up the threedigit Remote Code Number for your brand of device, you are ready to follow the four simple steps below. Please read through steps 1-4 before beginning. 5 2 1 2 3 4 Place the TV/DVD/ACC Mode Switch in the proper position. Enter the FOUR-DIGIT REMOTE CODE NUMBER (page 42-44) for your desired device. The remote is now ready to send commands to the unit. VCR 5 Point the remote at the Device.
REMOTE CONTROL USE WITH ACCESSORY DEVICES - SEARCH METHOD Y our TV remote can be set to work various external devices such as VCRs, Cable Boxes, Satellite Receivers, DBS, DVD, etc. by what is called the search method of remote control programming. Satellite Receiver 07 If the “Remote Code” number method shown on the previous page did not set your remote to work your external device, then follow the easy steps listed below. 08 09 VCR Please read steps 1-4 before beginning.
REMOTE CONTROL DIRECT ENTRY CODES VCR CODES Admiral . . . . . . . . . . . . . . . . . 2027, 2052 Adventura . . . . . . . . . . . . . . . . . . . .2001 Aiko . . . . . . . . . . . . . . . . . . . . . . . . .2059 Aiwa . . . .2001, 2017, 2062, 2070, 2072 Akai . . . . .2021, 2029, 2038, 2060, 2063 Akiba . . . . . . . . . . . . . . . . . . . . . . . .2034 Alba . . . . . . . . . . . . . .2011, 2034, 2052, . . . . . . . . . . . . . . . . . . .2059, 2063, 2072 Ambassador . . . . . . . . . . . . . . . . . . .
REMOTE CONTROL DIRECT ENTRY CODES VCR CODES (continued) Pentax . . . . . . . . . . . . . . . . . . . . . . .2022 Perdio . . . . . . . . . . . . . . . . . . . . . . . .2001 Philco . . . . . . . .2015, 2018, 2052, 2078 Philips . .2015, 2035 (DEFAULT VCR), . . . . . . . . . . . . . . . . . . . . . . . .2074, 2075 Phonola . . . . . . . . . . . . . . . . . . . . . .2035 Pilot . . . . . . . . . . . . . . . . . . . . . . . . .2017 Pioneer . . . . . . . . . . . . .2031, 2033, 2035 Portland . . . . . . . . . . . . .
REMOTE CONTROL DIRECT ENTRY CODES CABLE CODES (continued) PVP Stereo Visual Matrix . . . . . . . .3002 Quasar . . . . . . . . . . . . . . . . . . . . . . .3001 Radio Shack . . . . . . . . . . . . . . . . . . .3007 Rembrandt . . . . . . . . . . . . . . . . . . . .3004 Runco . . . . . . . . . . . . . . . . . . . . . . . .3001 Salora . . . . . . . . . . . . . . . . . . . . . . . .3026 Samsung . . . . . . . . . . . . . . . .3014, 3040 Satbox . . . . . . . . . . . . . . . . . . . . . . .3024 Scientific . . . . .
REMOTE CONTROL ACCESSORY DEVICE RELATED BUTTONS W hen using the TV remote with an accessory device, first make certain it is set to control your accessory device (by the REMOTE CODE or SEARCH method). 1 2 2 Set the TV/DVD/ACC mode switch to the proper position on the remote. Point the top of the remote toward the front of the accessory device (remote sensor window) when pressing the buttons. 1 TV PIP POSITION PROG.
SETTING UP THE FM MODE (FM RADIO) INSTALL CONTROLS T his TV also provides you with an FM Radio. An FM Radio signal must be connected to the FM Antenna 75Ω Jack located on the bottom of the TV. 1 To enter the FM Mode, press the RADIO button on the remote control. The FM Mode has its own onscreen menu options. 2 3 Press the MENU button on the remote control to display the FM Mode onscreen menu. Press the CURSOR UP or DOWN buttons to scroll through the available FM Mode onscreen options.
SETTING UP THE FM MODE (FM RADIO) MANUAL STORE/SORT 1 2 3 4 5 6 7 8 9 10 11 12 EQUALIZER BALANCE AVL INCR. SURROUND STEREO SOUND FEATURES INSTALL T o Manually search, store and sort FM channels follow the instructions below: If in the FM Mode, press the MENU button on the remote control to display the FM Mode onscreen menu. Press the CURSOR DOWN buttons to highlight the MANUAL STORE option. Press the CURSOR RIGHT button to shift the menu to the left. SEARCH will be highlighted.
SETTING UP THE FM MODE (FM RADIO) SOUND CONTROLS T o ensure the best sound quality from the FM Radio feature of this TV, several Sound Controls are available for adjustment. To enter the FM Mode, press the RADIO button on the remote control. The FM Mode has its own onscreen menu options. Press the MENU button on the remote control to display the FM Mode onscreen menu. Press the CURSOR DOWN button until SOUND is highlighted.
SETTING UP THE FM MODE (FM RADIO) TIMER CONTROLS T he FM Radio within the TV can be set to turn on and off at a specific time, or tune to a specific channel when it powers on. The Timer controls also allows the FM Display to be turned on or off. 1 To enter the FM Mode, press the RADIO button on the remote control. The FM Mode has its own onscreen menu options. 2 3 4 Press the MENU button on the remote control to display the FM Mode onscreen menu.
SETTING FM MODE (FM RADIO) UP THE MODE SELECT CONTROLS T he Mode Select options allow you to move to other operating modes within he TV. When in the FM Mode, choose from TV, PC, or HD Modes. 1 2 3 If in the FM mode, press the MENU button on the remote control to display the FM Mode onscreen menu. SOUND FEATURES INSTALL TIMER MODE SELECT SCREENSAVER Press the CURSOR DOWN button until MODE SELECT is highlighted.
SETTING UP THE FM MODE (FM RADIO) SCREENSAVER CONTROL W hile in the FM Mode, there is a Screensaver option that can be used. The Screensaver control, when on, will circulate the screen station indication around the display. 1 2 3 4 5 If in the FM mode, press the MENU button on the remote control to display the FM Mode onscreen menu. TIMER MODE SELECT SCREENSAVER SOUND FEATURES INSTALL Press the CURSOR DOWN button until FEATURES is highlighted.
SETTING UP THE FM MODE (FM RADIO) AUTOSOUND™ CONTROLS A utoSound™ allows you to select from four factory-set controls and a personal control that you set according to your own preferences through the onscreen Sound menu within the FM Mode. The four factory-set controls (Classical, Jazz Pop, or Rock) enable you to tailor the sound so as to enhance the particular program you are listening to.
SETTING UP THE HD MODE (HIGH DEFINITION) PICTURE CONTROLS T he HD Mode offers certain Picture, Sound and Blocking options within its onscreen menu. Below is a list of Picture Menu options. 1 2 3 4 5 MAIN PICTURE SOUND MODE SELECT BLOCK CHANNEL PICTURE Press the HD button on the remote control to place the TV in the HD Mode (HD1). BRIGHTNESS COLOR PICTURE SHARPNESS TINT COLOR TEMP VIEW FORMAT Press the MENU button on the remote control to display the HD Mode onscreen menu.
SETTING UP THE HD MODE (HIGH DEFINITION) SOUND CONTROLS T he HD Mode also offers certain Sound control adjustments to fine tune the sound being heard when in the HD Mode. 1 2 3 4 5 Press the HD button on the remote control to place the TV in the HD Mode (HD1). Press the MENU button on the remote control to display the HD Mode onscreen menu. The PICTURE option will be highlighted. MAIN PICTURE SOUND MODE SELECT BLOCK CHANNEL Press the CURSOR UP or DOWN buttons until SOUND is highlighted.
SETTING UP THE HD MODE (HIGH DEFINITION) HD SELECT CONTROL T he HD Select Control will allow you to quickly change from the HD Mode of operation to the TV, FM Radio, or PC Modes. 1 2 3 4 If in the HD Mode, press the MENU button on the remote control to display the HD Mode onscreen menu. The PICTURE option will be highlighted. MAIN PICTURE SOUND MODE SELECT BLOCK CHANNEL MODE SELECT Press the CURSOR UP or DOWN buttons until MODE SELECT is highlighted.
SETTING UP THE HD MODE (HIGH DEFINITION) BLOCK CHANNEL CONTROL T he HD Mode channel can be blocked to censor the viewing of programming not suitable for children. To block the HD Mode channel, follow the steps below. 1 2 3 4 MAIN PICTURE SOUND MODE SELECT BLOCK CHANNEL Press the HD button on the remote control to place the TV in the HD Mode (HD1). MAIN PICTURE SOUND HD INSTALLATION MODE SELECT BLOCK CHANNEL Press the MENU button on the remote control to display the HD Mode onscreen menu.
SETTING UP THE PC MODE (PERSONAL COMPUTER MONITOR) PC MODE CONTROLS MAIN CONTROLS AUDIO SELECTION BRIGHTNESS & CONTRAST ADJUST COLOR VIDEO NOISE ADJUST POSITION AUTO ADJUST PIP CONTROLS MODE SELECT LANGUAGE RESET TO FACTORY SETTINGS T he TV can be used as a PC Monitor. A PC video signal must be present or the TV will go into standby mode. Follow the steps below to access and adjust the onscreen PC Menu controls. Press the PC button on the remote control to place the TV in the PC Mode.
SETTING UP THE PC MODE (PERSONAL COMPUTER MONITOR) No.
TROUBLESHOOTING TIPS No Power • Check the TV power cord. Unplug the TV, wait 10 seconds, then reinsert the plug into the outlet and push the POWER button again. • Check that the outlet is not on a wall switch. • Be sure the fuse is not blown on the AC power strip, if one is being used. TV Only Produces MONO Sound • If using a cable box with RF only type connections, the signal coming from the cable box will be produced in MONO only. • Check Sound control setting. Change setting to Stereo.
GLOSSARY Active Control • Active Control continuously measures and corrects the incoming signals to provide the best picture possible. OF TERMS Incredible Surround • False acoustic management of the audio signal that produces a dramatic expansion of the wall of sound that surrounds the listener and heightens overall viewing pleasure. Audio/Video Inputs • Jacks (standard RCA), located on the back of the TV, used for external accessory devices.
INDEX AutoLock Controls Access Code . . . . . . . . . . . . . . . . . . . . . . . . . . . . . . . . . . . . .25 Block Channels . . . . . . . . . . . . . . . . . . . . . . . . . . . . . . . . . . .26 Blocking Options . . . . . . . . . . . . . . . . . . . . . . . . . . . . . . . . .30 Clear All Blocked Channels . . . . . . . . . . . . . . . . . . . . . . . . .27 Movie Ratings . . . . . . . . . . . . . . . . . . . . . . . . . . . . . . . . . . . .28 Review Screen . . . . . . . . . . . . . . . . . . . . . . . .
RENEWED 90 DAY LIMITED WARRANTY