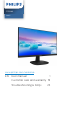
V Line 243V7 241B8 www.philips.
Table of Contents 1. Important........................................ 1 1.1 Safety precautions and maintenance................................... 1 1.2 Notational Descriptions.............. 3 1.3 Disposal of product and packing material............................................ 4 2. Setting up the monitor................ 5 2.1 Installation...................................... 5 2.2 Operating the monitor..................7 2.3 Remove the Base Assembly for VESA Mounting ...........................
1. Important proper cooling of the monitor’s electronics. 1. Important • Do not block the ventilation holes on the cabinet. • When positioning the monitor, make sure the power plug and outlet are easily accessible.
1. Important • Excessive usage of monitor can cause eye discomfort, it’s better to take shorter breaks more often at your workstation than longer breaks and less often; for example a 5-10 minute break after 50-60-minute continuous screen use is likely to be better than a 15-minute break every two hours. Try to keep your eyes from eye strain while using the screen for a constant period of time by : • Looking at something varying distances after a long period focusing on the screen.
1. Important • “Burn-in”, “after-imaging”, or “ghost imaging” is a well-known phenomenon in LCD panel technology. In most cases, the “burn-in” or “afterimaging” or “ghost imaging” will disappear gradually over a period of time after the power has been switched off. 1.2 Notational Descriptions The following subsections describe notational conventions used in this document. Notes, Cautions and Warnings Throughout this guide, blocks of text may be accompanied by an icon and printed in bold or italic type.
1. Important Taking back/Recycling Information for Customers 1.3 Disposal of product and packing material Philips establishes technically and economically viable objectives to optimize the environmental performance of the organization's product, service and activities. Waste Electrical and Electronic Equipment-WEEE From the planning, design and production stages, Philips emphasizes the important of making products that can easily be recycled.
2. Setting up the monitor Install base stand 2. Setting up the monitor 1. Place the monitor face down on soft and smooth surface taking care to avoid scratching or damaging the screen. 2.1 Installation 1 Package contents 2. Attach/Slide the base column with the monitor until it clicks into position. S line V Line 243V7 Quick Start Register your product and get support at www.philips.com/welcome Power 3.
2.
2. Setting up the monitor 243V7QHS 2.2 Operating the monitor Front view product description 243V7QS/243V7QDS/243V7QHS 4 5 4 3 AC power input VGA input HDMI input HDMI audio out Kensington anti-theft lock 7 6 5 4 2 Switch monitor’s power ON and OFF. Connect to PC 1. Connect the power cord to the back of the monitor firmly. Access the OSD menu. Confirm the OSD adjustment. 2. Turn off your computer and unplug its power cable. Adjust the OSD menu. 3.
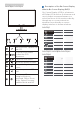
2. Setting up the monitor 243V7QDA/243V7QJA Description of the On Screen Display What is On-Screen Display (OSD)? On-Screen Display (OSD) is a feature in all Philips LCD monitors. It allows an end user to adjust screen performance or select functions of the monitors directly through an on-screen instruction window.
2. Setting up the monitor Basic and simple instruction on the control keys Main menu LowBlue Mode Sub menu On 1, 2, 3 (243V7QS, 243V7QD, 243V7QJ ) 1, 2, 3, 4 (243V7QHS) Off In the OSD shown above, you can press buttons at the front bezel of the monitor to move the cursor, and press OK button to confirm the choice or change. Input VGA DVI (243V7QS, 243V7QD) HDMI (243V7QD) HDMI 1.
2. Setting up the monitor Resolution notification 2.3 Remove the Base Assembly for VESA Mounting This monitor is designed for optimal performance at its native resolution, 1920 × 1080 @ 60 Hz. When the monitor is powered on at a different resolution, an alert is displayed on screen: Use 1920 × 1080 @ 60 Hz for best results. Remove the Base Stand Before you start disassembling the monitor base, please follow the instructions below to avoid any possible damage or injury.
2. Setting up the monitor 3. Press the release button to detach the base column. 0° 90° -5° * Display design may differ from those illustrated. 2 Warning Note This monitor accepts a 100mm x 100mm VESA-Compliant mounting interface. VESA Mounting Screw M4. Always contact manufacturer for wall-mount installation. 100mm 100mm 11 • To avoid potential screen damage, such as panel peeling, ensure that the monitor does not tilt downward by more than -5 degrees.
3. Image Optimization 3. Image Optimization 1. 3.1 SmartImage 2. Keep pressing to toggle among EasyRead, Office, Photo, Movie, Game, Economy, LowBlue Mode and Off. What is it? SmartImage provides presets that optimize display for different types of content, dynamically adjusting brightness, contrast, color and sharpness in real time. Whether you're working with text applications, displaying images or watching a video, Philips SmartImage delivers great optimized monitor performance.
3. Image Optimization • • Photo: This profile combines color saturation, dynamic contrast and sharpness enhancement to display photos and other images with outstanding clarity in vibrant colors all without artifacts and faded colors. 3.
4. Technical Specifications 4. Technical Specifications Picture/Display Monitor Panel Type Backlight Panel Size Aspect Ratio Pixel Pitch Contrast Ratio(typ.) Optimum Resolution Viewing Angle (typ.) Picture Enhancement Display Colors Vertical Refresh Rate Horizontal Frequency sRGB Flicker Free LowBlue Mode EasyRead Connectivity Signal Input/output Input Signal Audio in/out Convenience Built-in speakers(typ.) User Convenience OSD Languages Other Convenience IPS Technology W-LED system 23.8" W (60.
4. Technical Specifications Picture/Display Plug & Play Compatibility Stand Tilt DDC/CI, sRGB, Windows 7/Windows 8/Windows 8.1/ Windows 10, Mac OSX -5 / +20 degree Power Consumption Normal Operation Sleep (Standby mode) Off mode Heat Dissipation* Normal Operation Sleep (Standby mode) Off mode Power LED indicator Power Supply AC Input Voltage at 100VAC, 60Hz 21.29 W (typ.) AC Input Voltage at 115VAC, 60Hz 21.39 W (typ.) AC Input Voltage at 230VAC, 50Hz 21.49 W (typ.) 0.5 W 0.5 W 0.5 W 0.
4. Technical Specifications Atmospheric pressure (Non-operation) Environmental ROHS Packaging Specific Substances Cabinet Color Finish 500 to 1060hPa YES 100% recyclable 100% PVC BFR free housing Black/White Texture Note 1. This data is subject to change without notice. Go to www.philips.com/support to download the latest version of leaflet.
4. Technical Specifications 4.1 Resolution & Preset Modes Maximum Resolution 1920x1080@60Hz (analog input) 1920x1080@60Hz (DVI input) 1920x1080@75Hz (HDMI/DP input) Recommended Resolution 1920x1080@60Hz H. freq (kHz) Resolution V. freq (Hz) 31.47 720 x 400 70.09 31.47 640 x 480 59.94 35.00 640 x 480 66.67 37.86 640 x 480 72.81 37.50 640 x 480 75.00 35.16 800 x 600 56.25 37.88 800 x 600 60.32 48.08 800 x 600 72.19 46.88 800 x 600 75.00 47.73 832 x 624 74.55 48.
5. Power Management 5. Power Management If you have VESA DPM compliance display card or software installed in your PC, the monitor can automatically reduce its power consumption when not in use. If an input from a keyboard, mouse or other input device is detected, the monitor will 'wake up' automatically.
6. Customer care and warranty of red, green and blue. Many pixels together form an image. When all sub pixels of a pixel are lit, the three colored sub pixels together appear as a single white pixel. When all are dark, the three colored sub pixels together appear as a single black pixel. Other combinations of lit and dark sub pixels appear as single pixels of other colors. 6. Customer care and warranty 6.
6. Customer care and warranty Proximity of Pixel Defects Because pixel and sub pixels defects of the same type that are near to one another may be more noticeable, Philips also specifies tolerances for the proximity of pixel defects. Three adjacent lit sub pixels (one white pixel). Note A red or blue bright dot must be more than 50 percent brighter than neighboring dots while a green bright dot is 30 percent brighter than neighboring dots.
6. Customer care and warranty 1.
6. Customer care and warranty 6.2 Customer Care & Warranty For warranty coverage information and additional support requirements valid for your region, please visit www.philips.com/support website for details or contact your local Philips Customer Care Center. For Warranty Period please refer to Warranty Statement in Important Information Manual. For extended warranty, if you would like to extend your general warranty period, an Out of Warranty service package is offered via our Certified Service Center.
7. Troubleshooting & FAQs • 7. Troubleshooting & FAQs AUTO button doesn't function • 7.1 Troubleshooting This page deals with problems that can be corrected by a user. If the problem still persists after you have tried these solutions, contact Philips customer service representative. Visible signs of smoke or sparks No Picture (Power LED not lit) Make sure the power cord is plugged into the power outlet and into the back of the monitor.
7. Troubleshooting & FAQs Horizontal flicker appears Image appears distorted. Text is fuzzy or blurred. • • Adjust the image using the “Auto” function in OSD Main Controls. • Eliminate the vertical bars using the Phase/Clock of Setup in OSD Main Controls. It is valid only in VGA mode. Green, red, blue, dark, and white dots appears on the screen • Image appears blurred, indistinct or too dark • • You can adjust “power on” light using the power LED Setup in OSD main Controls.
7. Troubleshooting & FAQs • Restart your computer and repeat step 2 and 3 to verify that your PC is set at 1920 x 1080 @ 60 Hz. • Shut down your computer, disconnect your old monitor and reconnect your Philips LCD monitor. • Turn on your monitor and then turn on your PC. Ans.: In general it is recommended that the panel surface is not subjected to excessive shocks and is protected from sharp or blunt objects.
7. Troubleshooting & FAQs saver program when you leave your monitor unattended. Always activate a periodic screen refresh application if your LCD monitor will display unchanging static content. Note A measurement of the color of light radiated by an object while it is being heated. This measurement is expressed in terms of absolute scale, (degrees Kelvin). Lower Kevin temperatures such as 2004K are red; higher temperatures such as 9300K are blue. Neutral temperature is white, at 6504K.
2020 © TOP Victory Investments Ltd. All rights reserved. This product has been manufactured by and is sold under the responsibility of Top Victory Investments Ltd., and Top Victory Investments Ltd. is the warrantor in relation to this product. Philips and the Philips Shield Emblem are registered trademarks of Koninklijke Philips N.V. and are used under license. Specifications are subject to change without notice.