Information for users in the UK (not applicable outside the UK) Positioning the TV For the best results, choose a position where light does not fall directly on the screen, and at some distance away from radiators or other sources of heat. Leave a space of at least 5 cm all around the TV for ventilation, making sure that curtains, cupboards etc. cannot obstruct the air flow through the ventilation apertures.
Care of the screen Do not touch, push or rub or strike the screen with anything hard as this may scratch, mar or damage the screen permanently. Do not rub with dust clothes with chemical treatment. Do not touch the surface with bare hands or greasy cloth (some cosmetics are detrimental to the screen). Unplug the TV before cleaning the screen. When the surface becomes dusty, please wipe gently with absorbent cotton or other soft materials like chamois soaks.
Wall mounting instructions/Table stand According to the type of TV you’ve purchased a wall mount bracket and/or stand may be supplied. To mount the supplied stand and/or wall mount bracket, refer to separate instructions. Make sure that the wall mount is fixed securely so that it meets safety standards. Make sure that air can circulate freely through the ventilation slots To prevent any unsafe situations, no naked flame sources, such as lighted candles, should be placed on or in the vicinity.
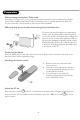
Accessing the Set-up Menu When the set is in the High Security Mode, the Setup menu can be accessed only with an Institutional Set-up Remote Control (RG4172BK or RC2573). When the set is in the Standard Security Mode, the Set-up Menu may be accessed either with an Institutional Set-up Remote Control, or with a guest remote control (like the RC2886) using an authorized access code. RG4172BK RC 2573 Navigation The current menu item can be selected by means of the cursor up and cursor down keys.
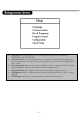
• • • • • • Language: Select the language of the installation menu. Options are "ENGLISH", "DEUTSCH", and "FRANCAIS". Communication: The Communication menu is required to enable interactive applications. For more information, consult the respective application notes. For stand-alone applications select “OFF”. No. of Programs: This sub menu allows setting the number of Television, PAY-TV, Radio and Info programs. The overall maximum number of programs is 125.
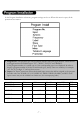
In the Program Installation sub-menu, program settings can be set. When this menu is open, all the protections are inactive. • Program No.: The program type can be selected with the cursor left/right buttons. These buttons will toggle between all available types: "TV", "INFO", "PAYTV" and "RADIO". If the program number of a certain type is 0, the corresponding type is not displayed.
• System: WEST EU (PAL/SECAM-BG), EAST EU (PAL/SECAM-DK), UK (PAL-I), FRANCE (SECAM-L/L') and AUTO. • Frequency: Digits can be entered for a frequency in MHz. Right cursor starts an auto search; during frequency entry the digits not yet entered are displayed as dashes "-". Enter “0” for frequencies below 100 MHz. • Label: This menu item will be used to add a label/name for each program.
In this sub menu the behavior of the TV after switching on and the behavior of the On Screen Display can be selected. • Welcome Message: Press Cursor Left/Right to display Welcome message entry menu: o Welcome Message o Line 1 o Line 2 o Clear With the Cursor Up/Down you can set the message characters. • Switch On Program: This item sets the television’s program at switch on. • • • • • Switch On Volume: This item sets the television’s volume at switch on. Use the Right/Left Cursor buttons to adjust.
In this sub menu, the Picture and Sound settings of the TV can be selected. • • • • • • Brightness: This changes picture brilliance. Colour: This changes the intensity of the colour. Contrast: This changes the difference between the light and dark tones. Sharpness: This changes the picture definition. Tint: Adjusts the picture to obtain natural skin tones.
In this sub menu, the Security settings of the TV can be configured. • Security: The menu function “SECURITY” allows the user to select one of two states “HIGH” or “STANDARD”. The default is “STANDARD”. o While the set is in the Security High Mode the Set-up menu can only be accessed with an Institutional Set-up Remote Control.
In this sub menu, the Control settings of the TV can be configured. • ESP: Energy Saving Programmability Mode (ESP) controls the maximum continuous viewing time allowed by the control system. The ESP Menu function is shown as "ESP", and its valid values are 00 - 99 (in hours). 00 value means OFF. • Audio/Video Mute: The Audio/Video Mute function determines whether the video should be blanked and the audio should be muted if the currently tuned channel has no signal.
The Clock set-up menu can be entered from this menu item. • Display Standby: This menu item will be used to set the intensity of the clock display when the television is in standby mode. • Display On: This menu item will be used to set the intensity of the clock when the television is in the ON mode. • Time Setting: This menu item will be used to set the time for the clock.
Alarm On (for sets with Clock display) Activates the wake-up alarm. After a valid time (0:00 to 23:59) is entered, the “Wake up Alarm” icon on the clock display will be visible. Standby Press to switch the TV off. + Info To move up or down an Info channel. + Pay TV To move up or down a Pay TV channel. + Radio To move up or down a Radio channel. Alarm Off (for sets with Clock display) Deactivates the wake-up alarm. The “Wake-up Alarm” icon on the clock display will disappear.
Teletext is an information system broadcast by certain channels that can be consulted like a newspaper. It also offers access to subtitles for viewers with hearing problems or who are not familiar with the transmission language (cable networks, satellite channels, etc.).
The pictures you receive may be transmitted in 16:9 format (wide screen) or 4:3 format (conventional screen). 16:9 pictures sometimes have a black band at the top and bottom of the screen (letterbox format). This function allows you to optimise the picture display on screen. Using the different formats Use the 16:9 Formats button on the Remote Control to select the different modes: Auto Format, 4:3, Zoom 14:9, Zoom 16:9, Subtitle zoom, Super wide and Wide screen.
Fullscreen This mode displays images in full screen. Auto Format This TV set is equipped with automatic switching which will select the correct screen format, provided the specific signals are transmitted with the programs. Press the key for approximately 5 seconds. The following text appears: If the word “LOW” appears instead of “OK”, the batteries are low and must be replaced.
Should your remote be lost or broken you can still change some of the basic settings with the keys on the top/side of your TV. Keys on top of TV Keys on side of TV Press: • • The – Vol + key to adjust the volume; The – P/CH+ key to select the TV channels or source Press the MENU/OK key to summon the main menu without the remote control (not available on all TVs).
This section provides information on the connectivity available for different LCD Television sets. Refer to the screen size that is relevant to your TV set. 15” LCD TVs Connectors on the 15” LCD TVs 1. 2. 3.
” & 23” LCD TVs Connectors on the 20” & 23” LCD TVs 1. 2. 3.
26” & 32” LCD TVs Connectors on the 26” & 32” LCD TVs 1. 2. 3.
42” TVs Connectors on the 42” TVs 1. 2. 3.
This section provides information on the connectivity available for different LCD Television sets. Refer to the screen size that is relevant to your TV set.
- 24 -
26” & 32” LCD TVs - 25 -
- 26 -
- 27 -
Pflege des Bildschirms Bildschirm nicht mit bloßen Händen oder speckiger Kleidung berühren (einige Schönheitsmittel sind für den Bildschirm schädlich). Bevor der Bildschirm gereinigt wird, den Netzstecker ziehen.Wenn der Bildschirm staubig ist, bitte z.B. mit einem Mikrofasertuch oder einem feuchten Ledertuch vorsichtig abreiben. Kein Aceton,Toluol oder Alkohol verwenden.Keine flüssigen Reinigungsmittel oder Sprays verwenden.
Hinweise zur Wandhalterung / zum Tischfuß Abhängig vom Modell, das Sie gekauft haben, wird ein Wandbefestigungswinkel und/oder ein Tischfuß mitgeliefert.Anweisungen für die Montage des mitgelieferten Standfußes und/oder Wandbefestigungswinkels finden Sie in der separat mitgelieferten Anleitung. Sorgen Sie dafür, dass der Winkel fest genug in der Wand verankert ist, so dass er den Sicherheitsnormen entspricht. Sorgen Sie dafür, daß die Luft frei durch die Lüftungsschlitze zirkulieren kann.
Installationsmenü aufrufen Zum Aufrufen des Installationsmenü wird eine Philips Gastfernbedienung (z. B. RC 2886) benötigt. Durch Eingabe eines Sicherheitscodes wird die normale Verriegelung aufgehoben. In Ausnahmefällen, z.B. in Systemanwendungen kann das Gerät im Modus „Hohe Sicherheit“ verriegelt sein und für den Zugang zum Installationsmenü die Spezialfernbedienung RG4172BK oder RC2573 (Sonderzubehör) erforderlich machen.
• • • • • • Sprache: Die Sprache kann im Menü unter „LANGUAGE“ (SPRACHE) eingestellt werden. Zur Wahl stehen die Sprachen: „ENGLISH“, „DEUTSCH“, und „FRANCAIS“. Kommunikation: Aktivieren Sie diese Einstellung für Einsatzmöglichkeiten in interaktiven Systemen. Weitere Informationen erhalten Sie im jeweiligen Handbuch des Softwareanbieters. Für alleinstehende Geräte wählen Sie bitte "Aus" bzw. "Nein".
In diesem Untermenü werden die Programmeinstellungen getätigt. Während der Verwendung dieses Menüs sind alle Verriegelungen deaktiviert. • Programmnummer: Legen Sie zunächst die Art des abzuspeichernden Programms ( „TV“, „INFO“, „PAYTV“ oder „RADIO“) durch Drücken der Cursor-Tasten „links“ bzw. „rechts“ fest. Wenn die Anzahl Programme einer Programmkategorie 0 beträgt, steht hier diese Programm-Art nicht zur Auswahl. Erhöhen Sie ggf.
• System: WEST EU (PAL/SECAM-BG), EAST EU (PAL/SECAM-DK), UK (PAL-I), FRANCE (SECAM-L/L') und AUTO. • Frequenz: Mit der > Taste wird der Sender-Suchlauf aktiviert, der bei jedem nennenswerten Signalpegel anhält, um die Festlegung des Programmspeicherplatzes, usw. zu ermöglichen. Es ist ebenfalls eine direkte Frequenzeingabe in MHz möglich. Bei Frequenzen unter 100 MHz ist eine führende „0“ einzugeben. • Programm-Name: Mit dieser Funktion kann jedem Programm ein Name zugeteilt werden.
In diesem Untermenü aktivieren / deaktivieren Sie sämtliche Funktionen, die sich auf Einschalteinstellungen und das On-Screen-Display (OSD) beziehen. • Willkommens-Gruss: Hier kann Ihr Willkommens-Gruss eingegeben werden, der nach Einschalten des Gerätes angezeigt wird. o Willkommens-Gruss o Zeile 1 o Zeile 2 o Löschen Die Cursor-Tasten < / > führen zu den Schreibstellen, mit ^ / v kann das Schriftzeichen gewählt werden.
Bild- und Toneinstellungen werden in diesem Untermenü festgelegt • • • • • • Helligkeit: Einstellung des gewünschten Helligkeitsgrades. Farbe: Einstellung der gewünschten Farbintensität. Kontrast: Einstellung des gewünschten Verhältnisses zwischen hellen und dunklen Tönen. Schaerfe: Anpassung der gewünschten Bildschärfe. Farbton: Stellt das Bild auf möglichst natürliche Hauttöne ein. Active Control: Stellt die Bildqualität je nach Empfangsniveau optimal ein (nur 23“, 26“, 30“ und 42“).
In diesem Untermenü werden die Sicherheitseinstellungen für das TV-Gerät konfiguriert. • Sicherheitslevel: Diese Funktion erlaubt es dem Nutzer, zwischen einem hohen und einem niedrigem Sicherheitslevel zu wählen. Voreingestellt ist hierbei "NIEDRIG". o Wenn das TV-Gerät auf Sicherheit „HOCH“ geschaltet ist, kann das Installationsmenü nur über eine RG 4172BK or RC2573 Fernbedienung erreicht werden.
In diesem Untermenü werden diverse Bedienungseinstellungen vorgenommen. • ESP: Die Funktion dient zur Einsparung von Energie, indem ein Zeitfenster (zwischen 00 und 99 Std.) für den ununterbrochenen Betrieb definiert wird. Danach schaltet sich das Gerät automatisch ab. • Audio/Video Stumm: Für den Fall, daß keine verwertbaren Signale empfangen werden, kann bestimmt werden, ob Ton und Bild entweder „stumm“ geschaltet oder abgeschaltet (ein schwarzer Bildschirm erscheint) werden.
Sämtliche Uhr-Einstellungen werden in diesem Untermnenü getätigt (nur für Geräte mit Uhrendisplay). • Helligkeit Standby: Hier kann die Intensität eingestellt werden, mit der die Uhr im StandbyMode angezeigt werden soll. • Helligkeit Ein: Einstellung der Helligkeit bei eingeschaltetem Gerät. • Uhr Stellen: Mit Hilfe der Zifferntastatur der Fernbedienung kann die aktuelle Uhrzeit eingestellt werden.
Alarm ON (für Geräte mit Uhrendisplay): Aktiviert die Weckfunktion. Nach der Eingabe einer korrekten Zeit (00:00 bis 23:59) wird ein Symbol für "Weckfunktion" im Uhrendisplay sichtbar. Standby Wechseln in den Stand-by-Modus per Tastendruck. + Info Auswahl eines höher oder niedriger abgespeichterten InfoKanals. + Pay TV - : Auswahl eines höher oder niedriger abgespeichterten Pay TVKanals. + Radio Auswahl eines höher oder niedriger abgespeichterten Radio- Kanals.
Videotext ist ein Informationssystem, das von den meisten Sendern ausgestrahlt wird und wie eine Zeitung gelesen werden kann. Dieses System ermöglicht auch den Zugang zu Untertiteln für Schwerhörige oder Personen, die mit der Sprache des übertragenen Programms (über Kabel, Satellit usw.) nur wenig vertraut sind. Drücken Sie: Aufrufen bzw.
Die Bilder, die Sie empfangen, können im Bildformat 16:9 (Kinoformat) oder 4:3 (konventioneller Bildschirm) übertragen werden. Bilder im Format 4:3 besitzen mitunter am oberen und unteren Bildrand einen schwarzen Streifen (Letterboxformat). Mit dieser Funktion können die schwarzen Streifen entfernt und die Darstellung der Bilder auf dem Bildschirm optimiert werden.
Durch Drücken der Taste für ca. 5 Sekunden erscheint auf dem Bildschirm ein "OK", sofern die Batterien der Fernbedienung voll funktionsfähig sind. Erscheint ein "NIEDRIG", sollten die schwachen Batterien gewechselt werden. Falls Ihre Fernbedienung unauffindbar ist oder nicht funktioniert, können Sie trotzdem einige Einstellungen mit den Tasten direkt am Fernsehgerät ändern, sofern keine Sperrung der Nahbedienungstasten vorgenommen wurde (siehe auch Menü Sicherheitseinstellungen).
Dieser Abschnitt enthält Informationen über die Anschlussmöglichkeiten der verschiedenen LCD TV-Geräte. Beachten Sie die Zollgröße, die auf Ihr TV-Gerät zutrifft. Anschlüsse bei 15" LCD-TV-Geräten 1. 2. 3. 12V-Stromversorgung Datenbuchse 2 (RJ45) - zum Gebrauch interaktiver Verbindungen Datenbuchse 1 (RJ12) - zum Gebrauch interaktiver Verbindungen Anschlüsse bei 20" und 23“ LCD-TV-Geräten 1. 2. 3.
- 44 -
Entretien de l’écran L’écran ne doit pas être touché, poussé, frotté ou frappé avec quoi que ce soit de dur. Il pourrait en effet être rayé, abîmé ou endommagé de manière permanente. Ne le frottez pas avec un chiffon enduit de produit chimique. Ne touchez pas la surface avec les mains nues ou avec un tissu graisseux (certains produits cosmétiques peuvent endommager l’écran). Débranchez la TV avant de nettoyer l’écran.
Instructions de montage au mur /Présentoir Selon le type de TV que vous avez acquis, un support de montage au mur ou un présentoir peuvent être fournis. Pour monter le présentoir ou le support mural, reportez-vous aux instructions fournies. Assurez-vous que le support mural est correctement fixé afin de respecter les impératifs de sécurité. Assurez-vous que l’air circule librement via les fentes d’aération.
Accès au menu Set-up Lorsque l’appareil est en mode Sécurité Haute, le menu Setup est accessible uniquement avec une Télécommande de configuration institutionnelle (RG4172BK ou RC2573). Lorsque l’appareil est en mode Sécurité Standard, le menu Set-up est accessible soit avec une Télécommande de configuration institutionnelle soit avec une télécommande invité (ainsi la RC2886) disposant d’un code d’accès autorisé.
• • • • • • Langage : sélectionnez la langue du menu d’installation. Les options sont « ENGLISH », « FRANÇAIS » et « DEUTSCH ». Communication : le menu Communication permet l’activation des applications interactives. Pour en savoir plus, veuillez consulter les notes des applications respectives. Pour les applications autonomes, sélectionnez « OFF ». No. de Programmes : ce sous-menu permet de régler les numéros des programmes de Télévision, PAY-TV, Radio et Info.
Le sous-menu Installation permet de régler les paramètres des programmes. Lorsque ce menu est ouvert, toutes les protections sont désactivées. • Num Program : le type de programme peut être sélectionné avec les boutons de curseur gauche/droite. Ces boutons font alterner les différents types disponibles : « TV », « INFO », « PAYTV » et « RADIO ». o Si le numéro de programme d'un certain type est 0, le type correspondant n’est pas affiché.
• Système : WEST EU (PAL/SECAM-BG), EAST EU (PAL/SECAM-DK), UK (PAL-I), • • • • • • • FRANCE (SECAM-L/L') et AUTO. Frequency : les chiffres de fréquence sont saisis en MHz. Le curseur droite lance une recherche automatique. Pour une saisie de fréquence, les chiffres en attente de saisie sont affichés comme des tirets « - ». Saisissez « 0 » pour les fréquences inférieures à 100 MHz. Nom : cet élément de menu permet d’attribuer un nom à chaque programme.
Ce sous-menu permet de sélectionner le mode de la TV après la mise en marche ainsi que celui de l’Affichage à l’écran (OSD). • Message d’Accueil : appuyez sur les touches de curseur gauche/droite pour afficher le menu de saisie de Message d’Accueil : Message d’Accueil Ligne 1 Ligne 2 Effacer Vous pouvez définir les caractères du message avec les touches de curseur haut/bas. • Activer Canal : l’élément définit le programme du téléviseur à la mise en marche.
Ce sous-menu permet de sélectionner les paramètres d’image et de son de la TV. • • • • • • • • • Lumière : modification de la brillance de l’image. Couleur : modification de l’intensité de la couleur. Contraste : modification de la différence entre les tons clairs et sombres. Définition : modification de la définition de l’image. Teint : réglage de l’image pour obtenir des tons chair naturels.
Ce sous-menu permet de configurer les paramètres de Sécurité de la TV. • • • Sécurité : la fonction de menu « SÉCURITÉ » permet à l’utilisateur de sélectionner l’un des états « HAUTE » ou « STANDARD ». La valeur par défaut est « STANDARD ». o Lorsque l’appareil est en mode de sécurité Haute, le menu Set-up est accessible uniquement avec une Télécommande de configuration institutionnelle.
Ce sous-menu permet de configurer les paramètres de Contrôle de la TV. • • • • • • • • ESP : le mode ESP (Energy Saving Programmability – Capacité de programmation d’économie d’énergie) commande la durée de visionnage continu maximum permise par le système de contrôle. La fonction de menu ESP est affichée « ESP » et ses valeurs valides s’échelonnent entre 00 et 99 (en heures). Une valeur de 00 signifie OFF.
Cet élément de menu permet d’accéder au menu d’installation de l’horloge. • • • • • • • Afficheur Arrêt : cet élément de menu permet de régler l’intensité de l’affichage de l’horloge lorsque le téléviseur est en mode Stand-by. Afficheur Marche : cet élément de menu permet de régler l’intensité de l’affichage de l’horloge lorsque le téléviseur est en mode Marche. Réglage Heure : cet élément de menu permet de régler l’heure de l’horloge. Telecharg.
Alarm On (pour les TV avec affichage d’horloge) Active l’alarme de réveil. Après la saisie d’une durée valide (0:00 à 23:59), l’icône d’alarme de réveil devient visible sur l’affichage de l’horloge. Standby Standby Arrête TV. Press to la switch the TV off. + Info Alterne entre les canaux de Info. + Pay TV Alterne entre les canaux de Pay TV (Télévision payante). + Radio Alterne entre les canaux de Radio. Alarm Off (pour les TV avec affichage d’horloge) Désactive l’alarme de réveil.
Le télétexte est un système d’information émis par certaines chaînes et susceptible d’être consulté comme un journal. Il offre également un accès aux sous-titres pour les spectateurs présentant une déficience auditive ou qui ne sont pas familiers avec la langue du programme (réseaux câblés, chaînes par satellite, etc.). Appuyez sur : Pour activer/désactiver le Télétexte.
Les images reçues peuvent être émises au format 16:9 (écran élargi) ou 4:3 (écran conventionnel). Les images 16:9 présentent parfois des bandeaux noirs en haut et en bas de l’écran (format letterbox – boîte à lettre). Cette fonction vous permet d’optimiser l’affichage des images à l’écran.
Auto Format Cette TV est équipée d’une commutation automatique sélectionnant le format d’écran correct, dans la mesure où les signaux spécifiques sont transmis avec les programmes. Appuyez sur la touche environ 5 secondes. Le texte suivant s’affiche : Si le mot « FAIBLE » s’affiche au lieu de « OK », les piles sont presque épuisées et doivent être remplacées.
• • Les touches – Vol + et – P/CH+ pour sélectionner les éléments de menu selon les directions indiquées ; La touche MENU/OK pour quitter le menu. Cette section présente les informations de connectivité disponible pour les différents téléviseurs LCD. Reportez-vous à la taille d’écran relative à votre TV. Connecteurs des TV LCD 15” 1. 2. 3.
- 61 -
Onderhoud van het scherm Reinig of raak het scherm niet aan met een hard voorwerp want dit kan het scherm onherroepelijk beschadigen of aantasten. En reinig het scherm aub niet met chemisch behandelde stofdoeken. Raak de oppervlakte niet aan met blote handen of vettige doeken (sommige cosmeticas zijn schadelijk voor het scherm).Trek de stekker uit het stopcontact vooraleer het scherm te reinigen.
Instructies voor wandmontage/stand Naargelang het type TV dat u hebt gekocht, wordt een muursteun en/of stand meegeleverd. Instructies voor de montage van de stand en/of muursteun vindt u elders in deze handleiding. Zorg ervoor dat de muursteun voldoende stevig verankerd is, zodat hij aan de veiligheidsnormen voldoet. Zorg ervoor dat de lucht kan circuleren door de ventilatiegleuven. Om gevaarlijke situaties te vermijden is het aan te raden geen naakte vlammen, bv.
Toegang tot het Setup menu In de hoogste beveiligingsstand (Security "High") is het Set-up Menu alleen toegankelijk met een afstandsbediening model (RG4172BK of RC2573) van de beheerder. In de normale beveiligingsstand (Security "Standard") is het Set-up Menu ook toegankelijk met een normale afstandsbediening van de gebruiker (bijv. model RC2886) , door het wachtwoord in te toetsen.
• • • • • • Language: Menutaal keuze van het installatie menu. Mogelijke opties zijn: "ENGLISH", "DEUTSCH", en " FRANCAIS ". Communication: Het Communicatie menu is uitsluitend noodzakelijk bij gebruik van interactieve applicaties. Consulteer de appicatie instructies voor meer informatie. Kies “OFF” voor normaal gebruik (geen interactieve applicatie). No. of Programs: In dit sub menu kunnen het aantal televisie, PAY-TV, radio en informatie kanalen ingesteld worden. Het maximale aantal kanalen is 125.
In het Program Installation sub-menu, kunnen instellingen per programma (zender) worden geconfigureerd. Wanneer dit sub menu geopend is, zijn de programma beveiligingen uitgeschakeld. • Program No.: In dit sub menu kunt u het aantal TV-, PAYTV-, Radio- en Informatiekanalen vastleggen. Het totale aantal kanalen bedraagt 125. Als het aantal “0” is, is het bewuste programma type niet beschikbaar in andere menus. Gebruik altijd twee-cijferige programma ingave. Voorbeeld toets “01” voor programma 1.
• System: WEST EU (PAL/SECAM-BG), EAST EU (PAL/SECAM-DK), UK (PAL-I), FRANCE (SECAM-L/L') en AUTO. • Frequency: de frequentie (in MHz) kan met de numerieke toetsen ingegeven worden; start met een “0” voor frequenties beneden de 100 MHz. Druk op “cursor rechts” om automatische te zoeken naar de volgende zender. • Label: Dit menu item maakt het mogelijk een programma naam in te geven voor elke zender.
In dit sub menu kan het gedrag van de tv m.b.t. inschakelgedrag en schermmenu’s ingesteld worden. • Welcome Message: instelling van de welkomsboodschap o Welcome Message o Line 1 o Line 2 o Clear Karakters (lijn 1 & 2) kunnen met cursor omhoog / omlaag ingesteld worden. “Clear” wist de welkomsboodschap. • Switch On Program: Na inschakelen gaat de tv naar deze zender.
In dit sub menu kunnen de instellingen voor beeld en geluid worden ingesteld.
In dit sub menu kunnen de beveiligingsinstelling van de tv ingesteld worden. • Security: deze instelling regelt de toegang tot het installatie menu o Indien hoog (High) dan is het installatie menu uitsluitend toegankelijk m.b.v. een installatie afstandsbediening (RC2886 of RG4174) o Indien normaal (Standard) dan is het installatie menu ook toegankelijk met een speciale code • Keyboard Lock: met deze funktie kunnen de bedieningstoetsen op het tv toestel uitgeschakeld worden. N.B.
In dit sub menu kunnen diverse controlle funkties van en over de tv ingesteld worden. • ESP: Energy Saving Programmability Mode (ESP) schakelt de tv automatisch uit na de ingestelde tijdsduur (in uren). De waarde kan varieren van 01 tot 99 uur. Kies 00 om EPS uit te schakelen • Audio/Video Mute: bepaalt of audio en video onderdrukt worden indien er geen signal wordt ontvanen • Step Tuning: Indien geactiveerd (YES) dan schakelt de tv onmiddelijk na ontvangst van een numerieke toets naar het bewuste kanaal.
Het klok installatie menu bevat de volgende instellingen (uitsluitend voor modellen met klok): • • • • Display Standby: helderheidsniveau van de klok tijdens standby Display On: helderheidsniveau van de klok terwijl de tv aan is Time Setting: tijdsinstelling Teletext Time Download: (de)activeert de automatisch tijdssynchronisatie met de teletekst klok van een willekeurige zender • Download Program: zender met teletekstsignaal waarmee de klok automatisch synchroniseerd • Time Offset: eventueel positief of
Alarm Aan (alleen tvs met klok) Activeert het wekalarm. “Wek alarm” icoon verschijnt in het klok scherm na ingave van een geldige wek tijd (0:00 tot 23:59) Standby Om naar standby te schakelen + Info Volgend / vorige Info zender + Pay TV Volgend / vorige Pay tv zender + Radio Volgend / vorige Radio zender Alarm Uit (alleen tvs met klok) Deactiveert the wek-alarm.
Teletekst is een informatie systeem dat wordt uitgezonden op bepaalde zenders.
De beelden die u ontvangt kunnen in het 16:9 (breedbeeld) of 4:3 (traditioneel beeld) formaat worden uitgezonden. Soms hebben 4:3 beelden een zwarte balk boven en onder in het beeld letterbox uitzendingen). Met deze toets kunt u de zwarte balken laten verdwijnen en de (letterbox) uitzending beeldvullend weergeven. Het gebruik van verschillende beeldformaten Gebruik de cursortoetsen links/rechts om een ander beeldformaat te kiezen: 4:3, Zoom 14:9, Zoom 16:9, Ondertitel Zoom, Superzoom, Breedbeeld en Voll.
Auto Format Het televisietoestel is voorzien van een automatische beeldformaatselectie. Hierdoor wordt het door sommige zenders specifiek uitgezonden signaal gedecodeerd en automatisch het juiste beeldformaat geselecteerd. U kunt het beeldformaat altijd handmatig wijzigen. Houd de toets ingedrukt voor circa 5 seconden.
Deze paragraaf beschrijft de aansluitmogelijkheden voor de diverse televisie modellen. Connectors op de 15” LCD TV 1. 2. 3. 12V-In gelijkstroom voedingsaansluiting Data 2 (RJ45) connector – voor interactieve applicaties Data 1 (RJ12) connector – voor interactieve applicaties Connectors op de 20” en 23” LCD TV 1. 2. 3. Externe extra luidspreker Data 2 (RJ45) connector – voor interactieve applicaties Data 1 (RJ12) connector – voor interactieve applicaties Connectors op de 26” en 32” LCD TV 1. 2. 3.
- 78 -
Cura dello schermo Non toccare, premere, strofinare o colpire lo schermo con oggetto solidi, perché possono graffiarlo o danneggiarlo permanentemente. Non strofinare con panni per rimuovere la polvere, trattati con sostanze chimiche. Non toccare la superficie con le mani nude o con panni unti ( alcuni prodotti cosmetici possono danneggiare lo schermo). Scollegare il televisore dalla rete elettrica prima di pulire lo schermo.
Istruzioni per l’installazione a parete / su piedistallo A seconda del tipo di televisore acquistato possono essere forniti un supporto per l'installazione a parete e/o un piedistallo. Per il montaggio del piedistallo e/o del supporto per installazione a parete forniti in dotazione, fare riferimento alle relative istruzioni separate. Verificare che il supporto per installazione a parete sia fissato saldamente in conformità agli standard di sicurezza.
Accesso al menu Regolazioni Quando l’apparecchio si trova in modalità di sicurezza elevata (High Security Mode), il menu Regolazioni è accessibile soltanto utilizzando un telecomando specifico di configurazione (Institutional di tipo RG4172BK oppure RC2573).
• • • • • • Language: permette di selezionare la lingua del menu d’installazione. Le varie opzioni sono "ENGLISH", "DEUTSCH", e "FRANCAIS". Communication: il menu Comunicazione è necessario per abilitare particolari applicazioni interattive. Per ulteriori informazioni, consultare le relative note applicative. Per applicazioni isolate selezionare “OFF”. No. of Programs: questo sottomenu permette di impostare il numero di programmi televisivi, PAY-TV, Radio e Informazioni.
Nel sottomenu Installazione Programma, è possibile impostare vari parametri dei programmi. Con tale menu aperto, tutte le protezioni risultano disabilitate. • Program No.: il tipo di programma può essere selezionato con i tasti cursore sinistra/destra. Tali pulsanti permetteranno di alternare fra i vari tipi disponibili: "TV", "INFO", "PAYTV" e "RADIO". o Se il numero di programma per un particolare tipo è 0, il tipo corrispondente non verrà visualizzato.
• System: WEST EU (PAL/SECAM-BG), EAST EU (PAL/SECAM-DK), UK (PAL-I), FRANCE (SECAM-L/L') e AUTO. • Frequency: è possibile inserire le cifre corrispondenti ad una frequenza in MHz. Il tasto cursore “destra” avvia una sequenza di ricerca automatica. Durante l’inserimento dei valori di frequenza, le cifre non ancora inserite verranno visualizzate come "-". Inserire “0” per i valori di frequenza inferiori a 100 MHz. • Label.: questa voce di menu permette di associare una etichetta/nome a ciascun programma.
• Security: Mediante questo sottomenu è possibile configurare vari parametri relativi alla sicurezza del televisore. • Control: Mediante questo sottomenu è possibile configurare varie impostazioni di controllo del televisore. In questo sottomenu è possibile selezionare la modalità di funzionamento del televisore dopo l’accensione e la modalità di funzionamento del menu di Visualizzazione su schermo (On Screen Display).
• • Volume Indicator: per visualizzare l’indicatore di volume durante la regolazione, selezionare "SÌ". Per nasconderlo, selezionare “NO”. Display Programma: le opzioni per Display Programma sono: Number, Label, All, None. Mediante questo sottomenu è possibile impostare sul televisore le modalità di visualizzazione immagini e di riproduzione del suono. • • • • • • • • • Brightness: con questa opzione si modifica la luminosità dell’immagine. Colour: con questa opzione si modifica l’intensità del colore.
Mediante questo sottomenu è possibile configurare vari parametri relativi alla sicurezza del televisore. • • • Security: la funzione di menu “SECURITY” consente all’utente di selezionare uno dei due stati: “HIGH” o “STANDARD”. L’impostazione predefinita è “STANDARD”. o Quando l’apparecchio si trova in modalità di sicurezza High, il menu Regolazioni è accessibile soltanto utilizzando un telecomando specifico di configurazione (Institutional Remote Control).
Mediante questo sottomenu è possibile configurare varie impostazioni di controllo del televisore. • • • • • • • • ESP: la modalità ESP (Energy Saving Programmability) = Programmazione per il risparmio energetico) con controllo del tempo massimo di visualizzazione continua consentito dal sistema di controllo. La funzione di menu ESP viene visualizzata come "ESP" e i valori validi sono 00 - 99 (in ore). 00 significa OFF.
Da questa voce di menu è possibile accedere al menu Installazione Orologio. • • • • • • • Display Standby: tramite questa voce di menu è possibile impostare l'intensità del display dell'orologio sul televisore in modalità preaccensione. Display On: tramite questa voce di menu è possibile impostare l'intensità dell'orologio sul televisore acceso (modalità ON). Time Setting: tramite questa voce di menu è possibile impostare l’orario dell’orologio.
Alarm On (per apparecchi con la visualizzazione dell’orologio) Attiva l’allarme di sveglia. Dopo aver inserito un orario valido (da 0:00 a 23:59), verrà visualizzata l’icona dell’allarme di sveglia sul display dell'orologio. + Pay TV Consente di spostarsi in alto o in basso sui canali della Pay TV. Standby Premere questo Standby pulsante per Press to switch spegnere il the TV off. televisore. + Info Consente di spostarsi in alto o in basso sui canali di informazioni.
Il televideo è un sistema informativo diffuso da alcuni canali consultabile come un giornale. Inoltre, offre l’accesso ai sottotitoli per spettatori con problemi di udito o per coloro che non conoscono la lingua in cui è trasmesso il programma (reti via cavo, canali via satellite, ecc.).
Le immagini ricevute possono essere trasmesse in formato 16:9 (wide screen) o in formato 4:3 (schermo convenzionale). Talvolta le immagini a 16:9 hanno una banda nera nella parte superiore e inferiore dello schermo (formato letterbox). Questa funzione consente di ottimizzare l’immagine visualizzata a schermo. Utilizzo dei vari formati Utilizzare il pulsante Formati 16:9 del telecomando per selezionare le varie modalità: Auto Format, 4:3, Zoom 14:9, Zoom 16:9, Zoom con sottotitoli, Super wide e Wide screen.
Auto Format Questo televisore è dotato di impostazione automatica per selezionare il formato corretto dello schermo, quando i relativi segnali specifici vengono trasmessi con i programmi. Premere il pulsante per circa 5 secondi. Compare il seguente messaggio: Se viene visualizzata la parola “SCARSO” anziché “OK”, le pile sono scariche e devono essere sostituite.
Premere il pulsante MENU/OK per richiamare il menu principale senza il telecomando (questo tasto non è disponibile su tutti i modelli). Utilizzare: • • il pulsante – Vol + e il pulsante – P/CH+ per selezionare le voci di menu nelle direzioni indicate; il pulsante MENU/OK per chiudere il menu Questa sezione fornisce informazioni su come collegare i vari modelli di televisori LCD. Fare riferimento alla dimensione dello schermo relativa al proprio televisore. Connettori per televisori LCD 15” 1. 2. 3.
- 95 -
Cuide la pantalla Para prevenir arañazos o daños permanentes en la pantalla, evite tocar, empujar, frotar o golpear esta con objetos duros. No limpie la pantalla con productos químicos. Evite tocar la pantalla con las manos o telas grasientas (algunos cosméticos pueden dañar la pantalla). Desconecte el televisor antes de limpiar la pantalla. Para limpiar la pantalla use un paño suave, algodón absorbente u otros materiales suaves.
Instrucciones para el montaje en la pared/soporte de mesa Dependiendo del tipo de TV que usted a adquirido se suministrara una barra para el montaje en la pared y/o un soporte de mesa. Para montar la barra y/o el soporte de mesa refiérase a las instrucciones para dichos soportes que se suministran por separado. Asegúrese que el aire pueda circular libremente por las ranuras de ventilación.
Accediendo al menú de configuración (Set-up menu) Mientras el televisor este en modo de seguridad alto, solo se puede acceder al menú de configuración con un mando a distancia ITV (Institutional) (RG4172BK o RC2573). Mientras el televisor este en modo de seguridad standard, el menú de configuración es accesible con un mando a distancia ITV (Institutional) o con un mando a distancia comercial (guest)( como el RC2886) usando el código de acceso autorizado.
• • • • • • Language: Selecciona el lenguaje del menú de instalación. Las opciones disponibles son: "ENGLISH", "DEUTSCH", e "FRANCAIS". Communication: El menú de comunicación es requerido para activar las aplicaciones interactivas. Para mas información, consulte las notas respectivas de cada aplicación. Para aplicaciones autónomas seleccione “OFF”. No. of Programs: Este submenú permite ajustar el numero de programas de televisión, PAY-TV, radio e información. El numero máximo de programas es 125.
El sub-menú Program Installation, permite ajustar los valores de los programas. Mientras este menú este abierto, todas las protecciones son inactivas. • Program No.: El tipo de programa puede ser elegido con el cursor izquierda/derecha. Con el cursor puede seleccionar los tipos disponibles: "TV", "INFO", "PAYTV" y "RADIO". Si el numero de programas de un cierto tipo es 0, el tipo correspondiente no aparecerá en la pantalla.
• System: WEST EU (PAL/SECAM-BG), EAST EU (PAL/SECAM-DK), UK (PAL-I), FRANCE (SECAM-L/L') y AUTO. • Frequency: Utilice dígitos para buscar una frecuencia en MHz. Presionando el cursor a la derecha empieza la búsqueda automática; mientras este insertando dígitos las cifras que todavía no han sido insertadas se ven como "-". Use “0” para frecuencias por debajo de 100 MHz. • Label: Este menú permite nombrar cada programa.
En este sub-menú, se puede seleccionar la reacción del televisor al encendido y del texto en pantalla. • Welcome Message: Presione el cursor izquierda/derecha para entrar en el menú de mensaje de bienvenida: o Welcome Message o Line 1 o Line 2 o Clear Con el cursor arriba/abajo puede seleccionar los caracteres del mensaje. • Switch On Program: Esta función determina el canal al encender el televisor. • • • • • Switch On Volume: Esta función determina el volumen del televisor al encendido.
En este sub-menú, puede seleccionar los ajustes de la pantalla y del sonido del televisor. • • • • • • Brightness: Ajusta el brillo. Colour: Ajusta la intensidad del color. Contrast: Ajusta la diferencia entre tonos claros y oscuros. Sharpness: Ajusta la definición de la pantalla. Tint: Ajusta la pantalla para obtener tonos de piel naturales. Active Control: Control activo optimiza la calidad de imagen dependiendo de la calidad de recepcion (esta opción solo es disponible en ciertos modelos de televisor).
En este sub-menú puede configurar los ajustes de seguridad del televisor. • Security: La función “SECURITY” permite seleccionar uno de los dos modos “HIGH” o “STANDARD”. El modo por defecto es “STANDARD”. o Mientras el televisor este en modo de seguridad High el menú de configuración solo puede ser accedido con un mando a distancia de configuración Institutional.
En este sub-menú puede configurar ajustes de control del televisor. • ESP: Modo de programación de ahorro de energía (ESP) controla el tiempo máximo de visualización permitido por el sistema de control. La función del menú de ESP se enseña como "ESP" y puede ser programada entre 00 - 99 (en horas). 00 significa OFF. • Audio/Video Mute: La función Audio/Video Mute determina si el video debe ser blanqueado y el audio desactivado si el canal actual no tiene señal.
El sub-menú de configuración del reloj puede ser accedido desde este menú. • Display Standby: Este menú permite ajustar la intensidad de la luz del reloj cuando el televisor este en modo de espera. • Display On: Este menú permite ajustar la intensidad de la luz del reloj cuando el televisor este encendido. • Time Setting: Este menú permite ajustar la hora del reloj. • Teletext Time Download: Este menú permite activar/desactivar la función de actualización automática por medio del Teletexto.
Alarma (Para TV con reloj) Activa la alarma del despertador. Después de introducir la hora (de 0:00 a 23:59), el icono de “alarma de despertador” será visible en el reloj. Standby (modo de espera) Presione para apagar el televisor. + Info Para cambiar de canal de información. + TV de pago Para cambiar de canal de televisión de pago. + Radio Para cambiar de canal de radio. Desactivar alarma (Para TV con reloj) Desactiva la alarma del despertador. El icono de “alarma de despertador” desaparecerá del reloj.
Teletexto es un sistema de información emitido por ciertos canales y puede ser consultado como un diario. También permite acceso a subtítulos para personas con problemas de oído o personas poco familiarizadas con el idioma de transmisión (televisión por cable, canal satélite, etc.).
Las imágenes recibidas pueden ser transmitidas en formato 16:9 (pantalla ancha) o formato 4:3 (formato convencional). En imágenes en formato 16:9 pueden aparecer bandas negras en la parte superior e inferior de la pantalla (formato cinemascope). Esta función permite eliminar las bandas negras y optimizar la imagen de la pantalla.
Presione la tecla 5 segundos aproximadamente. El siguiente texto aparecerá en la pantalla: Si aparece “LOW” en vez de “OK”, significa que las baterías están casi gastadas y tienen que ser cambiadas. En caso de que el mando a distancia se haya roto o extraviado tiene la posibilidad de modificar determinados ajustes con las teclas de la parte superior del televisor.
Esta sección provee información sobre las diferentes posibilidades y aparatos que pueden ser conectados a los diferentes tipos de televisor. Refiérase al tamaño de pantalla que coincide con su televisor. Conectores en 15” LCD TVs 1. 2. 3. Toma de corriente 12V- DC 2 entradas (RJ45) de datos – para conectividad interactiva 1 entrada (RJ12) de datos – para conectividad interactiva Conectores en 20” y 23” LCD TVs 1. 2. 3.
- 112 -
Cuidados com o écran Não toque, pressione, friccione nem atinja o écran com objectos duros, pois isso pode arranhar, estragar ou danificar permanentemente o écran. Não limpe com panos do pó impregnados de produtos químicos. Não toque a superfície com as mãos ou com panos oleosos (alguns cosméticos deterioram o écran). Retire a ficha da tomada antes de limpar o écran.
Instruções para montagem em parede / em móvel Conforme o tipo de televisor que tenha adquirido, o suporte para a montagem em parede ou em móvel pode ser fornecido. Para montar o suporte de parede ou móvel, siga as instruções fornecidas em separado. Certifique-se de que o suporte de parede esteja bem fixo de modo a assegurar as medidas de segurança necessárias.
Aceder ao menu Setup Quando o televisor estiver no modo de Alta Segurança, o menu setup só está acessível através Controlo Remoto de Setup Institucional (RG4172BK ou RC2573). Quando o televisor estiver no modo Segurança Standard, o menu Setup está acessível quer através do Controlo Remoto de Setup Institucional ou com outro controlo remoto (como o RC2886) utilizando um código de acesso autorizado.
• • • • • • Language: Seleccione a língua do menu de instalação. As opções são “English”, “Deutsch”, e “Français”. Communication: O menu de Comunicação permite-lhe realizar aplicações interactivas. Para mais informação, consulte as respectivas notas de aplicação. Para aplicações ‘stand alone’ seleccione ”Off” No. of Programs: Este Submenu permite-lhe a instalação de programas de televisão, PAYTV, Rádio e informação. O número total de canais é de 125.
No Submenu de Instalação de Programas, podem ser ajustadas as definições de programas. Quando este menu está aberto, todas as protecções estão inactivas. • Program No.: O tipo de programa pode ser seleccionado com os botões à esquerda/à direita do cursor. Estes botões utilizar-se-ão em todos os tipos: “TV”, “INFO”, “PAYTV” e “RADIO”. Se o número de determinado tipo for 0, o tipo correspondente não será apresentado.
• System: WEST EU (PAL/SECAM), EAST EU (PAL/SECAM-DK), UK (PAL-L), FRANCE (SECAM-L/L’) e AUTO. • Frequency: Podem ser introduzidos dígitos para uma frequência em MHz. O cursor à direita inicia uma auto busca; durante a introdução da frequência, aparecerá “-“ até serem apresentados os dígitos. Marque‘0’ para frequências abaixo dos 100 MHz. • Label: Este item do menu será usado para nomear/etiquetar cada programa.
Neste submenu, pode seleccionar-se o funcionamento do televisor ao ser ligado e o funcionamento do On Screen Display-OSD(Apresentação no Écran). • Welcome Message: Pulse o cursor à direita/à esquerda para apresentação da mensagem de boasvindas do menu de entrada. o Mensagem de Boas-vindas o Linha 1 o Linha 2 o Apagar Com o cursor acima/abaixo pode definir os caracteres da mensagem • Switch On Program: Este item define o programa aquando da ligação do televisor.
Neste submenu, podem seleccionar-se as definições de imagem e som do televisor. • • • • • • Brightness: Altera o brilho da imagem. Colour: Altera a intensidade da cor. Contrast: Altera a diferença entre tons claros e escuros. Sharpness: Altera a definição da imagem. Tint: Ajusta a imagem de modo a obter tons pele naturais. Active Control: Optimiza a qualidade da imagem de acordo com a qualidade da recepção (esta opção de menu está apenas disponível em alguns modelos de televisor LCD).
Neste submenu, podem seleccionar-se as definições de segurança do televisor. • Security: Esta função permite ao utilizador seleccionar entre dois estados, “HIGH” ou “STANDARD”. Por defeito está em “STANDARD”. o Enquanto o televisor estiver em modo de segurança ‘High’, o menu de Set-up só está acessível através do Controlo Remoto de Setup Institucional.
Neste submenu, podem ser configuradas as definições de controlo. • ESP: O modo Energy Saving Pragrammability (ESP), controla o tempo máximo de transmissão permitido pelo sistema de controlo. Esta função aparece como “ESP”, e os seus valores vão de 00-99 (em horas). O valor 00 significa OFF. • Audio/Video Mute: esta função determina se o vídeo e o áudio devem ser anulados, quando um canal sintonizado não recebe sinal.
Neste item tem acesso ao menu de acerto do relógio. • Display Standby: Este item do menu é utilizado para definir a intensidade da apresentação do relógio, quando o televisor estiver no modo Standby. • Display On: Este item do menu é utilizado para definir a intensidade da apresentação do relógio, quando o televisor estiver no modo ‘ON’. • Time Setting: Este item é utilizado para acertar a hora do relógio.
Alarm On (para televisores com apresentação de Relógio) Activa o despertador. Após uma entrada de hora (0:00 to 23:59), o ícone “Wake up Alarm” do relógio ficará visível Standby Standby Press Pulsetopara switch a TV thdesligar e TV off. + Info Para se mover acima/abaixo nos canais de Informação + Pay TV Para se mover acima/abaixo nos canais da Pay TV + Radio Para se mover acima/abaixo nos canais de Radio. Alarm Off (para televisores com apresentação de Relógio) Desactiva o despertador.
O é um sistema de informação transmitido por alguns canais, que pode ser consultado como se um jornal se tratasse. Também oferece acesso a legendas para espectadores com problemas auditivos ou para aqueles não estejam familiarizados com a língua em que é transmitido (emissões por cabo, canais satélite, etc.
As imagens recebidas podem ser transmitidas em formato 16:9 (écran largo) ou em formato 4:3 (écran convencional). As imagens em 16:9 têm, por vezes uma banda negra no cimo e no fundo do écran (formato de caixa de letra). Esta função permite-lhe optimizar a apresentação da imagem no écran. Utilização dos diferentes formatos Utilize o botão de ‘Formato 16:9’ do controlo remoto, para seleccionar entre diversos modos: Auto Format, 4:3, Zoom 14:9, Zoom 16:9, Zoom de Legendas, Super Largo e Écran Largo.
Auto Format (Formato Automático) Este televisor está equipado com troca automática que selecciona o formato correcto, desde que o programa transmita os sinais específicos para que essa selecção seja produzida. Pulse o botão durante aproximadamente 5 segundos. Aparecerá o seguinte texto: Se a palavra “LOW” aparecer no lugar de “OK”, as pilhas estão fracas e deve substituí-las.
Pulse: • • botão – Vol + e o botão – P/CH+ para seleccionar os itens do menu nas direcções pretendidas, como demonstrado; botão MENU/OK para sair do programa. Esta secção providencia-lhe informação sobre a conexão disponível nos diferentes televisores LCD. Conectores em televisores LCD de 15” 1. 2. 3. 12V-In power DC jack Data 2 (RJ45) jack – para fins de conexão interactiva Data 1 (RJ12) jack - para fins de conexão interactiva Conectores em televisores LCD de 20” e 23” 1. 2. 3.
- 129 -
Φροντίδα της οθόνης Μην αγγίζετε, πιέζετε, τρίβετε ή κτυπάτε την οθόνη µε οποιοδήποτε αντικείµενο καθώς µπορεί να προκληθούν µόνιµες γρατσουνιές, φθορά ή ζηµιά στην οθόνη. Μην τρίβετε την οθόνη µε ξεσκονόπανα εµποτισµένα µε χηµικά προϊόντα. Μην αγγίζετε την επιφάνεια µε γυµνά χέρια ή µε λιγδιασµένο ύφασµα (ορισµένα καλλυντικά είναι επιβλαβή για την οθόνη). Αποσυνδέστε την τηλεόραση πριν από τον καθαρισµό της οθόνης.
Οδηγίες τοποθέτησης στον Τοίχο/σε Επιτραπέζια βάση Ανάλογα µε τον τύπο της τηλεόρασης που έχετε αγοράσει, µπορεί να παρέχεται ένα στήριγµα τοίχου και/ή µια βάση. Για την τοποθέτηση της παρεχόµενης βάσης και/ή του στηρίγµατος τοίχου, δείτε το ειδικό φυλλάδιο. Βεβαιωθείτε ότι η στήριξη στον τοίχο έχει γίνει µε τέτοιο τρόπο ώστε να ικανοποιούνται οι κανονισµοί ασφάλειας.
Πρόσβαση στο µενού Set-up (Ρύθµιση) Όταν η συσκευή βρίσκεται σε λειτουργία High Security (Υψηλή Ασφάλεια), η πρόσβαση στο µενού Setup (Ρύθµιση) µπορεί να γίνει µόνο µέσω ενός τηλεχειριστηρίου γενικής ρύθµισης (RG4172BK ή RC2573).
• • • • • • Language (Γλώσσα): Επιλογή της γλώσσας του µενού συντονισµού. Οι επιλογές είναι "ENGLISH" (Αγγλικά), "DEUTSCH" (Γερµανικά) και " FRANCAIS " (Γαλλικά). Communication (Επικοινωνία): Το µενού Communication (Επικοινωνία) είναι απαραίτητο για την ενεργοποίηση διαδραστικών εφαρµογών. Για περισσότερες πληροφορίες, συµβουλευθείτε τις αντίστοιχες σηµειώσεις της εφαρµογής. Για αυτόνοµες εφαρµογές επιλέξτε "OFF" (Όχι). No. of Programs (Αριθµ. Προγρ.
Στο υποµενού Program Installation (Συντονισµός Προγράµµατος) µπορείτε να ορίσετε τις ρυθµίσεις του προγράµµατος. Όταν το µενού αυτό είναι ανοικτό, όλες οι προστασίες είναι ανενεργές. • Program No. (Αριθµ. Προγρ.): Ο τύπος του προγράµµατος µπορεί να επιλεχθεί µε τα αριστερά/δεξιά πλήκτρα του κέρσορα. Με αυτά τα πλήκτρα µπορείτε να µετακινηθείτε µεταξύ όλων των διαθέσιµων τύπων: "TV", "INFO", "PAYTV" και "RADIO".
• System (Σύστηµα): WEST EU (PAL/SECAM-BG), EAST EU (PAL/SECAM-DK), UK (PAL-I), FRANCE (SECAM-L/L') και AUTO. • Frequency (Συχνότητα): Μπορούν να εισαχθούν ψηφία για µία συχνότητα σε ΜΗz. Με το πλήκτρο κέρσορα • • • • • • δεξιά ξεκινά µία αυτόµατη αναζήτηση. Κατά την καταχώρηση της συχνότητας τα ψηφία που δεν έχουν εισαχθεί εµφανίζονται ως παύλες "-". Πληκτρολογήστε "0" για συχνότητες µικρότερες από 100 MHz.
Σε αυτό το υποµενού µπορείτε να επιλέξετε τη συµπεριφορά της τηλεόρασης µετά την ενεργοποίηση και τη συµπεριφορά της λειτουργίας OSD (Εµφάνιση πληροφοριών στην οθόνη). • Welcome Message (Μήνυµα υποδοχής): Πιέστε τον κέρσορα αριστερά/δεξιά για να εµφανίσετε το µενού καταχώρησης του µηνύµατος υποδοχής: o Welcome Message (Μήνυµα υποδοχής) o Line 1 (Γραµµή 1) o Line 2 (Γραµµή 2) o Clear (∆ιαγραφή) Μπορείτε να ορίσετε τους χαρακτήρες του µηνύµατος µε το πλήκτρο κέρσορα επάνω/κάτω.
Στο υποµενού αυτό µπορούν να επιλεχθούν οι ρυθµίσεις εικόνας και ήχου της τηλεόρασης. • • • • • • Brightness (Φωτεινότης): Αλλάζει τη φωτεινότητα της εικόνας. Colour (Χρώµα): Αλλάζει την ένταση των χρωµάτων. Contrast (Αντίθεση): Αλλάζει τη διαφορά µεταξύ ανοιχτών και σκούρων τόνων. Sharpness (Ευκρίνεια): Αλλάζει την ευκρίνεια της εικόνας. Tint (Aπόχρωση): Ρυθµίζει την εικόνα ώστε να αποκτήσει περισσότερη φυσικότητα.
Με το υποµενού Security (Ασφάλεια) µπορείτε να ορίσετε τις ρυθµίσεις ασφάλειας για την τηλεόραση. • Security (Επίπεδο Ασφάλειας): Η λειτουργία µενού "SECURITY" (Ασφάλεια) παρέχει τη δυνατότητα στο χρήστη να επιλέξει µεταξύ δύο καταστάσεων "HIGH" (Υψηλή) ή "STANDARD" (Βασική). Η προεπιλεγµένη κατάσταση είναι "STANDARD" (Βασική). o Όταν η συσκευή βρίσκεται σε λειτουργία ασφάλειας High (Υψηλή), η πρόσβαση στο µενού Setup (Ρύθµιση) µπορεί να γίνει µόνο ενός τηλεχειριστηρίου γενικής ρύθµισης.
Στο υποµενού αυτό µπορείτε να ορίσετε τις ρυθµίσεις ελέγχου της τηλεόρασης. • ESP: Η λειτουργία ESP (Energy Saving Programmability Mode – Προγραµµατισµός • • • • • • • Εξοικονόµησης Ενέργειας) ελέγχει το µέγιστο χρονικό διάστηµα συνεχούς θέασης που επιτρέπει το σύστηµα ελέγχου. Η λειτουργία µενού ESP εµφανίζεται ως "ESP" και οι επιτρεπτές τιµές της είναι 00 – 99 (σε ώρες). Η τιµή 00 σηµαίνει ότι η λειτουργία είναι απενεργοποιηµένη (OFF).
Η ενεργοποίηση του µενού Clock set-up (Ρύθµιση Ρολογιού) µπορεί να γίνει από αυτό το στοιχείο µενού. • Display Standby (Οθόνη Αναµονής): Το στοιχείο µενού αυτό χρησιµοποιείται για τη ρύθµιση της έντασης της οθόνης του ρολογιού όταν η τηλεόραση βρίσκεται σε κατάσταση αναµονής. • Display On (Οθόνη σε Λειτουργία): Το στοιχείο µενού αυτό χρησιµοποιείται για τη ρύθµιση της έντασης του ρολογιού όταν η τηλεόραση είναι ενεργοποιηµένη (ΟΝ).
Ενεργοποίηση αφύπνισης (για συσκευές µε οθόνη ρολογιού) Ενεργοποιεί την αφύπνιση. Αφού εισαχθεί η ώρα (0:00 έως 23:59), εµφανίζεται το εικονίδιο της αφύπνισης στην οθόνη του ρολογιού. Λειτουργία αναµονής Πιέστε για να απενεργοποιήσετε την τηλεόραση. + Info Για να µετακινηθείτε ένα πρόγραµµα πληροφοριών επάνω ή κάτω. + Pay TV Για να µετακινηθείτε ένα κανάλι συνδροµητικής τηλεόρασης επάνω ή κάτω. + Radio Για να µετακινηθείτε ένα κανάλι ραδιοφώνου επάνω ή κάτω.
Το Teletext είναι ένα σύστηµα πληροφοριών που µεταδίδεται από ορισµένα κανάλια, στο οποίο µπορείτε να ανατρέξετε όπως σε µια εφηµερίδα. Ακόµη, παρέχει πρόσβαση σε υπότιτλους για τηλεθεατές µε προβλήµατα ακοής ή για τηλεθεατές που δε γνωρίζουν τη γλώσσα εκποµπής (καλωδιακά δίκτυα, δορυφορικά κανάλια, κλπ.).
Οι εικόνες που λαµβάνετε µπορεί να µεταδίδονται σε φορµά 16:9 (ευρεία οθόνη) ή σε φορµά 4:3 (συµβατική οθόνη). Μερικές φορές, οι εικόνες 16:9 εµφανίζουν µια µαύρη λωρίδα στο πάνω και στο κάτω µέρος της οθόνης (φορµά "letterbox"). Αυτή η λειτουργία σας επιτρέπει να βελτιστοποιήσετε την εµφάνιση της εικόνας στην οθόνη.
Fullscreen (Πλήρης Οθόνη) Αυτή η λειτουργία προβάλλει εικόνες σε πλήρη οθόνη. Auto Format (Αυτόµατο Φορµά) Αυτή η τηλεόραση διαθέτει λειτουργία αυτόµατης εναλλαγής, η οποία επιλέγει το σωστό φορµά οθόνης µε την προϋπόθεση ότι τα συγκεκριµένα σήµατα µεταδίδονται µαζί µε τα προγράµµατα. Πιέστε το πλήκτρο για περίπου 5 δευτερόλεπτα. Εµφανίζεται το ακόλουθο κείµενο: Εάν εµφανίζεται η λέξη "LOW" (Χαµηλή) αντί της "OK", οι µπαταρίες έχουν εξασθενήσει και χρειάζονται αντικατάσταση.
Πιέστε: • • Το πλήκτρο – Vol + για να ρυθµίσετε την ένταση του ήχου. Το πλήκτρο – P/CH+ για να επιλέξετε τηλεοπτικά κανάλια ή πηγή Πιέστε το πλήκτρο MENU/OK στο τηλεχειριστήριο για να εµφανίσετε το κύριο µενού, χωρίς χρήση του τηλεχειριστηρίου (δεν είναι διαθέσιµο σε όλες τις τηλεοράσεις). Χρησιµοποιήστε: • Το πλήκτρο – Vol + και το πλήκτρο – P/CH+ για να επιλέξετε στοιχεία µενού στις κατευθύνσεις που εικονίζονται. Πιέστε το πλήκτρο MENU/OK για να βγείτε από το µενού.
- 146 -
Ekran bakımı Ekranı çizebileceği, lekeleyebileceği veya ekrana kalıcı zarar verebileceği için ekrana sert bir cisimle dokunmayın, vurmayın ve benzeri bir cisimle ekranı itmeyin veya silmeyin. Ekranı kimyasal madde içeren temizlik bezleriyle silmeyin. Ekrana çıplak el veya kirli bezle dokunmayın (bazı kozmetik maddeler ekrana zarar verir). Ekranı temizlemeden önce TV’nin fişini prizden çekin.
Duvara montaj yönergeleri/Sehpa Aldığınız TV türüne göre duvara montaj dirseği veya sehpa verilebilir. Verilen sehpayı ve/veya duvara montaj dirseğini monte etmek için, ilgili yönergelere bakın. Duvara montaj dirseğinin güvenlik standartlarına uygun bir şekilde takıldığından emin olun. Havalandırma deliklerinin çevresinde havanın rahat bir şekilde dolaşabildiğinden emin olun. Tehlikeli durumları önlemek için, yanan mumlar gibi açık alev kaynakları TV’nin üzerine veya çevresine bırakılmamalıdır.
Ayarlar Menüsüne Erişme Ayar, Yüksek Güvenlik Modundayken, Kurulum menüsüne yalnızca Fabrika Ayarlı Uzaktan Kumanda (RG4172BK veya RC2573) ile erişilebilir. Ayar Standart Güvenlik Modundayken, Ayarlar Menüsüne Otel TV Kurulum Kumandası veya onaylı erişim kodu kullanılarak konuk kumandası (RC2886) ile erişilebilir. RG4172BK RC 2573 Gezinme Geçerli menü öğesi aşağı ve yukarı yön tuşlarıyla seçilebilir. Alt menülere sağ yön tuşuna basarak “>” simgesiyle menü öğelerinden erişilebilir.
• • • • • • Language: Ayar menüsünün dilini seçin. Seçenekler şunlardır: "ENGLISH", "DEUTSCH", ve "FRANCAIS". Communication: İletişim menüsü, interaktif uygulamaları etkinleştirmek için gereklidir. Daha fazla bilgi için, ilgili uygulama notlarına bakın. Bağımsız uygulamalar için “OFF” öğesini seçin. No. Of Programs: Bu alt menü, televizyon, ÖDEMELİ-TV, Radyo ve Bilgi programlarının ayarlanmasını sağlar. Maksimum program sayısı 125’tir.
Program Installation alt-menüsünde, program ayarları yapılabilir. Bu menü açık olduğunda, tüm koruma devre dışıdır. • Program No.: Program türü sol/sağ yön tuşlarıyla seçilebilir. Bu düğmeler tüm mevcut türler arasında geçiş yapacaktır. "TV", "INFO", "PAYTV" ve "RADIO" Belirli bir türün program numarası 0 ise, ilgili tür görüntülenemez. Yukarıda belirtilen türler arasından bir program numarası görüntülemek için, her zaman iki numara girin, örneğin: TV1 veya “1” basamağı için “01” ve yukarı/aşağı yön tuşu.
• System: WEST EU (PAL/SECAM-BG), EAST EU (PAL/SECAM-DK), UK (PAL-I), FRANCE (SECAM-L/L') ve AUTO. • Frequency: Frekans basamakları MHz olarak girilebilir. Sağ yön tuşu otomatik aramaya başlar; frekans girişi sırasında girilmemiş haneler "-" olarak görüntülenir. 100 MHz altındaki frekanslar için “0” girin. • Label: Bu menü öğesi her programa etiket/ad eklemek için kullanılacaktır.
Bu alt menüde, açıldıktan sonra TV’nin çalışması ve Ekran Görüntüsü seçilebilir. • • • • • • • Welcome Message: Giriş menüsünü görüntülemek için Sol/Sağ Yön Tuşuna basın: o Welcome Message o Line1 o Line2 o Clear Yukarı/Aşağı Yön Tuşlarıyla mesaj karakterlerini ayarlayabilirsiniz. Switch On Program: Bu öğe açıldığında televizyonun programını ayarlar. Switch On Volume: Bu öğe televizyonun açıldığındaki sesini ayarlar. Ayarlama yapmak için Sağ/Sol Yön Tuşu düğmelerini kullanın.
Bu alt menüde, TV’nin Görüntü ve Ses ayarları seçilebilir. • • • • • • • • • Brightness: Bu ayar görüntünün parlaklığını değiştirir. Colour: Bu ayar rengin yoğunluğunu değiştirir. Contrast: Bu ayar açık ve koyu tonlar arasındaki farkı değiştirir. Sharpness: Bu ayar görüntü netliğini değiştirir.
Bu alt menüde, TV’nin Güvenlik ayarları yapılandırılabilir. • • • Security: “SECURITY” menü işlevi kullanıcının aşağıdaki iki durumdan birini seçmesini sağlar “HIGH” veya “STANDARD”. Varsayılan ayar: “STANDARD” o Ayar, Güvenlik High Modundayken Ayarlar menüsüne yalnızca Fabrika Ayarlı Uzaktan Kumandayla erişilebilir. o Ayar, Güvenlik Standard Modundayken, Ayarlar Menüsüne Otel TV Kurulum Kumandası veya onaylı erişim kodu kullanılarak konuk kumandasıyla erişilebilir.
Bu alt menüde, TV’nin Kontrol ayarları yapılandırılabilir. • • • • • • • • ESP: Enerji Tasarrufu Programı Modu (ESP) kontrol sisteminin izin verdiği maksimum kesintisiz görüntüleme süresini kontrol eder. ESP Menü işlevi "ESP" olarak gösterilir ve geçerli değerleri 00 – 99 (saat olarak) arasındadır. 00 değeri OFF anlamına gelir. Audio/Video Mute: Ses/Video Mute (Sessiz) menü işlevi ayarlanan kanalın hiç sinyali yoksa görüntü olmamasının ve sesin kesilmesinin gerekip gerekmediğini belirler.
Saat ayarı menüsüne bu menü öğesinden girilebilir. • • • • • • • Display Standby: Bu menü öğesi televizyon bekleme modundayken saat görüntüsünün belirginliğini ayarlamak için kullanılır. Display On: Bu menü öğesi televizyon AÇIK moddayken saat görüntüsünün belirginliğini ayarlamak için kullanılır. Time Setting: Bu menü öğesi saati ayarlamak için kullanılacaktır Teletext Time Download: Bu menü öğesi Teletext aracılığıyla otomatik saat işlevini etkinleştirmek veya devre dışı bırakmak için kullanılır.
Alarm Açma (Saat görüntüsü olan modeller için) Uyanma alarmını etkinleştirir. Geçerli bir saat (0:00 23:59) girildikten sonra, saat görüntüsünde “Uyanma Alarmı” simgesi görünecektir + Ödemeli TV Ödemeli TV kanalını yukarı veya aşağı taşımak Bekleme Televizyonu kapatmak için + Bilgi Bilgi kanalını yukarı veya aşağı taşımak için. +RadioRadyo kanalını yukarı veya aşağı taşımak için. Alarm Kapatma (Saat görüntüsü olan modeller için) Uyanma alarmını devre dışı bırakır.
Teletext belirli kanalların yayınladığı gazete gibi kullanılabilen bir bilgi sistemidir. Bu sistem işitme sorunu olan veya yayın dilini bilmeyen (kablo ağları, uydu yayınları, vs.) izleyiciler için altyazılara erişim olanağı sağlar.
Aldığınız görüntüler 16:9 biçiminde (geniş ekran) veya 4:3 biçiminde (normal ekran) aktarılabilir. 16:9 görüntülerde ekranın üstünde ve altında (letterbox biçimi) bazen siyah bir şerit bulunur. Bu işlev ekrandaki görüntüyü en iyi hale getirmenizi sağlar. Farklı biçimlerin kullanılması Farklı modları seçmek için Uzaktan Kumanda üzerindeki 16:9 Biçimler düğmesini kullanın: Otomatik Biçim, 4:3, Yakınlaştırma 14:9, Yakınlaştırma 16:9, Altyazı yakınlaştırma, Süper geniş ve Geniş ekran.
tuşuna yaklaşık 5 saniye boyunca basın. Aşağıdaki metin ekranda görünür: Ekranda “OK” yerine “LOW” görünürse, piller zayıftır ve değiştirilmelidir. Uzaktan kumandanızın kaybolması veya bozulması durumunda, televizyonunuzun üst/yan tarafındaki düğmeleri kullanarak, bazı temel ayarları değiştirebilirsiniz.
Bu bölümde farklı LCD Televizyon setlerinde kullanılabilen bağlantı hakkında bilgi verilmektedir. TV setinizin ekran boyutuna göre ilgili açıklamaları okuyun. 15” LCD TV’lerdeki konektörler 1. 2. 3. 12V-Giriş güç DC jakı Veri 2 (RJ45) jakı – interaktif bağlantı kullanımları için Veri 1 (RJ12) jakı – interaktif bağlantı kullanımları için 20” ve 23” LCD TV’lerdeki konektörler 1. 2. 3.
This page intentionally left blank - 163 -
3139 125 35281 - 164 -