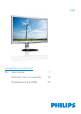
271S4 www.philips.
Table of Contents 1. Important �����������������������������������������������1 1.1 Safety precautions and maintenance �1 1.2 Notational Descriptions ���������������������������2 1.3 Disposal of product and packing material ���������������������������������������������������������������3 2. Setting up the monitor �����������������������4 2.1 Installation ���������������������������������������������������������4 2.2 Operating the monitor ������������������������������5 2.
1. Important 1. Important This electronic user’s guide is intended for anyone who uses the Philips monitor. Take time to read this user's manual before you use your monitor. It contains important information and notes regarding the operation of your monitor.
1. Important • Temperature: 0-40°C 32-104°F • Humidity: 20-80% RH 1.2 Notational Descriptions The following subsections describe notational conventions used in this document. Important information for Burn-in/Ghost image • Notes, Cautions and Warnings Always activate a moving screen saver program when you leave your monitor unattended. Always activate a periodic screen refresh application if your monitor will display unchanging static content.
1. Important Taking back/Recycling Information for Customers 1.3 Disposal of product and packing material Philips establishes technically and economically viable objectives to optimize the environmental performance of the organization's product, service and activities. Waste Electrical and Electronic EquipmentWEEE From the planning, design and production stages, Philips emphasizes the important of making products that can easily be recycled.
2. Setting up the monitor Install the base 2. Setting up the monitor 1. Place the monitor face down on a smooth surface. Pay attention not to scratch or damage the screen. 2.1 Installation Package contents 271S4 2. Hold the stand with both hands. (1) G ently attach the stand to the VESA mount area until the latch locks the stand. user s manual 使用产品前请阅读使用说明 2013 保留备用 (2) G ently attach the base to the stand.
2. Setting up the monitor Connecting to your PC 2.2 Operating the monitor Description of the control buttons 1 2 3 4 5 2 4 3 1 1 AC power input 2 DP input 3 DVI input 4 VGA input 5 Kensington anti-theft lock 3 Connect to PC 1. Connect the power cord to the back of the monitor firmly. 7 6 2. Turn off your computer and unplug its power cable. 5 4 2 1 Switch monitor’s power ON and OFF. 3. Connect the monitor signal cable to the video connector on the back of your computer.
2. Setting up the monitor Description of the On Screen Display The OSD Menu Below is an overall view of the structure of the On-Screen Display. You can use this as a reference when you want to work your way around the different adjustments later on. What is On-Screen Display (OSD)? On-Screen Display (OSD) is a feature in all Philips LCD monitors. It allows an end user to adjust screen performance or select functions of the monitors directly through an on-screen instruction window.
2. Setting up the monitor Resolution notification Height adjustment This monitor is designed for optimal performance at its native resolution, 1920 × 1080 @ 60 Hz. When the monitor is powered on at a different resolution, an alert is displayed on screen: Use 1920 × 1080 @ 60 Hz for best results. Display of the native resolution alert can be switched off from Setup in the OSD (On Screen Display) menu.
2. Setting up the monitor Note This monitor accepts a 100mm x 100mm VESA-Compliant mounting interface. 2.3 Remove the Base Assembly for VESA Mounting Before you start disassembling the monitor base, please follow the instructions below to avoid any possible damage or injury. 1. Extend the monitor base to its maximum height. 100mm 100mm 2. Place the monitor face down on a smooth surface. Pay attention not to scratch or damage the screen. Then lift the monitor stand. 3.
3. Image Optimization 3. The SmartImage on screen display will remain on screen for 5 seconds, or you can also press "OK" to make confirmation. There are six modes to select: Office, Photo, Movie, Game, Economy and Off. 3. Image Optimization 3.1 SmartImage What is it? SmartImage provides presets that optimize display for different types of content, dynamically adjusting brightness, contrast, color and sharpness in real time.
3. Image Optimization office applications and lower power consumption. • Off: No optimization by SmartImage. 3.2 SmartContrast What is it? Unique technology that dynamically analyzes displayed content and automatically optimizes a Monitor's contrast ratio for maximum visual clarity and viewing enjoyment, stepping up backlighting for clearer, crisper and brighter images or dimming backlighting for clear display of images on dark backgrounds.
4. PowerSensor™ • 4. PowerSensor™ • • • How does it work? PowerSensor works on principle of transmission and reception of harmless “infrared” signals in order to detect userpresence. When the user is in front of the monitor the monitor operates normally, at the predetermined settings that the user has set- i.e.
5. Technical Specifications 5. Technical Specifications Picture/Display Monitor Panel Type Backlight Panel Size Aspect Ratio Pixel Pitch SmartContrast Response Time (typ.
5.
5. Technical Specifications 5.1 Resolution & Preset Modes Maximum Resolution 1920 x 1080 @ 60 Hz (analog input) 1920 x 1080 @ 60 Hz (digital input) Recommended Resolution 1920 x 1080 @ 60 Hz (digital input) H. freq (kHz) Resolution V. freq (Hz) 31.47 720 x 400 70.09 31.47 640 x 480 59.94 35.00 640 x 480 66.67 37.86 640 x 480 72.81 37.50 640 x 480 75.00 37.88 800 x 600 60.32 46.88 800 x 600 75.00 48.36 1024 x 768 60.00 60.02 1024 x 768 75.03 63.89 1280 x 1024 60.02 79.
6. Power Management 6. Power Management If you have VESA DPM compliance display card or software installed in your PC, the monitor can automatically reduce its power consumption when not in use. If an input from a keyboard, mouse or other input device is detected, the monitor will 'wake up' automatically.
7. Customer care and warranty black pixel. Other combinations of lit and dark sub pixels appear as single pixels of other colors. 7. Customer care and warrant Types of Pixel Defects Pixel and sub pixel defects appear on the screen in different ways. There are two categories of pixel defects and several types of sub pixel defects within each category. 7.1 Philips’ Flat Panel Monitors Pixel Defect Policy Philips strives to deliver the highest quality products.
7. Customer care and warranty Proximity of Pixel Defects Note A red or blue bright dot must be more than 50 percent brighter than neighboring dots while a green bright dot is 30 percent brighter than neighboring dots. Because pixel and sub pixels defects of the same type that are near to one another may be more noticeable, Philips also specifies tolerances for the proximity of pixel defects. Black Dot Defects Black dot defects appear as pixels or sub pixels that are always dark or 'off'.
7. Customer care and warranty 7.2 Customer Care & Warranty For warranty coverage information and additional support requirements valid for your region, please visit www.philips.com/support website for details or contact your local Philips Customer Care Center. For extended warranty, if you would like to extend your general warranty period, an Out of Warranty service package is offered via our Certified Service Center.
7. Customer care and warranty Contact Information for WESTERN EUROPE region: Country CSP Hotline Number Price Opening hours Austria RTS +43 0810 000206 € 0.07 Mon to Fri : 9am - 6pm Belgium Ecare +32 078 250851 € 0.
7. Customer care and warranty Contact Information for CENTRAL AND EASTERN EUROPE region: Country Call center CSP Consumer care number Belarus N/A IBA +375 17 217 3386 +375 17 217 3389 Bulgaria N/A LAN Service +359 2 960 2360 Croatia N/A MR Service Ltd +385 (01) 640 1111 Czech Rep.
7. Customer care and warranty Contact Information for China: Country Call center Consumer care number China PCCW Limited 4008 800 008 Contact Information for NORTH AMERICA : Country Call center Consumer care number U.S.A. EPI - e-center (877) 835-1838 Canada EPI - e-center (800)479-6696 Contact Information for APMEA region: Country ASP Consumer care number Opening hours Australia AGOS NETWORK PTY LTD 1300 360 386 Mon.~Fri. 9:00am-5:30pm 0800 657447 Mon.~Fri.
7. Customer care and warranty Vietnam +84 8 38248007 Ho Chi Minh City FPT Service Informatic +84 5113.562666 Company Ltd. - Ho Chi Danang City Minh City Branch +84 5113.562666 Can tho Province Mon.~Fri. 8:00-12:00, 13:30-17:30 Sat. 8:00-12:00 Philippines EA Global Supply Chain Solutions ,Inc. (02) 655-7777; 6359456 Mon.~Fri. 8:30am~5:30pm Armenia Azerbaijan Georgia Kyrgyzstan Tajikistan Firebird service centre +97 14 8837911 Sun.~Thu.
8. Troubleshooting & FAQs satisfactory, you can do manual adjustments via the OSD menu. 8. Troubleshooting & FAQs Note The Auto Function is not applicable in DVIDigital mode as it is not necessary. 8.1 Troubleshooting This page deals with problems that can be corrected by a user. If the problem still persists after you have tried these solutions, contact Philips customer service representative.
8. Troubleshooting & FAQs • The "power on" light is too strong and is disturbing Eliminate the vertical bars using the Phase/ Clock of Setup in OSD Main Controls. It is valid only in VGA mode. • You can adjust “power on” light using the power LED Setup in OSD main Controls. For further assistance, refer to the Consumer Information Centers list and contact Philips customer service representative. Image appears blurred, indistinct or too dark • Adjust the contrast and brightness on On-Screen Display.
8. Troubleshooting & FAQs Q3: What are the .inf and .icm files on the CD-ROM? How do I install the drivers (.inf and .icm)? Ans.: Yes, you can change your color setting through OSD control as the following procedures, Ans.: These are the driver files for your monitor. Follow the instructions in your user manual to install the drivers. Your computer may ask you for monitor drivers (.inf and .icm files) or a driver disk when you first install your monitor.
8. Troubleshooting & FAQs Ans.: Yes, the monitors are Plug-and-Play compatible with Windows 10/8.1/8/7, Mac OSX. Q11: What is Image Sticking, or Image Burnin, or After Image, or Ghost Image in LCD panels? Ans.: Uninterrupted display of still or static images over an extended period may cause "burn in", also known as "after-imaging" or "ghost imaging", on your screen. "Burn-in", "after-imaging", or "ghost imaging" is a well-known phenomenon in LCD panel technology.
2013 © Koninklijke Philips N.V. All rights reserved. Philips and the Philips Shield Emblem are registered trademarks of Koninklijke Philips N.V. and are used under license from Koninklijke Philips N.V. Specifications are subject to change without notice.