328E8 www.philips.
Table of Contents 1. Important........................................ 1 1.1 Safety precautions and maintenance................................... 1 1.2 Notational Descriptions.............. 2 1.3 Disposal of product and packing material............................................ 3 2. Setting up the monitor................ 4 2.1 Installation...................................... 4 2.2 Operating the monitor................. 5 3. Image Optimization..................... 8 3.1 SmartImage...................
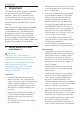
1. Important 1. Important This electronic user’s guide is intended for anyone who uses the Philips monitor. Take time to read this user's manual before you use your monitor. It contains important information and notes regarding the operation of your monitor.
1. Important Service off immediately and disconnect the power cord. Then, remove the foreign substance or water, and send it to the maintenance center. • Do not store or use the monitor in locations exposed to heat, direct sunlight or extreme cold. • In order to maintain the best performance of your monitor and use it for a longer lifetime, please use the monitor in a location that falls within the following temperature and humidity ranges.
1. Important Warning This icon indicates the potential for bodily harm and tells you how to avoid the problem. All redundant packing material has been omitted. We have done our utmost to make the packaging easily separable into mono materials. Some warnings may appear in alternate formats and may not be accompanied by an icon. In such cases, the specific presentation of the warning is mandated by the relevant regulatory authority.
2. Setting up the monitor Install base stand 2. Setting up the monitor 1. 2.1 Installation Place the monitor face down on soft and smooth surface taking care to avoid scratching or damaging the screen. Package contents Register your product and get support at www.philips.com/welcome 328E8 2. Hold the base stand with both hands and firmly insert the base stand into the base column. (1) Gently attach the base to the base column until the latch locks the base.
2. Setting up the monitor Connecting to your PC If the monitor displays an image, installation is complete. 328E8QJAB5 2.2 Operating the monitor 3 2 6 5 4 1 Front view product description 7 6 2 5 1 4 3 1 2 3 4 5 6 7 AC/DC power input Earphone jack Audio input VGA input HDMI input DP input Kensington anti-theft lock 328E8QJSB5L Press to switch power on. Press more than 3 seconds to switch power off. Access the OSD menu. Confirm the OSD adjustment. 2 1 5 4 3 6 5 Adjust the speaker volume.
2. Setting up the monitor Description of the On Screen Display The OSD Menu Below is an overall view of the structure of the On-Screen Display. You can use this as a reference when you want to work your way around the different adjustments later on. What is On-Screen Display (OSD)? On-Screen Display (OSD) is a feature in all Philips LCD monitors. It allows an end user to adjust screen performance or select functions of the monitors directly through an on-screen instruction window.
2. Setting up the monitor Resolution notification This monitor is designed for optimal performance at its native resolution, 1920×1080@60Hz. When the monitor is powered on at a different resolution, an alert is displayed on screen: Use 1920×1080@60Hz for best results. Display of the native resolution alert can be switched off from Setup in the OSD (On Screen Display) menu.
3. Image Optimization How to enable SmartImage? 3. Image Optimization 3.1 SmartImage What is it? SmartImage provides presets that optimize display for different types of content, dynamically adjusting brightness, contrast, color and sharpness in real time. Whether you're working with text applications, displaying images or watching a video, Philips SmartImage delivers great optimized monitor performance. 1. Toggle to the left to launch the SmartImage on screen display. 2.
3. Image Optimization • RTS: For playing RTS (Real Time Strategy) games, a user-selected portion can be highlighted for RTS games (through SmartFrame). The picture quality can be adjusted for the highlighted portion. • Gamer 1: User’s preference settings saved as Gamer 1. • Gamer 2: User’s preference settings saved as Gamer 2.
4. FreeSync • • • • 4. FreeSync AMD Radeon R9 290 AMD Radeon R9 285 AMD Radeon R7 260X AMD Radeon R7 260 ■■ Processor A-Series Desktop and Mobility APUs • • • • • • • • • PC gaming has long been an imperfect experience because GPUs and monitors update at different rates. Sometimes a GPU can render many new pictures during a single update of the monitor, and the monitor will show pieces of each picture as a single image. This is called “tearing.
5. Technical Specifications 5. Technical Specifications Picture/Display Monitor Panel Type Backlight VA LCD W-LED system Panel Size 31.5” W (80cm) Aspect Ratio Pixel Pitch SmartContrast Response Time (typ.) SmartResponse Optimum Resolution Viewing Angle Picture Enhancement Display Colors Wide Color Gamut 16:9 0.363 x 0.
5. Technical Specifications Power Consumption Normal Operation Sleep (Standby) Off Heat Dissipation* Normal Operation Sleep (Standby) Off Power LED indicator Power Supply AC Input AC Input AC Input Voltage at Voltage at Voltage at 100VAC , 50Hz 115VAC , 60Hz 230VAC , 50Hz 43.72 W (typ.) 43.82 W (typ.) 43.92 W (typ.) <0.5 W (typ.) <0.5 W (typ.) <0.5 W (typ.) <0.3 W (typ.) <0.3 W (typ.) <0.3 W (typ.) AC Input AC Input AC Input Voltage at Voltage at Voltage at 100VAC , 50Hz 115VAC , 60Hz 230VAC , 50Hz 149.
5. Technical Specifications Product with stand (WxHxD) Product without stand (WxHxD) Product with packaging (WxHxD) Weight Product with stand Product without stand Product with packaging Operating Condition Temperature range (operation) Relative humidity (operation) Atmospheric pressure (operation) Temperature range (Non-operation) Relative humidity (Non-operation) Atmospheric pressure (Non-operation) 721 x 525 x 223 mm 721 x 434 x 76 mm 836 x 648 x 186 mm 7.20kg 6.90kg 10.
5. Technical Specifications 5.1 Resolution & Preset Modes Maximum Resolution 1920x1080@60Hz (analog input) 1920x1080@60Hz (digital input) Recommended Resolution 1920x1080@60Hz (digital input) H. freq (kHz) Resolution V. freq (Hz) 31.47 720x400 70.09 31.47 640x480 59.94 35.00 640x480 66.67 37.86 640x480 72.81 37.50 640x480 75.00 37.88 800x600 60.32 46.88 800x600 75.00 48.36 1024x768 60.00 60.02 1024x768 75.03 63.89 1280x1024 60.02 79.98 1280x1024 75.03 55.
6. Power Management 6. Power Management If you have VESA DPM compliance display card or software installed in your PC, the monitor can automatically reduce its power consumption when not in use. If an input from a keyboard, mouse or other input device is detected, the monitor will 'wake up' automatically.
7. Customer care and warranty together form an image. When all sub pixels of a pixel are lit, the three colored sub pixels together appear as a single white pixel. When all are dark, the three colored sub pixels together appear as a single black pixel. Other combinations of lit and dark sub pixels appear as single pixels of other colors. 7. Customer care and warranty 7.1 Philips’ Flat Panel Monitors Pixel Defect Policy Philips strives to deliver the highest quality products.
7. Customer care and warranty Three adjacent lit sub pixels (one white pixel). Pixel Defect Tolerances In order to qualify for repair or replacement due to pixel defects during the warranty period, a TFT Monitor panel in a Philips flat panel monitor must have pixel or sub pixel defects exceeding the tolerances listed in the following tables. Note A red or blue bright dot must be more than 50 percent brighter than neighboring dots while a green bright dot is 30 percent brighter than neighboring dots.
7. Customer care and warranty 1.
7. Customer care and warranty 7.2 Customer Care & Warranty For warranty coverage information and additional support requirements valid for your region, please visit www.philips.com/support website for details or contact your local Philips Customer Care Center. For extended warranty, if you would like to extend your general warranty period, an Out of Warranty service package is offered via our Certified Service Center.
8. Troubleshooting & FAQs 8. Troubleshooting & FAQs • Check to see if the monitor cable has bent pins. • Make sure the computer is turned on. 8.1 Troubleshooting AUTO button doesn't function • This page deals with problems that can be corrected by a user. If the problem still persists after you have tried these solutions, contact Philips customer service representative. The auto function is applicable only in VGA-Analog mode.
8. Troubleshooting & FAQs Main Controls. It is valid only in VGA mode. and cannot be repaired. The damage mentioned above is not covered under your warranty. Horizontal flicker appears Image appears distorted. Text is fuzzy or blurred. • • Adjust the image using the “Auto” function in OSD Main Controls. • Eliminate the vertical bars using the Phase/Clock of Setup in OSD Main Controls. It is valid only in VGA mode.
8. Troubleshooting & FAQs .icm files) or a driver disk when you first install your monitor. Q4: How do I adjust the resolution? 8.2 General FAQs Q1: When I install my monitor what should I do if the screen shows 'Cannot display this video mode'? Ans.: Recommended resolution for this monitor: 1920x1080@60Hz. • Unplug all cables, then connect your PC to the monitor that you used previously. • In the Windows Start Menu, select Settings/Control Panel.
8. Troubleshooting & FAQs 1. Color Temperature; With settings in the 6500K range the panel appears "warm, with a redwhite color tone", while a 9300K temperature yields "cool, bluewhite toning". period may cause "burn in", also known as "after-imaging" or "ghost imaging", on your screen. "Burn-in", "after-imaging", or "ghost imaging" is a well-known phenomenon in LCD panel technology.
8.
© 2017 Koninklijke Philips N.V. All rights reserved. Philips and the Philips Shield Emblem are registered trademarks of Koninklijke Philips N.V. and are used under license from Koninklijke Philips N.V. Specifications are subject to change without notice.