Register your product and get support at www.philips.
Model Serial www.philips.
1 2 3 4 5 Get started 4 TV Tour Important Position the TV Product highlights Access more information 4 9 12 13 14 Use your TV 15 Overview Side controls and indicators Remote control Basic TV menus Watch TV Watch a connected device Use Ambilight Enjoy Net TV 15 15 15 17 19 21 21 22 Use more of your TV 28 Use teletext Favourite channels Use EPG Use timers and locks Use subtitles Access multimedia Use Scenea Universal access 28 29 29 29 30 31 32 33 Set up the TV 34 Change picture and sound s
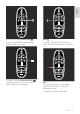
1 Get started TV Tour The remote control To open or close the Home menu . In the Home menu, you can access connected devices, picture and sound settings and other useful features. To adjust the volume. To open or close the Browse menu To switch TV channels. EN 4 . In the Browse menu, you can access Teletext, the channel list or the Electronic Programme Guide (EPG)*. * EPG is not available in all countries.
English To open or close the Options menu Back . Options menus offer convenient settings related to what is on screen. To open or close the Experience menu In the Experience menu, you can access a range of frequently used settings. . To return to the previous TV channel or menu. Press and hold to return to watching TV. . Red To select the red option, access digital Interactive TV services* or watch TV demonstration clips. * Available on certain models only.
Green Blue To select the green option or the energy-efficient settings. To select the blue option or to open the Widgets*. * Available on certain models only. Read more about the remote control in Help > Use your TV > Remote control > Overview (Page 15). Alternatively, find the answer in Search for... Press to select the next TV tour. The TV menus Yellow To select the yellow option.
the Experience menu English In the Home menu , you can select the source to watch, such as a TV channel or movies from a connected DVD player or USB flash drive. You can also add a new device or access the [Setup] menu for more settings. In the Browse Menu , you can access Teletext, the channel list or the Electronic Programme Guide (EPG)*. * EPG is not available in all countries. In the Options menu , you can select settings related to what is shown on screen.
Connect devices The HDMI connection offers the best picture and sound quality. If you connect a device to this TV, access the Home menu to add it. Press > [Add your devices], then follow the on-screen instructions. Ensure that you select the TV connector that the device is connected to. Read more in Help > Use your TV > Basic TV Menus > Add your devices (Page 18). If you connect an EasyLink (HDMI-CEC)-compliant device to the TV, it is automatically added to the Home menu.
Network and Net TV Network* When you connect your TV to your home network, you can play music, photos and video from a computer or other media server on the same network. Read more in Help > Set up the TV > Set up Network (Page 39). * Available on certain models only. Net TV* When the connected PC network is connected to the Internet, you can connect your TV to Net TV. Net TV offers movies, pictures, music and much more. Read more in Help > Use your TV > Enjoy Net TV (Page 22).
When stand mounting the TV, use only the supplied stand. Secure the stand to the TV tightly. Place the TV on a flat, level surface that can support the combined weight of the TV and the stand. When wall mounting the TV, use only a wall mount that can support the weight of the TV. Secure the wall mount to a wall that can support the combined weight of the TV and wall mount. Koninklijke Philips Electronics N.V. bears no responsibility for improper wall mounting that result in accident, injury or damage.
Please act according to your local rules and do not dispose of your old products with your normal household waste. Correct disposal of your old product helps to prevent potential negative consequences for the environment and human health. Your product contains batteries covered by the European Directive 2006/66/EC, which cannot be disposed of with normal household waste.
32 inches/81 cm: 200 mm x 300 mm, M6 37 inches/94 cm: 200 mm x 200 mm, M6 40 inches/102 cm: 200 mm x 200 mm, M6 42 inches/107 cm: 200 mm x 200 mm, M6 46 inches/117 cm: 300 mm x 300 mm, M8 Warning: Follow all instructions provided with the TV mount. Koninklijke Philips Electronics N.V. bears no responsibility for improper TV mounting that results in accident, injury or damage. To prevent damage to cables and connectors, be sure to leave a clearance of at least 5.5 cm/2.2" from the back of the TV.
Product highlights Full HD LCD display This TV is equipped with a full High-Definition (HD) LCD display, supporting the maximum HD resolution of 1920 x 1080p. This display offers a brilliant flicker-free progressive scan picture with optimum brightness and superb colours. The LED backlight of the display offers exceptional picture contrast with exceptional energy saving. Ambilight NonPu blish Placement NonPu blish Before positioning the TV, read all safety precautions.
Set up preferred EPG channels Notes: EPG is not available in all countries. For more information on EPG, see Use more of your TV > Use EPG (Page 29). Net TV Net TV allows you to enjoy movies, music and other infotainment from the Internet directly on your TV screen. See Use your TV > Enjoy Net TV (Page 22). To enjoy Net TV, you must connect the TV to a network. See Set up the TV > Set up network (Page 39).
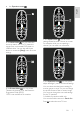
English 2 Use your TV Overview This section gives you an overview of commonly used TV controls and functions. Side controls and indicators NonPu blish 1. Ambient sensor/remote control sensor. Remote control Overview NonPu blish 1. +/- : Increases or decreases volume. In the home menu, these buttons allow you to move horizontally. 2. : Accesses the home menu. Press again to launch an activity in the home menu. 3. P/CH +/- : Switches to the next or previous channel.
Make sure the + and - ends of the batteries line up correctly (+ and - are marked inside). 7. (Experience): Accesses the experience menu. 8. (Options): Accesses options for the current activity or selection. 9. +/- (Volume) and (Mute): Increases or decreases volume; mutes or restores audio. Remove the batteries if you are not using the remote control for a long time. Dispose of batteries according to the end of use directives. Read Get started > Important > End of use (Page 10).
Basic TV menus English For remote control with coin cell batteries: Home NonPu blish The home menu gives you easy access to connected devices, picture and sound settings, and other useful features. 1. Press . 2. Select an item in the home menu, then press OK to access the menu. 3. To exit the home menu, press On-screen remote control NonPu blish Note: Available if the connected device is HDMI-CEC-compliant. An On-Screen Remote Control (OSRC) gives you easy access to commonly used functions.
To access the browse menu, while watching TV, press . Channel list NonPu blish The channel list displays the TV channels and possible radio stations installed on your TV. 1. While watching TV, press . 2. Select [Channel list], then press OK. 3. Select a channel, then press OK to access the channel. 4. Press to exit the channel list without changing the channel. 1. Press the Navigation buttons to select an item: [Programme guide]: Accesses the Electronic Programme Guide.
[Update software]: Guides you through an update of the TV software. [Software settings]: Advanced TV update settings. [Watch demos]: Demos of special features available with the TV. Options NonPu blish Option menus offer convenient settings related to what is on-screen. 1. Press to see what options are available. 2. To exit, press again. Watch TV Switch on/off or to standby NonPu blish Notes: The front LED indicator does not turn on when the TV is switched on.
Enter a channel number using the Numeric buttons. To view analogue or digital channels only Filter the channel list to access analogue or digital channels only. 1. In the channel list, press . 2. Select [Select list] > [Analogue] or [Digital], then press OK. Depending on your selection, only digital or analogue channels become available. Adjust volume NonPu blish To increase or decrease volume Press +/- on the remote control. Press +/- on the side of the TV.
3. Press OK to confirm your choice. The following picture formats can be selected: [Auto fill]: Adjusts the picture to fill the screen (subtitles remain visible). Recommended for minimal screen distortion but not for HD or PC. [Auto zoom]: Enlarges the picture to fill the screen. Recommended for minimal screen distortion but not for HD or PC. [Super zoom]: Removes the black bars on the sides of 4:3 broadcasts. Not recommended for HD or PC. [Movie expand 16:9]: Scales the classic 4:3 format to 16:9.
[Brightness]: Adjusts the brightness of Ambilight. [Colour]: Selects a predefined colour. [Custom colour]: Set your own Ambilight colour. To access this option, set [Ambilight] > [Colour] > [Custom]. [Separation]: Adjusts the difference in colour levels between each side of the TV. Turn off this feature for a dynamic and uniform Ambilight colour. [TV switch off]: Selects how Ambilight switches off when the TV is switched off. [Lounge light mood]: Selects a lounge light mode.
The number of services available on Net TV can change. The functionality of services can change as well. These changes are updated automatically. You can view the latest services added or changed in the "New" category. Net TV displays one page at a time and in full screen. You cannot download and save files or install plug-ins on this TV. What you need To enjoy Net TV, connect the TV to a router with a high-speed connection to the Internet. Read more at Set up the TV > Set up network (Page 39).
Open a Net TV service Select a Net TV service with the Navigation buttons. To open a selected service, press OK. A closing lock animation means that the page you have opened is a secure page. Navigate a Net TV service Navigating within a Net TV service can differ from one service to another. You can use the Navigation buttons and the OK button to browse the service. Some services indicate how to browse their services. To go back to the previous page, press (Back).
NonPu blish Koninklijke Philips Electronics N.V. bears no responsibility regarding the content and the quality of the content provided by the content service providers. Internet websites With Net TV you can link up to the Internet. You can view any website you like, but remember that most Internet websites are not meant to be viewed on a TV screen and certain plug-ins (e.g. to view pages or videos) are not available on your TV.
To enter a number code (PIN), use the Numeric buttons on the remote control. To enter an email address, select the text field on the page and press OK. Select a character on the keyboard and press OK to enter it. Download the video Once payment is complete, you can download the video to the video memory. During the download, you can carry on watching the TV programme until the TV notifies you that the video is ready to play.
Online TV NonPu blish English Some digital broadcasters offer an Online TV service. With Online TV you can watch a programme that you have missed. Access the broadcaster's Online TV page to see what programmes are available. What you need To access an Online TV service, you need a high-speed Internet connection to the TV. Read Set up the TV > Set up network (Page 39). Open Online TV from Net TV To open an Online TV service from Net TV, press , select [Browse Net TV] and press OK.
3 Use more of your TV Use teletext Select a teletext language Select a page NonPu blish 1. Press . 2. Select [Text], then press OK. 3. Select a page by: Entering the page number with the Numeric buttons. Pressing or to view the next or previous page. Pressing the Colour buttons to select a colour coded item. 4. Press to exit teletext. Access teletext options NonPu blish 1. When in teletext, press . 2. Select an option: [Freeze page] / [Unfreeze page]: Freezes or unfreezes the current page.
NonPu blish Teletext 2.5 offers more colours and better graphics than normal teletext. If Teletext 2.5 is broadcast by a channel, it is switched on by default. To switch Teletext 2.5 on or off 1. Press . 2. Select [Setup] > [TV settings] > [Preferences] > [Text 2.5] > [On] or [Off], then press OK. Favourite channels Add or remove channels NonPu blish 1. Press . 2. Select [Channel list:], then press OK. 3. Press . 4. Select [Mark as favourite] or [Unmark as favourite], then press OK.
3. Press the Navigation buttons to set the sleeptimer. The sleeptimer can be set up to 180 minutes, in steps of five minutes. The sleeptimer is switched off if it is set to zero minutes. 4. Press OK to activate the sleep timer. The TV switches to standby after the set period of time. For information on child lock codes, see Use more of your TV > Use timers and locks > Child lock (Page 30). Child lock 1. Switch the TV to an analogue TV channel. 2. Press , then select [Text] and press OK.
Browse USB NonPu blish You can view photos or play music and videos on TV from a USB storage device. Caution: Philips is not responsible if the USB storage device is not supported nor is it responsible for damage or loss of data from the device. You can access the USB content browser using one of the following methods: When watching TV, connect the USB device to the USB port on the side of your TV. Press . Select [Browse USB], then press OK.
Press to exit content browser. Press to access or exit the following settings: [Show info]: Displays the file information. [Stop]: Stops slideshow. [Rotate]: Rotates the file. [Repeat]: Repeats the slideshow. [Play once]: Plays the file once. [Shuffle off] / [Shuffle on]: Enables or disables random display of pictures in the slideshow. [Slideshow speed]: Sets the display time for each picture in the slideshow. [Slideshow transition]: Sets the transition from one picture to the next.
Enable universal access NonPu blish Where supported by your digital TV broadcaster, this TV allows special audio and subtitles for the hearing impaired, as well as special audio for the visually impaired. To enable these features, you must turn on universal access in the [Preferences] menu. 1. Press . 2. Select [Setup] > [TV settings] > [Preferences] > [Universal access] > [On], then press OK.
4 Set up the TV Change picture and sound settings Settings assistant NonPu blish Use the settings assistant to guide you through the picture and sound settings. 1. While watching TV, press . 2. Select [Setup] > [Quick picture and sound settings], then press OK. 3. Select [Start], then press OK. Follow the on-screen instructions to choose your preferred settings. Smart picture settings Use the [Smart picture] experience menu to access frequently used picture settings. 1. While watching TV, press . 2.
[PC mode]: Enabled by default if you select [Computer] in the home menu. If enabled, you can select [Picture format] > [Unscaled] which provides maximum detail for display of PC content. If a PC is connected via HDMI or VGA, this option is enabled by default. [Light sensor]: Enables dynamic adjustment of the screen display to match lighting conditions. [Picture format]: Changes the picture format. [Screen edges]: Changes the picture size. [Picture shift]: Adjusts the position of the picture.
3. In the channel list, press . 4. Select [Reorder], then press OK. 5. Select the channel to reorder, move it to the desired location, then press OK. 6. Select [Insert] to insert the channel into the desired location, [Swap] to swap location with another channel or [Cancel] to cancel the reorder. 7. Press OK to activate. Rename channels NonPu blish After installation, you may want to rename channels to suit your preference. 1. While watching TV, press . 2. Select [Channel list], then press OK. 3.
[Dual I-II]: Select the audio language for analogue channels. Select video stream (for DVB-S channel only) If available, you can view different video stream of the channel. (depending on broadcast service provider) 1. While watching TV, press . 2. Select [Video selection] to view the various selections. Install channels Automatic install When the TV was switched on for the first time, a full installation of channels was performed.
Install digital channels You can reposition your antenna to improve the reception. You need to know the correct frequency to tune. For best results, contact the service provider or get a professional installer. Note: If you are prompted to enter a code, enter '8888'. 1. Press . 2. Select [Setup] > [Channel settings] > [Channel installation] > [Digital: Reception test] > [Search], then press OK. 3. Press the Numeric buttons to enter the channel frequency. 4. Select [Search], then press OK. 5.
Benefits PC network If the TV is connected to your PC network, you can play photos, music and movies from a computer or storage device in that network. Once the network is installed, select [Browse PC] in the home menu to view PC content. Net TV If the TV is connected to the PC network, which is connected to the Internet, you can link up your TV to Net TV. The Net TV start page offers you movies, pictures, music, infotainment, games and much more, all set up for your TV screen.
This TV is Wi-Fi Ready*. With the Wireless USB adapter PTA01 accessory (sold separately), you can connect the TV to your network wirelessly. With the free Wi-Fi MediaConnect software, you can project your PC screen on the TV. Video, music or presentations that you play on your PC can be projected. * Available on certain models only. What you need To use Wi-Fi MediaConnect, you need to connect the TV to your home network. You need a wireless router.
Click the green plus icon and select Add folder. English For more information on (Page 41), access the PDF version of this user manual on the Internet at www.philips.com/support. PC media server settings TVersity v.0.9.10.3 (Microsoft Windows) Enable media sharing In Microsoft Windows, start TVersity. Click the Settings tab and click the Start Sharing button. In the Add media pop-up window, click the Browse button. A pop-up window tells you that the media server service is started. Click OK.
In the Basic Setup box, click Sharing. Sharing settings appear. In the Media Sharing window, tick Share my Media and click OK. Click Browse to add a folder location. Click Add new content directory to add more folders. When all folders are added, click Save changes then click Rescan content directories. Media files are ready to be accessed from the TV.
In Windows Media Player, select Library from the menu and select Add to Library. In the Add Folder window, select a folder with music, photos or videos that you want to share with other devices and click OK. In the Add To Library window, the newly added folder is shown. You can add more folders to share. Click the OK button to add the files to the library. You can now enjoy music, photos and videos on your TV. In the Add to Library window, select My folders and those of others that I can access.
TV clock NonPu blish You can display a clock on the TV screen. The clock displays the current time using time data received from your TV service operator. Display the TV clock 1. When watching TV, press . 2. Select [Status], then press OK. The clock is displayed on the bottom right-hand corner of the TV screen. Change the clock mode By default, the clock mode is set to [Automatic], syncing the TV clock to Coordinated Universal Time (UTC).
TV software 1. Press . 2. Select [Setup] > [Software settings] > [Current software info], then press OK. The version of the current software is displayed. To update the software, use one of these options: a. update from digital broadcast. b. update with USB. c. update from the Internet. For more information, see the following pages. NonPu blish If available, your TV can receive software updates via digital broadcasts. If an update is available, a message appears prompting you to update the software.
5. If the Help file on the Philips Support site is a later version than the file in your TV, click it to save the file to the USB flash drive. 6. Using the archive utility, extract the *.zip file to the 'upgrades' folder on the USB flash drive. 7. The *.upg Help file is extracted. 8. Disconnect the USB flash drive from the PC. Do not switch off the TV or remove the USB flash drive during the update. If a power failure occurs during the update, do not remove the USB flash drive from the TV.
First connections Power NonPu blish Be sure that the power plug in the wall socket is accessible at all times. When disconnecting the power cable, always pull the plug, never the cable. Although this TV has a very low standby power consumption, switch off the TV using the power switch on the bottom of the TV if you do not use the TV for a long time. Antenna NonPu blish Locate the antenna connector at the back of the TV. Insert the antenna cable securely into the antenna connector.
To add a new device, press , then select [Add your devices]. Follow the on-screen instructions. Match the Y Pb Pr connector colours with the cable plugs when you connect. Y Pb Pr can handle High Definition (HD) TV signals. HDMI An HDMI connection has the best picture and sound quality. One HDMI cable combines video and audio signals. Use HDMI for High-Definition (HD) TV signals and to enable EasyLink. The HDMI ARC connector on the TV features HDMI ARC functionality.
Bottom NonPu blish English TV connectors overview Rear NonPu blish 1. NETWORK: Data input from a network. 2. EXT 2 (SCART): Analogue audio and video input from analogue or digital devices such as DVD players or game consoles. 3. SERV. U: For use by service personnel only. 4. EXT 3 Component (Y Pb Pr): Analogue audio and video input from analogue or digital devices such as DVD players or game consoles. 5. : Stereo audio output to headphones or earphones. 1.
6. ANTENNA: Signal input from an antenna, cable or satellite. 7. VGA: Video input from a computer. Side NonPu blish 1. HDMI: Digital audio and video input from high-definition digital devices such as Blu-ray players. 2. USB: Data input from USB storage devices. 3. CI (Common Interface): Slot for a Conditional Access Module (CAM). 4. SD CARD: Slot for an SD memory card. Connect devices Blu-ray disc player Use an HDMI cable to connect the Blu-ray disc player to an HDMI connector on the bottom of the TV.
Use an HDMI cable to connect the DVD player to an HDMI connector on the bottom of the TV. DVD-Recorder First, use two antenna cables to connect the antenna to the DVD recorder and the TV. Finally, use a SCART cable to connect the DVD Recorder to a SCART connector on the bottom of the TV.
Home Theatre System First, use an HDMI cable to connect the device to the TV. Then, use a digital audio cinch cable to connect the device to the TV. Audio and video synchronisation (sync) If the sound does not match with the video on screen, you can set a delay on most DVD Home Theatre Systems to match the sound and video. EN 52 EasyLink To automatically mute the TV speakers when content is played from your Home Theatre System, enable EasyLink.
Dig. receiver/satellite English First, use two antenna cables to connect the antenna to the receiver and the TV. Finally, use a SCART cable to connect the receiver to the back of the TV. Dig. receiver and DVD-R First, use three antenna cables to connect the digital receiver and the DVD Recorder to the TV.
Then use a SCART cable to connect the digital receiver to the TV. Finally, use two SCART cables to connect the two devices and the TV. Dig. receiver, DVD-R and HTS First, use three antenna cables to connect the two devices and the TV.
English Then use two SCART cables to connect the digital receiver to the DVD Recorder and the DVD Recorder to the TV. Then use an HDMI cable to connect the Home Theatre System to the TV. Finally, use a digital audio cinch cable to connect the Home Theatre System to the TV.
Dig. HD receiver First, use two antenna cables to connect the Digital HD receiver to the TV. Use an HDMI cable to connect the Digital HD receiver to the TV. Connect more devices Game console Enable game mode To prevent picture delay, set the TV to [Game] mode. 1. Press . The most practical connections for a game 2. Select [Smart picture] > [Game], then console are at the side of the TV. However, press OK. more connectors are available at the back of 3. Press to exit. the TV if needed.
English If you cannot use the side connector, use an HDMI or the EXT2 (YPbPr and Audio L/R) cable to connect the game console to the back of the TV. (On certain models, EXT2 is labelled EXT3). Dig. camera To view pictures on your digital camera, connect it to the USB connector at the side of the TV. Switch on the digital camera. If the content of your camera does not appear automatically, you may need to enable Picture Transfer Protocol (PTP) on the camera.
Dig. camcorder The most practical connection for a camcorder is at the side of the TV. Otherwise, use an HDMI cable or the component video and audio cable (YPbPr and Audio L/R) to connect the camcorder to the back of the TV. Channel decoder NonPu blish Before using a SCART digital channel decoder, select the channel to decode and assign the decoder to the SCART connector. 1. Press . EN 58 2. Select [Setup] > [Channel settings] > [Decoder] > [Channel]. 3. Set the channel you want to decode. 4.
PC NonPu blish English Connect a computer using one of the following cables: HDMI cable DVI-HDMI cable HDMI cable and HDMI-DVI adaptor EN 59
VGA cable Use Philips EasyLink Enable or disable EasyLink NonPu blish Philips EasyLink provides several features that enable you to control devices that are connected via HDMI. Connected devices must support the HDMI-CEC standard, and must be properly configured for EasyLink to work. Note: HDMI-CEC functionality is known by other names on other brands. Some examples are Anynet (Samsung), Aquos Link (Sharp) or BRAVIA Sync (Sony). Not all brands are fully compatible with Philips EasyLink.
3. Press OK to activate. Auto subtitle shift Auto subtitle shift displays subtitles from Philips EasyLink compliant Home Theatre Systems over the video image on your TV. The video image is thus stretched across the whole of your TV display, without the need to create a separate subtitle bar at the bottom of the screen. To enable auto subtitle shift 1. Press . 2. Select [Setup] > [TV settings] > [EasyLink] > [Auto subtitle shift]. 3. Select [On], then press OK to activate.
Configure TV speakers 2. Select [Speakers], then press OK. 1. Press . 2. Select [Setup] > [TV settings] > [EasyLink] > [TV speakers]. 3. Select one of the following, then press OK: [TV]: On by default. Streams TV audio through TV speakers until the connected HDMI-CEC audio device switches to system audio control. Thereafter, TV audio is streamed through the connected device. [Amplifier]: Streams audio through the connected HDMI-CEC device.
Insert SD card Insert and activate a CAM Memory size NonPu blish NonPu blish Caution: Be sure to follow the instructions described below. Incorrect insertion of a Conditional Access Module (CAM) may damage both the CAM and your TV. Notes: This TV supports CI as well as CI+. CI+ allows service providers to offer premium HD digital programmes with a high level of copy protection. Refer to the documentation from your service operator on how to insert a smart card into the Conditional Access Module.
4. Leave the SD card in the slot permanently.
Contact us If you cannot resolve your problem, refer to the FAQs for this TV at www.philips.com/support. If the problem remains unresolved, contact Philips Consumer Care in your country as listed in the leaflet accompanying your product. Make a note of your TV model and serial number before you contact Philips. These numbers are printed on the back of the TV and on the packaging. Warning: Do not attempt to repair the TV yourself.
There is sound but no picture: Check that the picture settings are correctly set. There is poor TV reception from an antenna connection: Check that the antenna is properly connected to the TV. Loudspeakers, unearthed audio devices, neon lights, high buildings and other large objects can influence reception quality. If possible, try to improve the reception quality by changing the antenna direction or moving devices away from the TV. If reception on only one channel is poor, fine tune this channel.
English You cannot use EasyLink features: Check that your HDMI devices are HDMI-CEC compatible. EasyLink features only work with devices that are HDMI-CEC compatible. If an HDMI-CEC compliant audio device is connected to the TV and the TV does not display any mute or volume icon when the volume is muted, increased or decreased. This behaviour is normal when an HDMI-CEC audio device is connected.
7 Technical data Overview NonPu blish Product information is subject to change without notice. For detailed product information, go to www.philips.com/support. Power and reception NonPu blish Power Mains power: AC 220-240 V~, 50-60 Hz Standby power: <0.15 W Ambient temperature: 5 to 40 degrees Celsius For power consumption, see the product specifications at (http://www.philips.com/support).
AVI (*.avi): video: MPEG-4 SP, MPEG-4 ASP audio: MPEG Layer 2/3, AC3 MPEG (*.mpg, *.mpeg, *.vob): video: MPEG-1, MPEG-2 MPEG (*.mp2, *.mp3, *.mpg, *.mpeg, *.vob): audio: MPEG-1 Layer 2, MPEG-1 Layer 3, LPCM, AC3 MPEG-4 (*.mp4): video: MPEG-4 AVC (H.264, L2-CIF, L4-HD) audio: AAC-LC, HE-AAC *Multimedia file names must not exceed 128 characters. Supported audio/video files * WMV (*.wmv): video: WMV9/VC1 WMA (*.wma): audio: WMA (v2 to v9.2) MKV (*.mkv): video: H.
… with stand Height: 540 mm Depth: 221 mm Weight: 11.6 kg (estimate) 37PFL7605H ...without stand Width: 898 mm Height: 554 mm Depth: 42 mm Weight: 12 kg (estimate) … with TV stand Height: 602 mm Depth: 242 mm Weight: 15 kg (estimate) 40PFL7605H ...without stand Width: 966 mm Height: 593 mm Depth: 41.5 mm Weight: 13 kg (estimate) … with stand Height: 641 mm Depth: 242 mm Weight: 16 kg (estimate) 46PFL7605H ...without stand Width: 1103 mm Height: 669 mm Depth: 42.4 mm Weight: 17.
8 Index connectors, rear - 49 A controls, side - 15 age rating - 30 D Ambilight - 13 decoder - 58 Ambilight settings - 21 default settings - 35 Ambilight, response speed - 22 demo - 35 Ambilight, switch on - 21 devices, add - 21 audio language - 38 devices, watch - 21 audio lip sync - 43 digital channels, subtitles - 30 B digital radio - 32 bottom connectors - 49 C CAM, enable - 63 CAM, insert - 63 care - 10 channel list - 18 channels, favourites - 29 channels, hide or unhide - 36 chann
home menu - 17 PC network, media server - 41 home mode - 44 PC network, wired - 39 PC, connect - 59 I picture format - 21 information, on Internet - 14 picture settings - 34 information, on-screen - 14 position TV - 13 install channels (manual) - 37 power - 68 K R kensington lock - 12 rear connectors - 49 L recycle - 10 language, menu - 38 language, others - 38 location, home or shop - 44 location, stand or wall mount - 44 Lounge light - 22 register product - 9 remote control, on-screen -
specifications - 68 English standby - 19 subtitle, analogue - 30 subtitle, digital - 30 subtitle, language - 38 subtitles, language - 30 T technical specifications - 68 teletext 2.
© 2009 Koninklijke Philips Electronics N.V. All rights reserved.