Register your product and get support at www.philips.
Model Serial www.philips.
English Contents 1 2 3 4 5 Get started 4 TV Tour Important Position the TV Product highlights Access more information 4 9 12 13 14 Use your TV 15 Overview Side controls and indicators Remote control Basic TV menus Watch TV Watch a connected device Use Ambilight Enjoy Net TV 15 15 15 18 19 21 22 23 Use more of your TV 28 Use teletext Favourite channels Use EPG Use timers and locks Use subtitles Access multimedia Use Scenea Universal access 28 29 29 29 30 30 32 32 Set up the TV 34 Change p
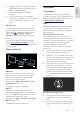
1 Get started TV Tour The remote control To open or close the Home menu . In the Home menu, you can access connected devices, picture and sound settings and other useful features. To adjust the volume. To open or close the Browse menu To switch TV channels. EN 4 . In the Browse menu, you can access Teletext, the channel list or the Electronic Programme Guide (EPG)*. *EPG is not available in all countries.
English To open or close the Options menu Back . Options menus offer convenient settings related to what is on screen. To open or close the Experience menu In the Experience menu, you can access a range of frequently used settings. . To return to the previous TV channel or menu. Press and hold to return to watching TV. . Red To select the red option, access digital Interactive TV services* or watch TV demonstration clips. *Available on certain models only.
Green Blue To select the green option or the energy-efficient settings. To select the blue option or to open the Widgets*. *Available on certain models only. Read more about the remote control in Help > Use your TV > Remote control > Overview (Page 15). Alternatively, find the answer in Search for... Press to select the next TV tour. The TV menus Yellow To select the yellow option.
the Home menu the Browse menu the Options menu the Experience menu In the Home menu , you can select the source to watch, such as a TV channel or movies from a connected DVD player or USB flash drive. You can also add a new device or access the [Setup] menu for more settings. In the Browse Menu , you can access Teletext, the channel list or the Electronic Programme Guide (EPG)*. *EPG is not available in all countries.
You can select the ideal picture setting for movies, games or music. Or you can change the picture format of the on-screen image. You can even change the surround settings for the TV speakers. *Available on certain models only. You can also find the answer in Search for... Press to select the next TV tour. Connect devices Connect DVD players, Blu-ray Disc players or game consoles through HDMI. The HDMI connection offers the best picture and sound quality.
a digital HD receiver, connected with an HDMI cable, playing HD content from a cable or satellite operator an HD channel on your DVB-C network an HD game console (for example, X-Box 360 or PlayStation 3), connected with an HDMI cable, playing an HD game Important English Congratulations NonPu blish Congratulations on your purchase, and welcome to Philips! To fully benefit from the support that Philips offers, register your TV at www.philips.com/welcome.
Risk of injury or damage to the TV! Two people are required to lift and carry a TV that weighs more than 25 kg/55 lbs. When stand mounting the TV, use only the supplied stand. Secure the stand to the TV tightly. Place the TV on a flat, level surface that can support the combined weight of the TV and the stand. When wall mounting the TV, use only a wall mount that can support the weight of the TV. Secure the wall mount to a wall that can support the combined weight of the TV and wall mount.
End of use Environmental efforts Your product is designed and manufactured with high quality materials and components, which can be recycled and reused. This TV has been awarded the European Union Ecolabel for its environmental qualities. A TV that is awarded the Ecolabel contains energy-efficient features. To access energy-saving settings whilst watching TV, press the green button on the remote control.
We continually focus on lowering the environmental impact of our innovative consumer products. We aim our efforts towards making environmental improvements during manufacturing, including reduction of harmful substances, promoting energy-efficient use, end-of-life instructions and product recycling. Use a Kensington lock NonPu blish Your TV is equipped with a Kensington security slot on the bottom of the TV. Purchase a Kensington anti-theft lock (not supplied) to secure the TV.
While seated, your eyes should be level with the centre of the screen. For the best Ambilight effect, position the TV 25 cm away from the wall. Product highlights For 46-inch TVs: Before you wall mount the TV, determine the correct length of the screw. You can determine the length of the screw by adding the thickness of your wall mount to the screw length shown in the graphic.
Digital TV Multimedia NonPu blish In addition to normal analogue TV broadcasts, your TV can receive digital terrestrial (DVB-T) broadcasts. Where available, your TV can also receive digital cable (DVB-C), digital satellite (DVB-S: Not supported on all models) and digital radio broadcasts. DVB (Digital Video Broadcasting) gives you a better picture and better sound quality. Some digital broadcasters also include several audio (speech) and/or teletext languages with DVB.
English 2 Use your TV Overview This section gives you an overview of commonly used TV controls and functions. Side controls and indicators NonPu blish 1. Ambient sensor/remote control sensor/LightGuide* LightGuide is available on certain models only. Select [Setup] > [Preferences] > [LightGuide brightness] to adjust the brightness of the LightGuide. Remote control Overview NonPu blish 1. +/- : Increases or decreases volume. In the home menu, these buttons allow you to move horizontally. 2.
4. (Navigation buttons): Navigates menus and selects items. 5. (Previous/Next): Switches channels. Also, skips through pages of a menu, and between tracks, albums or folders. 6. OK: Confirms an entry or selection. 13. (Subtitle): *Enables or disables subtitles. 14. (Back): *Returns to a previous menu screen. Press and hold to return to watching TV. *Not supported in MHEG mode. Batteries Open the battery cover on the back of the remote control to insert the batteries (Type AAA-LR03-1.
English For remote control with AAA batteries (side by side): On-screen remote control NonPu blish For remote control with coin cell batteries: Note: Available if the connected device is HDMI-CEC-compliant. An On-Screen Remote Control (OSRC) gives you easy access to commonly used functions. The on-screen buttons available differ depending on your TV setup and features of the connected HDMI-CEC device. To access the OSRC 1. While watching TV or a connected device, press . 2.
Basic TV menus To access the browse menu, while watching TV, press . Home NonPu blish The home menu gives you easy access to connected devices, picture and sound settings, and other useful features. 1. Press . 2. Select an item in the home menu, then press OK to access the menu. 3. To exit the home menu, press or . Press the Navigation buttons to select a home menu item, and then press OK: [Help] Accesses the electronic user manual.
NonPu blish The channel list displays the TV channels and possible radio stations installed on your TV. 1. While watching TV, press . 2. Select [Channel list], then press OK. 3. Select a channel, then press OK to access the channel. 4. Press to exit the channel list without changing the channel. [Network settings]: Advanced network settings. [Update software]: Guides you through an update of the TV software. [Software settings]: Advanced TV update settings.
If the front LED indicator is red, press on the remote control (2). Alternatively, switch on the TV from standby by pressing any key on the side of the TV. NonPu blish Notes: The front LED indicator does not turn on when the TV is switched on. The TV requires some time to start up. During this time, the TV will not respond to the remote control or side controls. This is normal behavior. To switch to standby Press on the remote control. The front LED indicator switches to red.
NonPu blish Use the [Smart picture] experience menu to access frequently used picture settings. 1. While watching TV, press . 2. Select [Smart picture], then select one of the following settings: [Personal]: Sets the TV to your personal preferences set in the [Picture] menus in [Setup]. [Vivid]: Rich and dynamic settings, ideal for daylight use. [Natural]: A natural picture setting. [Cinema]: Ideal settings for watching movies. [Game]: Ideal settings for gaming.
1. Press . 2. Select the device from the home menu. 3. Press OK to confirm your choice. While watching TV, press > [Setup] > [TV settings] > [Ambilight]. Select a setting to adjust: [Dynamic]: Adjusts Ambilight between relaxed and dynamic levels. Available only if Ambilight [Colour] is set to [Dynamic]. [Brightness]: Adjusts the brightness of Ambilight. Use Ambilight 1. Connect and switch on the device. 2. Press . 3. Select [Add your devices], then press OK. Follow the on-screen instructions.
(Available on certain models only.) When the TV is on standby, you can switch on Ambilight and create a lounge light effect in your room. During TV standby, press on the side of the TV. Note: It may take more than 5 seconds for the lounge light to switch on. To select another lounge light colour, see Use your TV > Use Ambilight > Set up Ambilight (Page 22). Enjoy Net TV What is Net TV? Koninklijke Philips Electronics N.V. bears no responsibility for content provided by Net TV service providers.
Only services on the Net TV pages can be locked. Advertisements and Internet websites cannot be locked. Services are locked per country. Categories are locked for all countries. Initial setup 1. Agree to the Terms of Use. 2. Register for Net TV. 3. Switch on parental control. How to register To register, you need an email address and a PC connected to the Internet. If you skip the registration during the initial setup, you can register from the Net TV Start page later.
You can mark up to 12 services as favourites. All your favourite services are shown on the Net TV Start page. In Services, favourite services are marked with a star. Only Net TV services can be marked as favourites. Advertisements and Internet websites cannot be marked. Unmark favourites To Unmark a favourite, select the icon of a favourite service and press (Options) and select [Unmark favourite].
Clear Net TV history With a site icon selected in the history list, you can clear the whole list. Press (Options) and select [Clear history]. Video stores With this TV, you can rent a video from an online video store. 1. Open a video store. You may need to register or enter your login. 2. Select a video. 3. Make the online payment. 4. Download the video. 5. Start watching. What you need To rent and download a video, you need a high-speed Internet connection to the TV.
Options With the widgets on screen, press (Options) to select the following: Set up Widget Add Widget Remove Widget Move Widget Switch view Set up widget To set up a widget, select the Widget and press (Options) and select [Setup Widget]. To enter text, select the text field and press OK. Select a character on the keyboard and press OK to enter it. NonPu blish Add Widget To add a widget, press (Options) and select [Add Widget]. Scroll through the widget collection with or to look for a widget.
3 Use more of your TV Use teletext Select a page NonPu blish 1. Press . 2. Select [Text], then press OK. 3. Select a page by: Entering the page number with the Numeric buttons. Pressing or to view the next or previous page. Pressing the Colour buttons to select a colour coded item. 4. Press to exit teletext. Access teletext options NonPu blish 1. When in teletext, press . 2. Select an option: [Freeze page] / [Unfreeze page]: Freezes or unfreezes the current page.
Favourite channels Add or remove channels NonPu blish 1. Press . 2. Select [Channel list:], then press OK. 3. Press . 4. Select [Mark as favourite] or [Unmark as favourite], then press OK. A star appears in the channel grid, indicating that the channel is added to the favourite list. The star disappears if you remove the channel from the favourite list. Select a favourite list EPG options NonPu blish Use the EPG options menu to set or clear reminders, change day and access other useful EPG options.
Child lock To prevent children from watching TV, you can lock the TV or block age-rated programmes. Set or change the child lock code 1. Press . 2. Select [Setup] > [Channel settings] > [Child lock]. 3. Select [Set code] or [Change code]. 4. Enter the code with the Numeric buttons. Tip: If you forget your code, enter '8888' to override any existing codes. 3. Enter the three number page number of the subtitles page (usually '888'). 4. Press to exit teletext. Subtitles display if available.
When watching TV, connect the USB device to the USB port on the side of your TV. Press . Select [Browse USB], then press OK. View slideshow Press the Navigation buttons to select a picture, then press OK. To pause or stop playback, press OK again. To jump to the previous or next file, press or . Press to exit content browser. Press to access or exit the following settings: [Show info]: Displays the file information. [Stop]: Stops slideshow. [Rotate]: Rotates the file.
[Shuffle off] / [Shuffle on]: Enables or disables random display of pictures in the slideshow. [Slideshow speed]: Sets the display time for each picture in the slideshow. [Slideshow transition]: Sets the transition from one picture to the next. [Set as Scenea]: Sets the selected picture as wallpaper on the TV. Listen to music Press the Navigation buttons to select a music track, then press OK. Press / to fast rewind or fast forward a track. Press to exit content browser.
Hearing impaired NonPu blish Some digital TV channels broadcast special audio and subtitles adapted for people who are hearing impaired. To switch on hearing impaired audio and subtitles (if available) 1. While watching TV, press . 2. Press the red button to select [Hearing impaired]. 3. Press the green button to switch on hearing impaired audio and subtitles, press the red button to switch it off. 4. Press to exit.
4 Set up the TV Change picture and sound settings Settings assistant NonPu blish Use the settings assistant to guide you through the picture and sound settings. 1. While watching TV, press . 2. Select [Setup] > [Quick picture and sound settings], then press OK. 3. Select [Start], then press OK. Follow the on-screen instructions to choose your preferred settings. Smart picture settings Use the [Smart picture] experience menu to access frequently used picture settings. 1.
Smart sound settings Reset to factory settings Resetting your TV to factory settings restores default picture and sound settings. Channel installation settings remain the same. 1. While watching TV, press . 2. Select [Setup] > [TV settings] > [Factory settings], then press OK. TV settings are reset back to the factory default. More sound settings Reorder channels NonPu blish 1. Press . 2. Select [Setup] > [TV settings] > [Sound], then press OK. 3.
3. In the channel list, press . 4. Select [Rename], then press OK. 5. In the entry screen that appears, press the Navigation buttons or Numeric buttons to edit the name, then press OK. 6. Once complete, press the Navigation buttons to select [Done]. To clear the entry, select [Clear]. To cancel, select [Cancel]. 7. Press OK to confirm your choice. 8. Press to exit. Hide or unhide channels NonPu blish Hide channels Hide channels from the channel list, to prevent unauthorised access. 1.
Automatic install NonPu blish When the TV was switched on for the first time, a full installation of channels was performed. You can redo this full installation again to set your language and country and install all available TV channels. Note: If you are prompted to enter a code, enter '8888'. [Search for satellite] is only available if the TV supports DVB-S. 1. Press . 2. Select [Setup] > [Search for channels] or [Search for satellite], then press OK. 3.
Install digital channels Fine-tune analogue channels You can reposition your antenna to improve the reception. You need to know the correct frequency to tune. For best results, contact the service provider or get a professional installer. Note: If you are prompted to enter a code, enter '8888'. 1. Press . 2. Select [Setup] > [Channel settings] > [Channel installation] > [Digital: Reception test] > [Search], then press OK. 3. Press the Numeric buttons to enter the channel frequency. 4.
[Preferred audio format]: Select [Standard] to receive standard audio format (MPEG). Select [Advanced] to receive advanced audio formats (AAC, EAC-3 or AC-3 if available). [Mono/Stereo]: Select [Mono] or [Stereo] if stereo broadcasting is available. 4. Press to exit. Tip: Set a secondary language in the same menu. You receive this language if the primary language is unavailable. Menu language NonPu blish 1. While watching TV, press . 2. Select [Setup] > [TV settings] > [Preferences] > [Menu language].
Follow the instructions on screen to install the wired network. The TV constantly searches for a network connection. If asked, agree to the End User Licence Agreement. Find the latest End User Licence Agreement at www.philips.com. Wi-Fi Ready Project your PC: Introduction This TV is Wi-Fi Ready*. With the Wireless USB adapter PTA01 accessory (sold separately), you can connect the TV to your network wirelessly. With the free Wi-Fi MediaConnect software, you can project your PC screen on the TV.
NonPu blish The TV's network settings that are used to connect to your router are standard and set to automatic. This ensures easy connection with any available network. If you have problems with the network connection, you might want to adjust the settings so that they are appropriate for your home network. If you are unsure, ask someone with knowledge of network settings to help you. To set specific network settings, press > [Setup] > [Network settings] and press OK.
In Microsoft Windows, start Windows Media Player 11. Windows Media Player appears. In the Media Sharing window, tick Share my Media and click OK. If no network connection is found and you are unable to tick this box, click the Networking button to show the Network and Sharing Centre window... Set Network discovery to On. Set File sharing to On. Go back to the Media Sharing window in Windows Media Player and tick the Share My Media box. Click OK.
Energy-efficient settings 1. While watching TV, press the green button. 2. Select one of the following settings, then press OK: [Energy saving]: Applies a combination of picture settings to reduce energy consumption. [Mute screen]: Turns off the TV display. 'Muting' the screen saves energy if you just want to listen to audio from the TV. [Light sensor]: To save energy, the built-in ambient light sensor lowers the brightness of the TV screen when the surrounding light darkens.
Update software TV software NonPu blish 1. Press . 2. Select [Setup] > [Software settings] > [Current software info], then press OK. The version of the current software is displayed. To update the software, use one of these options: a. update from digital broadcast. b. update with USB. c. update from the Internet. For more information, see the following pages. NonPu blish If available, your TV can receive software updates via digital broadcasts.
English 5. If the Help file on the Philips Support site is a later version than the file in your TV, click it to save the file to the USB flash drive. 6. Using the archive utility, extract the *.zip file to the 'upgrades' folder on the USB flash drive. 7. The *.upg Help file is extracted. 8. Disconnect the USB flash drive from the PC. Do not switch off the TV or remove the USB flash drive during the update. If a power failure occurs during the update, do not remove the USB flash drive from the TV.
5 Connect the TV First connections Power NonPu blish Be sure that the power plug in the wall socket is accessible at all times. When disconnecting the power cable, always pull the plug, never the cable. Although this TV has a very low standby power consumption, switch off the TV using the power switch on the bottom of the TV if you do not use the TV for a long time. Antenna Locate the antenna connector at the back of the TV. Insert the antenna cable securely into the antenna connector.
Match the Y Pb Pr connector colours with the cable plugs when you connect. Y Pb Pr can handle High Definition (HD) TV signals. HDMI An HDMI connection has the best picture and sound quality. One HDMI cable combines video and audio signals. Use HDMI for High-Definition (HD) TV signals and to enable EasyLink. The HDMI ARC connector on the TV features HDMI ARC functionality. This allows output of TV audio to an HDMI ARC-compliant device. Do not use an HDMI cable longer than 5 metres/16.4 feet.
TV connectors overview Bottom NonPu blish Rear NonPu blish 1. NETWORK: Data input from a network. 2. EXT 2 (SCART): Analogue audio and video input from analogue or digital devices such as DVD players or game consoles. 3. SERV. U: For use by service personnel only. 4. EXT 3 Component (Y Pb Pr): Analogue audio and video input from analogue or digital devices such as DVD players or game consoles. 5. : Stereo audio output to headphones or earphones. EN 48 1.
English 4. HDMI ARC: In addition to normal HDMI functionality, outputs TV audio to an HDMI ARC-compliant device, such as a home theatre system. 5. AUDIO IN: Audio input from a computer. 6. ANTENNA: Signal input from an antenna, cable or satellite. 7. VGA: Video input from a computer. Side NonPu blish 2. USB: Data input from USB storage devices. 3. CI (Common Interface): Slot for a Conditional Access Module (CAM). 4. SD CARD: Slot for an SD memory card. 1.
Connect devices Blu-ray disc player Use an HDMI cable to connect the Blu-ray disc player to an HDMI connector on the bottom of the TV. DVD player Use an HDMI cable to connect the DVD player to an HDMI connector on the bottom of the TV. DVD-Recorder First, use two antenna cables to connect the antenna to the DVD Recorder and the TV.
English Finally, use a SCART cable to connect the DVD Recorder to a SCART connector on the bottom of the TV. Home Theatre System First, use an HDMI cable to connect the device to the TV. Finally, use a digital audio cinch cable to connect the device to the TV or, alternatively, use the analogue Audio Out L/R.
Audio and video synchronisation (sync) If the sound does not match with the video on screen, you can set a delay on most DVD Home Theatre Systems to match the sound and video. EasyLink To automatically mute the TV speakers when content is played from your Home Theatre System, enable EasyLink. For more information, see Connect the TV > Use Philips EasyLink > Configure TV speakers (Page 61). Dig. receiver/satellite First, use two antenna cables to connect the antenna to the receiver and the TV.
Dig. receiver and DVD-R English First, use three antenna cables to connect the digital receiver and the DVD Recorder to the TV. Then use a SCART cable to connect the digital receiver to the TV. Finally, use two SCART cables to connect the two devices and the TV.
Dig. receiver, DVD-R and HTS First, use three antenna cables to connect the two devices and the TV. Then use two SCART cables to connect the digital receiver to the DVD Recorder and the DVD Recorder to the TV. Then use an HDMI cable to connect the Home Theatre System to the TV.
English Finally, use a digital audio cinch cable to connect the Home Theatre System to the TV. Dig. HD receiver First, use two antenna cables to connect the Digital HD receiver to the TV. Use an HDMI cable to connect the Digital HD receiver to the TV.
Connect more devices Game console Enable game mode To prevent picture delay, set the TV to [Game] mode. 1. Press . The most practical connections for a game 2. Select [Smart picture] > [Game], then console are at the side of the TV. However, press OK. more connectors are available at the back of 3. Press to exit. the TV if needed. The most practical connections for a game console are at the side of the TV.
Dig. camera English To view pictures on your digital camera, connect it to the USB connector at the side of the TV. Switch on the digital camera. If the content of your camera does not appear automatically, you may need to enable Picture Transfer Protocol (PTP) on the camera. Refer to the camera's user manual for instructions. Dig. camcorder The most practical connection for a camcorder is at the side of the TV.
Channel decoder NonPu blish Before using a SCART digital channel decoder, select the channel to decode and assign the decoder to the SCART connector. 1. Press . 2. Select [Setup] > [Channel settings] > [Decoder] > [Channel]. PC NonPu blish Connect a computer using one of the following cables: HDMI cable DVI-HDMI cable EN 58 3. Set the channel you want to decode. 4. Select [Status], then the location of the decoder. 5. Press OK.
English HDMI cable and HDMI-DVI adaptor VGA cable Use Philips EasyLink Enable or disable EasyLink 1. Press . 2. Select [Setup] > [TV settings] > [EasyLink] > [On] or [Off], then press OK. NonPu blish Philips EasyLink provides several features that enable you to control devices that are connected via HDMI. Connected devices must support the HDMI-CEC standard, and must be properly configured for EasyLink to work. Note: HDMI-CEC functionality is known by other names on other brands.
System audio control When you connect your TV to, for example, an HDMI-CEC compliant Home Theatre System (HTS), your TV speakers automatically mute and audio from the TV plays through the HTS. For more information about system audio control and other types of TV speaker configurations, see Connect the TV > Use Philips EasyLink > TV speakers (Page 61). EasyLink Remote Control EasyLink Remote Control allows you to control HDMI-CEC compliant devices using your TV remote control.
Numeric buttons: When EasyLink is enabled, selects a title, chapter or track. (Options): Displays the menu of the connected device. When is pressed, the TV menu is displayed. (Standby): Press to enable one-touch standby. This switches the TV and the connected device to standby. Other EasyLink buttons are available via On-Screen Remote Control (OSRC). To access the OSRC 1. While watching a connected device, press . 2. Select [Show remote control], then press OK. 3.
Use HDMI ARC The HDMI 1 connector is HDMI Audio Return Channel (ARC) compliant. Use it to output digital audio to an HDMI Home Theatre System. HDMI ARC allows you to use Philips EasyLink to output TV audio directly to a connected audio device, without the need for an additional digital audio cable. Be sure that the device is HDMI-CEC and ARC compliant, and that the TV is connected to the device using an HDMI cable attached to HDMI ARC connectors.
Memory size NonPu blish To download rented videos from Net TV, insert an SD memory card into the TV SD card slot. Once formatted, leave the card permanently in the slot. SD memory size Use a blank SD memory card.The SD card should have a minimum storage capacity of 4 GB. For high-definition video, ensure that you use an SD card with at least 8 GB of storage capacity. Caution: Ensure that you follow the instructions described in Connect the TV > Insert SD card > Insert and format (Page 63).
6 Troubleshooting Contact us If you cannot resolve your problem, refer to the FAQs for this TV at www.philips.com/support. If the problem remains unresolved, contact Philips Consumer Care in your country as listed in the leaflet accompanying your product. Make a note of your TV model and serial number before you contact Philips. These numbers are printed on the back of the TV and on the packaging. Warning: Do not attempt to repair the TV yourself.
Check that the external device or source is properly connected. There is sound but no picture: Check that the picture settings are correctly set. There is poor TV reception from an antenna connection: Check that the antenna is properly connected to the TV. Loudspeakers, unearthed audio devices, neon lights, high buildings and other large objects can influence reception quality. If possible, try to improve the reception quality by changing the antenna direction or moving devices away from the TV.
If you use an HDMI-to-DVI adapter or HDMI to DVI cable, check that an additional audio cable is connected to AUDIO L/R or AUDIO IN (mini-jack only). You cannot use EasyLink features: Check that your HDMI devices are HDMI-CEC compatible. EasyLink features only work with devices that are HDMI-CEC compatible. If an HDMI-CEC compliant audio device is connected to the TV and the TV does not display any mute or volume icon when the volume is muted, increased or decreased.
Overview 1080p 24 / 25 / 30 / 50 / 60 Hz processing 100 Hz LCD Product information is subject to change without notice. For detailed product information, go to www.philips.com/support. Sound Output power (RMS): 24 W Incredible Surround Clear Sound Dynamic Bass Enhancement Mono/Stereo/NICAM Power and reception Display resolutions NonPu blish English 7 Technical data NonPu blish Power Mains power: AC 220-240 V~, 50-60 Hz Standby power: <0.
SD card slot Ethernet UTP5 Supported image files JPEG (*.jpg) Supported audio/video files* AVI (*.avi): video: MPEG-4 SP, MPEG-4 ASP audio: MPEG Layer 2/3, AC3 MPEG (*.mpg, *.mpeg, *.vob): video: MPEG-1, MPEG-2 MPEG (*.mp2, *.mp3, *.mpg, *.mpeg, *.vob): audio: MPEG-1 Layer 2, MPEG-1 Layer 3, LPCM, AC3 MPEG-4 (*.mp4): video: MPEG-4 AVC (H.264, L2-CIF, L4-HD) audio: AAC-LC, HE-AAC *Multimedia file names must not exceed 128 characters. Supported audio/video files * WMV (*.wmv): video: WMV9/VC1 WMA (*.
Use your TV legend to note the thickness of your TV (with and without the stand). Use your TV legend to note the weight of the TV with stand. EN 69 English Make a note of the legend that corresponds The legends used to indicate the TV to your TV. Then, navigate to the next page dimensions are as follows: to view the dimensions.
Use your TV legend to note the weight of the TV without the stand.
8 Index connectors, rear - 48 A controls, side - 15 age rating - 30 D Ambilight - 13 decoder - 58 Ambilight settings - 22 default settings - 35 Ambilight, response speed - 22 demo - 35 Ambilight, switch on - 22 devices, add - 21 audio language - 38 devices, watch - 22 audio lip sync - 43 digital channels, overview - 14 B digital channels, subtitles - 30 bottom connectors - 48 C CAM, enable - 62 CAM, insert - 62 care - 10 channel list - 19 channels, favourites - 29 channels, hide or unhi
H P hearing impaired - 33 PC network settings - 41 home menu - 18 PC network, media server - 41 home mode - 43 PC network, wired - 39 PC, connect - 58 I picture format - 21 information, on Internet - 14 picture settings - 34 information, on-screen - 14 position TV - 13 install channels (automatic) - 37 power - 67 install channels (manual) - 37 K R rear connectors - 48 kensington lock - 12 recycle - 11 L register product - 9 language, menu - 39 language, others - 38 location, home or s
software, Internet update - 44 English software, version - 44 sound settings - 35 specifications - 67 standby - 20 subtitle, analogue - 30 subtitle, digital - 30 subtitle, language - 38 subtitles, language - 30 T technical specifications - 67 teletext 2.
© 2009 Koninklijke Philips Electronics N.V. All rights reserved.