!"#$%&'#(!)*+(!,(*-+.'!/0-!$#'!&+,,*('!/' !!!"#$%&%#'"()*+!,&()*, -.
Contents 1 1.1 1.2 1.3 1.4 1.5 1.6 1.7 1.8 1.9 1.10 Tour 3 Smart TV 3 App gallery 3 Rental videos 3 Online TV 3 Social networks 3 Skype 4 Smartphones and tablets 4 Pause TV and recordings 4 Gaming 4 EasyLink 5 2 2.1 2.2 2.3 2.4 2.5 2.6 2.7 2.8 Setting up 6 Tips on placement 6 Power cable 6 Antenna 6 Network 6 Connect devices 8 Setup menu 16 TV stand and wall mounting 16 Safety and care 16 3 3.1 3.2 3.3 3.4 3.5 3.6 3.7 3.8 3.9 3.10 3.
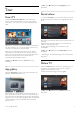
1 Tour 1.1 Smart TV Connect this Philips Smart LED TV to the Internet and discover a new world of television. You can make a wired connection to your router or you can link up wirelessly with Wi-Fi. With the TV connected to your home network, a smartphone can show a photo on TV, you can play videos stored on your computer or control the TV with your tablet.
1.5 Social networks No need to get up to check your friend's messages on your computer. Open Smart TV, select your social network page and send a message back from your couch. Operate your TV from your smartphone or tablet, switch channels or change the volume. With the MyRemote app, you can use your phone or tablet to send photos, music or videos from your computer to your TV.
The TV uses 3D technology to show both screens. To play a two-player game with two different full screen pictures, you need a pair of 3D glasses for each player. In Help, press L List and look up Game console or Twoplayer games for more information. 1.10 EasyLink With EasyLink you can operate a connected device, like a Bluray Disc player, with the remote control of the TV. EasyLink uses HDMI CEC to communicate with the connected devices. In Help, press L List and look up EasyLink for more information.
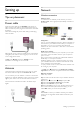
2 2.4 2.1 Wireless connection Setting up Tips on placement 2.2 Power cable Network What you need To connect the TV wirelessly to the Internet, you need a wireless router. Use a high-speed (broadband) connection to the Internet. Insert the power cable into the POWER socket of the TV. Make sure the power cable is securely inserted into the TV. Make sure that the power plug in the wall socket is accessible at all times. When disconnecting the power cable, always pull the plug, never the cable.
If your router has WPS, you can directly connect to the router without scanning. Go to the router, press the WPS button and return to the TV within 2 minutes. Then press Connect to make the connection. If you have devices in your wireless network that use the WEP security encryption system, you cannot use WPS. If you must use the WPS pin code to connect, select Scan instead of WPS. Step 6 - In the list of networks found, select your wireless network and press OK.
**To fulfill EMC regulations, use a shielded FTP Cat. 5E Ethernet cable. Antenna If you have a Set-top box (a digital receiver) or Recorder, connect the antenna cables to run the antenna signal through the Set-top box and/or Recorder first before it enters the TV. In this way, the antenna and the Set-top box can send possible additional channels to the Recorder to record. Network settings To open the Network settings, press h and select S Setup and press OK. Select Network settings and press OK.
Use a DVI to HDMI adapter if your device only has a DVI connection. Use one of the HDMI connections and add an Audio L/R cable (mini-jack 3.5 mm) to Audio In VGA/DVI for sound, on the back of the TV. Copy protection DVI and HDMI cables support HDCP (High-bandwidth Digital Content Protection). HDCP is a copy protection signal that prevents copying content from a DVD disc or Blu-ray Disc. Also referred to as DRM (Digital Rights Management). Y Pb Pr Component Video YPbPr is a high quality connection.
HDMI CEC on other brands The HDMI CEC functionality has different names on different brands. Some examples are: Anynet, Aquos Link, Bravia Theatre Sync, Kuro Link, Simplink and Viera Link. Not all brands are fully compatible with EasyLink. Example HDMI CEC branding names are property of their respective owners. Operate devices To operate a device connected to HDMI and set up with EasyLink, select the device -or its activity- in the list of TV connections.
Next to the antenna connection, add an HDMI cable to connect the device to the TV. Alternatively, you can use a SCART cable if the device has no HDMI connection. Set-top box STB Use 2 antenna cables to connect the antenna to the Set-top box (a digital receiver) and the TV. Next to the antenna connections, add an HDMI cable to connect the Set-top box to the TV. Alternatively, you can use a SCART cable if the Set-top box has no HDMI connection.
To set the Audio Out format, press h and select S Setup and press OK. Select TV settings > Sound > Audio Out format. If you have a Home Theatre System without any multichannel sound processing capabilities, select Stereo. Audio Out levelling Use the Audio Out levelling setting to level the volume (loudness) of the TV and the Home Theatre System when you switch over from one to another. Volume differences can be caused by differences in sound processing.
If the DVD player is connected with HDMI and has EasyLink HDMI CEC, you can operate the player with the TV remote control. In Help, press L List and look up EasyLink HDMI CEC for more information. Game Connect a game console to the side or back of the TV. You can use an HDMI, YPbPr or SCART connection. If your game console only has Video (CVBS) and Audio L/R output, use a Video Audio L/R to SCART adapter to connect to the SCART connection.
3 - When the TV is tuned to a digital TV channel, press p (Pause). Trying to pause will start the formatting. Formatting removes all files from the connected USB Hard Drive. Follow the instructions on screen. When the USB Hard Drive is formatted, leave it connected permanently. Warning The USB Hard Drive is formatted exclusively for this TV, you cannot use the stored recordings on another TV or PC. Do not copy or change recording files on the USB Hard Drive with any PC application.
To stop watching the USB flash drive content, press t TV or select another activity. To disconnect the USB flash drive, you can pull out the flash drive anytime. Or use a SCART adapter to connect the camcorder to the TV. In Help, press L List and look up Videos, photos and music, to watch or listen to content from an USB flash drive. Photo camera To view photos stored on your digital photo camera, you can connect the camera directly to the TV. Use the USB connection on the left side of the TV to connect.
You can find the mounting instructions in the Quick Start Guide that came with the TV. In case you lost this guide, you can download the guide from www.philips.com Use the product type number of the TV to look for the Quick Start Guide to download. Ideal monitor setting If your computer is added as a Computer type of device in the Source menu (list of connections), the TV is set to the ideal Computer setting automatically.
Never expose the TV to rain or water. Never place liquid containers, such as vases, near the TV. If liquids are spilt on or into the TV, disconnect the TV from the power outlet immediately. Contact Philips Consumer Care to have the TV checked before use. Never expose the TV, remote control or batteries to excessive heat. Never place them near burning candles, naked flames or other heat sources, including direct sunlight. Never insert objects into the ventilation slots or other openings on the TV.
3 TV 3.1 Switch on Switch on and off Make sure you plugged in the mains power on the back of the TV before you switch on the TV. If the red indicator light is off, press the small key A on the right, on the back of the TV to put the TV on standby - the red indicator will light up. With the TV on standby, press A on the remote control to switch the TV on. Alternatively, you can use the CH+, CHand h key to switch the TV on. Quick start With Quick start, the TV can start up faster than usual.
Top Bottom 1 - A Standby To switch the TV on or back to standby. 2 - Playback and record keys Play x, to playback Pause p, to pause playback Stop q, to stop playback Rewind !, to rewind Fast Forward ‹,to wind fast forward Record r, to record now 3 - GUIDE To open or close the TV guide. 4 -c SOURCE To open or close the list of connections. 5 - h Home To open or close the home menu. 6 - L LIST To open or close the channel list or your list of photos, music or videos. 7 - OK key To confirm a selection.
Remove the batteries if you are not using the remote control for a long time. Dispose of batteries according to the end of use directives. In Help, press L List and look up End of use for more information. Cleaning Your remote control is treated with a scratch-resistant coating. To clean the remote control, use a soft damp cloth. Never use substances such as alcohol, chemicals or household cleaners on the TV or remote control. 3.3 Watch TV Channels Switch channels To watch TV channels, press t TV.
In Help, press L List and look up Subtitles for more information. Audio languages For digital broadcast, you can select an available audio language temporarily if none of your preferred languages are available. In Help, press L List and look up Audio languages for more information.
In Help, press L List and look up Favourite channels for more information. Favourite channels You can create a favourite channel list that only holds the channels you want to watch. With the Favourite channel list selected, you will only see your favourite channels when you switch through channels. Create your Favourite channel list 1 - While watching a TV channel, press L LIST to open the channel lists. 2 - Select Favourites. 3 - If the list is empty, the TV asks you to start adding channels right now.
To switch off the Automatic channel update, press h, select S Setup and press OK. Select Channel settings and press OK. Select Channel installation > Automatic channel update > Off. Start an update To start an update yourself, press h, select S Setup and press OK. Select Search for channels and press OK. Select Update channels and follow the instructions on screen. The update may take a few minutes.
2 - Plug in the USB memory device that holds the channel list of the other TV. 3 - To start the channel list upload, press h, select S Setup and press OK. 4 - Select TV settings > General settings > Channel list copy > Copy to TV and press OK. You might be asked to enter the Child lock code of this TV. 5 - The TV notifies you if the channel list is copied to the TV successfully. Unplug the USB memory device.
• Auto zoom Automatically zooms in the picture to fill the screen as much as possible without distortion. Black bars may be visible. Not suitable for PC input. • Super zoom Removes the black bars on the side of 4:3 broadcasts. The picture is adjusted to fit the screen. • Movie expand 16:9 Scales the picture to a 16:9 format. • Wide screen Stretches the picture to a 16:9 format. • Unscaled Expert mode for HD or PC input. Pixel for pixel display. Black bars may appear with pictures from a computer.
Text 2.5 If available, Text 2.5 offers more colours and better graphics. Text 2.5 is activated as a standard factory setting. To switch it off, press h, select S Setup and press OK. Select TV settings > Preferences > Text 2.5. Interactive TV What is iTV? With interactive TV, some digital broadcasters combine their normal TV programme with information or entertainment pages. On some pages, you can respond to a programme or vote, do online shopping or pay for a video-on-demand programme. HbbTV, MHEG, . . .
* Depending on where the TV guide information (data) is coming from, analogue and digital channels or only digital channels are shown. Not all channels offer TV guide information. Receiving TV guide info The TV guide receives information (data) from broadcasters or from the Internet. In some regions and for some channels, TV guide information might not be available. As long as you did not connect the TV to the Internet, the information comes from the broadcaster.
If none of the preferred subtitle languages are available, you can select another subtitle language which is available. To set the primary and secondary subtitle language . . . 1 - Press h, select Setup and press OK. 2 - Select Channel settings and select Languages > Primary subtitles or Secondary subtitles and press OK. 3 - Select a language and press OK. 4 - Press b, repeatedly if necessary, to close the menu. EasyLink With EasyLink you can operate a connected device with the TV remote control.
In Help, press L List and look up Universal access for more information. Switch off timer Menu language To change the language of the TV menus and messages . . . 1 - Press h, select S Setup and press OK. 2 - Select TV settings > General settings > Menu language and press OK. 3 - Select the language you want and press OK. 4 - Press b, repeatedly if necessary, to close the menu. 3.
— Dynamic backlight sets the level at which power consumption can be reduced by dimming the intensity of the screen. Choose for the best power consumption or for the picture with the best intensity. — Colour enhancement makes the colours more vivid and improves the resolution of details in bright colours. • Advanced adjusts advanced picture settings: — Light sensor adjusts the picture and Ambilight settings automatically to the lighting conditions of the room.
Reduces sudden volume differences like at the beginning of adverts or when switching from one channel to another. Preferred audio format You can set the audio format to Standard (Stereo) or Advanced (Multichannel). If one of the two types are available, the TV will switch automatically to the type you set. 1 - Press h, select S Setup and press OK. 2 - Select Channel settings > Languages > Preferred audio format and press OK. 3 - Select Standard or Advanced and press OK.
Ambilight dynamic With Ambilight dynamic you can adjust the speed at which Ambilight responds to onscreen images. Press h, select SSetup and press OK. Select TV settings and press OK. Select Ambilight > Mode > Dynamic and press OK. Select Dynamic. Use the slider bar to adapt the speed to your preference. With Ambilight static you can set an Ambilight colour of your own. Press h, select SSetup and press OK. Select TV settings and press OK. Select Ambilight > Mode > Static and press OK. Select Static.
Hearing impaired Some digital TV channels broadcast special audio and subtitles adapted for hearing impaired people. With Hearing impaired switched on, the TV automatically switches to the adapted audio and subtitles, if available. Switch on To switch on Hearing impaired, press oOPTIONS, select Universal access and press OK. Select Hearing impaired, select On and press OK.
4 3D 4.1 What you need This is an Easy 3D TV. To watch 3D you need to : • tune to a TV channel that broadcasts programmes in 3D • rent a movie in 3D from an online video store with Smart TV • watch a movie in 3D from a 3D Blu-ray Disc, a USB device or computer Four pairs of passive 3D glasses are included. For an extra pair of glasses order the Philips Passive 3D glasses PTA417 or PTA426 (sold separately). Other 3D glasses might not be supported. 4.
4.5 Health warning • If you or your family have a history of epilepsy or photosensitive seizures, consult a medical professional before exposing yourself to flashing light sources, rapid image sequences or 3D viewing. • To avoid discomfort such as dizziness, headache or disorientation, we recommend not watching 3D for extended periods of time.
5 5.2 5.1 What you need Smart TV Home menu From the Home menu, you can start any activity you can do with the TV. Open the Home menu to start watching TV or start watching a disc on your Home Theatre System. Also in the Home menu, you can open Smart TV to surf the Internet, start Skype or open Help if you need information on using the TV. Open the Home menu To open the Home menu, press h. Select an activity using the arrow keys and press OK to start the activity.
Open Smart TV To open the Smart TV start page, press Smart TV. Alternatively, you can press h, select Smart TV and press OK. With Search, you can search the App gallery for relevant Apps. Enter a keyword in the text field, select l and press OK to start searching. You can enter names, titles, genres and description keywords to search. Alternatively, you can leave the text field empty and search for the most popular searches/keywords for a range of categories.
To return to the Smart TV start page, press L LIST or b. Consult the video store regarding the rental duration of rental movies. Add an App to your list In the App gallery, select the App icon and press OK. Select Add and press OK. Alternatively, select Add and move to add it and immediately position the App where you want it in your list. Internet traffic Streaming or downloading many videos may exceed your monthly Internet traffic limit. Start an App To start an App, press h and select Smart TV.
If you try to pause or record a programme with a USB Hard Drive connected, the TV will ask you to format the USB Hard Drive. This formatting will delete all current files on the USB Hard Drive. From a computer If the TV and the computer are in the same network, the TV can browse and play files stored on your computer. This TV uses the SimplyShare protocol and is compatible with other SimplyShare devices.
To make a 10-second jump forward or backward in a video, press x or w. To rewind or go fast forward, press ! or ‹. Press the keys several times to speed up - 2x, 4x, 8x, 16x, 32x. To stop the video playback, press q (Stop). Info To view info on a video (playhead position, duration, title, date, etc.), select the video and press i INFO. Press again to hide the info. DivX®, DivX Certified® and associated logos are trademarks of Rovi Corporation or its subsidiaries and are used under license.
With the progress bar on screen, press ! (Rewind) or press ‹ (Forward) to select from where you want to start viewing the stored broadcast. Press these keys repeatedly to change their speed. Specifics The Audio Description audio (commentary) for the visually impaired is not available for playback in Pause TV or Recording. In Help, press L List and look up USB Hard Drive, installation to install Pause TV. 5.
Broadcasters can limit the number of days a recording can be viewed. A recording in the list can show the number of days before it expires. Failed recording When a scheduled recording was prevented by the broadcaster or when the broadcast was interrupted, a recording is marked as Failed. Delete a recording To delete a made recording, select the recording in the list, press o OPTIONS and select Delete recording. In Help, press L List and look up Record a program for more information. 5.
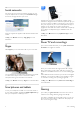
Download the App The MyRemote app is available for mobile devices running Apple iOS or Andriod. Apple iPhone To download the app on your iPhone, go to the Apple App Store and look for the Philips MyRemote app. In the MyRemote home menu you can find the following functions . . . • SimplyShare • Net TV • Control If you have a tablet, you also find . . . • TV guide Apple iPad To download the app on your iPad, go to the Apple App Store and look for the Philips MyRemote HD app.
Select a device to send media from 1 - Tap the white bar at the top to open the list of available devices. 2 - Tap a device in the list. Select a device to play the media 1 - Tap the white bar at the bottom to open the list of available devices. 2 - Tap a device in the list. Select a media file You can select the type of media you are looking for - Music, Videos or Photos. 1 - Tap the type of media you are looking for. 2 - In the list, tap the song, video or photo to play it on the device you selected.
6 Skype 6.1 What is Skype? With Skype™ you can make video calls on your TV for free. You can call and see your friends from anywhere in the world. Talk to your friends while watching them on the big screen of your TV. Point the camera to the position you usually sit at. In the Skype settings, you can test the camera, check its viewpoint or set the zoom level. You can position the camera anywhere you want but it is recommended to put it away from the speakers of the TV.
Your contacts can see that you are online but you do not wish to be disturbed. They can call you and you will be alerted with sound. No emergency calls No emergency calls - Skype is not a replacement for your telephone and cannot be used for emergency calling. - Invisible You will appear to be offline to all of your contacts, but you can still use Skype as usual. You can use Skype without being disturbed by incoming calls. 6.
On a voice call, you can still switch to a Video call. To switch to Video call, press * Camera on. Block a contact You can block any Skype user from finding you online. A blocked contact will be unable to contact you with Skype. A blocked contact will not be notified, you will always appear to be offline in the contact list of the blocked contact. On the ! Contacts page, select a contact and press * Block contact. You can always unblock a contact.
Also, new contact requests will be shown immediately. Skype during rental movies and Pause TV While you are watching a rental movie from a broadcaster or video store, or using Pause TV, accepting a Skype call will interrupt the movie or paused programme. To resume watching the rental movie, you need to go back to the video store or broadcast service. Some video stores and services do not allow you to restart the movie. The Pause TV programme storage is lost.
Navigate to the menu bar and select S Settings to open the Settings page. Select Online status and then select the online status you want your contacts to see when you are online and press OK. Select Sign out to quit Skype on your TV. 6.8 Terms of Use Read the Terms of Use of Skype at www.skype.com/go/tou Ringtone volume Also read the Privacy Statement at www.skype.com/privacy You can adjust the Skype ringtone volume. Navigate to the menu bar and select S Settings to open the Settings page.
7 Games 7.1 Play a game With a game console connected to the TV, you can play games on TV. Start a game Switch on the game console and press h, select the icon you have set for your game console (e.g. Game or Player) and press OK to view the game. Ideal game setting For some games, where speed and precision is needed, set the TV to the ideal Game setting before you start playing.
8 To check the relative power consumption, press h > Setup > Watch demos > Active control and press OK. Select a setting to check the corresponding values. 8.1 European energy label TV Specifications Environmental Saving energy Energy saving bundles the TV settings that help the environment. While you are watching TV channels, press * to open Eco settings. Active settings are marked with a fi. Press * again to close.
Please act according to your local rules and do not dispose of your old products with your normal household waste. Correct disposal of your old product helps to prevent potential negative consequences for the environment and human health. Your product contains batteries covered by the European Directive 2006/66/EC, which cannot be disposed with normal household waste.
8.5 8.7 • Output power (RMS) : 20W (2x10W)* @30%THD * 28W (2x14W) on XXPFL6X57, XXPFL6X67, XXPFL6X87, XXPFL6X97. • Sound enhancement : Auto Volume Leveller, Clear Sound, Incredible Surround, Incredible Surround 3D 8.6 TV Rear • SCART (adapter included): Audio L/R, CVBS in, RGB • YPbPr : Y Pb Pr (adapter included), Audio L/R • VGA (D-sub 15), Audio In (stereo mini-jack 3.5mm • Audio In (DVI to HDMI / VGA) (stereo mini-jack 3.
Depth 243.5 mm Weight ± 18.3 kg 55PFL6XX7 Width 1240.8 mm Height 744.32 mm Depth 30.2 mm Weight ± 22 kg . . . with TV stand Height 788.15 mm Depth 263 mm Weight ± 25.
9 TV Software 9.1 Software version To view the current TV software version, press h, select S Setup and press OK. Select Software settings and press OK. Select Current software info and see Version: . . . . 9.2 Software update Software update from Internet If the TV is connected to the Internet, you may receive a message from TP Vision to update the TV software. You need a high-speed (broadband) Internet connection. If you receive this message, we recommend you carry out the update. Select Update.
10 Support 10.1 Register Register your TV and enjoy a range of benefits including full support (including downloads), privileged access to information about new products, exclusive offers and discounts, the chance to win prizes and even participate in special surveys about new releases. Go to www.philips.com/welcome 10.2 Using help and search On the support site you can find your country's telephone number to contact us as well as answers to frequently asked questions (FAQs).
Index 3 3D depth 34 3D glasses, type 34 3D glasses, use 34 3D, 2D to 3D 34 3D, cleaning glasses 35 3D, experience 34 3D, health warning 35 3D, optimal viewing 34 A Ambilight colour 32 Ambilight, dynamic 32 Ambilight, mode 32 Ambilight, placement 31 Ambilight, setup 32 Ambilight, switch on or off 31 Ambilight, TV switch off 32 Antenna connection 6 Antenna connection, tips 8 App, feedback 37 App, gallery 37 App, lock 37 App, recommended 37 App, search 37 Audio commentary 33 Audio effects 33 Audio language 28
Network, wireless 6 O On and off 18 Online support 56 Online TV 38 Open source software 55 Options,on a channel 20 Original language 28 P Parental rating 22 Pause TV 40 Perfect Pixel HD Engine 29 Photo camera, connect 15 Photos, slideshow 39 Picture settings 29 Picture style 30 Pixel Plus link 10 Power consumption 51 Power inlet 6 Preferred audio format 31 Programme list 26 Q Quick start 18 R Radio channel 20 Reception quality 24 Recording 41 Recordings, home menu 41 Reinstall TV 23 Reminder, programme 26 R
!"#$%&%$'(%)*+,'-#,+./0#$(,(),$1'*2#,3%(1).