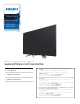
Televisions 6000 series 55PFL6921 49PFL6921 Register your product and get support at www.philips.com/welcome EN EN User Manual • ES Manual del Usuario ES FR Manuel d’Utilisation • FR • For further assistance, call the customer support service in your country. To obtain assistance, contact Philips Customer Care Center; In the U.S.A., Canada, Puerto Rico, or the U.S. Virgin Islands 1 866 202 5960 México D.F.
.English Contents 1 Notice ....................................................................................... 5 2 Important ...............................................................................
.English Register Online at www.philips.com/welcome today to get the most benefits from your purchase. Registering your model with Philips makes you eligible for all of the valuable benefits listed below, so don't miss out. Register Online at www.philips.com/welcome to ensure: *Product Safety Notification By Registering your Product, you'll receive notification - directly from the manufacturer - in the rare case of a Product Recall or Safety Defect.
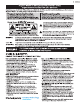
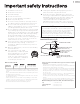
.English Important safety instructions 1. 2. 3. 4. 5. 6. 7. 8. 9. 10. 1 1. 12. Read these instructions. Keep these instructions. Heed all warnings. Follow all instructions. Do not use this apparatus near water. Clean only with dry cloth. Do not block any ventilation openings. Install in accordance with the manufacturer’s instructions. Do not install near any heat sources such as radiators, heat registers, stoves, or other apparatus (including amplifiers) that produce heat.
.English 1 Notice Modifications Trademarks are the property of Koninklijke Philips N.V. or their respective owners. Funai Corporation reserves the right to change products at any time without being obliged to adjust earlier supplies accordingly. The material in this Owner’s Manual is believed adequate for the intended use of the system.
.English Copyright All other registered and unregistered trademarks are the property of their respective owners. The terms HDMI and HDMI HighDefinition Multimedia Interface, and the HDMI Logo are trademarks or registered trademarks of HDMI Licensing Administrator, Inc. in the United States and other countries. Dolby, Dolby Audio, and the double-D symbol are trademarks of Dolby Laboratories Licensing Corporation.
.English 2 Important Environmental Care Positioning the TV • • • • • • • • • • • • • Thin TVs can easily bend. To avoid damage to the screen when laying this TV horizontally on the floor, it is highly recommended this work be done by three people (including one to support the middle of the TV). A thin TV MUST NOT be carried in a horizontal position when being moved. Install the Unit in a horizontal and stable position.
.English 3 Getting Started Supplied Accessories User Manual Quick Start Guide Caution Sheet CAUTION: READ THIS FIRST Features • DTV / Analog TV / CATV You can use your Remote Control to Select channels which are Broadcast in Digital format and conventional Analog format. Also, Cable and Satellite subscribers can access their TV channels. • Information display You can display on the TV screen the Title, contents (DTV only) and other information on the current Program.
.English Unpacking 4 Remove the outer slipbox with care. 5 Prepare a table and cover the top of it with a table cloth, blanket or such to avoid damage to the TV set. Support both sides of the TV set and, move it onto the table. 6 Carefully lay the TV set, with the screen side down, on the table. It is recommended that two or more people remove the TV set from the box. Thin TVs can easily bend.
.English Installing the Stands 1 Remove the tape on the bottom of the TV set and the plastic bag. 2 Fasten the matching stand to the TV with 2 screws (included). While fastening the screws, hold the stand to prevent it from falling. Also, make sure to attach the stand parallel to the bottom of the TV set, as shown in the enlarged illustration. Line of this stand 2 screws required 3 Lifting the TV Set Carefully lift the TV set as shown in the illustration and place it onto a stable, level surface.
.English Remote Control a (POWER) Turns the TV On from Standby or Off to Standby. SOURCE Selects Connected devices. EasyLink buttons / r b c . . : Searches Backward or Forward through the disc. : Starts, pauses or resumes playback. : Stops the Disc playback. 3 / 2 : Skips Backward or Forward Chapters, Titles or Tracks on a Disc. Note(s) q d e f p g h i o j n k m l • Pause may not work properly on some devices even if they are EasyLink (HDMI CEC) compliant.
.English Control Panel Terminals d e f g n h a bc Power On / Standby Indicator (On : lights in white, Standby : no light) Remote Control Sensor Receives IR signal from Remote control. Ambient Light Sensor Alters the brightness of the TV screen automatically by detecting your room lighting level. Do not block this Light Sensor window which allows proper operation. (POWER) Turns the TV On and Off. SOURCE Selects Connected Devices. MENU Opens the Main On-screen Menu.
.English Connecting Antenna or Cable / Satellite / IPTV Set-top Box Connecting a Cable / Satellite / IPTV Set-top Box, Bluray Disc / DVD Recorder via Composite Connectors and Analog Audio Be sure your Antenna or another Device is connected properly before plugging in the AC Power Cord. Do Not place your Recorder too close to the Screen because some Recorders can be susceptible to harmful interference from the TV.
.English No supplied cables are used with these connections: • Please purchase the Necessary Cables at your local store. Connecting your Devices Before you connect the AC Power Cord: Be sure other Devices are connected properly before plugging in the AC Power Cord. Selecting your Connection quality HDMI Digital Connection HDMI Connection offers the Highest Picture quality.
.English HDMI-ARC Connection Composite Analog Video Connection HDMI-ARC allows you to use EasyLink to output TV Audio directly to a connected Audio device, without the need for an additional Digital Audio cable. Composite Analog Video Connection offers Standard Picture quality for Video Devices connected to the Unit. HDMI 1 IN only If you connect to the Unit’s Component/Composite Video (Y/VIDEO) Input jack (green), connect Audio Cables to the Audio (L/R) Input jacks.
.English Connecting the TV to the Internet using a Wireless LAN PC Connection HDMI Connection Internet This Unit can be connected to your PC that has an HDMI terminal. Use an HDMI cable for this Digital Connection. Network provisioning equipment IN LAN OUT Ethernet cable HDMI cable PC WLAN Broadband router HDMI-DVI Connection Note(s) • Use a Wireless LAN Access Point (AP) (e.g. Broadband Wireless Router) which supports IEEE 802.1 1 b/g/n.
.English The following PC-Input Video signals can be displayed: Format Resolution VGA 640 x 480 SVGA 800 x 600 XGA 1,024 x 768 WXGA FHD UHD *1 Refresh rate 60Hz 1,280 x 768 1,360 x 768 1,920 x 1,080 3,840 x 2,160 24/30/60Hz *2 4,096 x 2,160 Other formats or non-standard signals will not be displayed correctly. *1 UHD format is available only when using the HDMI Connection and HDMI-DVI Connection. *2 Refresh rate for VGA Connection is only 60Hz.
.English These Operations are accessible by Remote Control. Some may also be accessible by the Main Unit's Control Panel. 5 After the standby mode setting is completed, Google Cast Setup screen will appear. TV Initial Setup This section will guide you through the Unit’s Initial setting which includes selecting a Language for your On-screen Menu, country, location and Autoprogram, which Automatically scans and memorizes viewable channels. You can also set the network connection in this setting.
.English 9 After an TV Initial Setup is completed... Use to Select Antenna for TV channels or Cable for CATV channels, then press OK. • If you want to scan the channels Automatically again. Search for channels p. 37 • If you want to change to another Language. Language p. 34 • If you want to change the Location setting. Location Installation Make sure that you have attached your antenna or cable signal into the jack on the back of your TV labeled "ANTENNA IN". • Antenna Cable p.
.English Google Cast Setup 4 Network Configuration • The “SET NAME” button appears on your mobile device, complete Needed for Google Cast Setup settings on this screen and then touch “SET NAME” to proceed. Pressing it moves to the Wireless Network setting screen. Select your wireless network name (SSID) and enter the password to proceed. • iOS or Android smartphone / tablet with Bluetooth and Location services on. • Have your Wireless Router’s SSID and Password handy.
.English 4 Use your TV Switching Channels Switching on your TV and putting it in Standby mode TV Remote Control TV Remote Control To Turn the TV On from Standby or Off to Standby • Press on the Side panel or the Remote Control. Note(s) To Select Channels by using CH + / – • Energy Consumption contributes to air and water pollution. When the AC Power Cord is plugged in, your TV consumes energy with a very low Standby Power Consumption. • Press CH + / – on the side panel or the Remote Control.
.English Watching Channels from an External Device Switching Each Input Mode can easily switch with the Remote Control between TV and external devices when they are connected to the unit. 1 Turn On the Set-top Box or the Connected Device. Create a list of favorite channels You can create lists of your preferred TV channels so that you can find those channels easily. 1 2 Press OK while viewing a TV program.
.English For 4:3 Video signal Changing Picture Format Display Modes can be Selected when your TV receives a 16:9 or 4:3 Video Signal. Three types of Display Modes can be Selected for a PC Input Signal. Press FORMAT Repeatedly to Switch the TV Aspect Ratio. For 16:9 Video signal (4096 x 2160p) Unscaled Super zoom 4:3 Wide screen Movie expand 16:9 Movie expand 14:9 Automatic Other than DTV and HDMI connected devices, enlarges the picture to Best fit the screen.
.English TV Screen information Using Options menu You can display the currently selected channel or other information such as the aspect ratio on the TV screen. You can access to some TV settings directly by using In the Digital mode, the detailed broadcasting information for the current off-the-air channel such as program title and program guides are displayed. 1 1 Press 2 Use OPTIONS to display options menu, then press OK. Press INFO.
.English Picture and sound Following settings can be configured. USB Auto picture To set predefined picture mode. Picture p. 29 Your TV is fitted with a USB connection that enables you to view Photos, listen to Music or watch Video files stored on a USB Memory Stick. Auto sound To set predefined sound mode. Sound p. 31 Headphone volume To adjust headphone volume. Sound p. 31 1 2 TV speakers To Select the audio output from the unit’s speakers or not. Sound p.
.English Note(s) • This unit accepts USB Memory Stick only. Other storage devices such as external HDD by USB Bus Power will not work. • Do not use an Extension Cord and/or USB Hub to connect devices to this Unit. Always Directly insert the USB Flash Memory Stick to this Unit directly. • We cannot be held responsible if your USB Memory Stick is Not Supported, nor will we accept any liability for damage or loss of stored data. Viewing photos 1 2 3 Use to Select Photo, then press OK.
.English Playing music Playing movies 1 2 3 1 2 3 Use to Select Music, then press OK. Use to Select the desired item, then press OK. Press OK or . to play the selected files. • Press OK or . to pause, then press OK or . again to resume. to fast-forward search. • Press Press to fast-backward search. • • Press . to stop playback. • Press OPTIONS to display the optional menu, then use to Use to Select Movie, then press OK. Use to Select the desired item, then press OK.
.English 5 Making more use with your TV This section describes the overview of the Main menus displayed when you press MENU. The Main menus consists of the function setting items below. 1 Picture and sound setup p. 29 Guides you to get the best picture and sound settings. Press MENU to display the Main menus. TV settings p. 29 Accesses menus that allow you to change picture, sound and TV usage settings. 2 Use to Select the desired Menu and an item, then press OK.
.English When you adjust the following settings, Personal picture will be set automatically. Picture and sound setup Before you begin: Cursor You must set Home in Location. p. 35 Otherwise, personalized Picture and Sound settings will not be memorized after the Unit goes into Standby Mode. Backlight to Reduce Power Consumption and Brightness 1 Contrast to Decrease Contrast 2 Press MENU and use then press OK.
.English You may adjust picture quality and enhancement settings using Advanced settings sub menus. These settings allow for advanced and precise color and picture quality adjustment. Some of them can degrade the picture quality if not configured properly. We recommend leaving these as set if you are unsure of what they affect.
.English This selects Sound modes for more Spatial or Surround sound reproduction. Sound Before you begin: You must set Home in Location. p. 35 Otherwise, personalized Picture and Sound settings will not be memorized after the Unit goes into Standby Mode. 1 2 Press MENU and use Use to Select Sound, then press OK. Picture Sound Cast TV settings Features Installation 3 to Select TV settings, then press OK.
.English Cast TV settings Features Displays Cast TV Settings. If you set Wake on Cast (LAN) to On, you can turn your TV on when you use your smartphone, tablet or PC via your home network. 1 2 1 2 Press MENU and use Use to Select Features, then press OK. Picture Sound Cast TV settings Features Installation Wake on Cast (LAN) 3 3 4 Use to Select TV settings, then press OK. to Select TV settings, then press OK. to Select Cast TV settings, then press OK.
.English You can choose the Size, Font, Color, Background and other characteristics of the Caption Text. Reset to default Digital caption options You can reset the status of Digital caption options. You can change Closed Captioning font style, size, color and transparency. (Font style, Font size, Font color and Font opacity) You can change background color and transparency of the displayed caption.
.English to prioritize VI-Visually Impaired Streaming or HIHearing Impaired Streaming: The setting for Handicapped users (Main audio, Visually Impaired or Hearing Impaired). Accessibility Audio language to set your Preferred language in the Audio Streaming (English, Spanish or French). Primary audio selection criteria to set TV Priority based on either of the above Settings: (Accessibility or Audio language). Installation 1 2 Press MENU and use Use to Select Installation, then press OK.
.English HDMI mode Preferences You can set the unit to reduce the power consumption or adjust the backlight brightness in Location setting. EasyLink allows you to operate your connected EasyLink device. Setting your location to home Choosing Home gives you full flexibility to change predefined settings for picture and sound. 1 2 Use to Select Preferences, then press OK. Use to Select Location, then press OK.
.English Set the Master EasyLink to On or Off. The following additional settings will be grayed out when you set them to Off. Use Philips EasyLink Your TV supports Philips EasyLink, which enables one-touch play and one-touch Standby between EasyLink-compliant devices. Compliant devices must be connected via an HDMI connector. Master EasyLink Off Disables All EasyLink. On Selects if you have connected an External Device that is compatible with the EasyLink function.
.English Search for channels Channel installation Be sure the RF cable is correctly connected to this Unit and you are registered with your Cable TV provider when you Install Cable channels. Be sure the RF cable is correctly connected to this Unit and you are registered with your Cable TV provider when you Install Cable channels. 1 Press MENU and use press OK. 2 Use to Select Search for channels, then Installation mode 1 2 3 to Select Start, then press OK.
.English TV ratings lock Child lock You can prevent your children from watching certain Programs or certain Channels by locking the TV Controls and by using Ratings. 1 Use to Select Child lock, then press OK.
.English US TV ratings Sub rating TV-Y7 Fantasy Violence TV-PG Violence Sex Language Dialog TV-14 Violence Sex Language TV-MA Change PIN Although the default PIN code (0000) is supplied with the Unit, you can set your own PIN code. 1 2 3 Use to Select Change PIN, then press OK. Press the NUMBER buttons to enter the Current 4-digit PIN code. Press the NUMBER buttons to enter the New 4-digit PIN code. • Enter PIN code again to confirm.
.English Update software USB upgrade Philips continuously tries to improve its products and we strongly recommend that you upgrade the TV software when upgrades are available. You can upgrade the software by using USB Memory Stick. 1 Connect your USB Memory Stick with the upgrade file to the USB terminal on the side of your TV. Preparing for the Software upgrade 2 Press MENU and use to Select Update software, then press OK.
.English Network updates Software settings You can update the software by connecting the unit to the Internet. 1 Press MENU and use to Select Update software, then press OK. 2 3 Use Use • 4 to Select Network, then press OK. to Select Yes, then press OK. This unit will then start checking for the latest FirmWare (software) version. Confirmation message will appear. Use to Select Yes, then press OK. • The unit will start downloading the latest FirmWare (software) version.
.English 6 Useful tips FAQ Question Answer • Check the Antenna or Cable Connection to the Main Unit. • Check the Batteries on the Remote Control. • Check if there is an obstacle between the infrared sensor window and the Remote Control. • Test the IR Signal Output use IR Signal Check. p. 45 My Remote Control does not work. What should I do? If okay, then possible Infrared Sensor trouble. • Aim the Remote Control directly at the infrared sensor window on the front of the Unit.
.English Troubleshooting Tips If the Unit does not perform properly when operated as instructed in this User Manual, Please check the following Troubleshooting Tips and All Connections Once before calling for Service. Power No Power • Make sure the AC Power Cord is plugged in. • Make sure that the AC outlet supplies the proper voltage, plug another electrical appliance into the AC outlet to ensure that the AC outlet operates normally.
.English Closed Captions Closed Captions are displayed as a white box. No Closed Captions are displayed in the Closed Captions-Supported Program. • Interference from buildings or weather conditions may cause Closed Captions to be incomplete if watching Analog TV signals. • Broadcasting Station may shorten the program to insert advertisements. The Closed Caption Decoder cannot read the information of the shortened program. Black Box is displayed on the TV Screen. • The text mode is selected for caption.
.English 7 Information Glossary Maintenance Analog TV (NTSC) Cabinet Cleaning Acronym that stands for National Television Systems Committee and the name of Analog broadcasting standards. Off the air Analog TV signals are no longer being sent by major broadcasting stations in the USA. ARC (Audio Return Channel) (HDMI 1 only) HDMI-ARC allows you to use Philips EasyLink to output TV audio directly to a connected Audio device, without the need for an additional Digital Audio cable.
.English 8 Specifications Model # Picture Type Diagonal screen size / Aspect ratio Viewing Angles Built-in Digital / Analog Tuner Sound Mono / Stereo Power Output (RMS watts) Equalizer Ease of Use SD (4:3 Source) HD Picture Format (16:9 Source) UHD Photo Slide Show Music Playback Video Playback Channel Channel Coverage CATV (Analog NTSC) Tuning System Channel Access Connectivity Component Video Input (Y/Pb/Pr) Composite Video Input (Shared Y Green Terminal with Component Video) HDMI Input Analog Audio
.English ĥŦWarranty Limited warranty one (1) year Warranty coverage : This warranty obligation is limited to the terms as set forth below. Who is covered: This product warranty is issued to the original purchaser or the person receiving the product as a gift against defects in materials and workmanship as based on the date of original purchase (“Warranty Period”) from an Authorized Dealer.
.English License Funai Corporation, Inc. hereby offers to deliver, upon request, a copy of the complete corresponding source code for the copyrighted open source code packages, on an “AS IS” basis, used in this product for which such offer is requested by the respective licenses. This offer is valid up to three years after the product purchase to anyone in receipt of this information. To obtain source code, please contact Funai Corporation, Inc.
Funai Corporation, Inc. 12489 Lakeland Road, Santa Fe Springs, CA 90670, USA This product has been manufactured by and is sold under the responsibility of Funai Corporation, Inc., and Funai Corporation, Inc. is the warrantor in relation to this product. The Philips trademark and the Philips Shield Emblem are registered trademarks of Koninklijke Philips N.V. used under license.