Register your product and get suppor t at 7000 series Smar t LED TV www.philips.
Contents 1 1.1 1.2 1.3 1.4 1.5 1.6 1.7 1.8 1.9 1.10 Tour 3 Smart TV 3 App gallery 3 Rental videos 3 Online TV 3 Social networks 3 Skype 4 Smartphones and tablets 4 Pause TV and recordings 4 Gaming 4 EasyLink 5 7.2 7.3 7.4 7.5 7.6 7.7 7.8 Start Skype 67 Contacts 68 Calling on Skype 69 Skype Credit 70 Skype settings 70 Sign out 71 Terms of Use 71 8 8.1 8.2 Games 72 Play a game 72 Two-player games 72 2 2.1 2.2 2.3 2.4 2.5 2.6 2.7 2.8 2.
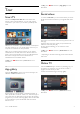
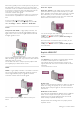
1 Tour 1.1 Smart TV Connect this Philips Smart LED TV to the Internet and discover a new world of television. You can make a wired connection to your router or you can link up wirelessly with Wi-Fi. With the TV connected to your home network, a smartphone can show a photo on TV, you can play videos stored on your computer or control the TV with your tablet.
1.5 Social networks No need to get up to check your friend's messages on your computer. Open Smart TV, select your social network page and send a message back from your couch. Operate your TV from your smartphone or tablet, switch channels or change the volume. With the MyRemote app, you can use your phone or tablet to send photos, music or videos from your computer to your TV.
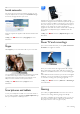
The TV uses 3D technology to show both screens. To play a two-player game with two different full screen pictures, you need a pair of 3D glasses for each player. In Help, press * List and look up Game console or Twoplayer games for more information. 1.10 EasyLink With EasyLink you can operate a connected device, like a Bluray Disc player, with the remote control of the TV. EasyLink uses HDMI CEC to communicate with the connected devices. In Help, press * List and look up EasyLink for more information.
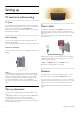
2 Setting up 2.1 TV stand and wall mounting TV Stand You can find the mounting instructions of the TV stand in the Quick Start Guide that came with the TV. In case you lost this guide, you can download it from www.philips.com. Use the product type number of the TV to look for the Quick Start Guide to download. Wall mounting 2.3 Power cable Insert the power cable into the POWER socket of the TV. Make sure the power cable is securely inserted into the TV.
With media server software on your computer, you can open your photos, music and videos stored on your computer on your TV screen. Use a recent version of media server software like Windows Media Player 11, Twonky™ or similar*. Install the software on your computer and set it up to share your media files with the TV. Read the manual of the media server software for more information. To open your files on the TV, the media server software must be running on your computer. 2.
To make a secured WPS connection with a PIN code, select WPS pin and press OK. Write down the 8-digit PIN code shown and enter it in the router software on your PC. Return to the TV and press Connect. Consult the router manual on where to enter the PIN code in the router software. 3 - Press h and select S Setup and press OK. 4 - Select Connect to network and press OK. 5 - Select Wired and press OK. The TV constantly searches for the network connection.
To receive multimedia files from smartphones or tablets, set the DMR to On. Wi-Fi Miracast For more information on Wi-Fi Miracast, press * List and look up Wi-Fi Miracast™. Wi-Fi Miracast connections For more information on Wi-Fi Miracast, press * List and look up Wi-Fi Miracast™. Wi-Fi smart screen For more information on Wi-Fi smart screen, press * List and look up MyRemote App, WiFi smart screen. TV network name If you have more than one TV in your network, you can rename the TVs here.
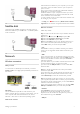
If the device, typically a Home Theatre System (HTS), also has the HDMI ARC connection, connect it to any of the HDMI connections on this TV. With the HDMI ARC connection, you do not need to connect the extra audio cable that sends the sound of the TV picture to the HTS. The HDMI ARC connection combines both signals. You can use any HDMI connection on this TV to connect the HTS but ARC is only available for 1 device/connection at a time.
Operate devices Common Interface CAM To operate a device connected to HDMI and set up with EasyLink, select the device -or its activity- in the list of TV connections. Press c SOURCE, select a device connected to an HDMI connection and press OK. CI+ This TV is ready for the CI+ Conditional Access. With CI+ you can watch premium HD programmes, like movies and sports, offered by digital TV broadcasters in your region.
Set-top box STB Use 2 antenna cables to connect the antenna to the Set-top box (a digital receiver) and the TV. Next to the antenna connections, add an HDMI cable to connect the Set-top box to the TV. Alternatively, you can use a SCART cable if the Set-top box has no HDMI connection. Switch off timer Deactivate the Switch off timer, if you only use the remote control of the Satellite receiver.
2 - Select TV settings > Sound > Advanced > Audio Out offset. 3 - Use the slider bar to set the sound offset and press OK. 4 - Press b, repeatedly if necessary, to close the menu. Audio Out format Audio to video synchronisation (sync) If the sound does not match the video on screen, you can set a delay on most DVD Home Theatre Systems to match the sound and video. A mismatch can be visible in scenes with people talking - when they finish sentences before their lips stop moving or just the opposite.
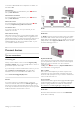
Blu-ray Disc Player Use a High speed HDMI cable to connect the Blu-ray Disc player to the TV. If the game console is connected with HDMI and has EasyLink HDMI CEC, you can operate the game console with the TV remote control. Audio Video LR / Scart If the Blu-ray Disc player has EasyLink HDMI CEC, you can operate the player with the TV remote control. In Help, press * List and look up EasyLink HDMI CEC for more information. You can connect a game console to the TV.
TV guide Before you decide to buy a USB Hard Drive to record, you can check if you can record digital TV channels in your country. Press Guide on the remote control. If there is a Record button on the TV guide page, you can record programmes from digital TV channels. In Help, press * List and look up USB Hard Drive, Installation to install a USB Hard Drive on this TV. Installation Before you can pause or record a broadcast, you must connect and format a USB Hard Drive.
Switch the TV on and connect the USB mouse to one of the USB connections on the TV. You can also connect the USB mouse to a connected USB keyboard. Mouse clicks - Left click = OK - Right click = Back b You can use the scroll wheel to scroll pages up and down. In Help, press * List and look up USB keyboard, to connect a USB keyboard. Photo camera To view photos stored on your digital photo camera, you can connect the camera directly to the TV. Use one of the USB connections on the TV to connect.
1 - Press h, select S Setup and press OK. 2 - Select TV settings > Picture > Game or computer and press OK. 3 - Select Game (for gaming) or select Off (for watching a movie) and press OK. 4 - Press b, repeatedly if necessary, to close the menu. Remember to set the Game or computer setting back to Computer when you stop playing the game. Computer You can connect your computer to the TV and use the TV as a PC monitor. With HDMI Use an HDMI cable to connect the computer to the TV.
To set a Quick picture setting . . . 1 - Press h, select an activity or a connected device (or its connection) and press OK. 2 - Press h again, select S Setup and press OK. 3 - Select Quick picture settings and press OK. Go through the steps and finish. The activity or connection has your personal preferences. In Help, press * List and look up Audio language or Subtitles for more information. In Help, press * List and look up Picture style, for more information.
Safety Read me Read and understand all safety instructions before you use the TV. If damage is caused by failure to follow instructions, the warranty does not apply. Risk of electric shock or fire! • Never expose the TV to rain or water. Never place liquid containers, such as vases, near the TV. If liquids are spilt on or into the TV, disconnect the TV from the power outlet immediately. Contact Consumer Care to have the TV checked before use.
• To avoid deformations and colour fading, wipe off water drops as quickly as possible. • Avoid stationary images as much as possible. Stationary images are images that remain onscreen for extended periods of time. Stationary images include onscreen menus, black bars, time displays, etc. If you must use stationary images, reduce screen contrast and brightness to avoid screen damage.
3 TV 3.1 Switch on Switch on and off Make sure you plugged in the mains power on the back of the TV before you switch on the TV. If the red indicator light is off, press the small key A on the right side of the back of the TV to put the TV in standby - the red indicator will light up. With the TV in standby, press A on the remote control to switch the TV on. Alternatively, you can use the CH+, CHand h key to switch the TV on. Quick start With Quick start, the TV can start up faster than usual.
Top To navigate up, down, left or right. 8 - o OPTIONS To open or close the Options menu. Bottom 1 - A Standby To switch the TV on or back to standby. 2 - Playback and record keys • Play x, to playback • Pause p, to pause playback • Stop q, to stop playback • Rewind !, to rewind • Fast Forward ‹,to wind fast forward • Record r, to record now 3 - GUIDE To open or close the TV guide. 4 - c SOURCE To open or close the list of connections. 5 - 3D To open or close the 3D menu.
5 - Enter - To confirm the text you entered. 6 - Backspace - Deletes the character in front of the text cursor. 7 - Ω Special character - To open the onscreen keyboard to select accented letters or symbols. 8 - Azerty letter - Letters available if the keyboard layout is set to Azerty in the Setup menu. * Your remote control has a Qwerty / Azerty or a Qwerty / Cyrillic keyboard, depending on your region.
Pointer About pointer Instead of navigating the screen with the arrow keys, you can use the pointer. You can move the pointer - a blue arrow over the TV screen by moving the remote control. Just like you move the cursor on a computer screen with a mouse. You can use the pointer to navigate Smart TV Apps* and Internet pages on TV. Some Smart TV Apps might not support the use of the pointer. When the pointer is not available, you can use the arrow keys to navigate the screen.
Pairing again You can pair another remote control with this TV. The method to pair a remote control is different for a remote control already paired with another TV compared with a remote control that is not paired yet. • The remote control is paired with another TV To pair, hold the Remote control close to the Philips logo (about 10cm) and press the * Red and * Blue key at the same time. A message will appear if pairing is successful.
Radio channels If digital broadcasting is available, digital radio stations are installed during installation. Switch to a radio channel just like you switch to a TV channel. A Cable (DVB-C) channel installation usually places radio stations from channel number 1001 onwards. Options on channels While watching a channel, depending on the type of channel (analogue or digital) you are watching or depending on the TV settings you made, some options are available.
In Help, press * List and look up Favourite channels for more information. Favourite channels Channel logos In some countries, the TV can show the channel logos. If you do not want these logos to appear, you can switch them off. To switch off Channel logos . . . 1 - Press h, select S Setup and press OK. 2 - Select TV settings > General settings > Channel logos and press OK. 3 - Select Off and press OK. 4 - Press b, repeatedly if necessary, to close the menu.
Child lock To prevent children from watching a channel or a programme, you can lock channels or lock age rated programmes. Lock a channel You can lock a channel to prevent children from watching it. To watch a locked channel you need to enter the Child lock code. To lock a channel, while watching a TV channel, press L LIST to open the Channel lists. In any list, select the channel you want to lock, press o OPTIONS and select Lock channel. In a channel list, a locked channel is marked with a lock ¬.
2 - Select TV settings > General settings > Reinstall TV and press OK. The installation may take a few minutes. Follow the instructions on screen. Factory settings Factory settings sets the TV back to the original TV settings for picture, sound and Ambilight. To switch back to the original Factory settings . . . 1 - Press h, select S Setup and press OK. 2 - Select TV settings > General settings > Factory settings and press OK. 3 - Press OK to confirm. 4 - Press b, repeatedly if necessary, to close the menu.
In some countries, different TV channels (broadcasters) might have the same channel number. While installing, the TV shows the list with channel number conflicts. You need to select which TV channel you want to install on a channel number with multiple TV channels. DVB-T + DVB-C If you can use a DVB-T antenna input but also a DVB-C input, you can set up your TV for both DVB-T and DVB-C. Install one system followed by the other with the necessary settings.
The digital frequency is shown for this channel. If the reception is poor, you can reposition your antenna. To check the signal quality of this frequency again, select Search and press OK. To enter a specific digital frequency yourself, use the remote control digit keys. Alternatively, select the frequency, position the arrows on a number with w and x and change the number with u and v. To check the frequency, select Search and press OK.
The TV makes a list of the last 10 Text pages you opened. You can easily reopen them again in the Favourite Text pages column. 1 - In Text, select the star in the top left corner of the screen to show the column of favourite pages. 2 - Press v or u to select a page number and press OK to open the page. You can clear the list with the option Clear favourite pages. Search Text You can select a word and scan Text for all occurrences of this word. Open a Text page and press OK.
2 - Select TV settings and select General settings > HbbTV and press OK. 3 - Select On and press OK. 4 - Press b, repeatedly if necessary, to close the menu. If you want to avoid access to HbbTV pages on a specific channel, you can block the HbbTV pages for this channel only. 1 - Tune to the channel of which you want to block the HbbTV pages. 2 - Press o OPTIONS and select HbbTV on this channel and press OK. 3 - Select Off and press OK.
To search for programmes by genre, press o OPTIONS and select Search by genre. Select a genre and press OK. A list with the found programmes appears. Recordings From the TV guide, you can instantly record or schedule a recording of a TV programme. To store the recordings, connect a USB Hard Drive to the TV. From this Source menu, you can switch to a device. Source menu To open the Source menu, press c SOURCE.
The device should be connected with an HDMI cable and both TV and device must have HDMI CEC switched on. Home Theatre System You can switch on your Home Theatre System to listen to an audio disc or a radio channel and leave the TV in standby. To only switch on the HTS, with the TV in standby, press c SOURCE on the TV remote control. EasyLink With EasyLink you can operate a connected device with the TV remote control. EasyLink uses HDMI CEC to communicate with the connected devices.
Clock To know what time it is, press GUIDE to find the time in the TV guide. Original language If the digital channel holds the original language of a programme or movie, you can set the TV to automatically switch to that audio language. Set Original language to On to watch a dubbed movie in its original language (if the original language is available). To set Original language . . . 1 - Press h, select Setup and press OK. 2 - Select Channel settings and select Languages > Original language and press OK.
Adjust a Picture style To adjust a Picture style . . . 1 - Select the style and press OK. 2 - Press h, select SSetup and press OK. 3 - Select TV settings, navigate to the individual setting and adjust it. 4 - Press b to close the menu to store your setting. To return to the original Picture style values . . . 1 - Press h, select SSetup and press OK. 2 - Select TV settings > Picture > Picture style and select the style you want to reset. 3 - Press *Reset. The style is reset.
Clear LCD With Clear LCD, you switch on a superior motion sharpness, better black level, high contrast with a flicker-free, quiet image and a larger viewing angle. To switch on or off . . . 1 - Press h, select S Setup and press OK. 2 - Select TV settings > Picture > Pixel Precise HD > Clear LCD. 3 - Press x (right) and select On or Off. 4 - Press b, repeatedly if necessary, to close the menu. Advanced sharpness With Advanced sharpness, you switch on a superior sharpness in line edges and contours.
3 - Press x (right). 4 - Select a setting with the arrow keys. (WP is white point and BL is black level.) 5 - Press OK to confirm a setting. You can also select one of the presets in this menu. 6 - Press b, repeatedly if necessary, to close the menu. Video contrast With Video contrast, you can decrease the range of the video contrast. If you are watching 3D pictures, this setting is switched to 3D video contrast. Video contrast and 3D video contrast are settings intended for expert users.
Adjust a Sound style To adjust a Sound style . . . 1 - Select the style and press OK. 2 - Press h, select SSetup and press OK. 3 - Select TV settings, navigate to the individual setting and adjust it. 4 - Press b to close the menu to store your setting. To return to the original Sound style values . . . 1 - Press h, select SSetup and press OK. 2 - Select TV settings > Sound > Sound style and select the style you want to reset. 3 - Press *Reset. The style is reset.
2 - Select TV settings > Sound > Advanced > Auto volume leveling. 3 - Press x (right) and select On or Off. 4 - Press b, repeatedly if necessary, to close the menu. TV speakers You can send the TV sound to a connected audio device - a Home Theatre System or audio amplifier. With TV speakers, you select where you want to hear the TV sound and how you want to control it. If you select Off, you permanently switch off the TV speakers. If you select On, the TV speakers are always on.
To create a colour yourself . . . 1 - Press h, select S Setup and press OK. 2 - Select TV settings > Ambilight > Static and press OK. 3 - Select Palette to adjust the colour. Select Saturation to adjust the intensity of the colour. Use the arrows to select and adjust. Press OK to confirm. 4 - If you prefer to select one of the preset colours, select Warm white or Cool white and press OK. 5 - Select Close and press OK. 6 - Press b, repeatedly if necessary, to close the menu.
To change the Lounge light colour scheme, press AMBILIGHT again. To switch off Lounge light, press and hold AMBILIGHT for a few seconds. You can also set up the colour scheme in the TV settings menu. With the TV switched on, press h, select SSetup and press OK. Select TV settings > Ambilight > Advanced > Lounge light mood. Select the colour scheme with which Lounge light will start up. 3.
Speech The audio commentary can also hold subtitles for the words which are spoken. To switch on these subtitles (if available) . . . 1 - Press h, select S Setup and press OK. 2 - Select Channel settings > Languages > Audio description > Speech and press OK. 3 - Select Descriptive (audio) or Subtitles and press OK. 4 - Press b, repeatedly if necessary, to close the menu. Key beep Key beep gives an audio feedback each time you press a key on the remote control. The volume of the beep is fixed.
4 Satellite channels 1 - In the channel list, select t or Ò in the menu bar to select the TV or Satellite channel list. 2 - Select a list - All, Favourites, Radio or New. 3 - Select a channel in any of the lists and press OK. The TV will tune to the selected channel. 4.1 Watching satellite channels To watch satellite channels, press h, select Satellite and press OK. The TV tunes to the satellite channel you last watched. Change channel To change channels, press CH+ or CH-.
There are two favourite lists, one for TV channels and one for satellite channels. 4.4 Lock satellite channels Set up your favourites list To compose a list of your favourite channels . . . 1 - While watching a channel, press L LIST to open the channel list. 2 - In the menu bar, select t for TV or Ò for satellite channels. 3 - Select the Favourites list. 4 - The TV will ask you to start adding channels immediately. Press OK.
Forgotten your Child lock code? If you forgot your code, you can override the current code and enter a new code. 1 - Press h, select S Setup and press OK. 2 - Select Satellite settings > Child lock > Change code and press OK. 3 - Enter the overriding code 8888. 4 - Now enter a new Child lock code and enter it again to confirm. 4.5 4c - If the exact number of satellites is set or you completed the Unicable settings, select Search and press OK.
Unicable setup The Unicable system You can use a Unicable system to connect the antenna dish to the TV. A Unicable system uses one cable to connect the satellite dish to all satellite receivers in its system. Unicable is typically used in apartment buildings. If you use a Unicable system, the TV will ask you to assign a user band number and corresponding frequency during the installation. You can install 1 or 2 satellites with Unicable on this TV.
2 - Press * Rename. You can enter text with the remote control keyboard or open the on-screen keyboard. With the remote control keyboard To delete a character, position the cursor behind the character and press # del. To enter a character, press the character on the keyboard. When you are ready, press Enter to select Done. Press Enter again to finish renaming. For more information on using the keyboard, press * LIST and look up Remote control, keyboard.
If Universal access does not appear in the Options menu, switch on Universal access in Setup. In Help, press * List and look up Universal access for more information. Audio description Switch on Digital TV channels can broadcast special audio commentary describing what is happening on screen. To be able to set the Audio description audio and effects, you have to switch on Audio description first. Also, before you can switch on Audio description, you have to switch on Universal access.
• If you use a Unicable system, make sure you assigned a unique user band number to the satellite receiver in the Unicable settings. It might be that another satellite receiver is using the same user band number. Some satellite channels seem to have disappeared from the channel list. If some channels seem to be gone or displaced, the broadcaster might have changed the transponder location of these channels. To restore the channel positions in the channel list, you can try an update of the channel package.
5 3D 5.1 To switch to 3D automatically, select Automatic. To show a notification first, select Notify. To never switch to 3D, select No 3D. You can still change this preference in the Setup menu > TV settings > 3D > Switch to 3D. What you need This is an Easy 3D TV.
5.5 Health warning • Watching 3D is not recommended for children under the age of six. • If you or your family have a history of epilepsy or photosensitive seizures, consult a medical professional before exposing yourself to flashing light sources, rapid image sequences or 3D viewing. • If you experience any discomfort, stop watching 3D and do not immediately engage in any potentially hazardous activity (for example driving a car) until your symptoms have disappeared.
6 6.2 6.1 What you need Smart TV Home menu From the Home menu, you can start any activity you can do with the TV. Open the Home menu to start watching TV or start watching a disc on your Home Theatre System. Also in the Home menu, you can open Smart TV to surf the Internet, start Skype or open Help if you need information on using the TV. Open the Home menu To open the Home menu, press h. Select an activity using the arrow keys and press OK to start the activity.
Open Smart TV To open the Smart TV start page, press Smart TV. Alternatively, you can press h, select Smart TV and press OK. Enter a keyword in the text field, select l and press OK to start searching. You can enter names, titles, genres and description keywords to search. Alternatively, you can leave the text field empty and search for the most popular searches/keywords for a range of categories. In the list of found keywords, select a keyword and press OK to search for items with that keyword.
To return to the Smart TV start page, press L LIST or b. Add an App to your list In the App gallery, select the App icon and press OK. Select Add and press OK. Alternatively, select Add and move to add it and immediately position the App where you want it in your list. Start an App To start an App, press h and select Smart TV. On the start page, select an App icon and press OK. In an App, press b to go back 1 step or page.
If you try to pause or record a programme with a USB Hard Drive connected, the TV will ask you to format the USB Hard Drive. This formatting will delete all current files on the USB Hard Drive. From a computer If the TV and the computer are in the same network, the TV can browse and play files stored on your computer. On your computer, you need to install media server software like Twonky™ to share your files with the TV. The TV shows your files and folders as they are organised on your computer.
To view info on a video (playhead position, duration, title, date, etc.), select the video and press i INFO. Press again to hide the info. This is an official DivX Certified® device that plays DivX video. Visit divx.com for more information and software tools to convert your files into DivX videos. Options Press o OPTIONS. - Subtitles If available, you can switch subtitles On, Off or On during mute. - Shuffle Plays your videos randomly. - Repeat Plays a video once or continuously.
2 - On the device, open an application such as Wi-Fi Miracast, Wi-Fi Direct™, Intel®Wireless Display* or similar and start scanning for other Miracast devices. 3 - In the list of found devices, select the TV and connect. 4 - On the TV, agree to the request to connect to the TV. You might be asked to enter a PIN code from the device on the TV - enter the numbers with the digit keys on the remote control. Alternatively, you might be asked by the TV to enter a PIN code on the device.
To switch on Switch on with Wi-Fi, press h, select S Setup and press OK. Select Network settings > Switch on with Wi-Fi and select On and press OK. If all conditions on both TVs are met, you can use Multi room. Using Multi room First time use When you start Multi room for the first time, switch on both TVs. Once this TV made a connection with the other TV, the other one will appear automatically in the Browse network menu even when it's in standby. 6.
• You can buffer the digital (DVB) subtitles of a channel. You cannot buffer subtitles that come from Text services. To check if digital (DVB) subtitles are available, tune to the TV channel and press o OPTIONS, select L Options in the menu bar and select Subtitle language to open the list of Subtitles. You can only buffer a subtitle language preceded with a DVB icon. 6.6 Recording Record a programme To change the date of the list, press o OPTIONS and select Select day.
In the list, select the recording and press x (Play) to start the playback. You can use the ‹ (Forward), ! (Rewind), p (Pause) or q (Stop) keys on the remote control. It's free You can download the MyRemote App for free. If you want to add the functions Wi-Fi smart screen, a small cost may apply. Expired recording Broadcasters can limit the number of days a recording can be viewed. A recording in the list can show the number of days before it expires.
5 - Press b, repeatedly if necessary, to close the menu. Home network Switch on with Wi-Fi - WoWLAN You can switch this TV on from your smartphone or tablet if the TV is in standby. The setting Switch on with Wi-Fi (WoWLAN) must be set to On. To switch this setting on . . . 1 - Press h and select S Setup and press OK. 2 - Select Network settings > Switch on with Wi-Fi (WoWLAN). 3 - Select On and press OK. 4 - Press b, repeatedly if necessary, to close the menu.
Select a media file Some devices that send files offer them by type of media. If so, you can select the type of media you are looking for - Music, Videos or Photos. 1 - Tap the type of media you are looking for. 2 - In the list, tap the song, video or photo to play it on the device you selected. Compatible media formats A wide range of media formats can be played on your TV. App menu From the MyRemote App menu, you can start the different MyRemote App functions. Simply tap a function to open it.
2 - Press the * (yellow) key to open the list of detected mobile devices. 3 - Select Link a mobile device and press OK to view the code to link up. 4 - On the mobile device, start the MyRemote App and tap the Setup button on the home menu. 5 - Tap the TV guide item. 6 - Enter the code to link up. The MyRemote recording setting Make sure this setting is switched on to schedule a recording. 1 - Press h and select S Setup and press OK. 2 - Select Network settings > MyRemote recording.
To switch TV channels, swipe the touchscreen of your smartphone or tablet. Swipe to the right to watch the previous channel or swipe to the left to watch the next channel. The sequence of channels follows the TV channel list. You can also use the Channel bar to look for and switch to TV channels. Pause TV and Recording If you pause the TV broadcast on TV or start recording a broadcast with the TV (on a connected USB Hard Drive), the Wi-Fi smart screen function will stop.
7 Skype 7.1 What is Skype? With Skype™ you can make video calls on your TV for free. You can call and see your friends from anywhere in the world. Talk to your friends while watching them on the big screen of your TV. In the Skype settings, you can test the camera or set the zoom level. Sign in - New account With the TV connected to the Internet and the TV camera mounted or built-in, you can start Skype on your TV. To open the Skype sign-in page, press h to open the Home menu, select Skype and press OK.
No emergency calls No emergency calls - Skype is not a replacement for your telephone and cannot be used for emergency calling. 7.3 - Invisible You will appear to be offline to all of your contacts, but you can still use Skype as usual. You can use Skype without being disturbed by incoming calls. Contacts - Offline Automatically shown when you are not signed in to Skype. You can also set your status to offline yourself.
Block a contact You can block any Skype user from finding you online. A blocked contact will be unable to contact you with Skype. A blocked contact will not be notified, you will always appear to be offline in the contact list of the blocked contact. On the ∂ Contacts page, select a contact and press * Block contact. You can always unblock a contact. To unblock, select the contact in the list and press * Unblock contact. In the list of contacts a blocked contact has this icon.
Skype during rental movies and Pause TV While you are watching a rental movie from a broadcaster or video store, or using Pause TV, accepting a Skype call will interrupt the movie or paused programme. To resume watching the rental movie, you need to go back to the video store or broadcast service. Some video stores and services do not allow you to restart the movie. The Pause TV programme storage is lost.
Navigate to the menu bar and select S Settings to open the Settings page. Select Online status and then select the online status you want your contacts to see when you are online and press OK. 7.7 Sign out Navigate to the menu bar and select S Settings to open the Settings page. Select Sign out to quit Skype on your TV. Ringtone volume You can adjust the Skype ringtone volume. 7.8 Navigate to the menu bar and select S Settings to open the Settings page.
8 Games To play a two-player game with this TV, you need a two-player kit with 2 passive 3D glasses - Philips PTA436 (sold separately). Also, the game console must be connected with HDMI. 8.1 Play a game Play a two-player game With a game console connected to the TV, you can play games on TV. To start a two-player game . . . 1 - Press c Source, select the game console and press OK. 2 - On the game console, start the game and select the multi or two-player mode.
9 To check the relative power consumption, press h > Setup > Watch demos > Active control and press OK. Select a setting to check the corresponding values. 9.1 European energy label TV Specifications Environmental Saving energy Energy saving bundles the TV settings that help the environment. While you are watching TV channels, press * to open Eco settings. Active settings are marked with a fi. Press * again to close.
Please act according to your local rules and do not dispose of your old products with your normal household waste. Correct disposal of your old product helps to prevent potential negative consequences for the environment and human health. Your product contains batteries covered by the European Directive 2006/66/EC, which cannot be disposed with normal household waste.
Playback formats • Containers : 3GP, AVCHD, AVI, DivX®, MPEG-PS, MPEGTS, MPEG-4, Matroska (MKV), Quicktime (MOV, M4V, M4A), Windows Media (ASF/WMV/WMA) • Video Codecs : DivX®, MPEG-1, MPEG-2, MPEG-4 Part 2, MPEG-4 Part 10 AVC (H264), VC-1, WMV9 • Audio Codecs : AAC, HE-AAC (v1/v2), AMR-NB, Dolby Digital, Dolby Digital Plus, DTS 2.0 + Digital Out™, MPEG1/2/2.5 Layer I/II/III (includes MP3), WMA (v2 to v9.
10 TV Software 10.1 Software version To view the current TV software version, press h, select S Setup and press OK. Select Software settings and press OK. Select Current software info and see Version: . . . . 10.2 Software update Software update from Internet If the TV is connected to the Internet, you may receive a message from TP Vision to update the TV software. You need a high-speed (broadband) Internet connection. If you receive this message, we recommend you carry out the update. Select Update.
11 Support 11.1 Register Register your TV and enjoy a range of benefits including full support (including downloads), privileged access to information about new products, exclusive offers and discounts, the chance to win prizes and even participate in special surveys about new releases. Go to www.philips.com/welcome 11.2 Using help and search On the support site you can find your country's telephone number to contact us as well as answers to frequently asked questions (FAQs).
12 Copyrights and licences 12.5 DLNA Certified® 12.1 HDMI HDMI® The terms HDMI and HDMI High-Definition Multimedia Interface, and the HDMI Logo are trademarks or registered trademarks of HDMI Licensing LLC in the United States and other countries. 12.2 Dolby Dolby® Manufactured under license from Dolby Laboratories. Dolby and the double-D symbol are trademarks of Dolby Laboratories. © 2013 Digital Living Network Alliance. All rights reserved. © 2013 DLNA. All rights reserved. 12.
12.8 Wi-Fi Alliance Wi-Fi®, the Wi-Fi CERTIFIED logo, the Wi-Fi logo are registered trademarks of the Wi-Fi Alliance. Wi-Fi CERTIFIED Miracast™, Miracast™ are trademarks of the Wi-Fi Alliance. 12.9 MHEG software The copyright in MHEG software ("the Software") comprised in this television ("this product") and included to enable you to use interactive television features is owned by S&T CLIENT SYSTEMS LIMITED ("the Owner"). You are permitted to use the Software only in conjunction with this product. 12.
Index 3 3D glasses, type 52 3D glasses, use 52 3D, 2D to 3D 52 3D, cleaning glasses 52 3D, health warning 53 3D, optimal viewing 52 A Active control 18 Ambilight, brightness 42 Ambilight, dynamic speed 42 Ambilight, mode 42 Ambilight, on or off 41 Ambilight, static colour 42 Ambilight, TV placement 6 Ambilight, TV switch off 42 Ambilight, wall colour 42 Amplifier 41 Antenna connection 6 Antenna connection, tips 9 App, feedback 55 App, gallery 55 App, lock 55 App, recommended 55 App, search 55 Audio commenta
K Key beep 44 Keyboard, connect 15 L Language, menus 36 Light sensor 73 Lounge light 42 M Manual installation 31 Media server software 8 Media servers, supported 75 MHEG 32 Miracast, block/unblock 59 Miracast, share a screen 58 Miracast, stop sharing 59 Miracast™ 58 Mixed volume 43 Mono/Stereo 40 Mouse, connect 16 Mouse, speed 16 MPEG artefact reduction 37 Multi room, how 60 Multi room, setup 60 Multi room, what 59 Music files, playback 57 MyRemote App, Control 65 MyRemote App, download 63 MyRemote App, Joi
Skype, event 70 Skype, history 70 Skype, mute 69 Skype, new account 67 Skype, notifications 70 Skype, online status 68 Skype, receive calls 69 Skype, ringtone 71 Skype, sign in 67 Skype, sign out 71 Skype, video call 69 Skype, voice call 69 Skype, voicemail 70 Sleep timer 36 Smart TV, PIN code 54 Smart TV, register 54 Smart TV, start page 54 Software, current version 76 Software, Internet update 76 Software, USB update 76 Sound style 39 Source menu 34 Speakers/Headphones 43 Speech 44 Standby 21 Standby dela
Contact information Argentina 0800 444 7749 Buenos Aires 0810 444 7782 België / Belgique 070 700 035 (0,15€/min.) Bosna i Hercegovina 033 941 251 (Lokalni poziv) Brazil 0800 701 0245 Sao Paulo 2938 0245 Italia 0245 28 70 14 (chiamata nazionale) 031 6300042 (Tarif local) Ireland 0818 210 140 (national call) Northern Ireland 0844 338 04 88 (5p/min BT landline) Suisse / Schweiz / Svizzera 0848 000 291 (0,081 CHF/Min.