Register your product and get support at www.philips.
Contents 1 2 3 4 5 EN Get started TV tour Important Environmental efforts Position the TV Help and support 3 3 6 8 9 10 Use your TV 11 Controls Watch TV Watch a connected device Watch 3D Ambilight Browse PC through DLNA Browse Net TV Rent online video 11 13 16 17 18 20 21 23 Use more of your TV 25 Enjoy HbbTV Smart USB recording View Teletext Set locks and timers View subtitles View Scenea Set universal access Use EasyLink 25 25 28 29 30 31 31 32 Set up your TV 36 Settings assistant Pictur
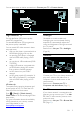
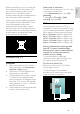
English 1 Get started TV tour Remote control To open or close the Find menu. In the Find menu, access the channel list. To adjust the volume. To open or close the Adjust menu. In the Adjust menu, access a range of frequently used settings. To switch TV channels. To open or close the Text menu. To open or close the Home menu. In the Text menu, access teletext for news and information. In the Home menu, access connected devices, picture and sound settings, and other useful features.
Press and hold to return to watching TV. Connect devices To select a red menu option, access digital Interactive TV services*, or watch TV demonstration clips. *Available on certain models only. To select a green menu option or to access energy efficient settings. To select a yellow menu option or to access the electronic user manual. Read more about the remote control in Use your TV > Controls > Remote control (Page 11). Alternatively, look at the index in Search for...
English You can learn more on device connections in Connect your TV > Connect devices. High Definition TV Ambilight For high-definition (HD) picture quality, watch HD programmes. On standard-definition (SD) programmes, the picture quality is standard.
3D TV This is a 3D TV. Connect your TV to a 3D Blu-ray disc player or tune in to a TV channel that broadcasts programmes in 3D. Read more in Use your TV > Watch 3D (Page 17). Important Safety Read and understand all instructions before you use your TV. If damage is caused by failure to follow instructions, the warranty does not apply. Risk of electric shock or fire! • Never expose the TV to rain or water. Never place liquid containers, such as vases, near the TV.
Risk of overheating! • Never install the TV in a confined space. Always leave a space of at least 4 inches or 10 cm around the TV for ventilation. Ensure that curtains or other objects never cover the ventilation slots on the TV. Risk of injury, fire or power cord damage! • Never place the TV or any objects on the power cord. • To easily disconnect the TV power cord from the power outlet, ensure that you have full access to the power cord at all times.
• • • • Do not expose the 3D glasses to direct sunlight, heat, fire or water. This may result in a product malfunction or fire. Do not drop, bend or apply force to the lenses of the 3D glasses. Do not use cleaning chemicals containing alcohol, solvent, surfactant, or wax, benzene, thinner, mosquito repellent or lubricant. Using these chemicals can cause discolouration or cracks.
Your product contains batteries covered by the European Directive 2006/66/EC, which cannot be disposed of with normal household waste. Please inform yourself about the local rules on separate collection of batteries because correct disposal helps to prevent negative consequences for the environment and human health. Stand mount or wall mount To apply the best settings for your TV, select wall mount or stand mount. 1. In the [Preferences] menu, select [TV placement]. 2.
For 47 inch to 55 inch TVs: Before you wall mount the TV, find the correct length of screw. To find the length of screw, add the thickness of your wall mount to the screw length, as shown in the graphic. Help and support Use Help You can access onscreen [Help] from the Home menu by pressing the Yellow button. You can also switch between the [Help] menu and the TV menu by pressing the Yellow button. Online support If you can't find what you need in the onscreen [Help], consult our online support at www.
Indicators English 2 Use your TV Controls TV controls 1. Ambient sensor / remote control sensor Ambient sensor is available on certain models only. Remote control 1. +/-: Increase or decrease volume. 2. AMBILIGHT: Switch Ambilight on or off. Ambilight is available on certain models only. 3. (Home): Access the Home menu. Press again to launch an activity in the Home menu. Confirm an entry or selection. 4. CH +/-: Switch to the next or previous channel. 5.Power: Switch the TV on or off. 1.
4. (Home): Access the Home menu. (Navigation buttons): Navigate 5. through menus and select items. 6. CH - / CH + (Previous/Next): Switch channels, navigate through menu pages, tracks, albums or folders. 7.OK: Confirm an entry or selection. 8. (Back): Return to the previous menu page or exit from a TV function. 9. FIND: Access the menu to select TV channel list. 10. ADJUST: Access the menu to adjust settings. 11. SOURCE: Select connected devices. 12.
Access EasyLink controls 1. While you view content from a connected HDMI-CEC device, press OPTIONS. 2. Select [Show device keys], then press OK. 3. Select the EasyLink control button, then press OK. Read more on EasyLink in Use more of your TV > Use EasyLink (Page 32). Smartphone control For remote control with coin cell batteries: Use your iPhone as a secondary remote, and even as a keyboard. Go to the Apple Apps store and download the application 'Philips Wifi TV Remote'.
Note: There is a short delay before the TV responds. Tip: If you cannot find your remote control and want to switch on the TV from standby, press CH +/- on the front of the TV. Though your TV consumes very little energy in standby, it does use some energy. If you are not going to use the TV for an extended period of time, switch it off to cut off the power. Switch TV to standby Press on the remote control. The remote control sensor on the TV switches to red.
You can view all channels, or only your favourites in the channel list. Press FIND to access the channel list. Create a channel list You can create a channel list that contains only your favourite channels. 1. Press FIND. OPTIONS. 2. Press 3. Select [Mark as favourite] or [Unmark as favourite], then press OK. Select a channels list OPTIONS. 1. In the channel list, press 2. Select [Select list] > [Favourites] to display channels in the favourite list; or [All] to display all channels. 3. Press OK to confirm.
• • • • • • • • [Vivid]: Rich and dynamic settings, ideal for daytime viewing. [Natural]: Natural picture settings. • [Cinema]: Ideal settings for movies. [Game]: Ideal settings for games. [Energy saving]: Settings that conserve the most energy. [Standard]: Default settings that suit most environments and types of video. [Photo]: Ideal settings for photos. [Custom]: Customise and store your own picture settings. • Use smart sound settings Select your preferred sound setting. 1.
SOURCE to display a You can also press list of connector names. Select the connector that connects the device to the TV. SOURCE. 1. Press 2. Press the Navigation buttons to select a connector in the list. 3. Press OK to confirm. Play from USB If you have photos, videos or music files on a USB storage device, you can play the files on TV. Caution: Philips is not responsible if the USB storage device is not supported, nor is it responsible for damage or loss of data in the device.
Before you watch 3D, read the health warning information in Get started > Important > 3D Health warning (Page 7). Note: Passive 3D glasses from other manufacturers may not work or offer less optimal 3D viewing. Start 3D Note: The 2D/3D menu is only available when the TV receives 3D content from the input signal, or when [3D format] has been set to [3D - Side by side] or [3D - Top / bottom].
1. While you watch TV, press > [Setup]. 2. Select [TV settings] > [Ambilight]. 3. Select a setting to adjust: • [Dynamic]: Adjust Ambilight between relaxed and dynamic levels. Available only if Ambilight [Colour] is set to [Dynamic]. • [Brightness]: Adjust the brightness of Ambilight. • • • • • For the best Ambilight effect, position the TV 25cm away from the wall. Keep the remote control away from the TV, as it can interfere with the infrared signals. Dim the light in the room. Switch on 1.
Browse PC through DLNA • What you can do • If you have photos, videos or music files stored on a computer connected through a home network, you can play the files on your TV. What you need • • • • A wired or wireless home network, connected with a Universal Plug and Play (uPnP) router. A Philips wireless USB adapter or a LAN cable that connects your TV to your home network. A media server such as: PC running Windows Media Player 11 or higher; or Mac running Twonky Media Server.
By default, Windows Media Player shares files from these folders: My Music, My Pictures, and My Videos. 6. If your files are in other folders, select Organize tab and select Manage libraries > Music. Follow the onscreen instructions to add the folders that contain your media files. Enable sharing on Twonky Media 1. Visit www.twonkymedia.com to purchase the software, or download a free 30-day trial to your Macintosh. 2. Start Twonky Media on the Macintosh. 3.
What you need To enjoy Net TV, complete these tasks: 1. On your home network, connect the TV to the Internet 2. On your TV, configure Net TV. 3. On your PC, register with Philips to enjoy exclusive benefits and receive updates on product information. You can register now or later. Notes: • You can lock Net TV Applications (Apps) with a 4 digit pin-code. All adult Apps can be locked as one selection.
What you need Press OPTIONS to select the following: • Remove App • Lock App • Unlock App • Move App To rent and download a video, you need a high-speed Internet connection to the TV. Read more about network connections in Connect your TV > Computers and the Internet (Page 51). Show remote control Keys such as play , rewind and fast forward can be called up with [Show remote control]. OPTIONS and select [Show Press remote control]. Use the onscreen keys to operate the connected audio or video player.
1. Switch on the TV. 2. As illustrated, insert the SD memory card into the SD card slot on the side of the TV. The TV automatically starts formatting the card. 3. After formatting, leave the SD card in the slot. Rent View a video store 1. Press . 2. Select [Browse Net TV] and press OK. 3. Access the App Gallery to search for available video stores in your country. 4. Press the Navigation buttons to select a store, then press OK to confirm. The icon of the video store is added to the home page. 5.
While you watch videos within HbbTV pages, you can use (play), (pause) and (stop) buttons. Enjoy HbbTV What you can do Some broadcasters of digital channels offer interactive HbbTV (Hybrid Broadcast Broadband TV). With HbbTV, broadcasters combine their normal TV programme with all kinds of information or entertainment. You can browse this information interactively. You can respond to a programme or vote, do online shopping or pay for a video-ondemand programme.
To record programmes with the USB hard disk device, ensure your TV is connected to the Internet. Read more about connecting the TV to the Internet in (Page 51). To record programmes with the USB hard disk device, ensure your TV is connected to the Internet. Read more about connecting the TV to the Internet in (Page 51). If you cannot connect to the Internet, you can still pause live TV broadcasts. To pause broadcasts, you need a USB hard disk with a minimum size of 32 GB hard disk space.
you switch to another channel. The USB hard disk starts storing the content on the new channel broadcast. • you start watching a programme from a connected device - a Blu-ray disc player or digital receiver. While a programme is recording to the USB hard disk, you cannot pause a live TV broadcast. Instant replay While you watch a live TV broadcast from a digital channel, you can replay the broadcast instantly.
Manage recordings List of recordings To view the list of recordings and scheduled recordings, select the Recordings button above the programme guide list and press OK. On this page with your recordings, you can: • select a recording to watch, • remove recorded programmes, • check the free disk space, or • schedule a timed recording not linked to a specific TV programme. Watch a recording To watch a recording, select the arrow in front of the recording and press OK. The playback of the recording starts.
Teletext 2.5 Some digital TV broadcasters provide several teletext languages. You can set your primary and secondary language. 1. Press . 2. Select [Setup] > [Channel settings] or [Satellite settings]. 3. Select [Languages] > [Primary Text] or [Secondary Text]. 4. Select your preferred teletext languages, then press OK. Teletext 2.5 offers more colours and better graphics than normal teletext. If Teletext 2.5 is broadcast by a channel, it is switched on by default. To switch Teletext 2.5 on or off 1.
Set the clock manually If clock mode is set to [Manual], set the date and time manually. 1. In the [Clock] menu, select [Date] or [Time], then press OK. 2. Use the Navigation buttons to make your selection. 3. Select [Done], then press OK. Sleeptimer Sleeptimer switches the TV to standby after a specified time. You can switch off your TV earlier or reset the sleeptimer during the countdown. 1. Press . 2. Select [Setup] > [TV settings] > [Preferences] > [Sleeptimer]. 3.
You can change the subtitle language on some digital channels. 1. Press . 2. Select [Setup] > [Channel settings] or [Satellite settings] > [Subtitle language]. 3. Select [Primary subtitles] or [Secondary subtitles] for the preferred language. 4. Press OK to confirm. OPTIONS > Tip: You can also press [Subtitle language]. View Scenea What you can do You can display a default picture as the wallpaper on your TV. You can also load another picture as the wallpaper.
To switch on hearing impaired audio and subtitles 1. While you watch TV, press OPTIONS. 2. Press one of the following buttons to select an option: • Red: Switch hearing impaired on or off. • Green: Switch on hearing impaired audio and subtitles. 3. Press to exit. Visually impaired Tip: To verify whether visually impaired audio is available, press OPTIONS and select [Audio language]. Languages with an eye icon support visually impaired audio. To switch on visually impaired audio (if available) OPTIONS. 1.
If your TV picture quality is affected by the picture-processing features of other devices, switch on Pixel Plus Link. To switch on Pixel Plus Link, see Use more of your TV > Use EasyLink > Retain picture quality (Page 34). Maximize display for subtitled video While you view subtitles in a video, you can maximize the video display area. Some subtitles can create a separate subtitle bar under the video, which limits the video display area.
• • : Display the TV menu. (Standby): Switch the TV and the connected device to standby. Other EasyLink buttons are available through the On-Screen Remote Control (OSRC). To access the OSRC 1. While you view content from a connected device, press OPTIONS. 2. Select [Show device keys], then press OK. 3. Select an onscreen button, then press OK. to exit. 4. Press Select speaker output If the connected device is HDMI Audio Return Channel (HDMI ARC) compliant, you can output TV audio through an HDMI cable.
Hear another device at TV standby English You can hear a connected HDMI-CEC compliant device through the TV speakers, even when the TV is in standby. 1. Press ADJUST to receive audio from the connected Philips EasyLink device. If available, audio only mode is enabled. 2. Accept the prompt on the TV to turn off the TV screen. 3. Control the audio playback with the TV remote control.
4 Set up your TV • Settings assistant Use the settings assistant to guide you through the picture and sound settings. 1. While you watch TV, press . 2. Select [Setup] > [Quick picture and sound settings], then press OK. 3. Select [Start], then press OK. 4. Follow the onscreen instructions to choose your preferred settings. • Picture and sound • More picture settings • 1. Press . 2. Select [Setup] > [TV settings] > [Picture], then press OK. 3.
Select audio language If the TV channel has multiple or dual sound broadcast, you can select the preferred audio language. While you watch TV, press OPTIONS. • [Audio language]: Select the audio language for digital channels. • [Dual I-II]: Select the audio language for analogue channels. Digital TV channels can stream several audio languages. If multiple languages are available, select the preferred language. 1. Press . 2. Select [Setup] > [Channel settings] or [Satellite settings] > [Language]. 3.
Hide or unhide Hide channels To prevent unauthorised access to channels, hide them from the channel list. 1. While you watch TV, press FIND. 2. Select the channel to rename and press OPTIONS. 3. Select [Hide channel], then press OK. The channel is hidden. Unhide channels 1. While you watch TV, press FIND. OPTIONS. 2. Press 3. Select [Show hidden channels], then press OK. Hidden channels appear in the channel list, but the channel information is not displayed. 4. Select a radio channel, then press OPTIONS.
You can search and store analogue TV channels manually. Step 1: Select your system Note: Skip this step if your system settings are correct. 1. While you watch TV, press . 2. Select [Setup] > [Channel settings] > [Channel installation]. 3. Select [Analogue: Manual installation] > [System], then press OK. 4. Select the system for your country or region, then press OK. Step 2: Search and store new TV channels 1. In the [Analogue: Manual installation] menu, select [Find channel], then press OK. 2.
Reinstall channels ATTENTION: This feature is intended for dealers and service personnel. You can copy channel lists from one Philips TV to another through a USB storage device. You do not need to search for channels or install them again on the second TV. The channel list file is small enough to fit on any USB storage device.
Update software TV software Check software version 1. Press . 2. Select [Setup] > [Software settings] > [Current software info], then press OK. The version of the current software is displayed. Caution: Do not install a lower version of software than the current version installed on your product. Philips cannot be held liable or be made responsible for problems caused by a software downgrade.
• An archive utility that supports the ZIP file format (for example, WinZip for Microsoft Windows or Stufflt for Macintosh). Note: Do not use a USB hard drive. Download the latest file 1. Insert a USB storage device into the USB connector on your PC. 2. Create a folder named ‘upgrades’ in the root directory of the USB storage device. 3. In your web browser, navigate to www.philips.com/support. 4. At the Philips Support site, find your product and locate the [Help] file for your TV. The file (a *.
• Do not use an HDMI cable longer than 5 meters / 16.4 feet. About cables Cable quality Overview Before you connect devices to the TV, check the available connectors on the device. Connect the device to the TV with the highest quality connection available. Good quality cables ensure a good transfer of picture and sound. The connections shown in this user manual are recommendations only. Other solutions are possible.
SCART VGA A SCART cable combines video and audio signals. SCART connectors can handle RGB video signals but cannot handle high-definition (HD) TV signals. Use this connection to display PC content on the TV. For video and sound, use the VGA and AUDIO IN connectors. Connect devices Overview You can connect your devices to the TV with any of the following options. After connection, press > [Add your devices].
Blu-ray or DVD disc player English Connect the disc player with an HDMI cable to the TV. Connect the disc player with a component cable (Y Pb Pr) and an audio L/R cable to the TV. TV receiver Connect the satellite or digital TV receiver with an antenna cable to the TV. (SAT is available on certain models only.
Connect the satellite or digital TV receiver with an HDMI cable to the TV. Connect the satellite or digital TV receiver with a SCART cable to the TV. Connect the satellite or digital TV receiver with a component cable (Y Pb Pr) and an audio L/R cable to the TV.
Connect the recorder with an antenna cable to the TV. (SAT is available on certain models only.) Connect the recorder with a SCART cable to the TV. Connect the recorder with a component cable (Y Pb Pr) and an audio L/R cable to the TV. Game console The most practical connectors for a game console are on the side of the TV. However, you can also use the connectors at the back of the TV. For the best gaming experience, set the TV to game mode. 1. Press ADJUST. 2.
Connect the game console with an HDMI cable to the TV. Connect the game console with a component cable (Y Pb Pr) and an audio L/R cable to the TV. Home theatre system Connect the home theatre with an HDMI cable and an optical or coaxial audio cable to the TV. (Optical audio output is available on certain models only.
English Connect the home theatre with a SCART cable to the TV. Connect the home theatre with a component cable (Y Pb Pr) and an audio L/R cable to the TV. Digital camera Connect the digital camera with a USB cable to the TV.
Digital camcorder Connect the digital camera with an HDMI cable to the TV. Connect the digital camcorder with a component cable (Y Pb Pr) and an audio L/R cable to the TV. Connect more devices External hard disk Connect the external hard disk with a USB cable to the TV.
Computer English Connect the computer with an HDMI cable to the TV. Connect the computer with a DVI-HDMI cable to the TV. Connect the computer with a VGA cable and an audio cable to the TV.
Computers and the Internet What you can do Note: This DLNA1.5 network feature supports these computer operating systems: Microsoft Windows XP or Vista, Intel Mac OSX or Linux. Connect Network benefits If you connect your TV to a computer network with storage devices such as computers, you can play the photos, music and videos on your devices. See Use your TV > Browse PC through DLNA (Page 20). If you connect your TV to a computer network with Internet access, you can access Net TV content.
• • • The wireless network operates in the same 2.4GHz frequency spectrum as common household devices, such as Dect phones, microwave ovens or Bluetooth devices, which can cause WiFi interferences. Move these devices away from the TV with the connected Wireless USB adapter. You should turn off any unused network equipment in the home network as this increases network traffic.
*The Wi-Fi MediaConnect CD-ROM is supplied with the Wireless USB adapter, PTA01. For Wi-Fi integrated models, the CD-ROM is supplied with the TV. What you need To use Wi-Fi MediaConnect, you need the following: • Connect the TV to your home network • A wireless router • A wireless USB adapter (only for TVs which are not Wi-Fi integrated). For the availability of the wireless USB adapter, check with your local retailers or buy online at www.philips.com/tv. Install Wi-Fi MediaConnect 1.
What you can do To watch some digital TV programmes, you need a Conditional Access Module (CAM). If a CAM is inserted and subscription fees are paid, you can watch the channel. The applications, functions, the content and the onscreen messages vary for each CAM service. What you need Caution: To protect the CAM from damage, insert the CAM according to these instructions. Notes: • This TV supports CI as well as CI+.
6 Troubleshooting Contact Philips Warning: Do not attempt to repair the TV yourself. This may cause severe injury, irreparable damage to your TV or void your warranty. If you cannot resolve your problem, refer to the frequently asked questions (FAQs) for this TV at www.philips.com/support. You can also contact Philips Consumer Care in your country for support. You can find the contact number in the leaflet that accompanies the TV. Take a note of your TV model and serial number before you contact Philips.
Make sure that the correct device is selected as the display source. • Make sure that the external device or source is properly connected. There is sound but no picture: Make sure that the picture settings are set correctly. There is poor TV reception from an antenna connection: • Make sure that the antenna is properly connected to the TV. • Loud speakers, unearthed audio devices, neon lights, high buildings and other large objects can influence reception quality.
HDMI There are problems with HDMI devices: • Note that HDCP (High-bandwidth Digital Content Protection) support can delay the time taken for a TV to display content from a HDMI device. • If the TV does not recognise the HDMI device and no picture is displayed, switch the source from one device to another and back again. • If there are intermittent sound disruptions, make sure that output settings from the HDMI device are correct.
Power and reception Power • Mains power : AC 220-240 V~, 50/60 Hz • Standby power consumption : <0.15 W • Ambient temperature: 5 to 40 degrees Celsius • For power consumption, see the product specifications at www.philips.com/support. Reception • Antenna input: 75 ohm coaxial (IEC75) • TV system: DVB COFDM 2K/8 K, • Video playback: NTSC, PAL, SECAM • Digital TV: MPEG-4, DVB-T (Terrestrial), *DVB-T2, DVB-C (Cable), *DVB-S/S2 (Satellite).
Multimedia • Ethernet LAN RJ-45 Supported image files • JPEG (*.jpg) Supported multimedia connections • USB (FAT or DOS-formatted; Mass Storage Class compliant with 500mA only) • SD card (Videostore) Supported audio/video files Multimedia file names must not exceed 128 characters.
English Bottom • Ethernet LAN RJ-45 • DIGITAL AUDIO OUT: Optical • HDMI 1 - 3 • AUDIO IN: DVI/VGA (stereo 3.
Dimensions Note: Dimensions and weights are approximate values only. Design and specifications are subject to change without notice. Legend for TV dimensions The legends used to indicate the TV dimensions are as follows: ( ) : 81 cm / 32 inch TV { } : 94-cm/37-inch TV [ ] : 107-cm/42-inch TV (( )) : 119 cm / 47 inch TV {{ }} : 140 cm / 55 inch TV Take a note of the legend that corresponds to your TV. Then, go to the next page to view the dimensions.
English Use your TV legend to note the dimensions of your TV (with and without the stand). Use your TV legend to note the thickness of your TV (with and without the stand).
8 Index connectors - 4 3 contact information, on Internet - 10 3D - 17 3D glasses - 7 connect, USB - 17 contact Philips - 10 controls - 11 3D, health warning - 7 D A demo - 40 age rating - 30 analogue channels, fine-tune - 39 analogue channels, subtitles - 30 audio language - 37 C devices, add - 16 devices, watch - 16 digital channels - 39 digital channels, subtitles - 30 digital radio - 15 dimensions - 62 CAM, enable - 55 CAM, insert - 55 CAM, see Conditional Access Module - 55 care - 7 chann
hearing impaired - 31 help, onscreen - 10 high-definition (HD), content - 5 home menu - 3 power - 59 R recycle - 8 register product - 10 home mode - 10 reinstall TV - 42 I remote control, batteries - 12 install channels - 38 remote control - 11 remote control, onscreen - 33 install channels (automatic) - 38 remote control, overview - 11 install channels (manual) - 39 rename channels - 37 K kensington lock - 10 L language, menu - 40 location, home or shop - 10 M multimedia - 60 multimedia, pla
teletext, enlarge - 28 teletext, language - 29 teletext, search - 29 teletext, subpages - 29 U universal access, enable - 31 universal access, hearing impaired - 31 universal access, visually impaired - 32 USB recording - 27 V visually impaired - 32 volume - 11 W wall mount - 9 wallpaper - 31 Wi-Fi MediaConnect - 53 Wireless LAN ready - 52 EN 66
© 2011 Koninklijke Philips Electronics N.V. All rights reserved.