Register your product and get support at 7100 series www.philips.
Contents 1 TV Tour 1.1 Ultra HD TV 4 1.2 Philips Android TV™ 4 1.3 Using Apps 4 1.4 Playing Games 4 1.5 Movies and missed programmes 1.6 Pause TV and Recordings 4 1.7 Social Networks 5 1.8 Ambilight 5 1.9 Ambilight + Hue 5 2 Setting Up 9 Top Picks 4 10 Sources 11 Apps 6 13 3D 5 Switching On and Off 14 Multi View 43 14.1 Text and TV 43 14.2 App Gallery and TV 14.3 HDMI and TV 43 15 Settings 43 44 15.1 Picture 44 15.2 Sound 49 15.3 Ambilight 52 15.4 Eco Settings 54 15.5 General Settings 55 15.
18.9 Multimedia 109 19 Help and Support 110 19.1 Register 110 19.2 Troubleshooting 110 19.3 Help 111 19.4 Online Help 111 19.5 Repair 112 20 Safety and Care 20.1 Safety 113 20.2 Screen Care 113 114 21 Terms of Use_TV 115 22 Terms of Use_Smart TV 23 Copyrights 116 117 23.1 Ultra HD 117 23.2 HDMI 117 23.3 Dolby Digital Plus 117 23.4 DTS Premium Sound ™ 117 23.5 DLNA Certified® 117 23.6 Microsoft 117 23.7 Wi-Fi Alliance 118 23.8 Kensington 118 23.
Google, Android, Google Play and other marks are trademarks of Google Inc. The Android robot is reproduced or modified from work created and shared by Google and used according to terms described in the Creative Commons 3.0 Attribution License. 1 TV Tour 1.1 Ultra HD TV http://creativecommons.org/licenses/by/3.0/legalco de This TV has an Ultra HD display. Its resolution is four times as much as normal HD displays. Ultra HD means 8 million pixels for the most refined and lifelike picture on TV. 1.
1.6 experience. Pause TV and Recordings Ambilight + Hue If you connect a USB Hard Drive, you can pause and record a broadcast from a digital TV channel. Fill your space and your life with the wonder of Ambilight. Ambilight + hue* allows you to extend the Ambilight experience throughout your room. Pause your TV and answer that urgent phone call or simply take a break during a sports match, while the TV stores the broadcast on the USB Hard Drive. You can watch it again later.
Wall mounting the TV requires special skills and should only be performed by qualified personnel. The TV wall mounting should meet safety standards according to the TVs weight. Also read the safety precautions before positioning the TV. TP Vision Europe B.V. bears no responsibility for improper mounting or any mounting that results in accident or injury. 2 Setting Up 2.1 Read Safety Read the safety instructions first before you use the TV. 2.
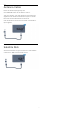
2.5 Antenna Cable Insert the antenna plug firmly into the Antenna socket at the back of the TV. You can connect your own antenna or an antenna signal from an antenna distribution system. Use an IEC Coax 75 Ohm RF antenna connector. Use this antenna connection for DVB-T and DVB-C input signals. 2.6 Satellite Dish Attach the satellite F-type connector to the satellite connection SAT at the back of the TV.
6 - Depending on the type of router, enter your encryption key - WEP, WPA or WPA2. If you entered the encryption key for this network before, you can select OK to make the connection immediately. 7 - A message will be shown when the connection is successful. 3 Network 3.1 Smart TV and Internet No Smart TV without the Internet. WPS This Smart TV is no smart TV without being connected to your home network and the Internet.
3.3 Internet does not work • If the connection to the router is OK, check the router connection to the Internet. Network Settings The PC and Internet connection are slow • Look in your wireless router's user manual for information on indoor range, transfer rate and other factors of signal quality. • Use a high-speed (broadband) Internet connection for your router. View Network Settings You can view all current network settings here. The IP and MAC address, signal strength, speed, encryption method, etc.
Switch on Wi-Fi connection TV Network Name You can switch on or off Wi-Fi connection on your TV. If you have more than one TV in your home network, you can give the TV a unique name. To switch on Wi-Fi… To change the TV name… 1 - Press , select All Settings and press OK. 2 - Select Wireless and Networks and press (right) to enter the menu. 3 - Select Wired or Wi-Fi > Wi-Fi On/Off and press OK. 4 - Select On and press OK. 5 - Press (left) repeatedly if necessary, to close the menu.
than 5 m. 4 Connections 4.1 Tips on Connections Connectivity Guide Always connect a device to the TV with the highest quality connection available. Also, use good quality cables to ensure a good transfer of picture and sound. Copy protection HDMI cables support HDCP (High-bandwidth Digital Content Protection). HDCP is a copy protection signal that prevents copying content from a DVD disc or Bluray Disc. Also referred to as DRM (Digital Rights Management).
Some very specific device keys might not be available in the Controls menu. Only devices that support EasyLink Remote Control function will respond to the TV remote control. EasyLink Settings EasyLink HDMI CEC The TV comes with the EasyLink settings switched on. If your devices are connected with HDMI and have EasyLink, you can operate them with the TV remote control. EasyLink HDMI CEC must be switched On on the TV and the connected device.
Copy protection Audio Out - Optical DVI and HDMI cables support HDCP (High-bandwidth Digital Content Protection). HDCP is a copy protection signal that prevents copying content from a DVD disc or Blu-ray Disc. Also referred to as DRM (Digital Rights Management). Audio Out - Optical is a high quality sound connection. This optical connection can carry 5.1 audio channels.
4.3 One Smart Card Receiver - Set-Top Box Digital TV operators provide a CI+ module (Conditional Access Module - CAM) and an accompanying smart card, when you subscribe to their premium programmes. Cable Box Use 2 antenna cables to connect the antenna to the Set-top box (a digital receiver) and the TV. Insert the smart card into the CAM module. See the instruction you received from the operator. To insert the CAM in the TV… 1 - Look on the CAM for the correct method of insertion.
Connect with HDMI Use an HDMI cable to connect a Home Theatre System (HTS) to the TV. You can connect a Philips Soundbar or an HTS with a built-in disc player. If the Home Theatre System has no HDMI ARC connection, add an optical audio cable (Toslink) to send the sound of the TV picture to the Home Theatre System. Switch Off Timer Switch off this automatic timer, if you only use the remote control of the Set-top box.
Volume differences can be caused by differences in sound processing. The Audio Out Delay setting should be switched on. To level the difference in volume… 1 - Press , select All Settings and press OK. 2 - Select Sound and press (right) to enter the menu. 3 - Select Advanced > Audio Out Offset and press OK. 4 - Use the slider bar to set the sound offset and press OK. 5 - Press (left) repeatedly if necessary, to close the menu.
4.6 4.8 DVD Player Game Consoles Use an HDMI cable to connect the DVD player to the TV. Alternatively, you can use a SCART cable, if the device has no HDMI connection. HDMI For best quality, connect the game console with a High speed HDMI cable to the TV. If the DVD player is connected with HDMI and has EasyLink CEC, you can operate the player with the TV remote control. YPbPr For more information on EasyLink, press the colour key Keywords and look up EasyLink HDMI CEC.
4.9 space. Gamepad To Record To pause and record a broadcast, you need a minimum of 250GB disk space. If you want to record a broadcast with TV guide data from the Internet, you need to have the Internet connection installed on your TV before you install the USB Hard Drive. Connect a Gamepad To play games from the Internet on this TV, you can connect a selected range of wireless Gamepads. When you connect the Gamepad, you can use it immediately.
4.11 4.12 USB Keyboard USB Flash Drive Connect You can view photos or play your music and videos from a connected USB flash drive. Connect a USB keyboard (USB-HID type) to enter text on your TV. Insert a USB flash drive in one of the USB connections on the TV while the TV is switched on. You can connect a keyboard and a mouse to the TV. Use one of the USB connections to connect. The TV detects the flash drive and opens a list showing its content.
4.14 Camcorder HDMI For best quality, use an HDMI cable to connect the camcorder to the TV. With DVI to HDMI Alternatively, you can use a DVI to HDMI adapter (sold separately) to connect the PC to HDMI and an audio L/R cable (mini-jack 3.5mm) to AUDIO IN L/R on the back of the TV. Video-Audio LR / Scart You can use an HDMI, YPbPr or SCART connection to connect your camcorder.
5 Switching On and Off 5.1 On or standby 5.3 Keys on TV Before you switch on the TV, make sure you plugged in the mains power in the POWER connector on the back of the TV. If you lost the remote control or its batteries are empty, you can still do some basic TV operations. To put the TV in Standby when the indicator light is off, press the small joystick key on the back of the TV. The indicator will light up.
5.5 Switch Off Timer If the TV receives a TV signal but you don't press a key on the remote control during a 4 hour period, the TV switches off automatically to save energy. Also, if the TV does not receive a TV signal nor a remote control command for 10 minutes, the TV switches off automatically. If you use the TV as a monitor or use a digital receiver to watch TV (a Set-Top Box - STB) and you do not use the remote control of the TV, you should deactivate this automatic switch off.
6 Remote Control 6.1 Key overview Top 1 To open TV menus. 2 - SOURCES To open the Sources menu. 3 - Colour keys Direct selection of options. Blue key , opens Help. 4 - INFO To open or close programme info. 1 - Standby / On To switch the TV on or back to Standby. 5 - BACK To switch back to the previous channel you selected. To close a menu without changing a setting. To go back to the previous App/Internet page. 2 - Playback and Record • Play , to playback.
Azerty. 2 - Shift To type uppercase characters. 3 - Ω Special characters To open the onscreen keyboard to select accented characters or symbols. 4 - Fn key To type a number or punctuation character. 5- Spacebar 6- Navigation and OK 7 - Share this To share online what you are watching at the moment. * Your remote control has a Qwerty / Azerty or a Qwerty / Cyrillic keyboard, depending on your region. 1 - MULTIVIEW To open an extra small screen. 2 - Volume To adjust the volume level.
the Remote Control Keyboard. Writing Text With the keyboard on the back of the remote control, you can write text in any text field on screen. Turn the keyboard facing upwards to activate the keyboard keys. Hold the remote control with two hands and type with both thumbs. Qwerty, Azerty and Cyrillic keyboard The standard layout of the Remote Control Keyboard is Qwerty. Azerty keyboard Depending on your region, the Remote Control Keyboard can be set to Azerty.
6.5 Pairing Again Batteries You can pair another remote control with this TV. If the TV does not react on a key press on the remote control, the batteries might be empty. The method to pair a remote control is different for a remote control already paired with another TV compared with a remote control that is not paired yet. To replace the batteries, open the battery compartment on the keyboard side of the remote control.
7 Home and TV menu 7.1 Open the Home Menu About the Home Menu To enjoy the benefits of your Android TV, connect the TV to the Internet. Like on your Android smartphone or tablet, the Home menu is the centre of your TV. From the Home menu you can start any application, switch to a TV channel, rent a movie, open a website or switch to a connected device. Depending on your TV setup and your country the Home menu can contain different items.
press OPTIONS. 2 - Select Select Channel List and press OK. 3 - In the list menu, select one of the available channel lists and press OK. 8 Channels 8.1 Alternatively, you can select the list name at the top of the channel list and press OK to open the list menu. Channel Lists Tip About Channel Lists You can easily switch between the two tuners in the Sources menu. Press SOURCES and select Watch TV to switch to the Antenna/Cable tuner. Select Watch Satellite to switch to the satellite tuner.
5 - Press (left) to go back one step or press to close the menu. press OK. 5 - Select Search Channel and press OK to open a text field.You can use the remote control keyboard or the onscreen keyboard to enter text. 6 - Enter a number, a name or part of a name and select Apply and press OK. The TV will search for matching channel names in the list you selected. To unlock a channel… 1 - Press . 2 - Press OK to open the channel list. If necessary change the channel list.
Channel Options in one of these languages are available, the TV will show the subtitles you selected. Open Options To set the primary and secondary subtitle language… 1 - Press , select All Settings and press OK. 2 - Select Region and Language and select Languages > Primary Subtitles or Secondary Subtitles. 3 - Select the language you need and press OK. 4 - Press (left) to go back one step or press to close the menu. While watching a channel, you can set some options.
press (right). 3 - Select Mono or Stereo and press OK. 4 - Press (left) to go back one step or press to close the menu. Common Interface If you installed a CAM in one of the Common Interface slots, you can view the CAM and operator information or do some CAM related settings. To view the CAM information… Video Selection 1 - Press SOURCES. 2 - Select the channel type you are using the CAM for, Watch TV or Watch Satellite. 3 - Press OPTIONS and select Common Interface.
6 - To finish adding channels, press BACK. Remove a Favourites List The TV will ask to rename the Favourites List. You can use the on screen keyboard or use the keyboard on the back of the remote control. You can only remove a Favourites List. To remove a Favourites List… 1 - Press BACK to hide the on screen keyboard. 2 - Use the keyboard on the back of the remote control to delete the current name and enter a new name. 3 - When done, turn the remote control, select Close and press OK.
decoder. To call up the details of the selected programme, press INFO . The TV comes with the information set to From the broadcaster. If TV Guide information comes from the Internet, the TV Guide can also list analogue channels next to the digital channels. The TV Guide menu also shows a small screen with the current channel. Change Day From the Internet If the TV Guide information comes from the broadcaster, you can press + to view the schedule of one of the next days.
Some broadcasters offer T.O.P. Text. To open T.O.P. Text pages within Text, press OPTIONS and select T.O.P. overview. • Enlarge To enlarge the Text page for comfortable reading. • Reveal To unhide hidden information on a page. • Cycle subpages To cycle subpages when these are available. • Language To switch the group of characters that Text uses to display correctly. • Text 2.5 To activate the Text 2.5 for more colours and better graphics.
referred to as Digital Text or Red button. But each system is distinct. Visit the broadcaster's Internet website for more information. What You Need Interactive TV is only available on digital TV channels. To enjoy the full benefits of Interactive TV, you need a high-speed (broadband) Internet connection to the TV. HbbTV If a TV channel offers HbbTV pages, you must first switch on HbbTV in the TV settings to view the pages. 1 - Press , select All Settings and press OK.
9 when Now on TV is available. Top Picks The TV does not store former recommendations. 9.1 Using Now on TV About Top Picks To open Now on TV… With TOP PICKS your TV recommends current TV programmes, the latest rental videos and Online TV services for you to watch. Make sure you agree to the Terms of Use. To enjoy Top Picks connect your TV to the Internet. 1 - Press TOP PICKS to open the Top Picks menu. 2 - Select Now on TV at the top of the screen and press OK. 3 - Press BACK to close.
When you open TV on Demand, the TV may need a few seconds to refresh the page information. You can select a specific broadcaster if more than one is available. 9.4 Video on Demand About Video on Demand With Video on Demand , you can rent movies from an online rental video store. You can let Video on Demand do some personalised recommendations of movies, based on your country, the TV installation and the programmes you watch regularly.
10 10.3 Sources One Touch Play 10.1 With the TV in Standby, you can switch on a disc player with your TV remote control. Switch to a device Play To switch on both disc player and TV from Standby and start playing the disc immediately, press (play) on the TV remote control. The device must be connected with an HDMI cable and both TV and device must have HDMI CEC switched on. From the list of Sources, you can switch to a connected device and watch its programme.
11 Apps 11.1 About Apps With Apps in the Home menu, you open the Apps pages. The Apps pages show the collection of Apps (Applications) on your TV. Like Apps on your smartphone or tablet, the Apps on your TV offer specific functions for an enriched TV experience. Apps like TV games or weather forecasts (a.o.). Or start an Internet browser App to surf the Internet. Apps can come from the Philips App Gallery or the Google Play™ store. To get you started, some practical Apps are pre-installed on your TV.
press SOURCES , select SimplyShare. 12 Videos, Photos and Music 12.1 From a USB Connection You can view your photos or play your music and videos from a connected USB flash drive or USB Hard Drive. With the TV switched on, plug in a USB flash drive or a USB Hard Drive to one of the USB connections. The TV detects the device and will list your Media files. If the list of files does not appear automatically, press SOURCES and select USB.
the menu. 13 3D Stop 3D 13.1 To stop watching 3D... What You Need 1 - Press . 2 - Select 3D Format > This is a passive 3D TV. 2D, and press OK. 3D is switched to 2D when you switch to another channel or connected device. To watch 3D… • tune to a TV channel that broadcasts programmes in 3D. • rent a movie in 3D from an online video store. • watch a movie in 3D from a 3D Blu-ray Disc, a USB device or computer. 2D to 3D conversion With 2D to 3D Conversion, you can watch 3D all the time.
13.5 Care of the 3D Glasses • Do not use cleaning chemicals containing alcohol, solvent, surfactant, or wax, benzene, thinner, mosquito repellent or lubricant. Using these chemicals can cause discoloration or cracks. • Do not expose the 3D glasses to direct sunlight, heat, fire or water. This may result in a product malfunction or fire. • Do not drop, bend or apply force to the lenses of the 3D glasses. • Use a clean soft cloth (microfiber or cotton flannel) to clean the lenses to avoid scratching them.
14 Multi View 14.1 Text and TV You can watch a TV channel in the small screen of Multi View when you're watching Text. To watch a TV channel while watching Text… 1 - Press MULTI VIEW . 2 - Select Multi View: On on screen. The channel you were watching appears in the small screen. 3 - Press or to switch channels in the small screen. To hide the small screen, press MULTI VIEW again and select Multi View: Off on screen. 14.
15 To set the TV for Home use… Settings 1 - Press , select All Settings and press OK. 2 - Select General Settings and press (right) to enter the menu. 3 - Select Location > Home and press OK. 4 - Press (left) repeatedly if necessary, to close the menu. 15.1 Picture Picture Style Picture Settings Select a Style Colour For easy picture adjustment, you can select a preset Picture Style. With Colour, you can adjust the colour saturation of the picture. 1 - While watching a TV channel, press .
select the device type you want to use. To switch back to TV, select Off. 4 - Press (left) repeatedly if necessary, to close the menu. 3D Picture Settings 3D Contrast If you are watching 3D pictures, you can adjust the contrast of the 3D picture with 3D Contrast . To adjust the 3D contrast… Colour Settings 1 - Press , select All Settings and press OK. 2 - Select Picture and press (right) to enter the menu. 3 - Select 3D Contrast and press (right).
the menu. 3 - Select Advanced > Colour > Colour control and press OK. 4 - Select Hue, and press (right). 5 - Press the arrows (up) or (down) to adjust the value. 6 - Press (left) repeatedly if necessary, to close the menu. Custom Colour Temperature With Custom Colour Temperature, you can set a colour temperature yourself. To set a custom colour temperature, first select Custom in the Colour Temperature menu. Custom Colour Temperature is a setting intended for expert users.
Contrast Settings Video Contrast Contrast Modes With Video Contrast, you can decrease the range of the video contrast. With Contrast Mode, you can set the level at which power consumption can be reduced by dimming the intensity of the screen. Choose for the best power consumption or for the picture with the best intensity. To adjust the level… 1 - Press , select All Settings and press OK. 2 - Select Picture and press (right) to enter the menu.
1 - Press , select All Settings and press OK. 2 - Select Picture and press (right) to enter the menu. 3 - Select Advanced > Contrast > Gamma, and press OK. 4 - Press the arrows (up) or (down) to adjust the value. 5 - Press (left) repeatedly if necessary, to close the menu. 5 - Press (left) repeatedly if necessary, to close the menu.
did for each connection. The available styles are… To format the picture manually… • Personal - The sound preferences you set during the first start up. • Original - Most neutral sound setting • Movie - Ideal for watching movies • Music - Ideal for listening to music • Game - Ideal for gaming 1 - While watching a TV channel, press . 2 - Select Advanced and press OK. 3 - Use Shift, Zoom, Stretch or Original to adjust the picture.
menu. 3 - Select Treble and press (right). 4 - Press the arrows (up) or (down) to adjust the value. 5 - Press (left) repeatedly if necessary, to close the menu. Advanced Sound Settings Auto Volume Levelling With Auto Volume Levelling, you can set the TV to automatically level out sudden volume differences. Typically at the beginning of adverts or when you are switching channels. Surround mode To switch on or off… With Surround Mode, you can set the sound effect of the TV speakers.
4 - Press the arrows (up) or (down) to adjust the value. 5 - Press (left) repeatedly if necessary, to close the menu. To level the difference in volume… 1 - Press , select All Settings and press OK. 2 - Select Sound and press (right) to enter the menu. 3 - Select Advanced > Audio Out Levelling and press OK. 4 - Select More, Medium, or Less, then press OK. Speakers 5 - If the volume difference is large, select More. If the volume difference is small, select Less.
this TV - www.philips.com/tv Philips wireless audio products. To play the TV sound on a wireless speaker, you must pair the wireless speaker with the TV. You can pair up to 10 wireless speakers but you can only play the sound on one wireless audio speaker at a time. If you connect a subwoofer, the sound is played on the TV and the subwoofer. If you connect a sound bar the sound is played on the sound bar only.
the menu. 3 - Select Brightness and press OK. 4 - Press the arrows (up) or (down) to adjust the value. 5 - Press (left) repeatedly if necessary, to close the menu. intended. To select the colour of the wall . . . 1 - Press , select All Settings and press OK. 2 - Select Ambilight and press (right) to enter the menu. 3 - Select Advanced > Wall Colour and press OK. 4 - In the colour palette, select the colour that matches the colour of the wall behind the TV.
Lounge Light+hue Switch Off If you installed Ambilight+hue, you can let the hue bulbs follow Lounge Light from Ambilight. The Philips hue lamps will expand the Lounge Light effect across the room. The hue bulbs are switched on and automatically set to follow Lounge Light when you configure Ambilight+hue. If you do not want the hue bulbs to follow Lounge Light, you can switch the bulbs off. To switch off Ambilight+hue... 1 - Press , select All Settings and press OK.
15.4 Switch off timer Eco Settings If the TV receives a TV signal but you don't press a key on the remote control during a 4 hour period, the TV switches off automatically to save energy. Also, if the TV does not receive a TV signal nor a remote control command for 10 minutes, the TV switches off automatically. Energy Saving Eco settings bundles the settings that help the environment.
HDMI Ultra HD Philips Logo Brightness This TV can display Ultra HD signals. Some devices connected with HDMI - do not recognise a TV with Ultra HD and might not work correctly or show distorted picture or sound. To avoid the malfunctioning of such a device, you can set the signal quality to a level the device can handle. If the device is not using Ultra HD signals, you can switch off Ultra HD for this HDMI connection. You can switch off or adjust the brightness of the Philips logo on the front of the TV.
4 - Select On or Off. 5 - Press (left) repeatedly if necessary, to close the menu. store demo 5 - Press (left) repeatedly if necessary, to close the menu. If you want to avoid access to HbbTV pages on a specific channel, you can block the HbbTV pages for this channel only. TV Placement 1 - Tune to the channel of which you want to block the HbbTV pages. 2 - Press OPTIONS and select HBB TV on This Channel and press OK. 3 - Select Off and press OK.
The new code is set. Child Lock Parental Rating Reinstall TV To set a minumum age to watch rated programmes... You can redo a full TV installation. The TV is completely reinstalled. 1 - Press , select All Settings and press OK. 2 - Select General Settings and press (right) to enter the menu. 3 - Select Child Lock > Parental Rating, and select one of the age in the list. 4 - Press (left) repeatedly if necessary, to close the menu.
1 - Press OPTIONS . 2 - Select Audio Language and select on the audio language you want temporarily. available. To know if a channel is analogue or digital, switch to the channel and open Channel Info in OPTIONS. Subtitles Text / Teletex Languages Switch On To switch on Subtitles, press SUBTITLE. Text Pages You can switch subtitles On, Off or On During Mute. Or to show subtitles automatically when the broadcasted programme is not in language – the language set for the TV – select Automatic.
1 - Press , select the device and press OK. 2 - While watching a channel on the device, press OPTIONS , select Show device keys and select the key and press OK. 3 - Press BACK to hide the device keys. 4 - To close Text, press BACK again. To switch off Text 2.5… 1 - Press TEXT. 2 - With Text/Teletext open on screen, press OPTIONS. 3 - Select Text 2.5 > Off. 4 - Press (left) repeatedly if necessary, to close the menu.
3 - Select Clock > Time Zone, and press OK. 4 - Select one of the time zones. 5 - Press (left) repeatedly if necessary, to close the menu. Hard of Hearing Some digital TV channels broadcast special audio and subtitles adapted for the hard of hearing or deaf people. With Hearing impaired switched on, the TV automatically switches to the adapted audio and subtitles, if available. Before you can switch on Hearing impaired, you have to switch on Universal Access.
6 - Press (left) repeatedly if necessary, to close the menu. OK. 4 - Select Descriptive or Subtitles and press OK. 5 - Press (left) repeatedly if necessary, to close the menu. To switch on Audio Description while watching TV... 1 - While watching a TV channel, press OPTIONS , select Universal Access and press OK. 2 - Select Audio Description, and select On. 15.8 Wireless and Networks You can check if an audio commentary is available.
15.9 Android Settings Access Android Settings menu to view or adjust the settings for using Android Apps. 1 - Press , select All Settings and press OK. 2 - Select General Settings and press (right) to enter the menu. 3 - Select Android Settings, and press OK. 4 - Press BACK if necessary, to close the menu.
16 Reinstall Channels Channel Installation Reinstall Channels 16.1 You can reinstall all channels and leave all other TV settings untouched. Antenna/Cable Installation If a child lock code is set, you will need to enter this code before you can reinstall channels. Update Channels To reinstall channels… Automatic Channel Update 1 - Press , select All Settings and press OK. 2 - Select Antenna/Cable Installation > Search for Channels and select Start. 3 - Select Reinstall Channels, then press OK.
• Both TVs are from the same year range. • Both TVs have the same hardware type. Check the hardware type on the TV type plate on the back of the TV. Typically noted as Q . . . LA • Both TVs have compatible software versions. To Installed TVs Depending on whether your TV is already installed or not, you must use a different method to upload a channel list. Current software version To an already installed TV 1 - Verify the country setting of the TV. (To verify this setting, press .
DVB Settings Free / Scrambled Network Frequency Mode If you have a subscription and a CAM - Conditional Access Module for pay TV services, select Free + Scrambled. If you did not subscribe to pay TV channels or services, you can select Free Channels Only . If you intend to use the fast Quick Scan method in Frequency Scan to search for channels, select Automatic. The TV will use 1 of the predefined network frequencies (or HC - homing channel) as used by most cable operator in your country.
you are now. If you don't want to change the setup, select Search. Go to step 5. • Search Channel To find a channel, select Search Channel. Select Search. You can also enter a frequency yourself. If the reception is poor, press Search again. If you want to store the channel, select Done. 6 - In Installation System, select the number of satellites you want to install or select one of the Unicable systems.
1 - Press , select All Settings and press OK. 2 - Select Satellite Installation > Automatic Channel Update and select Off. 3 - Press (left) repeatedly if necessary, to close the menu. Unicable Setup The Unicable System You can use a Single Cable system, MDU or Unicable system to connect the antenna dish to the TV. A Single Cable system uses one cable to connect the satellite dish to all satellite tuners in its system. A Single Cable system is typically used in apartment buildings.
satellites are shown. 3 - Select Search. The TV will search for new satellites. 4 - If the TV has found one or more satellites, select Install. The TV installs the channels of the found satellites. 5 - To store the channels and radio stations, select Finish. LNB Settings In some countries, you can adjust some expert settings for each LNB. LNB Power By default, LNB Power is set to On. 22 kHz Tone By default, the Tone is set to Auto.
complete installation again and select another package. Sometimes the reception is poor • Check if the satellite dish is solidly mounted. Strong winds can move the dish. • Snow and rain can degrade the reception.
17 Update from Internet Software If the TV is connected to the Internet, you may receive a message to update the TV software. You need a high-speed (broadband) Internet connection. If you receive this message, we recommend you to carry out the update. 17.1 Update Software Update from USB With the message on screen, select Update and follow the instructions on screen. It might be necessary to update the TV software.
following exception applies : "NOTE! This copyright does *not* cover user programs that use kernel services by normal system calls - this is merely considered normal use of the kernel, and does *not* fall under the heading of "derived work". Also note that the GPL below is copyrighted by the Free Software Foundation, but the instance of code that it refers to (the linux kernel) is copyrighted by me and others who actually wrote it.
License C programming language, implements the basic cryptographic functions and provides various utility functions. The original download site for this software is : http://openssl.org/OpenSSL license libjpeg (8a) This package contains C software to implement JPEG image encoding, decoding, and transcoding. This software is based in part on the work of the Independent JPEG Group.
for this software is : http://code.google.com/p/protobufCopyright 2008, Google Inc.All rights reserved. Redistribution and use in source and binary forms, with or without modification, are permitted provided that the following conditions are met: * Redistributions of source code must retain the above copyright notice, this list of conditions and the following disclaimer.
list of conditions and the following disclaimer in the documentation and/or other materials provided with the distribution. * Neither the name of Google Inc. nor the names of its contributors may be used to endorse or promote products derived from this software without specific prior written permission.
of the Terms of Use to be unenforceable, the remainder of the Terms of Use will continue in full force and effect.14. The Terms of Use constitute the entire agreement between the parties with respect to the subject matter hereof and supersedes and replaces all prior or contemporaneous understandings or agreements, written or oral, regarding such subject matter.15.
stores. Different kernel modules and programs are currently used for different protocols; iptables applies to IPv4The original download site for this software is : https://android.googlesource.comThis piece of software is made available under the terms and conditions of the GPL v2. made available under the terms and conditions of the GPL v2 license, which can be found below. tinyxml (2.4.0) This TV uses FLAC in libddlacodec.so.
Fusion provides an implementation of abstractions needed for multi-threaded/multi-process programming: .The original download site for this software is : http://www.directfb.org/This piece of software is made available under the terms and conditions of the LGPL v2.1 license, which can be found below. Open Source Project nor the names of its contributors may be used to endorse or promote products derived from this software without specific prior written permission.
terms and conditions of Android Apache License version 2. site for this software is : http://libmtp.sourceforge.net/This piece of software is made available under the terms and conditions of Apache License version 2.0. Unicode (4.8.1.1) This TV uses Unicode which specifies the representation of text MDNS Responder (NA) MDNS Responder. The mDNSResponder project is a component of Bonjour,Apple's ease-of-use IP networking initiative. The original download site for this software is : http://www.opensource.
PROFITS; OR BUSINESS INTERRUPTION) HOWEVER CAUSED AND ON ANYTHEORY OF LIABILITY, WHETHER IN CONTRACT, STRICT LIABILITY, OR TORT(INCLUDING NEGLIGENCE OR OTHERWISE) ARISING IN ANY WAY OUT OF THE USEOF THIS SOFTWARE, EVEN IF ADVISED OF THE POSSIBILITY OF SUCH DAMAGE.
Project nor the names of its contributors may be used to endorse or promote products derived from this software without specific prior written permission. THIS SOFTWARE IS PROVIDED BY The Android Open Source Project ``AS IS'' ANDANY EXPRESS OR IMPLIED WARRANTIES, INCLUDING, BUT NOT LIMITED TO, THEIMPLIED WARRANTIES OF MERCHANTABILITY AND FITNESS FOR A PARTICULAR PURPOSEARE DISCLAIMED.
kill different types of RF radios When we speak of free software, we are referring to freedom, not price. Our General Public Licenses are designed to make sure that you have the freedom to distribute copies of free software (and charge for this service if you wish), that you receive source code or can get it if you want it, that you can change the software or use pieces of it in new free programs; and that you know you can do these things.
b) You must cause any work that you distribute or publish, that in whole or in part contains or is derived from the Program or any part thereof, to be licensed as a whole at no charge to all third parties under the terms of this License. object code or executable form with such an offer, in accord with Subsection b above.) The source code for a work means the preferred form of the work for making modifications to it.
GNU LESSER GENERAL PUBLIC LICENSE We protect your rights with a two-step method: (1) we copyright the library, and (2) we offer you this license, which gives you legal permission to copy, distribute and/or modify the library. Version 2.1, February 1999 Copyright (C) 1991, 1999 Free Software Foundation, Inc. To protect each distributor, we want to make it very clear that there is no warranty for the free library.
whole GNU operating system, as well as its variant, the GNU/Linux operating system. ?d) If a facility in the modified Library refers to a function or a table of data to be supplied by an application program that uses the facility, other than as an argument passed when the facility is invoked, then you must make a good faith effort to ensure that, in the event an application does not supply such function or table, the facility still operates, and performs whatever part of its purpose remains meaningful.
executable is therefore covered by this License. Section 6 states terms for distribution of such executables. charge no more than the cost of performing this distribution. ?d) If distribution of the work is made by offering access to copy from a designated place, offer equivalent access to copy the above specified materials from the same place.
License which applies to it and "any later version", you have the option of following the terms and conditions either of that version or of any later version published by the Free Software Foundation. If the Library does not specify a license version number, you may choose any version ever published by the Free Software Foundation. The above copyright notice and this permission notice shall be included in all copies or substantial portions of the Software.
are under common of this License, Derivative Works shall not include works that remain control with that entity. For the purposes of this definition, separable from, or merely link (or bind by name) to the interfaces of, "control" means (i) the power, direct or indirect, to cause the the Work and Derivative Works thereof.
and distribute the prominent notices Work and such Derivative Works in Source or Object form. stating that You changed the files; and (c) You must retain, in the Source form of any Derivative Works 3. Grant of Patent License.
terms and conditions risks associated with Your exercise of permissions under this License. for use, reproduction, or distribution of Your modifications, or for any such Derivative Works as a whole, provided Your use, 8. Limitation of Liability. In no event and under no legal theory, reproduction, and distribution of the Work otherwise complies with whether in tort (including negligence), contract, or otherwise, the conditions stated in this License.
convenience. In case of APPENDIX: How to apply the Apache License to your work. any discrepancy between this copy and the notices in the file png.h that is included in the libpng distribution, the latter shall prevail. To apply the Apache License to your work, attach the following boilerplate notice, with the fields enclosed by brackets "[]" COPYRIGHT NOTICE, DISCLAIMER, and LICENSE: replaced with your own identifying information.
or needs. This library is provided with all faults, and the entire Guy Eric Schalnat Paul Schmidt risk of satisfactory quality, performance, accuracy, and effort is with Tim Wegner the user. The PNG Reference Library is supplied "AS IS". The Contributing Authors libpng versions 0.97, January 1998, through 1.0.6, March 20, 2000, are and Group 42, Inc.
Also, the PNG logo (in PNG format, of course) is supplied in the This license applies to all files found in such packages, and files "pngbar.png.jpg" and "pngbar.jpg (88x31) and "pngnow.png.jpg" (98x31). which do not fall under their own explicit license. The license affects thus the FreeType font engine, the test programs, Libpng is OSI Certified Open Source Software. OSI Certified Open Source is a documentation and makefiles, at the very least. certification mark of the Open Source Initiative.
encourage you to use the following text: If you are unsure whether or not a particular file is covered by this license, you must contact us to verify this. """ Portions of this software are copyright ? The FreeType The FreeType Project is copyright (C) 1996-2000 by David Turner, Project (www.freetype.org). All rights reserved. Robert Wilhelm, and Werner Lemberg. All rights reserved except as """ specified below.
of the unaltered, Therefore, by using, distributing, or modifying the FreeType original files must be preserved in all copies of source Project, you indicate that you understand and accept all the terms files. of this license. o Redistribution in binary form must provide a disclaimer that ----------- states that the software is based in part of the work of the There are two mailing lists related to FreeType: FreeType Team, in the distribution documentation. We also o freetype@nongnu.
See below for the actual license texts. Actually both licenses are BSD-style * * Open Source licenses. In case of any license issues related to OpenSSL * 5. Products derived from this software may not be called "OpenSSL" please contact openssl-core@openssl.org. * nor may "OpenSSL" appear in their names without prior written OpenSSL License * --------------- * permission of the OpenSSL Project. * 6.
*/ disclaimer. * 2. Redistributions in binary form must reproduce the above copyright Original SSLeay License * notice, this list of conditions and the following disclaimer in the ----------------------- * documentation and/or other materials provided with the distribution. /* Copyright (C) 1995-1998 Eric Young (eay@cryptsoft.com) * All rights reserved. * 3.
code cannot simply be * copied and put under another distribution licence 1.6. "Initial Developer" means the individual or entity identified * [including the GNU Public Licence.] as the Initial Developer in the Source Code notice required by Exhibit */ A. 1.7. "Larger Work" means a work which combines Covered Code or _____________________________ MOZILLA PUBLIC portions thereof with code not governed by the terms of this License. LICENSE Version 1.1 1.8. "License" means this document.
claim(s), now owned or non-exclusive license, subject to third party intellectual property hereafter acquired, including without limitation, method, process, claims: and apparatus claims, in any patent Licensable by grantor. (a) under intellectual property rights (other than patent or trademark) Licensable by Initial Developer to use, reproduce, 1.11.
trademark) Licensable by Contributor, to use, reproduce, modify, absence of Modifications made by that Contributor. display, perform, sublicense and distribute the Modifications created by such Contributor (or portions thereof) either on an 3.1. Application of License.
Electronic Distribution Mechanism is maintained by a third party. (b) Contributor APIs. If Contributor's Modifications include an application programming 3.3. Description of Modifications. You must cause all Covered Code to which You contribute to contain a interface and Contributor has knowledge of patent licenses which file documenting the changes You made to create that Covered Code and are reasonably necessary to implement that API, Contributor must the date of any change.
absolutely clear than Initial Developer and every Contributor for any liability incurred by any such warranty, support, indemnity or liability obligation is the Initial Developer or such Contributor as a result of any such offered by You alone, and You hereby agree to indemnify the Initial terms You offer. Developer and every Contributor for any liability incurred by the 3.7. Larger Works.
and/or new versions of the License from time to time. Each version WITHOUT LIMITATION, WARRANTIES THAT THE COVERED CODE IS FREE OF will be given a distinguishing version number. DEFECTS, MERCHANTABLE, FIT FOR A PARTICULAR PURPOSE OR NON-INFRINGING. THE ENTIRE RISK AS TO THE QUALITY AND PERFORMANCE OF THE COVERED CODE 6.2. Effect of New Versions. Once Covered Code has been published under a particular version of the IS WITH YOU.
terminate prospectively, unless if within 60 days after receipt of notice You either: (i) 8.4. In the event of termination under Sections 8.1 or 8.
C.F.R. 12.212 and 48 C.F.R. 227.7202-1 through 227.7202-4 (June 1995), out of its utilization of rights under this License and You agree to all U.S. Government End Users acquire Covered Code with only those work with Initial Developer and Contributors to distribute such rights set forth herein. responsibility on an equitable basis. Nothing herein is intended or shall be deemed to constitute any admission of liability. This License represents the complete agreement concerning subject matter hereof.
Alternatively, the contents of this file may be used under the terms of the _____ license (the "[___] License"), in which case the provisions of [______] License are applicable instead of those above. If you wish to allow use of your version of this file only under the terms of the [____] License and not to allow others to use your version of this file under the MPL, indicate your decision by deleting the provisions above and replace them with the notice and other provisions required by the [___] License.
and no function is active. 18 Specifications End of Use 18.1 Disposal of your old product and batteries Environmental Your product is designed and manufactured with high quality materials and components, which can be recycled and reused. European Energy Label The European Energy Label informs you on the energy efficiency class of this product. The greener the energy efficiency class of this product is, the lower the energy it consumes.
For power consumption information, see chapter Product Fiche. Input Resolution The power rating stated on the product typeplate is the power consumption for this product during normal household use (IEC 62087 Ed.2). The maximum power rating, stated between brackets, is used for electrical safety (IEC 60065 Ed. 7.2).
• without TV stand: Width 1457.8 mm - Height 835.7 mm - Depth 55.3 mm - Weight ± 32.7 kg (HEVC) • Audio Codecs : AAC, HE-AAC (v1/v2), AMR-NB, Dolby Digital, Dolby Digital Plus, DTS Premium Sound™, MPEG-1/2/2.5 Layer I/II/III (includes MP3), WMA (v2 to v9.
control and you notice the infra red LED flicker through the camera, the remote control is working. The TV needs to be checked. If you do not notice the flickering, the remote control might be broken or its batteries are low. This method of checking the remote control is not possible with remote controls which are wirelessly paired with the TV. 19 Help and Support 19.
Change to a different picture format. • When an HDMI-CEC audio device is connected this behaviour is normal. Photos, videos and music from a USB device do not Picture format keeps changing with different channels show • Make sure that the USB storage device is set to Mass Storage Class compliant, as described in the storage device's documentation. • Make sure that the USB storage device is compatible with the TV. • Make sure that the audio and picture file formats are supported by the TV.
your question directly or send a question by email. You can download new TV software or the manual to read on your computer. 19.5 Repair For support and repair, call the Consumer Care hotline in your country. Find the telephone number in the printed documentation that came with the TV. Or consult our website www.philips.com/support . TV model number and serial number You might be asked to provide the TV product model number and serial number.
20 Risk of Injury or Damage to the TV Safety and Care • Two people are required to lift and carry a TV that weighs more than 25 kg or 55 lbs. • If you mount the TV on a stand, only use the supplied stand. Secure the stand to the TV tightly. Place the TV on a flat, level surface that can support the weight of the TV and the stand. • When wall mounted, ensure that the wall mount can safely bear the weight of the TV set.
Lightning Storms Disconnect the TV from the power outlet and antenna before lightning storms. During lightning storms, never touch any part of the TV, power cord or antenna cable. Risk of Hearing Damage Avoid using earphones or headphones at high volumes or for prolonged periods of time. Low Temperatures If the TV is transported in temperatures below 5°C or 41°F, unpack the TV and wait until the TV temperature reaches room temperature before connecting the TV to the power outlet.
Directives 2006/95/EC (Low Voltage), 2004/108/EC (EMC) and 2011/65/EU (ROHS). 21 Terms of Use_TV Compliance with EMF TP Vision Europe B.V. manufactures and sells many products targeted at consumers which, like any electronic apparatus, in general have the ability to emit and receive electromagnetic signals.
22 Terms of Use_Smart TV You can see the terms of use, privacy policy, and also set privacy settings of your Smart TV. To open the terms of use of Smart TV page… 1 - Press HOME to open the Home menu. 2 - Select Apps to open Apps. 3 - Select Support.
23 23.4 Copyrights DTS Premium Sound ™ 23.1 Ultra HD The DIGITALEUROPE UHD Display Logo is a trademark of DIGITALEUROPE. DTS Premium Sound ™ For DTS patents, see http://patents.dts.com. Manufactured under license from DTS Licensing Limited. DTS, the Symbol, & DTS and the Symbol together are registered trademarks, and DTS 2.0 Channel is a trademark of DTS, Inc. © DTS, Inc. All Rights Reserved. 23.2 23.
Content owners may require you to upgrade PlayReady to access their content. If you decline an upgrade, you will not be able to access content that requires the upgrade. 23.7 Wi-Fi Alliance Wi-Fi®, the Wi-Fi CERTIFIED logo, the Wi-Fi logo are registered trademarks of the Wi-Fi Alliance. 23.8 Kensington (If applicable) Kensington and Micro Saver are registered US trademarks of ACCO World Corporation with issued registrations and pending applications in other countries throughout the world. 23.
Index 3 D 3D Backlight Contrast 45 3D, Health Warning 42 3D, Optimal Viewing 41 Digital Text 33 DMR, Digital Media Renderer 10 DVD player 17 DVD player, connect 17 A Age Rating 29 Antenna connection 7 Antenna connection, Tips 11 Apps 39 Audio Out - Optical, tips 13 Audio Out Delay 16 Audio Out Format 15 Audio Out Levelling 15 Audio Out Offset 16 Audio Out Settings 15 Audio to Video Sync 16 Auto Surround 3D 50 Auto Volume Levelling 50 Automatic switch off 22 B Backlight Contrast 44 Bass 49 Batteries, re
Network, settings 9 Network, Static IP 9 Network, Switch on Wi-Fi 10 Network, TV Network Name 10 Network, View Settings 9 Network, Wi-Fi Smart Screen 10 Network, Wired 9 Network, Wireless 8 Network, WoWLAN 9 Network, WPS 8 Noise Reduction 48 Now on TV 36 O On and Off 21 Open, channel list 28 Options on a Channel 30 P Pairing the Remote Control 25 Parental Rating 29 Perfect Natural Motion 48 Philips Logo, Brightness 21 Photo camera, connect 19 Picture In Picture 43 Picture Style 44 Picture, Backlight Contr
Powered by TCPDF (www.tcpdf.