7607 Series User Manual 43PUS7607 50PUS7607 55PUS7607 Register your product and get support at www.philips.
Contents 1 Get Support 4 11 Open TV Setting Menus 30 1.2 TV Help and User Manual 4 11.2 Frequent Settings and All settings 30 1.1 Identify and Register your TV 1.3 Consumer Care / Repair 4 2.1 Update Software 5 2 Software 5 2.2 Software Version 5 2.3 Automatic Software Update 11.1 Home Menu Overview 4 5 2.4 View Software Update History 5 3.1 Remote Control 7 3 Quick Guide 7 3.2 IR sensor 9 11.3 All Settings 30 12.1 Home Network 41 12 Wireless and Networks 41 12.
25.1 Open Source Software 25.
installation. • Contact info - Show the telephone number or web address for your country or region. 1 Get Support * Sorting channels is only applicable for certain countries. 1.1 Identify and Register your TV ** Ambilight setting is only for models which support Ambilight function. Identify your TV - TV model number and serial number 1.3 You might be asked to provide the TV product model number and serial number.
The TV switches itself off for 10 seconds and then back on again. Please wait. 2 Software Do not . . . • use the remote control • remove the USB memory device from the TV • press twice • press the power switch on the TV The TV switches itself off (for 10 seconds) and then back on again. Please wait. 2.1 Update Software Search for Updates The TV software has been updated. You can use the TV again. To prevent an accidental update of the TV software, delete the autorun.
2.4 View Software Update History (Home) > Settings > All settings > Update software > View software update history Display the list of software versions that are successfully update on the TV.
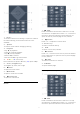
3 Top (for UK models) Quick Guide 3.1 Remote Control Key Overview Top 1 - Standby / On To switch the TV on or back to Standby. 2 - OPTIONS To open or close the Options menu. 3- To launch the Amazon prime video App. 4- To open the Netflix App directly. With the TV switched on or from standby. 1 - Standby / On To switch the TV on or back to Standby. • If you have a Netflix membership subscription, you can enjoy Netflix on this TV. Your TV must be connected to the Internet.
1 - - EXIT Press in middle to switch back to watch TV. To stop an interactive TV application. Prese + or - to switch to the next or previous channel in the channel list. To open the next or previous page in Text/Teletext. 1 - OK key To confirm a selection or setting. To open the channel list while watching TV if Interactive Service is not available. 2 - Volume Prese + or - to adjust the volume level. 3 - Number keys To select a channel directly. 2 - Back To close a menu without changing a setting.
open the next or previous page in Text/Teletext. 2 - Replace the old batteries with new batteries. Make sure the + and the - ends of the batteries line up correctly. 3 - Reposition the battery door and slide it back until it clicks. • Remove the batteries if you are not using the remote control for a long time. • Safely dispose of your old batteries according to the end of use directions. 2 - Volume Prese + or - to adjust the volume level. 3 - Number keys To select a channel directly.
4 Wall Mounting Setting Up Your TV is also prepared for the wall mount bracket (sold separately). 4.1 The wall mount size may vary depending on different type of back cases; refer to the Quick Start Guide in your product package to see which size is applied to your TV. Read Safety Read the safety instructions first before you use the TV. Use the following wall mount dimension when purchasing the wall mount.
Although this TV has a very low standby power consumption, unplug the power cable to save energy if you do not use the TV for a long period of time. On or Standby Before you switch on the TV, make sure you plugged in the mains power in the POWER connector on the back of the TV. Switch On Press the small joystick key on the bottom of the TV. Switch to standby To switch the TV to standby, press on the remote control. You can also press the small joystick key on the bottom of the TV.
5 Connections 5.1 Connectivity guide Always connect a device to the TV with the highest quality connection available. Also, use good quality cables to ensure a good transfer of picture and sound. When you connect a device, the TV recognizes its type and gives each device a correct type name. You can change the type name if you wish. If a correct type name for a device is set, the TV automatically switches to the ideal TV settings when you switch to this device in the Sources menu. 5.2 5.
5.5 Audio Device HDMI ARC/eARC Only HDMI 1 on the TV have Return Channel). HDMI ARC (Audio If the device, typically a Home Theatre System (HTS), also has the HDMI ARC connection, connect it to any of the HDMI connections on this TV. With the HDMI ARC connection, you do not need to connect the extra audio cable that sends the sound of the TV picture to the HTS. The HDMI ARC connection combines both signals. HDMI eARC (Enhanced Audio Return Channel) is an advancement over the previous ARC.
From the TV Apps - Philips TV Remote App To stop watching the screen of the device on TV, you can . . . The new Philips TV Remote App on your smartphone or tablet is your new TV buddy. • press EXIT to watch a TV broadcast • press (Home) to start another activity on TV • press SOURCES to open the Sources menu and select a connected device. Download the Philips TV Remote App from your favourite app store today. The Philips TV Remote App is available for iOS and Android and is free of charge.
into the slot COMMON INTERFACE. 3. Push the CAM in as far as it will go. Leave it in the slot permanently. When you switch on the TV, it may take a few minutes before the CAM is activated. If a CAM is inserted and subscription fees are paid (subscription methods can differ), you can watch the scrambled channels supported by the CAM smart card. The CAM and smart card are exclusively for your TV. If you remove the CAM, you will no longer be able to watch the scrambled channels supported by the CAM.
6 Switch Source 6.1 Source List • To open the sources menu, press SOURCES . • To switch to a connected device, select the device with the arrows (Right) or (Left) and press OK. • To view the technical information of the connected device you are watching, press OPTIONS and select Device info. • To close the source menu without switching to a device, press SOURCES again. 6.
7 for channels Channels 1 - Select Start now and press OK. 2 - Select Update channels to only add new digital channels. 3 - Select Start and press OK to update channels. This can take a few minutes. 7.1 About Channels and Switch Channels Quick reinstall (Home) > Settings > Install Channels > Antenna/cable installation > for channels To watch TV channels • Press . The TV tunes to the TV channel you last watched. • Press (Home) > TV > Channels and press OK. • Press + or - to switch channels.
select Advanced. or removed, a message is shown at TV start up. The TV must be in standby to automatically update channels. Frequency step size The TV searches for channels in steps of 8MHz. If this results in having no channels installed or if some channels are missing, you can search in smaller steps of 1MHz. Using the 1MHz steps will take more time to search for and install channels.
To fine tune a channel, select Fine tune and press OK. You can fine tune the channel with or . If you want to store the channel found, select Done and press OK. • Low LO Frequency / High LO Frequency - The local oscillator frequencies are set to standard values. Adjust the values only in case of exceptional equipment that needs different values. • 22 kHz Tone - By default, the Tone is set to Automatic. • LNB Power - By default, LNB Power is set to Automatic.
1 - Switch on the TV. This TV should have channels installed. 2 - Plug in a USB flash drive to USB 2* port. 3 - Select (Home) > Settings > All settings > Channels > Channel list copy > Copy to USB and press OK. 4 - When copying is done, unplug the USB flash drive. Manual Installation (Home) > Settings > Install Channels > Satellite installation > installation Manual Manually install satellite. • LNB - Select the LNB for which you want to add new channels.
done, continue with step 2. 2 - Plug in the USB flash drive that holds the channel list of the other TV. 3 - To start the channel list upload, select (Home) > Settings > All settings > Channels > Channel List Copy > Copy to TV and press OK. Enter your PIN code if necessary. 4 - The TV notifies you if the channel list is copied to the TV successfully. Unplug the USB flash drive.
* Note: The listed by genre function is only apply to Germany. HbbTV on This Channel Channel List Options If you want to avoid access to HbbTV pages on a specific channel, you can block the HbbTV pages for this channel only. Open Option Menu 1 - Tune to the channel of which you want to block the HbbTV pages. 2 - Press OPTIONS and select HbbTV on this channel and press (right). 3 - Select Off and press OK. 4 - Press (left) to go back one step or press Back to close the menu.
Select Channel List > OK > OPTIONS > Create a Favourites List Select channel list 1 - While watching a TV channel, press Channel list to open the channel list. 2 - Select the channel, and press Mark as favourites to mark as favourite. 3 - The selected channel is marked with a . 4 - To finish, press Back . The channels are added to the Favourites list. Select one of channel lists that sorted by different kinds of channels.
On each page of TV Guide, there is a "Did you know" grid inserted on your favourite channel list. The "Did you know"-channel provides useful tips to improve the way you use your TV. Text Options In Text/Teletext, press OPTIONS to select the following… * Satellite channel only can be searched on xxPxSxxxx TV models. • Freeze page To stop the automatic rotation of subpages. • Dual screen / Full screen To show the TV channel and Text alongside each other. • T.O.P. overview To open T.O.P. Text.
8 Update TV Guide TV Guide You can update the TV guide to get the latest programmes information. 8.1 To update the TV guide, press OPTIONS and select Update TV guide*. It may take few times to complete the update. What You Need With the TV guide you can view a list of the current and scheduled TV programmes of your channels. Depending on where the TV guide information (data) is coming from, analogue and digital channels or only digital channels are shown. Not all channels offer TV guide information.
9 9.3 Freeview Play (for UK models) TV Guide on Freeview Play When Freeview Play* is activated, press TV GUIDE can open the TV guide, press TV GUIDE again to close. 9.1 About Freeview Play Change day If the TV guide information comes from the broadcaster, you can press Channel up to view the schedule of one of the next days. Press Channel down to go back to the previous day. To enjoy Freeview Play*, you need to connect your TV to Internet first.
10 View Photos Videos, Photos and Music 1 - Press SOURCES, select USB and press OK. 2 - Select USB Flash Drive and then select the USB device you need. 3 - Select Photo, you can press Sort to browse your photos by day, month or year. 4 - Select one of photos, and press OK to view the selected photo. • To view photos, select Photos in the menu bar, select a photo thumbnail and press OK.
10.4 360° Photo Options 360° Photo When browsing 360° photo files, press OPTIONS to… View 360° Photos List/Thumbnails View 360° photos with list view or thumbnails view. 1 - Press SOURCES, select USB and press OK. 2 - Select USB Flash Drive and then select the USB device you need. 3 - Select 360° Photos, you can press Sort to browse your 360° photos by date, month, year or alphabetically by name. 4 - Select one of 360° photos, and press OK to view the selected 360° photo.
Character set Select the character set if external subtitle is available. Music Options Audio language Select audio language if available. When browsing music files, press OPTIONS to… Shuffle off, Shuffle on Play songs in sequential order, or at random. Status Display the information of the video file. Repeat, Play once Play songs repeatedly or once. Repeat, Play once Play videos repeatedly or once.
• Install channels - Update channels or start a complete new channel installation. • Picture style - Select one of preset picture styles for ideal picture viewing. • Picture format - Select one of preset picture format which fits the screen. • Sound style - Select one of preset sound styles for ideal sound settings. • Audio out - Set the TV to play the sound on TV or on the connected audio system. • Sleep timer - Set the TV to switch to standby automatically after a preset time.
** Picture style - Monitor is only available when HDMI source video is applicable for PC application. HDR is not supported in Monitor mode. The TV is able to play HDR video in Monitor mode but no HDR processing will be applied. Adjust the picture contrast (Home) > Settings > All settings > Picture > Backlight contrast Press the arrows (Right) or (Left) to adjust the contrast value of the picture. Custom a style You can decrease contrast value to reduce power consumption.
(Home) > Settings > All settings > Picture > Expert mode settings > Custom colour temperature Dynamic Contrast (Home) > Settings > All settings > Picture > Expert mode settings > Dynamic contrast Select Custom in Colour temperature menu to customise a colour temperature yourself. Press the arrows (Right) or (Left) to adjust the value.
Select Maximum, Medium, Minimum to set the level for removing the noise in video content. Noise is mostly visible as small moving dots in onscreen picture. Dolby Vision Notification (Home) > Settings > All settings > Picture > Dolby Vision Notification Switch On or Off the Dolby Vision notification when Dolby Vision content begins to play on your TV.
Select On or Auto (Dolby Atmos) to enable Dolby Atmos which can add height dimension in sound. With height dimension, sound can be precisely placed and moved in three-dimensional space. (Home) > Settings > All settings > Sound > Advanced > Delta volume The Delta volume setting can be used to adjust to balance the sound level difference between the TV channel and the HDMI source input. Press the arrows (Right) or (Left) to adjust the delta value for TV speaker volume.
settings > Sound > Advanced > Digital out format Dolby Atmos Notification Set the audio out signal of the TV to fit the sound capabilities of the connected Home Theatre System. (Home) > Settings > All settings > Sound > Dolby Atmos Notification • Stereo (uncompressed): If your audio playback devices have no multichannel sound processing, select to only output stereo content to your audio playback devices.
channel installation and updates. brands. - The HDMI CEC functionality has different names on different brands. Some examples are: Anynet, Aquos Link, Bravia Theatre Sync, Kuro Link, Simplink and Viera Link. Not all brands are fully compatible with EasyLink. Example HDMI CEC branding names are property of their respective owners.
- 12 bit: YCbCr 4:2:0*, YCbCr 4:2:2* * Supported only when HDMI Ultra HD is set to Optimal. (Home) > Settings > All settings > General settings > Eco settings > Switch off timer Press the arrows (Right) or (Left) to adjust the value. The value 0 (Off) deactivates the automatic switch off. Select Standard if the picture or sound are distorted. • Set Optimal (Auto Game) to enable TV to support the HDMI Variable Refresh Rate* video (on some models only and the Picture style setting is not Monitor).
completely. All settings will be reset and installed channels will be replaced. The installation can take a few minute Manage Demos (Home) > Apps > Demo me > Manage demos If the TV is set to Shop, you can manage the demo videos in Demo me app. Universal Access Settings (Home) > access Play demo video (Home) > Apps > Demo me > demos > Play Select a demo video file and play.
commentary. Only available when sound setting Clear dialogue is On and audio stream is AC-4. (Home) > Settings > All settings > Region and language > Language > Primary audio, Secondary audio Digital TV channels can broadcast audio with several spoken languages for a programme. You can set a preferred primary and secondary audio language. If audio in one of these languages is available, the TV will switch to this audio.
Note: • If none of the automatic settings display the time correctly, you can set the time manually. • The Auto clock mode setting will be back to Automatic after the TV power is turned off and on again. Set time zone or set a time offset for your region (Home) > Settings > All settings > language > Clock > Time zone Region and Select one of the time zones. Set the TV to switch to Standby automatically after a preset time (Home) > Settings > All settings > language > Clock > Sleep timer.
12 Wired Connection Wireless and Networks What You Need To connect the TV to the Internet, you need a network router with a connection to the Internet. Use a high-speed (broadband) connection to the Internet. 12.1 Home Network To enjoy the full capabilities of your Philips Smart TV, your TV must be connected to the Internet. Connect the TV to a home network with a high-speed Internet connection. You can connect your TV wirelessly or wired to your network router. 12.
and networks > Wired or Wi-Fi > Configuration > Static IP Network If you have more than one TV in your home network, you can give the TV a unique name. If you are an advanced user and want to install your network with Static IP addressing, set the TV to Static IP. Netflix settings (Home) > Settings > All settings > Wireless and networks > Wired or Wi-Fi > Netflix settings Network Configuration - Static IP Configuration With Netflix settings, you can view ESN number or deactive Netflix device.
genres and description keywords to search. 13 Smart TV 13.1 Setup Smart TV The first time you open Smart TV, you need to configure your connection. Read and agree to the terms and conditions to continue. The Smart TV Collection page is your link to the Internet. You can rent movies online, read newspapers, watch videos and listen to music, also shop online, or watch TV programmes when it suits you with On-line TV.
14 Netflix If you have a Netflix membership subscription, you can enjoy Netflix on this TV. Your TV must be connected to the Internet. To open Netflix, press to open the Netflix App. You can open Netflix immediately from a TV in standby. www.netflix.
15 Rakuten TV Watch the latest new releases on your Smart TV. The biggest blockbusters, award winning classics and TV series available instantly. Press the key on your remote control or the app icon to open the Rakuten TV app. Your TV must be connected to the Internet to use the app. For more information about Rakuten TV, please visit www.rakuten.tv.
16 Amazon Prime Video With an Amazon prime membership, you gain access to thousands of popular movies and TV show, including exclusive Prime Originals. Press the key to open the Amazon Prime Video app. Your TV must be connected to the Internet to use the app. For more information about Amazon Prime Video, please visit www.primevideo.com.
17 YouTube YouTube provides a platform to connect to the world. Watch and discover popular videos that uploaded by YouTube users around the world. Use the YouTube app to explore the latest topics on music, news, and more. Press the app icon to open the YouTube app. Your TV must be connected to the Internet to use the app. For more information about YouTube, please visit www.youtube.com.
18 Google Assistant Google Assistant is available on Philips Android TVs running on Android O (8) or higher OS version. GA is available in selected languages and countries with English-UK and German-DE and French-FR being supported from the start. Supported language/countries list is going to be expanded overtime. For latest language and countries support list please contact our consumer care. Your TV can work with the Google Assistant.
19 Environmental 49
20 20.4 Specifications Supported Input Resolution Supported Computer/Video resolution 20.1 Resolution — Refresh rate Power Video Inputs - Max frame rate is 60Hz (TV can be in Video/Game/Computer mode) Product specifications are subject to change without notice. For more specification details of this product, see www.philips.
Playback formats • Video Codec : AVI, MKV, H.264/MPEG-4 AVC, MPEG1, MPEG2, MPEG4, VP9, HEVC (H.265), AV1 • Audio Codec : MP3, WAV, AAC, WMA (v2 up to v9.2), WMA-PRO (v9 and v10), FLAC • Subtitles : - Format : SRT, SMI, SSA, SUB, ASS, TXT - Character encodings : Western Europe, Turkish, Central Europe, Cyrillic, Greek, UTF-8 (Unicode), Hebrew, Arabic, Baltic • Maximum Supported Data Rate : – MPEG-4 AVC (H.264) is supported up to High Profile @ L5.1. 30Mbps – H.
contraction of the TV as it cools and warms up. This does not affect performance. 21 Troubleshooting The TV goes back to standby after showing the Philips startup screen 21.1 When the TV is in standby, a Philips startup screen is displayed, then the TV returns to standby mode. This is normal behaviour. When the TV is disconnected and reconnected to the power supply, the startup screen is displayed at the next startup.
correct country and system. • Check if the settings are set to two satellites. Changing the installation settings did not solve my No analogue channels found during the installation • Check if the TV was connected with an antenna. Check the cable connections. • Check if you selected the correct DVB (Digital Video Broadcast) system. Select DVB-T (terrestrial) when you use an antenna or common antenna. • Redo the installation and select Digital and analogue channels during the installation.
• Restore picture style, select back to Picture style, then press Restore style. • Reset all TV settings, go to (Home) > Settings > All settings > General settings > Reinstall TV. • Check the connections of the source/input devices. • If the picture size changes all the time, press (Home) > Settings > All settings > Picture > Picture Format > Fit to screen.
signal quality to a level the device can handle. If the device is not using Ultra HD signals, you can switch off Ultra HD for this HDMI connection. If the picture and sound of a device connected with HDMI is distorted, check if a different HDMI Ultra HD setting can solve this problem. In Help > User manual, press the colour key Keywords and look up HDMI Ultra HD. • If there are intermittent sound disruptions, make sure that output settings from the HDMI device are correct. for your router.
ensure that the power voltage matches the value printed on the back of the TV. Never connect the TV to the power outlet if the voltage is different. 22 Safety and Care 22.1 Stability Hazards Safety A television set may fall, causing serious personal injury or death. Many injuries, particularly to children, can be avoided by taking simple precautions such as: Important Read and understand all safety instructions before you use the TV.
some lithium battery types). • Disposal of a battery into fire or a hot oven, or mechanically crushing or cutting of a battery, that can result in an explosion. • Leaving a battery in an extremely high temperature surrounding environment that can result in an explosion or the leakage of flammable liquid or gas. • A battery subjected to extremely low air pressure that may result in an explosion or the leakage of flammable liquid or gas. 22.
Therefore, please note this is not subjected to repair, exchange or refund within and/or out of the warranty period. 23 Terms of Use Backlight characteristics All Philips TV have gone through stringent tests and checks before shipping to you. You can be rest assured that we place the quality of our TVs the utmost importance so that you do not suffer any viewing displeasure while watching your TV.
24 Copyrights 24.1 HDMI HDMI 24.4 The terms HDMI, HDMI High-Definition Multimedia Interface, HDMI trade dress and the HDMI Logos are trademarks or registered trademarks of HDMI Licensing Administrator, Inc. DTS-HD DTS-HD For DTS patents, see http://patents.dts.com. Manufactured under license from DTS Licensing Limited. DTS, the Symbol, DTS and the Symbol together, DTS-HD, and the DTS-HD logo are registered trademarks or trademarks of DTS, Inc. in the United States and/or other countries. © DTS, Inc.
regardless of the platform on which their software is built, relieving them of the need to code special-case conditions to work around or take advantage of platform-specific deficiencies or features. Source: https://github.com/apache/apr 25 Open Source 25.1 Open Source Software This television contains open source software. TP Vision Europe B.V.
The "and coordination" part is important; D-Bus provides a bus daemon that does things like: - notify applications when other apps exit - start services on demand - support single-instance applications Source: https://github.com/freedesktop/dbus operating system. ALSA has the following significant features: Efficient support for all types of audio interfaces, from consumer sound cards to professional multichannel audio interfaces. Fully modularized sound drivers.
libpng (1.0.1) libpng -THE reference library for reading, displaying, writing and examining png Image Network Graphics. This piece of software is made available under the terms and conditions of the libpng license, which can be found below. Source: http://sourceforge.net/projects/libpng/files/ developed for the GNOME software suite and is available under a "MIT" license. Source: http://www.xmlsoft.org linux_kernel (4.
library in a variety of computer languages are available. Source: http://www.openssl.org/ pcre (8.45) The PCRE library is a set of functions that implement regular expression pattern matching using the same syntax and semantics as Perl 5. PCRE has its own native API, as well as a set of wrapper functions that correspond to the POSIX regular expression API. The PCRE library is free, even for building proprietary software. https://www.pcre.org/ procps (ps, top) (3.3.
26 Disclaimer regarding services and/or software offered by third parties Services and/or software offered by third parties may be changed, suspended, or terminated without prior notice. TP Vision does not bear any responsibility in these sorts of situations.
Index Get Support Google Assistant A Advanced Picture Settings Advanced Sound Settings AI Equalizer Antenna App lock Audio Language Audio Out Menu Auto Clock Mode Auto movie mode Automatic software update 31 34 33 12 39 39 34 39 37 5 H C CAM PIN Channel List Channel List Copy Channel Options Channel, Channel Filter Channel, Rename Channel Channels Child Lock Child Lock, Change Code Child Lock, Set Code CI Card Clear dialogue Clear Internet Memory Clock Colour Enhancement Colour Settings Colour Temperatu
S Safety and Care Satellite Screen Mirroring Screen Mirroring Connection Screen Off Screensaver settings Shop Setup Sleep Timer Smart TV Software Version Sound Menu Sound Style Sound, Auto Volume Levelling Sound, Delta Volume Source List Standby Mode Static IP Subtitle Language Super resolution Switch Off Timer Switch On with Wi-Fi Switching On 56 12 13 13 37 36 37 39 43 5 33 33 34 34 16 11 41 39 32 37 41 11 T Teletext Text Time Time Zone Troubleshooting TV Guide TV Information TV Network Name TV Placemen
Powered by TCPDF (www.tcpdf.