
User manual
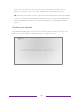
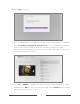
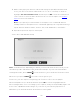
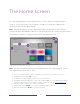
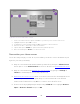
Table Of Contents
- Top cover
- Safety
- Contents
- Welcome
- Connections and setup
- Connecting an antenna, cable, or satellite box
- Connecting external equipment with a composite AV video cable
- Connecting external equipment with an HDMI® cable
- Connecting headphones or analog soundbar
- Connecting headphones to a Roku Voice Remote Pro
- Connecting an AV receiver or digital soundbar
- Preparing for Internet connectivity
- AC power
- Roku remote batteries
- Roku TV remote
- Panel buttons
- Guided Setup
- The Home screen
- Benefits of connecting
- Setting up live TV
- Using your TV
- Status indicator
- Standby mode energy savings
- Getting help
- Opting in to Smart TV experience (U.S. only)
- Watching live TV channels
- Using the Live TV Channel Guide (U.S. only)
- Viewing program information
- Adjusting settings while watching a program
- Pausing live TV
- More Ways to Watch (U.S. only)
- Automatic network recommendation
- Switching TV inputs
- Using Roku Voice commands
- Playing content from USB storage devices
- Playing content from local network media servers
- Setting up a payment method
- Using your TV in a hotel or dorm room
- Using Apple AirPlay and the Apple Home app
- Adjusting TV settings
- Featured Free (U.S. only)
- My Feed
- Searching for something to watch
- Using the Roku Channel Store
- Customizing your TV
- Parental controls
- More settings
- Other devices
- FAQ
- Warranty
- License
- Back cover

31
10. Press OK to proceed:
11. Connect all the devices you plan to use with your TV, turn them all on, and then
select Everything is plugged in and turned on. The TV now takes you step by
step through each of its inputs and asks what kind of device you have
connected. For each input that has a connected and active device, you can see
its picture and hear its sound.
12. Press UP or DOWN to highlight the label you want to associate with the input,
and then press OK. If you are not using the input, select Nothing, and the input
won’t appear on the Home screen.