User manual Manuel d’utilisation Gebruikershandleiding Användar-handbok | Benutzerhandbuch | Manuale per l'utent PhotoFrame™ | Manual del usuario | Manual do usuário 7FF1 Classic 7FF1CME 7FF1CWO Modern 7FF1M4 7FF1CMI
• Packing list • Initial setup Getting started • Specification Packing List Digital PhotoFrame™ PhotoFrame™ Stand Quick start guide User manual CD Power adaptor USB Cable to PC (male A type plug) What else you'll need Power outlet Digital Photos, memory card or PC RETURN TO TOP OF THE PAGE ©2005 Koninklijke Philips Electronics NV All rights reserved.
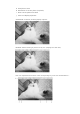
• Packing list Getting started • Initial setup • Specification Initial setup Philips digital PhotoFrame™ can be placed either vertically or horizontally to fit the photos on display. Its internal rechargeable battery provides you the freedom to pass it around and show photos without the power cord. Or, you can place it somewhere in the room for constant PhotoFrame™ by connecting it to the main. A. Removing the protective bag/film on parts B.
• LCD display also shows the function icon for each key at the same position. Previous/Left Switch view Setup Next/ Right Show/ Hide icon Photo setting Up Copy Confirm Down Delete Escape C. Turning on PhotoFrame™ • Slide the power switch up to the ON position. The power LED will be green and the Startup screen will appear. D. Choose your preferred language • • • • Press the key (the 3rd key from the left on the rear of PhotoFrame™) A menu with general settings for PhotoFrame™ will appear.
•Packing list Getting started •Initial setup •Specification Specification Picture/Display - Effective display area: 137 x 91 mm (5.4" x 3.6"), 6.5" diagonal - Vertical dot pitch: 0.1905 mm - Horizontal dot pitch: 0.
Photo menu:
OSD languages: English, French, German, Italian, Spanish, Simplified Chinese, Russian, Japanese Plug & Play compatibility: Windows 2000/XP or later, Mac OS X or later, Linux Accessories accessories: AC power adaptor (AC 100~240V 50/60 Hz 0.36A-->DC 5V - Included 2.
• Viewing Enjoying photos photos • Copying photos • Viewing Viewing Photos photo slideshows When there is no memory card in PhotoFrame™, it displays photos stored in local memory. • Deleting When a memory card is inserted to PhotoFrame™, it will display photos from most recently and connected media in a "Last-in, First-display" order. Rotating photos You can choose from three PhotoFrame™ viewing modes.
G Total photo count H Resolution of current photo (in pixels). I Date current photo was taken J Source of displayed photos. SLIDESHOW- Automatic, Rotating display of photos. BROWSE—Manual viewing of photos one-by-one. (Displays size and date) Each icon represents the function of the corresponding key in the rear of PhotoFrame™.
A Each icon represents the function of the corresponding key in the rear of PhotoFrame™. B Source of photos on screen Memory stick Compact flash SD, MMC PhotoFrame™ C Current Photo number D Total photo count E Resolution of current photo (in pixels) F Date current photo was taken Viewing photos on PhotoFrame™ • Remove any memory card from PhotoFrame™. Photos stored in the PhotoFrame™ will appear.
• Viewing Enjoying photos photos • Copying photos • Viewing Copying Photos photo slideshows You can copy photos stored on a memory card, or PC to PhotoFrame™. PhotoFrame™ will • Deleting then internally store a resized copy of the original photo. This resized copy will remain and inside PhotoFrame™ until you delete it from PhotoFrame™. Rotating photos PhotoFrame™'s internal memory will store 50 or more resized photos.
• Use the or key to move, to add photos to copy list, from copy list, and then press the to remove photos to confirm the copy list. Photos on the copy list are shown with a small copy icon . Do not remove the memory card before the copy screen disappears upon completion. If a warning message shows up indicating no free space for more photos, you may need to remove some already stored photos first before copying more photos.
•Viewing Enjoying photos photos •Copying photos •Viewing photo slideshows •Deleting and Rotating photos Viewing Photo Slideshows When you set the PhotoFrame™ view mode to Slideshow, it will automatically rotate the PhotoFrame™ed on screen. You may handpick the photos for slideshow and choose slideshow frequency – for example, how long a photo remains on screen – transition effect – how next photo replaces current one on screen – and sequential or random PhotoFrame™.
• Press the key to select Slideshow settings and use the the Frequency item. Next press the • Use the or or key to move to key again to select Frequency settings. key to highlight the interval a photo remains on screen and press to confirm. • Now your selected setting is confirmed. • Press to leave this menu. Choosing transition effects Note: This function applies • Press the to photos stored on all media. key (the 3rd key from the left on the rear of PhotoFrame™).
• Use the Press or key to highlight the way one photo replaces the next on screen. to confirm your selection. Now your selected setting is confirmed. Press to leave this menu. Choosing photo order Note: This function applies • to photos stored on all media. key (the 3rd key from the left on the rear of PhotoFrame™). Press the • A menu with general settings for PhotoFrame™ will appear. • Press the key to select Slideshow settings and use the the Order item.
• • Press key to select Slideshow settings; press key again to select Orientation. Use the or key to highlight how you want to place PhotoFrame™. Press confirm your selection. Now your selected setting is confirmed. • Press to leave this menu. Selecting correct photo orientation for Slideshow Note: This function only applies to photos stored on PhotoFrame™'s internal memory. • Change the view mode to Browse or Thumbnail. • key (the 4th key from the left on the rear of PhotoFrame™).
• • Use the or key to move the highlight among different rotation angles until the thumbnail image on the left shows the desired orientation for the selected photo. Press to confirm. Now your selected settings are confirmed. • Press to leave this menu.
•Viewing Enjoying photos photos •Copying photos •Viewing Deleting and Rotating photos photo slideshows Sometimes you may want to delete some photos stored on PhotoFrame™ or change the •Deleting orientation of photos. Here is how: and Rotating a photo Rotating photos Note: This function only applies to photos stored on PhotoFrame™'s internal memory. • • • Press the key (the 4th key from the left on the rear of PhotoFrame™). A menu with specific settings for the selected photo will appear.
• Use the or key to highlight Delete Photo; Press to confirm. • When you delete a photo, PhotoFrame™ will show status and return to Brose mode after completion. Delete several photos at once in Thumbnail mode • Change view mode to Thumbnail. • • Highlight the photo for delete in Thumbnail mode and press the key (the 2rd key from the left on the rear of PhotoFrame™). A multi-photo delete screen with small photos from current thumbnail screen will appear.
•Selecting brightness, language and set time functions •Checking PhotoFrame™ status •Taking care of your PhotoFrame™ Optimizing PhotoFrame™ Selecting brightness, language and set time functions Use this section to select PhotoFrame™ brightness levels and on-screen information displa language. You may also enter your local time and then set a different brightness level fo the evening hours from 6:00PM~6:00AM.
Press the key (the 3th key from the left on the rear of PhotoFrame™). A menu with general settings for PhotoFrame™ will appear. • • Use the or Press the key to highlight Time functions. Next press the key to select. key again to select Current Time. A clock will appear for you to set Hours, Minute, and AM/PM. • • Use the or key to set Hours; next then press the use the or key to set Minute. Use Press key to move to Minutes and to move back for any changes. to confirm.
• Press the key (the 3rd key from the left on the rear of PhotoFrame™). A menu with general settings for PhotoFrame™ will appear. • Use the or key to highlight Time functions. Next, press the Use the or key to highlight 6PM-6AM Brightness and press the key to select. • • • key to select. Use the or key to modify the brightness level and press to confirm and leave. If you choose Current Brightness, brightness will remain the same during the evening. Press again to leave this menu.
• • • • • • • • Use the or key to highlight Time functions. Next, press the Use the or key to highlight Auto on/off timer. Next, press the Select Enabled and press key to select. key to select. to confirm. Move to Auto on at and press key to select. Set the time to turn on PhotoFrame™ everyday and press Move to Auto off and press to confirm. key to select. Set the time to turn off PhotoFrame™ everyday and Press to confirm. Now you have completed the auto on/off setup for your PhotoFrame™.
• Use the or key to choose your preferred language and press The new selected setting is effective immediately. • Press again to leave this menu. RETURN TO TOP OF THE PAGE to confirm.
•Selecting brightness, language and set time functions •Checking PhotoFrame™ status •Taking care of your PhotoFrame™ Optimizing PhotoFrame™ Checking PhotoFrame™ status You may check the status of your PhotoFrame™— whether the system is ON, if the batte is charging, how many more photos can be stored, how much battery power remains, whic media are currently connected, or the PhotoFrame™ software version.
Optimizing PhotoFrame™ •Selecting brightness, language and set time Taking care of your PhotoFrame™ functions •Checking PhotoFrame™ 1) Do not drop status PhotoFrame™ is a complicated electronic device and cannot withstand shock from drops •Taking care of your 2) Do not expose to moisture PhotoFrame™ PhotoFrame™ is neither moisture proof nor moisture resistant. Exposing it to moisture o liquid spills of any kind will very likely damage your PhotoFrame™.
Frequently asked questions 1) Q: Is the LCD screen touch-enabled? A: The LCD screen is not touch-enabled. Please use the keys in the back to control PhotoFrame™. 2) Q: Can I switch between different slideshows photos by using different memory cards? A: Yes. When you connect your memory card to PhotoFrame™, it will slideshow photos stored on that specific card. 3) Q: How can I quick-charge my PhotoFrame™? A: Charge it with the system in OFF status.
13) My PhotoFrame™ is ON but the system does not respond anymore! First please make sure the system is properly powered. Then please use a pin to trigger the Reset button located at the lower-left corner on the back to restore the system. 14) Q: Why doesn't my PhotoFrame™ go into Auto-off status after I set it? A: First, please make sure you set Current Time, Auto-off at, and Auto-on at correctly. PhotoFrame™ will automatically turn off its display exactly at the Auto-off time.
•Troubleshooting your PhotoFrame™ •Keeping your PhotoFrame™ up to date Troubleshooting Troubleshooting your PhotoFrame™ Please see below for various situations and recommended actions. Situations Recommended actions Warning message: "Low battery" Recharge PhotoFrame™ or turn off PhotoFrame™ befo it can be recharged again. If the PhotoFrame™'s intern battery level drops completely to zero, the "Current tim setting may be lost.
•International Service and Warranty Warranty •For European Countries •USA Your Philips Warranty Thank you for purchasing this Philips product. All Philips products are designed and manufactured to high standards and deliver highquality performance, ease of use and ease of installation. Should you encounter any difficulties while installing or using this product, please check our website www.philips.com/support before you contact the Philips helpdesk.
z else; z Defects caused by abuse or misuse of the product; z This warranty does not cover accessories belonging to the product. z Product requires modification or adaptation to enable it to comply with local or national technical standards, which apply in countries for which the product was not originally designed, manufactured, approved and/or authorized. Therefore always check whether a product can be used in a specific country.
Ireland 01 601 1161 Local call tariff Italy 199 404 042 € 0.25 Luxembourg 26 84 30 00 Local call tariff The Netherlands 0900 0400 063 € 0.20 Norway 2270 8250 Local call tariff Portugal 2 1359 1440 Local call tariff Spain 902 888 785 € 0.15 Sweden 08 632 0016 Local call tariff Switzerland 02 2310 2116 Local call tariff United Kingdom 0906 1010 017 £0.
Consumer Information Centers Antilles •Argentina •Australia • Bangladesh• Brasil •Chile •China • Colombia •Belarus •Bulgaria • Croatia • Czech Republic •Estonia • Dubai • Hong Kong • Hungary • India • Indonesia • Korea • Latvia • Lithuania • Malaysia • Mexico • Morocco • New Zealand • Pakistan • Paraguay • Peru • Philippines • Poland • Romania • Russia • Serbia & Montenegro • Singapore • Slovakia • Slovenia • South Africa • Taiwan • Thailand • Turkey • Ukraine • Uruguay • Venezuela Eastern Europe BELARUS T
HU - 1031 Budapest Tel: +36 1 2426331 Email: inbox@serware.hu www.serware.hu LATVIA ServiceNet LV Jelgavas iela 36 LV - 1055 Riga, Tel: +371 7460399 Email: serviss@servicenet.lv LITHUANIA ServiceNet LT Gaiziunu G. 3 LT - 3009 KAUNAS Tel: +370 7400088 Email: servisas@servicenet.lt www.servicenet.lt ROMANIA Blue Ridge Int'l Computers SRL 115, Mihai Eminescu St., Sector 2 RO - 020074 Bucharest Tel: +40 21 2101969 SERBIA & MONTENEGRO Tehnicom Service d.o.o.
Tel: +7 095 961-1111 Tel: 8-800-200-0880 Website: www.philips.ru TURKEY Türk Philips Ticaret A.S. Yukari Dudullu Org.San.Bolgesi 2.Cadde No:22 34776-Umraniye/Istanbul Tel: (0800)-261 33 02 UKRAINE Comel Shevchenko street 32 UA - 49030 Dnepropetrovsk Tel: +380 562320045 www.csp-comel.com Latin America ANTILLES Philips Antillana N.V. Kaminda A.J.E. Kusters 4 Zeelandia, P.O. box 3523-3051 Willemstad, Curacao Phone: (09)-4612799 Fax : (09)-4612772 ARGENTINA Philips Antillana N.V.
Phone:(01)-8000 111001 (toll free) Fax : (01)-619-4300/619-4104 MEXICO Consumer Information Centre Norte 45 No.669 Col. Industrial Vallejo C.P.02300, -Mexico, D.F. Phone: (05)-3687788 / 9180050462 Fax : (05)-7284272 PARAGUAY Av. Rca. Argentina 1780 c/Alfredo Seiferheld P.O. Box 605 Phone: (595 21) 664 333 Fax: (595 21) 664 336 Customer Desk: Phone: 009 800 54 1 0004 PERU Philips Peruana S.A.
2 Wagener Place, Mt.Albert P.O. box 1041 Auckland Phone: 0800 477 999 (toll free) Fax : 0800 288 588 Asia BANGLADESH Philips Service Centre 100 Kazi Nazrul Islam Avenue Kawran Bazar C/A Dhaka-1215 Phone: (02)-812909 Fax : (02)-813062 CHINA SHANGHAI Rm 1007, Hongyun Building, No. 501 Wuning road, 200063 Shanghai P.R. China Phone: 4008 800 008 Fax: 21-52710058 HONG KONG Philips Electronics Hong Kong Limited Consumer Service Unit A, 10/F. Park Sun Building 103-107 Wo Yi Hop Road Kwai Chung, N.T.
NEW DELHI Customer Relation Centre 68, Shivaji Marg New Dehli 110 015 INDONESIA Philips Group of Companies in Indonesia Consumer Information Centre Jl.Buncit Raya Kav. 99-100 12510 Jakarta Phone: (021)-7940040 ext: 2100 Fax : (021)-794 7511 / 794 7539 KOREA Philips Korea Ltd. Philips House C.P.O. box 3680 260-199, Itaewon-Dong.
Accord Customer Care Solutions Ltd Authorized Philips Service Center Consumer Service 620A Lorong 1 Toa Rayoh Singapore 319762 Tel: +65 6882 3999 Fax: +65 6250 8037 TAIWAN Philips Taiwan Ltd. Consumer Information Centre 13F, No. 3-1 Yuan Qu St., Nan Gang Dist., Taipei 115, Taiwan Phone: 0800-231-099 Fax : (02)-3789-2641 THAILAND Philips Electronics (Thailand) Ltd.
Philips Pixel Defect Policy Philips strives to deliver the highest quality products. We use some of the industry's most advanced manufacturing processes and practice stringent quality control. However, pixel or sub pixel defects on the TFT LCD panels used in flat panel monitors are sometimes unavoidable. No manufacturer can guarantee that all panels will be free from pixel defects, but Philips guarantees that any monitor with an unacceptable number of defects will be repaired or replaced under warranty.
Black Dot Defects Black dot defects appear as pixels or sub pixels that are always dark or 'off'. That is, a dark dot is a sub-pixel that stands out on the screen when the monitor displays a light pattern. These are the types of black dot defects: One dark sub pixel Two or three adjacent dark sub pixels Proximity of Pixel Defects Because pixel and sub pixels defects of the same type that are near to one another may be more noticeable, Philips also specifies tolerances for the proximity of pixel defects.
Regulatory Recycling Information for Customers • Banned Substance Declaration • CE Declaration Confirmity • FCC Declaration of Conformity • Federal Communications Commission (FCC) Notice (U.S.
Banned Substance Declaration This product comply with RoHs and Philips BSD (AR17-G04-5010-010) requirements CE Declaration of Conformity z Philips Consumer Electronics declare under our responsibility that the product is in conformity with the following standards - EN60950:2000 (Safety requirement of Information Technology Equipment) - EN55022:1998 (Radio Disturbance requirement of Information Technology Equipment) - EN55024:1998 (Immunity requirement of Information Technology Equipment) - EN61000-3-2:200
THIS CLASS B DIGITAL APPARATUS MEETS ALL REQUIREMENTS OF THE CANADIAN INTERFERENCE-CAUSING EQUIPMENT REGULATIONS. RETURN TO TOP OF THE PAGE FCC Declaration of Conformity Model Number: 7FF1 Trade Name: Philips Responsible Party: Philips Consumer Electronics North America P.O. Box 671539 Marietta, GA 30006-0026 1-888-PHILIPS (744-5477) Declaration of Conformity for Products Marked with FCC Logo, United States Only This device complies with Part 15 of the FCC Rules.
Toutes modifications n'ayant pas reçu l'approbation des services compétents en matière de conformité est susceptible d'interdire à l'utilisateur l'usage du présent équipement. Les raccordements à cet appareil doivent être réalisés avec des câbles blindés à protections métalliques pour les connecteurs RFI/EMI afin de maintenir la conformité avec les Règlements et la Législation du FCC. CET APPAREIL NUMERIQUE DE LA CLASSE B RESPECTE TOUTES LES EXIGENCES DU REGLEMENT SUR LE MATERIEL BROUILLEUR DU CANADA.
RETURN TO TOP OF THE PAGE Polish Center for Testing and Certification Notice The equipment should draw power from a socket with an attached protection circuit (a threeprong socket). All equipment that works together (computer, monitor, printer, and so on) should have the same power supply source. The phasing conductor of the room's electrical installation should have a reserve short-circuit protection device in the form of a fuse with a nominal value no larger than 16 amperes (A).
Placering/Ventilation ADVARSEL: SØRG VED PLACERINGEN FOR, AT NETLEDNINGENS STIK OG STIKKONTAKT ER NEMT TILGÆNGELIGE. Paikka/Ilmankierto VAROITUS: SIJOITA LAITE SITEN, ETTÄ VERKKOJOHTO VOIDAAN TARVITTAESSA HELPOSTI IRROTTAA PISTORASIASTA. Plassering/Ventilasjon ADVARSEL: NÅR DETTE UTSTYRET PLASSERES, MÅ DU PASSE KONTAKTENE FOR STØMTILFØRSEL ER LETTE Å NÅ.
For additional information on recycling contact www.eia.org (Consumer Education Initiative) RETURN TO TOP OF THE PAGE Waste Electronics and Electrical Equipment (WEEE) This product is labelled with this symbol in accordance with European Directive 2002/96/EG to indicate that it must not be disposed of with your other household waste. Please check your local city office or waste disposal service for the return and recycling of this product.
Specifications are subject to change without notice. Trademarks are the property of Koninklijke Philips Electronics N.V. or their respective owners 2006 © Koninklijke Philips Electronics N.V. All rights reserved. www.philips.