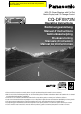
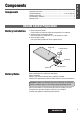
This Manual is an overseas version and some details may differ from Instructions enclosed with products sold in Australia MP3 CD Player/Receiver with Full Dot Matrix Display and CD Changer Control AF DISP CQ-DFX972N P·SET/DISC OPEN U PUS HM EN PW R TA TUNE BAND SRC TRACK SET/APM SO UR CE VO LUM E CD RECEIVER WITH FULL DOT MATRIX DISPLAY EON · PTY· CT FOLDER CQ-DFX972N Operating Instructions Bedienungsanleitung Manuel d’instructions Gebruiksaanwijzing Bruksanvisning Manuale di istruz
Contents Page Precautions ................................................... Components .................................................. General .......................................................... Radio .............................................................. Radio Data System (RDS) ............................ CD Player ....................................................... MP3 Player.....................................................
CD Changer Control ..................................... Audio Setting-AUDIO MENU ........................ Display Setting-PICTURE MENU ................. Function Setting-FUNCTION MENU ............ Installation ..................................................... Anti-Theft System ......................................... Electrical Connections ................................. 22 24 26 28 30 33 34 Steuerung des CD-Wechslers ..................... 64 Audio-Einstellung ..............
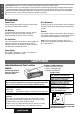
E N G L I S H Panasonic welcomes you to their constantly growing family of electronic products owners. We endeavor to give you the advantages of precise electronic and mechanical engineering, manufactured with carefully selected components, and assembled by people who are proud of the reputation their work has built for our company.
Components Components • Operating Instructions ........................................................................................1 • Supplied Hardware ..................................................................1 set (a Page 30) • Remote Control Unit ...........................................................................................1 • Lithium Battery (CR2025)...................................................................................1 • Warranty Card.............................
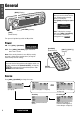
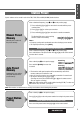
E N G L I S H General [DISP] (Display) SC P·SET/DI 3 Demonstration Message When you use this unit for the first time, a demonstration message appears on the display. Press [DISP] to change to regular mode. OPEN 2N CQ-DFX97 TUNE AF BAND DISP M EN U SET / AP PUSH M PW R TA FOLDER SRC LL DOT SO UR CE TRACK VO LUM CEIVER E CD RE WITH FU MATRIX Y DISPLA [VOLUME] (Volume) Note: To display the message again, press [SRC] / [SOURCE] for 4 seconds or more when turning power on.
Volume Mute / Attenuation [VOLUME] (Clockwise) / [VOL}] : Up [VOLUME] (Counterclockwise) / [VOL{] : Down E N G L I S H (Only for remote control) ON : Press [MUTE]. OFF : Press again. Decreasing volume range depends on setting. (Mute / Attenuation setting a Page 28) Setting Range : 0 to 40 4 : No sound Note: The sound level for each source is stored in memory. (For radio, one volume setting for AM, one volume setting for all FMs) : Decrease the volume to 1/10 of previous level.
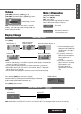
E N G L I S H Radio []] [[] (Tune) [}] [{] (Preset station/Select) [DISP] (Return) 5 C P·SET/DIS 1 Radio Mode Press [SRC] / [SOURCE] to select the radio mode.
E N G L I S H Station Preset Up to 6 stations can be stored in each of the FM1, FM2, FM3 and AM (LW/MW) band selections. 6 Select a band and frequency (step w and e on the previous page) q Press and hold [}] or [{] for more than 2 seconds until the preset number blinks. w Press [}] or [{] to select a preset number. e Press and hold [}] or [{] for more than 2 seconds to memorize. Manual Preset Memory Manually save a station in the preset memory.
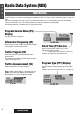
E N G L I S H 7 Radio Data System (RDS) RDS Basics Some FM stations are broadcasting added data compatible with RDS. This radio set offers convenient functions using such data. RDS service availability varies with areas. Please understand if RDS service is not available in your area, the following service is not available, either. This chapter explains the summary and operation regarding RDS. The following functions are available when receiving RDS stations.
E N G L I S H Alternative Frequency (AF) 8 Alternative Frequency (AF) Mode Default : AF mode is active. (Press and hold [TA] on the main unit for more than 2 seconds to switch the AF mode on or off.) AF ON : AF, Best Station and PI Seek function are active. Auto Preset Memory (Default) Lights when AF is on When AF ON is selected, only RDS stations will be memorized automatically.
E N G L I S H 9 Radio Data System (RDS) (continued) Traffic Announcement (TA) Traffic Announcement (TA) Mode TA Mode Press [TA] on the main unit to switch the TA mode on. (Press again to switch the TA mode off.) TA ON : If the station received is not a TP station, the unit automatically searches for a TP station to tune in to it. When the TP station received begins a traffic announcement, you can hear it from the unit.
E N G L I S H Program Type (PTY) Reception 10 Program Type (PTY) Mode PTY Mode Press and hold [MENU] / [SEL] for more than 2 seconds to switch the PTY display mode on. (Press and hold again to switch the PTY display mode off.) PTY ON : The PTY function described below becomes enabled after selecting to the PTY mode.
E N G L I S H Radio Data System (RDS) (continued) Program Type (PTY) Reception 11 PTY Preset Call Program types are stored in memory under preset memory number 1 to 6 as shown in the table on the next page. To select the desired program type, press [}] or [{] or preset buttons on the remote control.
Program Type (PTY) Reception E N G L I S H 12 PTY Preset (Default) Preset No. Program Type When PTY search is activated, these program type is receivable.
E N G L I S H CD Player P·SET/DISC CQ-DFX97 1 2 OPEN 2N TUNE BAND DISP AF PW 13 TRACK SET/APM PUSH ME NU R TA FOLDER SRC SO UR VO CE LUM CD E R RECEIVE WITH FUL L DOT MATRIX DISPLAY Label Side Open the Front Panel Press [OPEN] on the front panel. Insert a Disc Insert a disc and close the front panel. Playback will start automatically after the unit recognized the loaded disc as an ordinary music CD.
Available Discs CD-RW TEXT Note: Refer to the section on “Notes on CD-Rs/RWs” (a Page 39). CD Menu Setting CD Menu Display q Press [MENU] / [SEL] during CD playing. w Press [}] or [{] to select an item. e Press [BAND] to switch on or off in turn. E N G L I S H 14 Note: Press [MENU] / [SEL] or [DISP] to return to the regular mode.
E N G L I S H MP3 Player P·SET/DISC 1 2 OPEN 2N CQ-DFX97 TUNE AF BAND DISP PW 15 SET/APM PUSH ME NU R TA TRACK FOLDER SRC SO UR VO CE LUM E CD REC EIVER WITH FUL L RIX DOT MAT DISPLAY Label Side Open the Front Panel Press [OPEN] on the front panel. Insert a Disc Insert a disc and close the front panel. Playback will start automatically when an MP3 file has been recognized on the disc.
Available Discs MP3 MP3 MP3 CD-RW CD-ROM Note: Refer to the section on “Points to remember when recording an MP3 disc” (a Page 20) and “Notes on CD-Rs/RWs” (a Page 39). MP3 Menu Setting MP3 Menu Display q Press [MENU] / [SEL] during MP3 playing. w Press [}] or [{] to select an item. e Press [BAND] to switch on or off in turn. E N G L I S H 16 Note: Press [MENU] / [SEL] or [DISP] to return to the regular mode.
E N G L I S H MP3 Player (continued) Points to remember when recording an MP3 disc 17 This player allows you to play MP3 files recorded on CD-ROMs, CD-Rs (Recordable) and CD-RWs (Rewritable). What is MP3 MP3, short for MPEG Audio Layer-3, is a standard for compressing digital video data adopted for video CDs and similar media. It is one of the audio compression systems covered by MPEG’s (Motion Picture Experts Group) digital audio compression standards.
E N G L I S H 18 Folder Selection Order / MP3 file playback order (Example) Root Folder (Root Directory) 1 2 Notes: ¡This unit counts the number of folders irrespective of the presence or absence of MP3 file. ¡If the selected folder does not contain any MP3 files, the nearest MP3 files in the order of playback will be played. ¡Playback order may be different from other MP3 players even if the same disc is used. ¡“ROOT” appears when displaying the root folder’s folder name.
E N G L I S H CD Changer Control Insert the Magazine CD changer functions are designed for optional Panasonic CD changer unit. (a Page 36 and 37 for connection) Playback starts. 19 [1] [2] (Track/Fast forward/Fast reverse) Notes: ¡The power will be turned on automatically when a magazine is loaded. ( ACC ON ) ¡The unit returns to previous mode when the magazine is ejected in the CD changer mode.
Available Disc TEXT Note: CD text is displayed when the unit is connected to a CD changer capable of recognizing CD text (CX-DP9061EN, for example). CD Changer Menu Setting CD Changer Menu Display q Press [MENU] / [SEL] during CD changer playing. w Press [}] or [{] to select an item. e Press [BAND] to switch on or off in turn. E N G L I S H 20 Note: Press [MENU] / [SEL] or [DISP] to return to the regular mode.
E N G L I S H Audio Setting - AUDIO Menu [DISP] (Return) C P·SET/DIS q OPEN 72N CQ-DFX9 21 TUNE AF BAND TRACK DISP PUSH M PW SET / AP [BAND] (Set) FOLDER SRC SO UR CE M EN U R TA AUDIO Menu VO PUSHIVER WITH FULL DOT MATR LUM CE E CD RE [MENU] (Menu/Return) [}] [{] (Select/Adjust) e w LAY IX DISP []] [[] (Select/Adjust) q w Super High Definition Bass (S·HDB) Press [}] or [{] to select S·HDB Especially for rock music, the bass-sound will be more powerful.
[SEL] (Menu/Return) Note: Press [MENU] / [SEL] or [DISP] to return to the regular mode. []] [[] (Select/Adjust) E N G L I S H 22 [}] [{] (Select/Adjust) [BAND] (Set) e [DISP] (Return) [}] or [{] to change. S·HDB OFF : S.HDB off BOOM TIGHT : The bass sound of the speakers are strongly emphasized. : The bass sounds of the speakers are moderately emphasized. (The sound of the Sub-Woofer can be heard clearly.) q Press [[] or []] to select “BAS” (Bass) or “TRE” (Treble).
E N G L I S H Display Setting - PICTURE Menu [DISP] (Return) C P·SET/DIS q OPEN PICTURE (Display) Menu 72N CQ-DFX9 23 TUNE AF BAND DISP PUSH M PW SET / AP M FOLDER SRC SO UR VO PUSHIVER WITH FULL DOT MATR LUM CE E CD RE [}] [{] (Select/Adjust) [MENU] (Menu/Return) e w LAY IX DISP CE [BAND] (Set) TRA CK EN U R TA []] [[] (Select/Adjust) q w Press [}] or [{] to select Dimmer DIMMER Default : DIMMER 3 Press [BAND] to set.
[SEL] (Menu/Return) Note: Press [MENU] / [SEL] or [DISP] to return to the regular mode. []] [[] (Select/Adjust) E N G L I S H 24 [}] [{] (Select/Adjust) [BAND] (Set) e [DISP] (Return) [[] or []] to change. 3 : Brighter 2 : Medium 1 : Darker [[] or []] to change. A : Display showing a cube that continues to change. B : Display showing a globe that continues to change. C : Display showing the image of a soccer. D : Display showing a text. E : Display showing the image of a circuit.
E N G L I S H Function Setting - FUNCTION Menu FUNCTION Menu [DISP] (Return) C P·SET/DIS q OPEN 72N CQ-DFX9 25 TUN E AF BAND DISP PUSH M PW SET / AP PUSH SO UR VO LUM w FOLDER SRC CE [BAND] (Set) M EN U R TA TRACK CEIVER E CD RE LL DOT WITH FU MATRIX SPLAY DI [}] [{] (Select) [MENU] (Menu/Return) []] [[] (Select) q e w Mute / Attenuation Press [}] or [{] to select Decreasing range by pressing [MUTE] button can be selected.
[SEL] (Menu/Return) Note: Press [MENU] / [SEL] or [DISP] to return to the regular mode. []] [[] (Select) E N G L I S H 26 [}] [{] (Select) [BAND] (Set) e [DISP] (Return) Press [BAND] to switch between mute or attenuation in turn. MUTE ATT : No sound : Decrease to 1/10 Press [BAND] to change the volume level of the sound source as shown. LV0 : No sound LV1 : Decrease 15 levels LV2 : Decrease 5 levels OFF : Unchanged Press [BAND] to activate the function or inactivate it in turn.
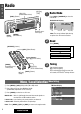
E N G L I S H 27 Installation Preparation ¡Before installation, check the radio operation with antenna and speakers. ¡Disconnect the cable from the negative (–) battery terminal (see caution below). ¡Unit should be installed in a horizontal position with the front end up at a convenient angle, but not more than 30°. Supplied Hardware No.
Cautions: ¡We strongly recommend that you wear gloves for installation work to protect yourself from injuries. ¡When bending the mounting tab of the mounting collar with a screwdriver, be careful not to injure your hands and fingers. 1 First complete the electrical connections, and then check them for correctness. (a Page 34) The included Mounting Collar q is designed specially for this unit. Do not use it to attach any other model.
E N G L I S H Installation (continued) To Remove the Unit Switch off the power of the unit. 29 1 Remove the removable face plate. q Press [OPEN]. The removable face plate will be opened. w Push the face plate to either the right or left. e Pull it out toward you. P·SET/DISC OPEN 1 Open Open TUNE BAND TRACK SET/APM FOLDER 2 3 Remove the Trim Plate t with a screwdriver. q Insert the Lock Cancel Plates u along the grooves on both sides of the main unit until “click” is heard.
Anti-Theft System This unit is equipped with a removable face plate. Removing this face plate makes the radio totally inoperable. The security indicator will blink. E N G L I S H r Removable Face Plate Case 30 Place Removable Face Plate into Case q Switch off the power of the unit. w Remove the removable face plate. (a Page 32) e Gently press the bottom of the case and open the cover. Place the face plate into the case and take it with you when you leave the car.
E N G L I S H 31 Electrical Connections Wiring Diagram Precautions (ISO Connector) ¡The pin arrangement of the power connector conforms to ISO standard. ¡The pin arrangement of ISO connectors in some cars may differ from the ISO standard. ¡Please check that the pin arrangement of the connector in your car conforms to ISO standard. ¡For car types A and B, change the wiring of the red and yellow leads as shown at below. ¡After connection, insulate the portions marked (C) with insulating tape.
Cautions: ¡Check the connectors provided on your car (see precaution below) before connecting the system. ¡This unit is designed for use in a car having a 12-volt negative ground battery system. ¡To prevent damage to the unit, be sure to follow the connection diagram. ¡Strip about 5 mm of the lead ends for connection (only non-ISO connector cords). ¡Do not insert the power connector into the unit until the wiring is completed.
E N G L I S H 33 Electrical Connections (continued) System Upgrade Example 1 : Nine Speakers and CD Changer Combination: CD Changer (CX-DP9061EN), 4 Channel Power Amplifier (CY-M9054EN) and Stereo/Mono Power Amplifier (CY-M7052EN) CD text recognizable CD changer CX-DP9061EN ¡This unit can be connected to an optional CD changer (CX-DP9061/DP9060EN, CX-DP88N, CX-DP801/DP 803EN or CX-DP601EN) and optional extension cord. ¡For details consult your nearest authorized Panasonic Dealer.
E N G L I S H System Upgrade Example 2 : Connecting Two CD Changers Combination: Two CD Changer (CX-DP9061EN) 34 Note: To connect two CD changers, the optional dual CD changer selector (CA-CD55EN) is necessary. CD text recognizable CD changer CX-DP9061EN Power Connector (Supplied to CX-DP9061EN) Ground Lead (Black) To a clean, bare metallic part of the car chassis DIN Cord RCA Cord Battery Lead (Yellow) To the car battery, continuous +12 V DC DIN Cord (Supplied to CA-CD55EN) CD.
E N G L I S H Speaker Connections Caution: Please follow the instructions given below. Failure to do so will cause damage to the unit and speakers. 35 ¡Use ungrounded speaker only. ¡The maximum speaker output should be 50 W or more. (If used with the optional power amplifier, the speaker output should be higher than the maximum amplifier output.) ¡The speaker impedance should be 4 - 8 Ω. ¡This unit uses the BTCL circuit, so each speaker should be connected separately using parallel vinyl insulated cords.
Maintenance Your product is designed and manufactured to ensure the minimum of maintenance. Use a soft cloth for routine exterior cleaning. Never use benzine, thinner, or other solvents. E N G L I S H 36 Notes on CD / CD Media (CD-ROM, CD-R, CD-RW) If you use commercial CDs, they must have either of these labels shown at right. How to hold the disc ¡Do not touch the underside of the disc. ¡Do not scratch on the disc. ¡Do not bend disc. ¡When not in use, keep disc in the case.
E N G L I S H Troubleshooting Preliminary Steps Check and take steps as described in the tables below. 37 If You Suspect Something Wrong Immediately switch power off. Disconnect the power cable and check that there is neither smoke nor heat from the unit before asking for repairs. Never try to repair the unit yourself because it is dangerous to do so. Cautions: ¡Do not use the unit if it malfunctions or something is wrong.
■ Radio Problem Possible cause / Possible solution E N G L I S H 38 Station is too far, or signals are too weak. aSelect other stations of higher signal level. Poor reception of FM stereo and monaural broadcasts. The radio antenna is not extended enough. aExtend the radio antenna enough. The motor antenna relay control lead is not connected correctly. aIf there is a motor antenna in the car, connect the motor antenna relay control lead to the motor antenna lead that is installed in the car correctly.
E N G L I S H Troubleshooting (continued) ■ CD Problem Possible cause / Possible solution 39 CD text is not displayed normally. Disc is dirty, or has scratches. aClean disc, referring to the section on “Notes on CD / CD Media (CD-ROM, CD-R, CD-RW)” (a Page 39). Time is counted but no sound comes out. The 1st track of a mix mode disc was reproduced. (Mix mode is a format in which data except music is recorded on the 1st track and music data is recorded on other than the 1st track in a session.
■ MP3 (Continued) Problem Possible cause / Possible solution E N G L I S H 40 You ran the file in fast forward or fast reverse during playback or turned off the ignition switch of the car during playback. aPlaying another file will return the file playing time to normal. File playing time is not displayed correctly. You played a VBR (Variable Bit Rate) format MP3 file. aThe file playing time of VBR (Variable Bit Rate) format MP3 file is sometimes displayed incorrectly.
E N G L I S H 41 Troubleshooting (continued) Error Display Messages ■ CD / MP3 Display Possible cause / Possible solution Disc is dirty, or is upside down. A disc that has data other than CD-DA or MP3 type is loaded. Disc has scratches. No operation by some cause. After 5 seconds After 5 seconds aOpen the panel and press [u]. ¡Check disc. ¡Load the disc again. Return to previous mode When there is no MP3 files in the specified folder during direct MP3 folder selection.
Specifications General CD Player Power Supply Sampling Frequency DA Converter Error Correction System : DC 12 V (11 V - 16 V), Test Voltage 14.4 V, Negative Ground Current Consumption : Less than 2.5 A (CD mode, 0.5 W 4-Speaker) Maximum Power Output : 50 W x 4 (at 4 Ω) Power Output : 22 W x 4 (DIN45 324, at 4 Ω) Speaker Impedance : 4-8Ω External Input Impedance : 10 kΩ (AUX IN) External Input Sensitivity : Max.
Matsushita Electric Industrial Co., Ltd. Central P.O. Box 288, Osaka 542-8588, Japan Dalian Matsushita Communication Industrial Co., Ltd. Daxinzhaizi, Ganjingzi District, Dalian, China P.C.