
Technical data


Getting started
5
3 Getting started
3.1 Install
Insert the installation CD into the PC’s CDROM (or DVDROM)
drive
• The installation program will start automatically
Follow instructions on the screen
Note
If for some reason the installation does not start automatically:
1 Click on Windows START and then RUN
2 Type explorer and navigate to the CD ROM (or DVDROM)
drive
3 Double-click on Setup.exe
Tip
By default, the language of your operating system will be choosen, but
you have 10 seconds if you want to select another one.
Click on the required language
• The next screen will be displayed automatically
Click on the picture of the CCU7740N Wireless USB Adapter
• The software end user licence agreement screen is displayed
Read carefully and click on Agree
• The next screen will be displayed
3.2 Connect
Note
DO NOT PLUG IN YOUR CCU7740N WIRELESS USB ADAPTER
BEFORE BEING INSTRUCTED
Click on Continue
• A progress bar screen will be displayed
• You will be invited to connect your wireless USB adapter
Connect your CCU7740N wireless USB adapter
• The installation will go on and a confirmation of installation screen is
displayed
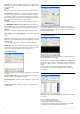
Double click on the tray icon in the right corner of your screen or
on the Philips Wireless Network Manager icon on your desktop
1
2
3
4
5
1
2
3