Register your product and get support at www.philips.
7 Other settings 1 Important 2 2 Your car audio system 3 3 Introduction 3 Play Load and eject discs Insert and remove USB device Insert and remove SD/SDHC card Skip/search Intro play Repeat play Random play Select Language Dynamic Bass Boost MAX sound Zoom 4 Radio Select tuner sensitivity Manual tune to a radio station Auto tune to a radio station Store stations manually Store stations automatically Select the preset station Select stereo or mono broadcasting 5 Play with RDS Activate AF/TA/REG/CT fu
1 Important Read and understand all instructions before you use the apparatus. If damage is caused by failure to follow instructions, the warranty does not apply. Use of controls or adjustments or performance of procedures other than herein may result in hazardous radiation exposure or other unsafe operation. This unit is designed for negative ground (earth) 12 V DC operation only. watch video during driving.
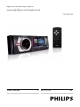
E n g lish 2 Your car audio system Congratulations on your purchase, and welcome to Philips! Philips offers, register your product at www.Philips.com/welcome. Read this user manual carefully before you install and use the unit. Save it for future reference. Introduction your drive while you listen to: " #" $" % Audio from a USB drive, a SD/SDHC card, external devices.
3 Play Make sure that the disc or device contains playable music or video. Note 3 To remove the disc, press the button. » unit switches to TUNER mode automatically. 4 Close the front panel. » After a few seconds, the screen illuminates. For video discs, press an item, then press "<= "# or to select a folder, JPEGs, press to start playing. track or picture. Press &' session is played.
Insert the USB device into the USB socket. » The unit starts playing from the USB device automatically. 3 To remove the USB device, press turn off the unit. 4 Remove the USB device. 3 To remove the SD or SDHC card, press to turn off the unit. 4 Press the card until you hear a click sound. » The card is now disengaged. to Insert and remove SD/SDHC card 1 Press 2 Insert SD or SDHC card into the card slot. » The unit starts playing from the SD/ SDHC card automatically.
During MP3/WMA play twice to display the folder list. Press to select, and then press to or or the folder. Press Repeat play There are 3 standard modes of repeat play for @ "<=K "# Press the button repeated to select. within press the numeric buttons. [REP ONE]: play the current chapter or track repeatedly.
[SHUFFLE ALL]: start random play for all tracks. Dynamic Bass Boost [SHUFFLE DIR]: start random play in current folder. 1 [SHUFFLE OFF]: cancel random play. » [DBB OFF]: The DBB function is off. Select Language Subtitle Press / on the car audio on the system for 3 seconds or press remote control. » [DBB ON]: The Dynamic Bass Boost (DBB) function is on. 2 Press again to change the DBB setting. You can select the subtitle language if the DVD discs contain two or more subtitle languages.
Zoom To zoom in and out of video images and pictures: 1 Press on the remote control repeatedly. » [ZOOM] is displayed. 2 Press the navigation buttons to pan across the display.
6 Select tuner sensitivity Before you start to search for radio station, you can select tuner sensitivity. 1 Press . » The main menu is displayed. 2 Press the navigation buttons to select on remote [SETTINGS], then press on the car audio to control or 3 Press 4 5 Press or Press or button to select [LOC] on remote control or[DX] , then press or Manual tune to a radio station 1 Press 2 Press and hold or to select band.
3 Press or manually. to tune to a radio station Store stations automatically You can store up to 6 stations in each band. 1 Press on the remote control or press and hold on the unit. » The six strongest stations of the selected band are saved in preset channels 1-6 automatically. Auto tune to a radio station Select the preset station In [RADIO] mode, press and hold for 3 seconds. 1 Press and hold or to select band. » [FM-1], [FM-2], [FM-3], [FM], [MW-1], or [MW-2] is display.
E n g lish 4 Press or setting . 5 6 Press buttons to select the radio to select [STEREO_MONO]. Press again to reach the [STEREO_ MONO] option list. 7 Press or [MONO].
5 Play with RDS Search for an RDS station by PTY information The RDS (Radio Data System) function operates only in areas with FM stations broadcasting RDS signals. If you tune to an RDS station, an RDS icon and the station name are displayed. Activate AF/TA/REG/CT functions 1 2 Press in radio mode. » The PTY menu is displayed. 2 Turn to select a program type, then to start searching. press » ; broadcasted automatically. » NO PTY [ searched.
CULTURE Culture, religion and society 8 SCIENCE Science 9 VARIED Entertainment programs 10 POP M Pop music 11 ROCK M Rock music 12 MOR M Light music 13 LIGHT M Light classical music 14 CLASSICS Classical music 15 OTHER M Special music programs 16 WEATHER 17 FINANCE Finance 18 CHILDREN Children’s programs 19 SOCIAL Social Affairs 20 RELIGION Religion 21 PHONE IN Phone In 22 TRAVEL Travel 23 LEISURE Leisure 24 JAZZ Jazz Music 25 COUNTRY Country Mus
6 System settings 3 Press or buttons to select the general setting . 4 Press , and then sub-menus. or to select the Q General settings, DVD settings, Language settings, and Radio settings. Adjust AV-In setting Note AV-In source input is switched off by default to prevent blank screen when AV-In source is not connected. Activate it before using AV-In. Adjust general settings 1 2 Press .
Press the navigation buttons to select [SETTINGS], then press 4 Press adjust. , and then or button to E n g lish 2 Adjust radio settings 1 2 Press . Press the navigation buttons to select [SETTINGS], then press » The general settings menu is displayed 3 Press or setting . 4 Press , and then or select the sub-menus. buttons to select the DVD button to Select language settings 1 2 Press » The settings menu is displayed 3 Press or setting .
7 Other settings Select equalizer settings You can select preset equalizer settings, and they are: [USER] [TECHNO] [ROCK] [CLASSIC] [JAZZ] [OPTIMAL] [FLAT] [POP] 2 Press or to select one of the preset equalizer settings. 3 You can also select [USER], and then press 4 Then, press or and [TREBLE]. 5 6 Press Press or to select of [BASS] to adjust the values. to exit.
Then, you can select one of the following methods to preset zone settings. Press or 2 ; [BALANCE]: 7L to 7R (L= left speaker ; R= right speaker) Turn the control knob; or Press [FADE]: 7R to 7F (R= rear speaker ; F= front speaker) continuously. Here are the options of zone setting: Press or to select the audio settings to be adjusted. 3 [ALL] - all speakers are in same volume level.
Turn on or off the screen backlight To turn on or off the screen backlight of the . system, press and hold Reset To reset the car audio system to its default setting: 1 2 Detach the front panel. Press by using a ball-point pen or similar tool. » All settings are erased except clock. Replace fuse If the system does not power on, the fuse may be damaged and need replacement. 1 Detach the front panel and take out the system. 2 3 Check the electric connection. 4 Replace the fuse.
Note Product information is subject to change without prior notice. General Power supply Fuse Suitable speaker impedance Continuous power output Line output voltage Aux-in level ' $ { | { '% Tuner Frequency range - FM Frequency range - AM $" % Usable sensitivity - FM Usable sensitivity - AM $" % E n g lish 8 Product information 87.5 - 107.
Supported audio formats Supported video formats MP3 bit rate (data rate): 32 320 Kbps and variable bit rate "# @ Unsupported video formats DIVX4 (*.avi) DIVX5 (*.avi) M-JPEG (*.avi, *.mov) ID3 tag v1.0, 1.1, 2.2, v2.3, and v2.4 DVD region: Region 3 (for model CED229/98) MPEG4 (*.mov, *.wmv, *.mp4, *.3g2, *.asf, *.3gp) | = $ @ @ [@ *.3gp) MPEG1 (*.avi, *.mpg, *.dat) H.264 (*.mp4, *.
Caution Never remove the casing of this apparatus. To keep the warranty valid, never try to repair the system yourself. If you encounter problems when using this system, check the following points before requesting service. If the problem remains unsolved, go to the Philips web site (www. K % < make sure that your system is nearby and the model number and serial number are available. No power Car engine has not been started. Start the car engine.
10 Notice The making of unauthorized copies of copyprotected material, including computer recordings, may be an infringement of copyrights and constitute a criminal offence. This equipment should not be used for such purposes. Manufactured under license from Dolby Laboratories. "Dolby" and the double-D symbol are trademarks of Dolby Laboratories. Other trademarks and trade names are those of their respective owners.
Specifications are subject to change without notice © 2011 Koninklijke Philips Electronics N.V. All rights reserved. CED229_UM_98_V1.