Philips355_APMEA.book Page 0 Tuesday, November 16, 2004 2:36 PM Discover your phone Screen ( Pick up and Wap key Navigation and , key ) Hang up C MMS / Camera key How to... Switch phone On /Off Press and hold ). Enter PIN code Enter your PIN code using the keypad and press , or # to confirm. Make a call Enter the phone number on the keypad and press ( to dial. and on/off key c Cancel and lock key Keypad Microphone Philips continuously strives to improve its products.
Philips355_APMEA.book Page 1 Tuesday, November 16, 2004 2:36 PM Quickly return to idle when browsing menus Press and hold c. The carousel Lock/unlock the keypad Press and hold c when in idle mode. A carousel is a circular loop of icons displayed on the screen. Each icon represents a feature or operation of your phone. View the last call made Press ( in idle mode. Change the language used Access a function in the menu Press and hold 0, move + or - to select the language and press ,.
Philips355_APMEA.book Page 2 Tuesday, November 16, 2004 2:36 PM Table of contents 1. Getting started 2. 2 ........................................... 6 Insert the SIM card .......................................... 6 Switch on the phone ....................................... 7 Set date and time ............................................. 7 Copy the SIM phonebook .............................. 7 Charge the battery .......................................... 7 Main features .............................
Philips355_APMEA.book Page 3 Tuesday, November 16, 2004 2:36 PM 6. Mix music ..................................................... 22 7. How to... .......................................................... 22 Getting started ............................................... 22 Activate tracks ......................................... 22 Change track melodies and instruments 23 Change the tempo .................................... 23 Record a mix ...................................................
Philips355_APMEA.book Page 4 Tuesday, November 16, 2004 2:36 PM 9. 4 Network .......................................................... 41 GPRS attach ............................................ 41 Register again ........................................... 41 Preferred list ............................................. 41 Access settings ........................................... 41 Time and date ................................................. 43 Clock display ........................................
Philips355_APMEA.book Page 5 Tuesday, November 16, 2004 2:36 PM 12. Games & Appli. ..................................... 68 Calculator ........................................................ 68 Alarm clock ..................................................... 68 Organiser ......................................................... 68 Create a new event .................................. 68 Modify an event ...................................... 69 Brick Game .................................................
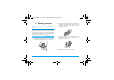
Philips355_APMEA.book Page 6 Tuesday, November 16, 2004 2:36 PM 1 • Getting started 2. Remove the SIM card from its holder and insert it under the metal clip holder, until it stops. Be careful that the clipped corner of the card is in the correct corner. 3. Slide the battery into its slot, metallic connectors downwards, until it stops. Then lock it by pushing it downwards. 4. Replace the back cover of your phone. Read the safety instructions in the «Precautions» section before use.
Philips355_APMEA.book Page 7 Tuesday, November 16, 2004 2:36 PM Switch on the phone 1. 2. To switch on the phone, long press the ) key. When you switch on the phone, you may be prompted to enter the PIN code, which is the 4 to 8-digit secret code of your SIM card to protect it from unauthorised use. It is preconfigured and communicated to you by your operator or retailer. To personalise the PIN code, see page 40. If you enter a wrong PIN code 3 times, your SIM card is blocked.
Philips355_APMEA.book Page 8 Tuesday, November 16, 2004 2:36 PM Keeping the charger plugged to the mobile when the battery is fully charged doesn’t damage the battery. The only way to turn off the charger is to unplug it, so use an easily accessible AC power socket. You can connect the charger to an IT supply (Belgium only). 3. 1. 2.
Philips355_APMEA.book Page 9 Tuesday, November 16, 2004 2:36 PM 2 • Main features Access and consult the phonebook In idle mode, press -. Depending on the selected phonebook (in SIM or in Contacts phone), the content that appears on the screen may vary: see “Contacts” page 26 for details on this subject. To consult the phonebook during a call, press ,, select View Names List, press , and scroll through the entries by pressing - or +. Then press c twice to return to the in-call screen. Make a call 1. 2.
Philips355_APMEA.book Page 10 Tuesday, November 16, 2004 2:36 PM Lock / unlock the keypad You can lock the keypad to protect the keys from being pressed accidentally Keypad lock (e.g., when the phone is in your pocket). To lock the keypad, press and hold c when in idle screen. To unlock the keypad, press and hold c again.
Philips355_APMEA.book Page 11 Tuesday, November 16, 2004 2:36 PM Fotocall: see and hear who’s calling This feature is available only when selecting the phonebook in the phone (not the one in the SIM card). This feature allows you to link one or several names to a group. When a name in that group calls, it will appear along with the corresponding picture, and the melody defined for that group will ring. 1.
Philips355_APMEA.book Page 12 Tuesday, November 16, 2004 2:36 PM Record a conversation In most countries, conversation recording is subject to law regulation. Record dialogue We advise you to notify the caller if you intend to record the conversation you have with them and only record if they agree. You should also keep any recording private. 1 min. is the maximum recording time available (see “Sound recording” page 67). To record a conversation during a call: 1.
Philips355_APMEA.book Page 13 Tuesday, November 16, 2004 2:36 PM 3 • Menu tree The table below describe the complete menu tree (first to third levels) of your mobile phone, as well as the page reference you should refer to for more information concerning each feature or setting.
Philips355_APMEA.book Page 14 Tuesday, November 16, 2004 2:36 PM E-Mail p49 For each available mail box Settings / Open mailbox / Send mail Broadcast Message p57 Reception / Topics / District codes Demo mode p66 Sound recording p67 BeDJ p67 Instant message p57 MMS p58 Create an MMS / Receive an MMS / Manage folders / Settings Camera p67 Games & Appli.
Philips355_APMEA.book Page 15 Tuesday, November 16, 2004 2:36 PM Call information p72 Operator services p81 Call settings p72 Call forward / Mailboxes / Auto redial / Any key answer / Call waiting / Caller ID Service numbers The numbers available in this menu are operator and subscription-dependent, please check with your operator.
Philips355_APMEA.book Page 16 Tuesday, November 16, 2004 2:36 PM 4 • Text or number entry Text can be entered in editing screens in two different ways: by using T9 ® predictive Text Input, or basic text input. Two other modes for numbers and punctuation marks, are also available. Icons appearing on the screen show the active text mode. T9® text input What is it? T9 ® predictive Text Input is an intelligent editing mode for messages, including a comprehensive dictionary. Tegic Euro. Pat.
Philips355_APMEA.book Page 17 Tuesday, November 16, 2004 2:36 PM Basic text input If you wish to access the basic text input, select «Abc» basic text input using * key. This method requires multiple key presses to reach the desired character: the letter «h» is the second letter on the 4 key, so you must press it twice to enter «h». Using this mode requires you press a key as many times as is equal to the order of the letter.
Philips355_APMEA.book Page 18 Tuesday, November 16, 2004 2:36 PM 5 • Taking pictures Save the picture Your mobile phone features a digital camera that allows you to take pictures, store them in your phone, use them as wallpaper or send them to your friends and relatives. How to... Activate /deactivate the camera Long press C to activate, and press c to deactivate. Zoom in/out Press the navigation key (up) or - (down). + Change the Camera mode Press * to toggle between Night and Normal mode.
Philips355_APMEA.book Page 19 Tuesday, November 16, 2004 2:36 PM Camera mode Two modes are available: Normal and Night mode. According to ambiant light level, press * to toggle between modes, which are reflected by the icons in the bottom of the screen (sun & moon). Picture resolution The default picture size of the standard format is 128 x 128. Press # to switch to Q VGA (320 x 240 pixels), to SQ VGA (160 x 120 pixels) or to 128 x 128.
Philips355_APMEA.book Page 20 Tuesday, November 16, 2004 2:36 PM Beep alarms can be customized via the camera settings. At any time, press c to stop the timer and go back to preview mode or press 0 to just stop the timer. Once the picture is shot, follow the instructions starting at point 2 of the previous section. Number of pictures The number of pictures you can save in the phone will vary according to the settings you have configured: the higher the resolution, the bigger the file size. 3. 3. 4.
Philips355_APMEA.book Page 21 Tuesday, November 16, 2004 2:36 PM 2. Rejecting the call will also quit any action linked to the camera, and will bring you back to the preview screen. Make a call To make a call, you must first long press c to go back to the idle screen. Then enter the number or select a name of your phonebook, press ( to dial and press ) to hang up.
Philips355_APMEA.book Page 22 Tuesday, November 16, 2004 2:36 PM 6 • Mix music With BeDJ, you can create your own sound by using a predefined BeDJ style (as explained below), or any SP-MIDI or MIDI ring tones present in your phone, or that you downloaded via WAP, E-mail, etc. (refer to relevant chapters in the present user manual for complete information). You can then send your own mix to friends and relatives, use it as a ringer or an alarm, etc.
Philips355_APMEA.book Page 23 Tuesday, November 16, 2004 2:36 PM 5. Up to 16 tracks are available: press and hold keys 1 to 9 to open the track selection list. Key 5 is always dedicated to the voice track. The activated track appears in orange, and the above table displays the name of the relevant melody and instrument. Change the tempo 1. 2. Change track melodies and instruments Press and hold keys 1 to 9 according to the track you would like to change.
Philips355_APMEA.book Page 24 Tuesday, November 16, 2004 2:36 PM 3. Press 0 to stop recording. Create your own style and mix The recording will stop automatically when the mix reaches 50 KB (approximately 2 min.). Capacity depends on the memory available in your phone: select Multimedia > Memory Status for memory information. Advanced options allow you to create and mix your own styles of music, either directly from the BeDJ styles available (e.g. Groove, Techno, Disco, etc.
Philips355_APMEA.book Page 25 Tuesday, November 16, 2004 2:36 PM 2. 3. 4. 5. 6. Press and hold 1: the list of all the MIDI files present in your phone appears on the screen. Select one of them and press ,. A new list appears, showing all tracks of the selected MIDI file (max.16). Move + or - to select one of them, then press , to apply it to key 1. Repeat these two steps to apply tracks of your choice to keys 2 to 9 of the phone. When ready, record your mix (see page 23).
Philips355_APMEA.book Page 26 Tuesday, November 16, 2004 2:36 PM 7 • Contacts All operations described in this chapter require the relevant phonebook, whether in the SIM or in the phone to be selected. Your mobile phone has two phonebooks. The SIM phonebook is located on the SIM card and the number of entries depends on the card capacity. The second phonebook is built into the mobile’s memory and can hold up to 299 names. The SIM card capacity depends on the type of card you have.
Philips355_APMEA.book Page 27 Tuesday, November 16, 2004 2:36 PM Phone’s phonebook Your mobile phone only manages one phonebook at a time and will ignore the information relative to the other one: e.g., if «Smith» is present in both phonebooks and if you delete it in the phone, it remains unchanged in the SIM. The default selected phonebook is the one located in your phone. It can hold up to 299 names and can be reset at In phone once using the Delete all option.
Philips355_APMEA.book Page 28 Tuesday, November 16, 2004 2:36 PM Add a record in the phone’s phonebook Own numbers Add a name field 1. Press - to enter the phonebook, select , and then press ,. 2. Enter the last name of your contact and confirm by pressing ,, then enter their first name and confirm by pressing ,. The Own numbers option that appears in your phonebook should contain your own phone number. If not, we advise that you enter your mobile number as well as any other relevant information.
Philips355_APMEA.book Page 29 Tuesday, November 16, 2004 2:36 PM To use Fotocall, you need to be using the phonebook in the phone; if you are not already doing so, see “Copy the SIM phonebook” page 7. 2. In Settings, select Groups setting, press , and select the group of your choice. 3. Rename the group to be identified («Friends», «Kids», etc.) and select the Melody and the Picture to be associated to this group. 4. Long press c to go back to idle, then press to display the content of your phonebook.
Philips355_APMEA.book Page 30 Tuesday, November 16, 2004 2:36 PM back to the previous menu, or a long press to go back to the idle mode. Numbers or text will appear in order of creation date. The first fax or phone number you enter becomes the default number. As such, it appears in first position in the list. To make another number default, see “Make default” page 30. Alphanumeric fields (note and email) can only be changed or deleted. Change a field content 1.
Philips355_APMEA.book Page 31 Tuesday, November 16, 2004 2:36 PM always updated when switching phonebooks or when using another phone. To copy a number into the SIM card phonebook, repeat steps 1 to 3 of the “Change a field content”paragraph. Then select Copy to SIM and press ,. Make calls Emergency number The emergency number will call the emergency services number in your SOS Call country. In most cases, you can call this number even if your keypad is locked and if you haven’t yet entered your PIN.
Philips355_APMEA.book Page 32 Tuesday, November 16, 2004 2:36 PM Use Flash dial In idle mode, press and hold a key between 2 and 9 to dial the Flash dial associated entry (see “Hotkeys” page 35): connection is established. Press ) to hang up. Use Voice dial In idle mode, press and hold ,, then pronounce the saved voice tag (see Voice Dial “Voice dial” page 38). If the phone recognizes the voice tag, it dials the number associated with it. Press ) to hang up.
Philips355_APMEA.book Page 33 Tuesday, November 16, 2004 2:36 PM 8 • Settings The Settings menu allows you to customise your phone and change the settings related to each available option (sounds, time and date, security, etc.). The Profiles menu allows you to change several settings at once (see page 44). Sounds Silent Silent Allows you to set the Silence mode On or Off. When this setting is On, all alerts are deactivated and the vibra alert is active. The Silent mode also applies to key tones.
Philips355_APMEA.book Page 34 Tuesday, November 16, 2004 2:36 PM Sounds Alerts Allows you to set alert beeps On or Off for the following items: Sounds Alerts - when an Event you programmed in your organiser is due, - when you have missed a call, - when the Battery is low and requires charging, - to manage the duration of your calls, first after 45 seconds, then every minute of an ongoing call (the beep cannot be heard by the caller).
Philips355_APMEA.book Page 35 Tuesday, November 16, 2004 2:36 PM 3. Then select the Display period and press ,. The timing you have set will be applied between each picture of the slideshow. Animation Animation Allows you to set the animation of the carousel menus On or Off. When On, this option will also scroll texts, such a message selected in the Read SMS menu. Deactivating this function increases the autonomy of your phone. Contrast Contrast Allows you to choose among several levels of contrast.
Philips355_APMEA.book Page 36 Tuesday, November 16, 2004 2:36 PM If the selected key is already set, you can reprogram it: select Settings > Hotkeys > a hotkey in the list. Press , twice, select Change and press ,. This will bring you to the list of available functions. To use the hotkeys, simply press and hold the key corresponding to the function you want to launch or to the number you want to dial while in idle mode. You can associate hotkeys 2 to 9 to the functions of the following table: 3. Active.
Philips355_APMEA.book Page 37 Tuesday, November 16, 2004 2:36 PM Redials the last number called. Redial last no. Reply last no. Alarm Clock Redials the number of the last call received. Allows to record a new sound. Record Launches a WAP session. Dials the emergency call number. SOS call E-mail WAP Opens the E-mail menu for access to the mail boxes. Displays balance. Show balance the remaining Displays the Total cost of outgoing calls. Total cost Opens the Screen saver On/Off menu.
Philips355_APMEA.book Page 38 Tuesday, November 16, 2004 2:36 PM Voice command Voice Command Instead of entering the various menus and browsing the lists, you can also set a voice tag that will activate a feature (e.g., launch the Calculator). You can associate a Voice command to all the functions supported by the Hotkeys (see page 35), except for «Get mail» and «Alarm clock». Select Settings > Voice Command > and press ,, then browse the list to select the function to be set with a voice tag.
Philips355_APMEA.book Page 39 Tuesday, November 16, 2004 2:36 PM Up to 15 voice tags can be defined and shared between voice dial and voice command. This feature is subscription dependent and requires a PIN2 code (see page 40). Security Call restriction Allows you restrict the calls to the Public Names list. In this case, you can only Call restriction access the names of the Public names list, as opposed to the phonebook of the main menu.
Philips355_APMEA.book Page 40 Tuesday, November 16, 2004 2:36 PM a specific call barring password supplied by your service provider. Outgoing calls The Outgoing menu allows you to select between All calls, International calls and Outgoing Intl. Exc. Home calls (the latter allowing you to call your home country when you are abroad). You can also Deactivate the bar on outgoing calls. These menus then allow you to bar, within each available option, All calls, Voice calls, Data calls or Fax calls.
Philips355_APMEA.book Page 41 Tuesday, November 16, 2004 2:36 PM Network This menu allows you to handle the connection between the phone and the network, register manually the available networks and manage your preferred networks. GPRS attach Your mobile integrates features that support GPRS (Global Packet Radio GPRS attach Service), a service allowing you to exchange data with high speed rates and to stay always on-line (i.e. have a permanent connection to the Internet and WAP).
Philips355_APMEA.book Page 42 Tuesday, November 16, 2004 2:36 PM All options described below are operator and/or subscription dependent.With some operators, you may receive a SMS which contains access parameters that will be stored automatically. Please contact your network operator for detailed information on this subject. Phone Number allows you to enter the phone number needed to establish a connection. Select Phone numbers and press ,, then press + or - to select: - ISDN No.
Philips355_APMEA.book Page 43 Tuesday, November 16, 2004 2:36 PM Error messages during connections are mainly due to incorrect parameters: you should contact your operator before first use, in order to have the appropriate settings. With some operators, the access parameters can be set remotely. Please check with your operator. Time and date This menu allows you to set the time and date, time zone, daylight savings, and change the clock display mode.
Philips355_APMEA.book Page 44 Tuesday, November 16, 2004 2:36 PM Set time Set time Allows you to set the time by pressing the appropriate keys or moving + or to increase or decrease the time minute by minute. Language This menu allows you to select a language for all menu text. Browse the list and press , to confirm your choice. A long press on 0 when in the idle screen automatically displays this menu.
Philips355_APMEA.book Page 45 Tuesday, November 16, 2004 2:36 PM When connecting an accessory, the settings described in the table below also become available. When disconnecting the accessory, the phone goes back to the Personal profile.
Philips355_APMEA.book Page 46 Tuesday, November 16, 2004 2:36 PM 9 • Messages The Send SMS item of the Messages menu allows you to: Send SMS • • send a standard or customised short text message to someone, edit the last message sent and send it again, add an iMelody, pre-defined sounds, an animation or a picture to your message. The features above are not available from the idle mode when the Instant message feature is On (see page 57). In this case, you can only access the Answer option.
Philips355_APMEA.book Page 47 Tuesday, November 16, 2004 2:36 PM Together with an attachment This option allows you to attach a sound, picture or animation to your message and press , to confirm and attach it to your message. Depending on the type of file you want to attach, select Add graphic to attach a bitmap image or an animation, and/or Add sound to attach a melody.
Philips355_APMEA.
Philips355_APMEA.book Page 49 Tuesday, November 16, 2004 2:36 PM Validity period This feature is subscription dependent. Allows you to select the length of time your message is to be stored in your Validity period SMS centre. This is useful when the recipient is not connected to the network (and thus cannot receive your message immediately). Reply path This feature is subscription dependent. Allows you to set the Reply path option On or Off.
Philips355_APMEA.book Page 50 Tuesday, November 16, 2004 2:36 PM Your phone might have been pre-configured. In this case, most parameters are already set and you don’t have to change them (except for Login, Password and E-mail address which are up to you when creating an e-mail account). GSM or GPRS: your mobile will only use the GSM or the GPRS network for e-mail connections.
Philips355_APMEA.book Page 51 Tuesday, November 16, 2004 2:36 PM Phone Number: allows you to enter the phone number provided by your ISP and needed to establish a connection. Press + or - to select: - ISDN number to enter an ISDN ISP number, OR - Analogue No. to enter an analogic number, then press ,. 1. 2. • Contact your ISP to know what type of number you should select.
Philips355_APMEA.book Page 52 Tuesday, November 16, 2004 2:36 PM Press ,, select Messages > E-mail > E-mail 1 > Settings > Account name and press ,. 2. Enter the new name in the edition window that appears and press ,. Advanced The menus described in this section feature advanced settings that may have been pre-configured, so you shouldn’t have to change any of them. 1. If the fields of these menus are empty, or if you encounter connection problems, contact your ISP.
Philips355_APMEA.book Page 53 Tuesday, November 16, 2004 2:36 PM 5. 6. 7. Repeat steps 2 to 4 to add as many recipients as required. Select Validate list and press ,. Then enter the subject of your e-mail (you can leave this field empty) and press ,. In the next window, enter the text of your e-mail (you can also leave this field empty). Press , when you are ready to send your e-mail. To learn how to enter text, see “Text or number entry” page 16.
Philips355_APMEA.book Page 54 Tuesday, November 16, 2004 2:36 PM Connect to the server Connection process 1. Press , and select Messages > E-mail, then Email 1 or E-mail 2 depending on the one you wish to use. Select Open mailbox and press ,. Mailboxes 1 and 2 feature the same settings and options. Configuring them differently will allow you to have two different e-mail addresses from your phone. 2. 3. 4.
Philips355_APMEA.book Page 55 Tuesday, November 16, 2004 2:36 PM Get and store attachments If the e-mail you have received contains attachments (JPEG picture, text file or another e-mail), they are characterised by a specific icon: Contains the details of the e-mail header (date and time, sender’s e-mail address, etc.), press , to display these details. The text of the e-mail itself can be viewed as an attachment, press , to read it.
Philips355_APMEA.book Page 56 Tuesday, November 16, 2004 2:36 PM Add an e-mail address to the phonebook You must have selected the phonebook in your phone to be able to add an e-mail address; this menu item will NOT appear if you selected the SIM phonebook. You can add the sender’s e-mail address to your phonebook, even when you Add to names haven’t yet downloaded his e-mail (retrieving the header only is sufficient to access the e-mail address). 1.
Philips355_APMEA.book Page 57 Tuesday, November 16, 2004 2:36 PM In both cases (reply to an e-mail or forward it), your phone will disconnect from the server when reaching the network inactivity time out set in the Auto disconnection menu (see “Bearer” page 50). It will reconnect to this server when sending the e-mail. Broadcast Message The Broadcast SMS feature is network-dependent.
Philips355_APMEA.book Page 58 Tuesday, November 16, 2004 2:36 PM 10 • MMS Your mobile phone allows you to send and receive MMS (multimedia MMS messages), featuring texts, pictures and sounds, including memos that you have recorded. A multimedia message can be made of one slide (including text, sound and image), or of several: in this case, the message is played in a slide show, whether you send it to an e-mail address or to another mobile phone.
Philips355_APMEA.book Page 59 Tuesday, November 16, 2004 2:36 PM Although the picture preview when creating the MMS is (W)105 x (H)55 pixels, the maximum size of a picture you can send is (W)640 x (H)640 pixels. Warning! The bigger the picture size, the longer it will take to send it. A copyright-protected picture cannot be sent. Select None if you don’t want to insert any picture. 3. 4.
Philips355_APMEA.book Page 60 Tuesday, November 16, 2004 2:36 PM Save MMS as draft To save your message as a draft, that you can edit, complete and send later on. MMS saved as drafts are stored in MMS > Drafts (see “Manage folders” page 62). Save as template To save your message as a template, that you can use as a basis for other MMS (e.g., «Happy birthday» type of message). MMS saved as templates are listed in MMS > Templates (see “Manage folders” page 62).
Philips355_APMEA.book Page 61 Tuesday, November 16, 2004 2:36 PM Receive an MMS Download and play an MMS phone. In this case, you must free memory by deleting data (picture, sounds, etc.). See “Memory Status” page 66. When you receive an MMS, an alert message appears on the screen to inform you. 1. If you activated the Automatic retrieval mode (see page 64), the message is automatically downloaded and placed in the Inbox. Select it in the Inbox list and press > to play it. 2.
Philips355_APMEA.book Page 62 Tuesday, November 16, 2004 2:36 PM Detach picture To detach the picture of the current slide and save it in the Picture album. Detach sound Outbox To detach the sound of the current slide and save it in the Sound album. Manage folders The MMS menu allows you to manage your messages in 4 different folders. The default (active) folder is the last one you selected.
Philips355_APMEA.book Page 63 Tuesday, November 16, 2004 2:36 PM If the «Memory full» icon is displayed (see page 88), you must delete items to free some memory. GPRS Your mobile will only use the GPRS network for connections. Settings GPRS first Your mobile will first try to connect to the GPRS network, then to the GSM network if the GPRS network isn’t available when connecting. Your phone may have been pre-configured to directly access the services offered.
Philips355_APMEA.book Page 64 Tuesday, November 16, 2004 2:36 PM Application settings Retrieval mode Manual Messages are stored on the MMS server, and you must connect manually to retrieve them: 1. Press , to access the Inbox. 2. Select the notification item corresponding to this message and press ,. 3. Select Read and press ,. 4. When the Details of the message are displayed, press , to launch the connection and download it. 5. Once the message is in your phone, press ,, select Play message and press ,.
Philips355_APMEA.book Page 65 Tuesday, November 16, 2004 2:36 PM 11 • Multimedia Picture album JPEG pictures must have the correct size and format for your mobile phone to store and display them correctly. Please check “Get and store attachments” page 55 for complete information on this subject. This menu allows you to manage and display the pictures stored in your Picture Album mobile phone. When entering one of the available sub-menus, the pictures stored in your phone are displayed as a text list.
Philips355_APMEA.book Page 66 Tuesday, November 16, 2004 2:36 PM Select a sound and press options: , to access the following Rename To Rename it: press ,, enter a name and press , again. Delete To Delete the selected sound. Send by Email To send the selected picture via E-mail (see “E-Mail” page 49 for details). Set as ringer To set the selected sound as Ringer. Set as messages ringer To set the selected sound as Messages ringer (this option must be set On in Settings > Sounds, see page 33).
Philips355_APMEA.book Page 67 Tuesday, November 16, 2004 2:36 PM Sound recording This menu allows you to record a sound of 1 min. maximum, and up to 20 Sound recording different sounds, depending on the Memory status. Press , and select Multimedia > Sound recording, then press ,again. Select to record a new sound. Follow the instructions on the screen and press , once your sound is recorded. You can then Delete or Rename it. Memos previously saved cannot be sent by MMS.
Philips355_APMEA.book Page 68 Tuesday, November 16, 2004 2:36 PM 12 • Games & Appli. Calculator Calculator This menu provides the following functions: Addition By pressing the * key. Subtraction By pressing the * key twice. Multiplication By pressing the * key 3 times. Division By pressing the * key 4 times. Equals By pressing the # key. Enter the figures using the keypad. Calculator accuracy is to 2 decimal places and is rounded up to the higher decimal figure. Press c to correct the numbers.
Philips355_APMEA.book Page 69 Tuesday, November 16, 2004 2:36 PM 4. The Set Reminder menu reminds you of events via alerts triggered at the chosen time. Move < or >, set the Reminder for this event and press ,. This menu only applies to Meeting and ToDo events. Note that the reminder depends on the time set and displayed on the screen. As such, it will be updated when changing time zones (see “Time and date” page 43). 5. 6. Move < or > to set the Repeat Event option for this event and press ,.
Philips355_APMEA.book Page 70 Tuesday, November 16, 2004 2:36 PM Deleting a repeated event • • By selecting a past occurrence: select a past occurrences of an event and press ,. When the event details appear, press ,, then select Delete and press , to confirm: only the past occurrences of the selected event are deleted. By selecting a future occurrence: select a future occurrence of an event and press ,.
Philips355_APMEA.book Page 71 Tuesday, November 16, 2004 2:36 PM This menu gives you access to the brick game. The object of the game is to destroy the bricks by hitting them with the ball. When you have destroyed the last brick, you access the next level. Keys used are the following: Brick Game 4 and 6 * and # 0 To move the racket left or right. To throw the ball left or right. Press either of these keys to start the game. To pause the game; pause time is limited to 2 min.
Philips355_APMEA.book Page 72 Tuesday, November 16, 2004 2:36 PM 13 • Call information Call settings This menu allows you to set all the call options (call forward, waiting, etc.). Call settings Call forward Allows you to divert incoming calls either to your mailbox or to a number Call forward (whether in your phonebook or not) and applies to: Data calls, Voice calls and Fax calls. Before activating this option, you must enter your voice mailboxes’ numbers (see “Mailboxes” page 72).
Philips355_APMEA.book Page 73 Tuesday, November 16, 2004 2:36 PM Auto redial Allows you to set the auto redial On or Off. When On and if the person you are Autoredial calling is busy, your phone automatically redials this number until a successful connection is made, or until the maximum number of attempts is reached (10). The phone emits one beep at the beginning of each attempt and one special beep if the connection is successful.
Philips355_APMEA.book Page 74 Tuesday, November 16, 2004 2:36 PM Call list From the main carousel, press , then select Call Info > Call list > Call list to Call list display the call list. Use + and - arrows to scroll the list and press , again to consult the date, time, number, call status of any selected call and to know if it was sent or received. Press , for access to a carousel which allows you to Call this correspondent, Send a SMS, Delete the selected call or Store the associated number.
Philips355_APMEA.book Page 75 Tuesday, November 16, 2004 2:36 PM Info at call end This feature is subscription dependent. Info at call end Allows you to activate or deactivate the systematic display of the length and/or cost of each call when hanging up. Total cost This feature is subscription dependent. Show Allows you to display the accumulated cost and to set the counter to zero. It may be protected by PIN or PIN2 codes. Shows how much has been spent, having established the charge rate.
Philips355_APMEA.book Page 76 Tuesday, November 16, 2004 2:36 PM 14 • WAP Your mobile phone supports services based on the Wireless Application WAP Protocol (WAP). The built-in WAP browser allows you to access services supplied with your network, such as news, sports, weather, etc. Your mobile phone readily supports the WAP function if it is included in your subscription; if your phone was pre-configured, it shouldn’t be necessary for you to change the settings described in this section.
Philips355_APMEA.book Page 77 Tuesday, November 16, 2004 2:36 PM Bookmarks Enter address This menu allows you to store your favourite WAP site addresses, rename them if desired and access them quickly from the list. This menu allows you to enter a WAP site address, to which you can connect directly when selecting it and pressing ,. This is a quick way to access WAP addresses without saving them as bookmarks. 1. Press , and enter the URL address of the desired homepage. 2.
Philips355_APMEA.book Page 78 Tuesday, November 16, 2004 2:36 PM Select Profile This menu allows you to select one of the available profiles, and to then define the connection settings for each of them: scroll + or - to choose the profile of your choice, then press < or > to select / deselect it and press , to confirm. All connection settings described below will apply to the selected profile, which you can then rename for easier identification.
Philips355_APMEA.book Page 79 Tuesday, November 16, 2004 2:36 PM Current certificate Allows you to display the currently used security certificate. Press c to go back one page. Rename Profile This menu allows you to rename the currently selected profile: enter the new name (an edit screen automatically appears), then press , to save the name you entered. Browser Options This menu allows you to activate/deactivate the downloading of images attached to WAP pages.
Philips355_APMEA.book Page 80 Tuesday, November 16, 2004 2:36 PM Back Save as... Brings you back to the previously browsed page. When browsing WAP sites, this menu option allows you to save images embedded in the pages that are displayed. 1. While browsing, scroll + or - to select the picture. 2. Once the picture is highlighted, press @ to access the Options. Select Save as... and press ,. 3. Rename the picture if desired and press , to save it in the Picture Album.
Philips355_APMEA.book Page 81 Tuesday, November 16, 2004 2:36 PM 15 • Operator services Most items of the Operator Services menu (e.g. Service numbers, Services +) are subscriptiondependent and specific to operators: your mobile phone readily supports them if they are included in your subscription. Consequently, the menus shown following may or may not be available. Contact your network operator for detailed information on availability and rates.
Philips355_APMEA.book Page 82 Tuesday, November 16, 2004 2:36 PM Pause and wait characters To obtain a pause or wait character, press and hold #. The display shows w for a wait and p for a pause. The phone always interprets the first pause character as a wait character. When you dial a number containing a wait character, your phone dials the first part (the phone number) and then waits for the call to be connected before sending the rest of the digits as DTMF tones.
Philips355_APMEA.book Page 83 Tuesday, November 16, 2004 2:36 PM Answer a second call You are able to receive another call when already in communication (if this feature is available with your subscription). When you receive a second call the phone emits an alert beep and the screen displays Call waiting. To receive a second call, you must have: - subscribed to this feature, - deactivated the Call forward option for voice calls (see page 72), - activated the Call waiting option (see page 73).
Philips355_APMEA.book Page 84 Tuesday, November 16, 2004 2:36 PM You may have up to five members at the same time and end the conference with ). At this point all calls are disconnected. In order to make consecutive outgoing calls, first initiate a normal call with the first number of the conference. When the first member is on line, initiate a second call as described in “Make a second call” above. When the second call is engaged, press , and select Conference.
Philips355_APMEA.book Page 85 Tuesday, November 16, 2004 2:36 PM Troubleshooting The phone does not switch on Remove and reinstall the battery (see page 6). Make sure you plugged the jack of the charger into the correct connector (see “Charge the battery” page 7). Then charge the phone until the battery icon has stopped scrolling. Finally, unplug from the charger and try to switch the mobile on.
Philips355_APMEA.book Page 86 Tuesday, November 16, 2004 2:36 PM Your phone doesn’t return to the idle screen Press and hold c, or switch off the phone, check that the SIM card and the battery are installed correctly, and switch it on again. Your phone doesn’t display the phone numbers of incoming calls This feature is network and subscription dependent. If the network doesn’t send the caller’s number, the phone will display Call 1 or Withheld instead.
Philips355_APMEA.book Page 87 Tuesday, November 16, 2004 2:36 PM When attempting to use a feature in the menu, the mobile displays NOT ALLOWED Some features are network dependent. They are only available, therefore, if the network or your subscription supports them. Contact your operator for detailed information on this subject. The display shows INSERT YOUR SIM CARD Check that the SIM card has been inserted in the right position (see page 6). If the problem remains, your SIM card might be damaged.
Philips355_APMEA.book Page 88 Tuesday, November 16, 2004 2:36 PM Icons & symbols In idle mode, several symbols can be displayed simultaneously. If the network symbol isn’t displayed, the network is not currently available. You may be in a bad reception area: move to a different location. Silent - Your phone will not ring when receiving a call. Vibra - Your phone will vibrate when receiving a call. Battery - The bars indicate the battery level (4 bars = full, 1 bar = low).
Philips355_APMEA.book Page 89 Tuesday, November 16, 2004 2:36 PM Precautions Radio waves Your cellular mobile phone is a low power radio transmitter and receiver. When it is operating, it sends and receives radio waves. The radio waves carry your voice or data signal to a base station that is connected to the telephone network. The network controls the power at which the phone transmits. • Your phone transmits/receives radio waves in the GSM frequency (900 /1800MHz).
Philips355_APMEA.book Page 90 Tuesday, November 16, 2004 2:36 PM standards and the Radio Equipment and Telecommunications Terminal Equipment Directive 1999/5/EC. Always switch off your phone Inadequately protected or sensitive electronic equipment may be affected by radio energy. This interference can lead to accidents.
Philips355_APMEA.book Page 91 Tuesday, November 16, 2004 2:36 PM Performance improvement In order to improve the performance of your phone, reduce radio energy emission, reduce battery consumption and ensure safe operation adhere to the following guidelines: For the optimal and satisfactory operation of the phone you are recommended to use the phone in the normal operating position (when not using in hands-free mode or with a hands-free accessory). • Do not expose your phone to extreme temperatures.
Philips355_APMEA.book Page 92 Tuesday, November 16, 2004 2:36 PM Do not use your phone while driving It lowers concentration, which can be dangerous. Adhere to the following guidelines: • • • • • Give your full attention to driving. Pull off the road and park before using the phone. Respect the local regulations in countries where you drive and use your GSM phone.
Philips355_APMEA.book Page 93 Tuesday, November 16, 2004 2:36 PM Philips authentic accessories Charger Charges your battery in any AC outlet. Small enough to carry in a briefcase/handbag. Universal car kit Designed to operate your Philips mobile phone hands-free and easy to use, this compact hands-free solution offers a high audio quality. Simply plug the kit into the vehicle auxiliary outlet. Deluxe headset In-line answer button offers you a simplified alternative to searching for the phone.
Philips355_APMEA.book Page 94 Tuesday, November 16, 2004 2:36 PM Workmanship During The Limited Warranty Period? Limited warranty 1. What Does This Limited Warranty Cover? During the limited warranty period, Philips or its authorized service representative will, at its option either repair or replace, without charge for parts or labour, a materially defective Product with new or refurbished parts or Product and return such repaired or replaced Product to the Consumer in working condition.
Philips355_APMEA.
Philips355_APMEA.book Page 96 Tuesday, November 16, 2004 2:36 PM DISCLAIMS ANY WARRANTY OF SATISFACTORY QUALITY MERCHANTABILITY OR FITNESS FOR A PARTICULAR PURPOSE. PHILIPS’ TOTAL LIABILITY FOR DAMAGES RELATING TO OR ARISING OUT OF THE PURCHASE OR USE OF THE PRODUCT, REGARDLESS OF THE TYPE OR CAUSE OF SUCH DAMAGE OR THE FORM OR CHARACTERISATION OF THE CLAIM ASSERTED (E.G. CONTRACT OR TOPIT), SHALL NOT EXCEED THE ORIGINAL PURCHASE PRICE PAID FOR THE PRODUCT.