
Component DVD Micro System User Manual


14
Turn on Progressive Scan
Progressive scan displays twice the number of
frames per seconds than interlaced scanning
(ordinary TV system). With nearly double the
number of lines, progressive scan offers higher
picture resolution and quality.
Before you turn on this feature, ensure that:
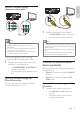
The TV supports progressive scan signals.•
You have connected this unit with the TV •
through component video.
1 Turn on the TV.
2 Ensure that the TV progressive scan
mode is deactivated (see the TV user
manual).
3 Switch the TV to the correct viewing
channel for this unit.
4 Press DISC.
5 Press SYSTEM MENU.
6 Press / to select [Video Setup] in the
menu, then press
.
7 Select [Component Video], then press
.
8 Select [P-Scan], then press OK.
The progressive setup is complete. »
Go to the lowest channel on your •
TV, then press the Channel Down
button until you see the blue screen.
Press the source button repeatedly •
on the remote control of your TV.
Tip
The video-in channel is between the lowest •
and highest channels and may be called
FRONT, A/V IN, VIDEO etc. See the TV user
manual on how to select the correct input on
the TV.
Select the correct TV system
Change this setting if the video does not appear
correctly. By default, this setting matches the
most common setting for TVs in your country.
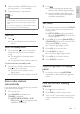
1 Press SYSTEM MENU.
2 Select [Video Setup].
3 Select [TV System] and then press .
4 Select a setting and then press OK.
• [NTSC] - For TV with NTSC color
system.
• [PAL] - For TV with PAL color
system.
• [Multi] - For TV that is compatible
with both PAL and NTSC.
5 To exit the menu, press SYSTEM MENU.
Change system menu
language
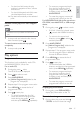
1
Press SYSTEM MENU.
2 Select [General Setup].
3 Select [OSD language] and then press .
4 Select a setting and then press OK.
5 To exit the menu, press SYSTEM MENU.
EN