DVD Recorder / VCR User Manual DVDR3430V DVDR3432V
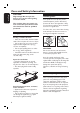
Important notes for users in U.K. Italia DICHIARAZIONE DI CONFORMITA’ Mains plug This apparatus is fitted with an approved 13 Amp plug. To change a fuse in this type of plug proceed as follows: 1 Remove fuse cover and fuse. Si dichiara che l’apparecchio DVDR3430V, DVDR3432V, Philips risponde alle prescrizioni dell’art. 2 comma 1 del D.M. 28 Agosto 1995 n. 548. Fatto a Eindhoven 2 Fix new fuse which should be a BS1362 5 Amp, A.S.T.A. or BSI approved type.
Advarsel: Usynlig laserstråling ved åbning når sikkerhedsafbrydere er ude af funktion. Undgå utsættelse for stråling. Bemærk: Netafbryderen er sekundært indkoblet og ofbryder ikke strømmen fra nettet. Den indbyggede netdel er derfor tilsluttet til lysnettet så længe netstikket sidder i stikkontakten. S Klass 1 laseraparat Varning! Om apparaten används på annat sätt än i denna bruksanvisning specificerats, kan användaren utsättas för osynlig laserstrålning, som överskrider gränsen för laserklass 1.
English This product incorporates copyright protection technology that is protected by US patents. Use of this copyright protection technology must be authorised by Macrovision, and is intended for home and other limited viewing uses only unless otherwise authorised by Macrovision. Reverse engineering or disassembly is prohibited. U.S. Patent Number 4,631,603; 4,819,098; 4,907,093; 5,315,448; and 6,516,132 Manufactured under license from Dolby Laboratories.
Table of Contents English General Care and Safety Information .......................................................................................... 8 Setup precautions.................................................................................................................................................8 Cleaning discs ........................................................................................................................................................8 About recycling .......
Dubbing Direct Dubbing (Disc î Tape) ..................................................................................... 33 Dubbing from VCR to DVD ............................................................................................................................33 Dubbing from DVD to VCR ............................................................................................................................33 Playback DVD Playback .............................................................
Care and Safety Information English CAUTION! High voltage! Do not open the device. You run the risk of getting an electric shock. The machine does not contain any user-serviceable parts. Please leave all maintenance work to qualified personnel. Setup precautions Finding a suitable location – Place the set on a flat, hard and stable surface. Do not place the set on a carpet. – Do not place the set on top of other equipment that might heat it up (e.g., receiver or amplifier).
Introduction Accessories supplied Your Philips DVD recorder comes with a built-in VCR deck. It allows recording to DVD±RW, DVD±R, DVD+R DL and VHS tape. In addition, you can enjoy playback of DVD discs and VHS tapes. The DVD±R discs have to be finalised before they can be played on other DVD players. – Remote control and batteries – RF coaxial cable – Quick Start Guide Before you can start using this recorder, complete the basic connections and set-up in three simple steps.
Product Information (continued) English Product features This is a simple programming system for recorders. To use it, enter the programming number associated with your television programme. You can find this number in your favourite listings magazine. Note: In the UK and Ireland the ShowView system is called VIDEO Plus+ system and ShowView Programming Number is called PlusCode Programming Number.
English Main Unit PREV NEXT a STANDBY-ON 1 l PLAY/PAUSE u – Turns on the recorder or to standby mode. – Starts playback. – Pauses the playback/recording/dubbing. b Tape deck STOP x – Stops playback/recording. c EJECT Z e Disc tray REW m / F.FWD M (PREV / NEXT) – Skips to the previous or next title/ chapter/track. – Press and hold this button for fast forward and backward search. f CHANNEL V v m REC z – While in tuner, selects the next or previous TV channel.
Remote Control English d CLEAR 1 2 3 – Clears a track/chapter/file in the selection playlist/copylist. – Clears a timer entry. – Resets tape counter to zero. 4 e SETUP 5 – Enters/exits the system setup menu. 6 f W X : Cursor buttons for moving to the 7 8 9 left or right, do a forward/reverse search. ST : Cursor buttons for moving up/down or changing the recorder’s TV tuner channel. g OK – Stores/confirms an entry. 10 h DISPLAY 11 – Displays/removes the status bar.
Remote Control (continued) English o REPEAT – Selects to repeat playback of title, chapter, track or disc in DVD mode. p TOOLS 15 – Enters/exits the tools or disc/title editing menu. 16 q SELECT 18 17 – Selects a track/chapter/file in the programme menu. r DISC-MENU 19 – Accesses DVD disc menu or Index Picture screen of a DVD±R/±RW. – Accesses VCD disc menu when PBC is turned on. 20 s BACK2 21 22 – Returns to the previous menu of a video CD (VCD).
Remote Control (continued) English Using the remote control C A B A Open the battery compartment. B Insert two batteries type R03 or AAA, following the indications (+-) inside the compartment. C Close the cover. D Point the remote control directly at the remote sensor (iR) on the front panel. E Select the source you wish to control by pressing the DVD, VCR or SOURCE button on the remote control. F Then select the desired function (for example m, M).
A cable satellite English Step 1: Basic Recorder Connections antenna ~ MAINS ANTENNA VIDEO (CVBS) EXT 2 AUX - I/O Y S-VIDEO (Y/C) PB L AUDIO PR R EXT 1 TV TO TV - I/O AUDIO AUDIO / VIDEO OUT COMPONENT VIDEO COAXIAL AUDIO / VIDEO OUT 1 B Connecting the antenna cables These connections enable you to watch and record TV programmes using the recorder.
Step 1: Basic Recorder Connections (continued) English ~ MAINS ANTENNA VIDEO (CVBS) EXT 2 AUX - I/O Y S-VIDEO (Y/C) PB L AUDIO PR R EXT 1 TO TV - I/O AUDIO AUDIO / VIDEO OUT TV COMPONENT VIDEO COAXIAL AUDIO / VIDEO OUT 1 OR OR DIGITAL AUDIO OUT Option 3 Option 2 Option 1 TV Connecting the video cables This connection enables you to view the disc playback from the recorder. You only need to choose one of the options below to make your video connection.
English Step 1: Basic Recorder Connections (continued) ~ MAINS ANTENNA VIDEO (CVBS) EXT 2 AUX - I/O Y S-VIDEO (Y/C) PB L AUDIO PR R EXT 1 TV TO TV - I/O AUDIO AUDIO / VIDEO OUT COMPONENT VIDEO COAXIAL AUDIO / VIDEO OUT 1 DIGITAL AUDIO OUT Option 2 Option 1 AV amplifier/ receiver Connecting the audio cables This connection enables you to listen to the playback from the recorder. However, this connection is not required if the recorder is connected to the TV using the SCART cable.
Step 2: Optional Connections English Rear of a Cable Box or Satellite Receiver (Example only) cable A satellite C antenna ~ MAINS ANTENNA VIDEO (CVBS) EXT 2 AUX - I/O EXT 1 TO TV - I/O Y S-VIDEO (Y/C) PB L AUDIO PR R TV AUDIO AUDIO / VIDEO OUT COMPONENT VIDEO AUDIO / VIDEO OUT 1 COAXIAL DIGITAL AUDIO OUT TV B Connecting to a Cable Box or Satellite Receiver Option 2 If your Cable Box/Satellite Receiver has a SCART output socket A Keep the existing antenna connection Option 1 If y
English Step 2: Optional Connections (continued) A Connecting a DV camcorder Use this if you have a Digital Video or Digital 8 camcorder. The DV socket conforms to the i.LINK standard. B Connecting another video device You can use the front sockets connection to copy the playback from another video device (for example, camcorder, VCR or DVD player). Use an i.LINK 4-pin cable (not supplied) to connect the DV IN socket at the front panel of the recorder to the appropriate DV OUT socket on the camcorder.
Step 3: Installation and Setup English Before you start... When you completed the connections and turn on the recorder for the first time, it is advisable that you perform several basic settings. Please see the following pages on using the system setup menu features to programme TV channels, menu language and system clock settings. This will optimise the performance of this recorder. Setting the OSD language Select the menu language for this recorder’s on-screen display.
English Step 3: Installation and Setup (continued) Select the country of your residence Setting the TV channel programmes Select the country of your area for auto channel tuning. Before the recorder is able to start recording the TV channel programmes, you need to search for the available TV channels and store them in the recorder. A Press SETUP on the remote control. The system setup menu appears on the TV. B Use ST keys to highlight { Setup Menu - General } and press X.
Step 3: Installation and Setup (continued) English Setting the date & time This recorder has an automatic date and time setting feature. If the recorder has not set the time and date correctly, you can further adjust the clock settings A Press SETUP. The system setup menu appears. B Use ST keys to select { Setup Menu - Clock } and press X to confirm. Setup Menu - Clock Date (dd / mm / yy) 0 1/0 1/06 Time (hh : mm : ss) 0 0:05 :0 8 Date-Time Setting Auto C Select { Date-Time Setting } and press X.
This recorder can be used to record TV programme or copy the content from an external device to a DVD recordable disc or VHS tape. The storage capacity of the disc and tape are depending on the recording mode selected. This recorder also incorporates timer recording function with which you can prepare a recording schedule before hand. DVD+R DL (DVD+R Double Layer) – It contains the same usage as DVD+R, the only difference is the capacity of 8.5 GB. It offers two recordable layers on a single DVD disc.
Recording (continued) English IMPORTANT! Unrecordable contents Contents with copy protection cannot be recorded on this recorder. When the recorder receives a copy guard signal, recording will be paused. Recording settings The default recording settings allow you to set the auto chapter markers, preferred recording input source and recording mode. Any changes made using the remote control will only apply to the current recording settings.
RECORD settings (underlined options are the factory default settings) Auto Chapter Marker Automatically divides a recording (title) into chapters by inserting chapter markers at a specific interval. This enables you to access a specific point in the recording quickly. { On } – Chapter markers will automatically be inserted within the title during recording at every 5 (five) minutes interval. – No chapter marker will be inserted in the recording.
Recording (continued) English E Set a recording mode as necessary by Recording from various sources This recorder has various external input signal terminals that can be used to record or playback, including Tuner input, S-Video input, composite video input, DV input, Scart input and stereo audio input. VCR DVD SOURCE pressing REC MODE repeatedly. F Press REC z to start recording.
E Press SOURCE repeatedly to select the correct input channel that matches the connected socket of the device. { EXT 1 } Input source from the device connected to the EXT1 TO TV-I/O SCART socket at the rear panel. { EXT 2 } Input source from the device connected to the EXT2 AUX-I/O SCART socket at the rear panel. { CAM 1 } Input source from the device connected to the VIDEO and AUDIO L/R sockets at the front panel. F Set a recording mode as necessary by pressing REC MODE repeatedly.
Recording (continued) English Instant time-off recording This function allows you to make a recording with a preset length easily without using the timer programming. A Press P +- to select the programme number to record, for example ‘P01’. B Press DVD or VCR to select the destination of recording. Watching another source during recording While recording is in progress, you can watch another TV channel or playback from other audio/video device which is connected to this recorder.
About timer recording Use the timer recording to automatically start and stop a recording at a later date/time. The recorder will tune to the right programme channel and begin recording at the specified time. With this recorder, you can schedule up to 8 recordings at a time. During timer recording, changing the recorder’s channel is not possible. There are two ways to programme a timer recording – Using the ShowView / VIDEO Plus+ system. – Using manual timer schedule.
Timer Recording (continued) English D To confirm your entry, move to CONFIRM in the menu and press OK. The programme information will be shown on the timer editor menu. Timer Editor Source Dest. Rec Mode Mode Date Start End VPS OK 09 : 05 : 56 Ch003 DVD SP Once 01 / 01 / 06 10 : 33 11 : 03 Off CANCELOK Note: You may have to manually key in channel number that is assigned to the SHOWVIEW® / VIDEO Plus+ code if it has not been assigned to the programming number. Follow the instructions on the TV screen.
{ Source } Select the TV channel or the correct input source (EXT1, EXT2 or CAM1) which you have used to connect the external device. { Dest. } Select the recording destination, DVD or VCR. { Rec Mode } Select the mode of recording. See the chapter “Recording – RECORD settings - Default Recording mode” for more information. { Mode } Select a desired repeat recording mode (Once, Daily, Weekly, Mon-Fri, Mon-Sat or Weekend). { Date } Enter the date for recording (Day/Month/ Year).
Timer Recording (continued) English Setting a timer recording from an external Cable Box/ Satellite Receiver If you have a Satellite Receiver/Cable Box connected to this recorder via the EXT2 AUX-I/O SCART connection (see “Step 2: Optional Connections”), follow the steps described below to programme the recordings. A Select the channel you want to record on Changing/ Deleting a timer recording A Turn on the TV to the correct viewing channel for the recorder (e.g. ‘EXT’, ‘0’, ‘AV’).
Dubbing from VCR to DVD Dubbing from DVD to VCR This allows you to archive your VHS tapes to a recordable DVD. If the disc you are attempting to dub is copy-protected, you will not be able to copy the disc. It is not permitted to copy Macrovision encoded DVDs. DIRECT DUBBING A Insert a blank VHS tape in the tape deck. B Insert the disc you want to copy in the disc tray. C Press DVD on the remote control. A Insert a recordable DVD. B Insert a prerecorded VHS tape. C Press VCR on the remote control.
DVD Playback English Playable discs Using this recorder, you can playback and record on the following discs: Recording and Playback DVD±RW (DVD Rewritable); can be recorded on over and over. DVD±R (DVD Recordable); can be recorded only once. IMPORTANT! – If the inhibit icon (Error) appears on the TV screen when a button is pressed, it means the function is not available on the current disc or at the current time. – DVD discs and players are designed with regional restrictions.
Starting disc playback A Press STANDBY-ON to turn on the recorder. B Press DVD on the remote control. The DVD indicator lights up. C Press OPEN/CLOSE ç at the front panel. The disc tray opens. You can also hold down the STOP x button on the remote control to open and close the disc tray. D Place the disc onto the tray with the label facing up, then press OPEN/CLOSEç. For double-sided discs, load the side as indicated on the label. E Turn on the TV to the correct viewing channel for the recorder (e.g.
DVD Playback (continued) English Playing a (Super) Video CD (Super) Video CDs may feature ‘PBC’ (Play Back Control). This allows you to play the video CDs interactively by following the menu on the display. A Insert a (Super) Video CD. Playing a DivX disc This recorder supports the playback of DivX movies which you can copy from your computer onto a CD-R/RW, DVD±R/±RW. A Insert a DivX disc. The disc content menu appears.
Playing an MP3/WMA disc MP3 (MPEG1 Audio Layer-3) files are highly compressed music files. The MP3 format lets you store about ten times more data (music, pictures) on a single CD-ROM than a regular CD. A Insert an MP3/WMA CD. The disc content menu appears. Audio Stop Directory 0:00:00 - 0:00:00 Playlist E To start playback, move the cursor to the right selection screen and press u. F During playback, you can press í/ë to select the next/previous track. G To stop playback, press STOP x.
DVD Playback (continued) English Playing a picture disc (or musical slide show) You can display JPEG pictures in the selected roll automatically one after the other. A Insert a JPEG picture disc (CD, CD-R/RW, recordable DVD). The disc content menu appears. E During playback, you can press TOOLS on the remote control to access various settings for the slide show playback.
Changing to another title/ chapter/track Searching forwards/ backwards When a disc contains more than one track, title or chapter, you can change to a different track, title or chapter as follows. You can fast forward or fast reverse a disc at two, four, sixteen or thirty two times the normal playback speed. During playback, Press ë (NEXT) to go to the next chapter/track. Pressí (PREV) to return to the start of the previous chapter/track.
Additional Playback Features (continued) English Using the TOOLS options REPEAT TOOLS DISC MENU SELECT CLEAR DISPLAY Selecting various repeat/ shuffle functions You can select various repeat play or random play mode during playback. During disc playback, press REPEAT repeatedly to toggle through the options on the disc. Or, A During disc playback, press TOOLS on SUBTITLE AUDIO the remote control. The Tools menu appears.
Creating a playlist Changing the audio language You can playback the contents of the disc in the order you want by creating a playlist. A During disc playback, press TOOLS on the remote control. The Tools menu appears. B Select { Mode } > { Program }. The programme menu appears. Edit Program Play List Title Playlist Title 01 Title 02 Title 03 Title 04 Title 05 Title 06 Title 07 Title 08 C If the disc is recorded with Titles/Folders/ Albums, press OK to access the tracks/ files/chapters.
Additional Playback Features (continued) English Changing subtitle languages This operation works only on DVDs with multiple subtitle languages, you can change the language you want while playback the DVD. Switching camera angles This option is only available with DVDs that contain sequences recorded from different camera angles. This allows you to view the picture from different angles. During disc playback, press SUBTITLE repeatedly to toggle through the language options on the disc.
Starting VCR playback This VCR uses the VHS system. A Press STANDBY-ON to turn on the recorder. Reset tape counter Press CLEAR on the remote control to set the counter to “0:00:00”. When you insert a VHS tape in the recorder, the counter will automatically reset to “0:00:00”. B Press VCR on the remote control. The VCR indicator lights up. C Insert a pre-recorded VHS tape into the tape deck with the window side facing up and the label side towards the front. D Playback will start automatically.
Edit Recordings - Recordable DVD English About disc editing This recorder offers various disc edit options for various disc types. You can change the disc content and settings of a recorded DVD from the disc editing menu. The edited contents may not be available when you play the disc on an another DVD player. Accessing disc editing menu OK The displayed options in the disc editing menu differ depending on the type of disc. A Insert a recorded disc into the recorder.
Rename disc Erase disc (DVD±RW only) The original disc name is generated automatically by the recorder. You can change the disc name by following the steps below. This erases the content of the DVD±RW. Once the existing content is erased, it can be used for recording. A In disc editing menu, use ST keys to A In disc editing menu, use ST keys to select { Rename Disc } and press OK. The keyboard screen appears.
Edit Recordings - Recordable DVD (continued) English Make compatible (DVD±RW only) The edited DVD±RW may still display the original titles or hidden scenes when played back on other DVD players. This function enures that the edited changes of the DVD±RW remain when played back on other players. In disc editing menu, use ST keys to select { Make Compatible } and press OK to confirm. Helpful Hint: – If the option {Compatible} is not available for selection, it means that the disc is already compatible.
About title editing You can change the individual title information or delete a title (recording) in a recorded DVD. If a DVD±R has been finalised, it cannot be edited. The displayed options in the title editing menu differ depending on the type of disc. { Play Title } Start playing a recording. { Edit Title } Access the video editing menu. { Rename Title } Change the name of the recording. { Erase Title } - DVD±RW only Delete the title (recording).
Edit Recordings - Recordable DVD (continued) English Rename title Overwrite title (DVD±RW only) The original title name is generated automatically by the recorder. You can give a new name to the title by following the steps below. A In title editing menu, use ST keys to A In title editing menu, use ST keys to select { Rename Title } and press OK. The keyboard screen appears. B Use W X ST keys to highlight a Space Caps Clear : to remove the character to the left of the cursor.
About video editing After a recording has been made, this recorder allows you to edit the video content. You can add/delete chapter markers, hide unwanted scenes, change the picture in the index picture screen and split a title (recording) into two. Accessing video editing menu OK When you playback a recording in video edit mode, the entire recording will be played back including hidden scenes. The edit functions available in the disc editing menu are: { Title } Select a title (recording) to play.
Edit Recordings - Recordable DVD (continued) English Selecting a title This option shows the current title and the total number of titles in the disc. It also allows you to select a specific title. A During playback, press EDIT to display the video editing menu. B Use ST keys to select { Title } and press OK. Creating chapter marker You can create a chapter by inserting chapter marker at any point within a title during playback.
Hiding/unhiding an unwanted chapter You can choose to hide certain scenes from playback (e.g. skipping a commercial scene) or make it visible again. A Create a chapter marker at the start and end of the scene you want to hide. (See previous page on “Creating Chapter Marker”). B Select the chapter you want to hide and start playback. (See previous page on “Selecting a chapter”).
DVD Setup Menu Options English Accessing the Setup Menu The system setup menu provides various options for you to adjust the recorder to suit your preferences. SETUP OK Setup Menu - Record Auto Chapter Marker On System Recording Source Tuner DVD Default Recording Mode SP VCR Default Recording Mode SP See Recording chapter – “RECORD Settings” Setup Menu - DVD Default Disc Menu Language English A Press SETUP on the remote control. The system setup menu appears on TV.
GENERAL settings (underlined options are the factory default settings) Country Select the country of your area for auto channel tuning. (See section “Step 3: Installation and Setup - Select the country of your residence”). On Screen Display Language Select the menu language for this recorder on-screen display. Screen Saver The screen saver prevents damage to the TV screen by avoiding exposure to a static image for too long.
DVD Setup Menu Options (continued) English PLAYBACK settings (underlined options are the factory default settings) TV Aspect Ratio Set the aspect ratio of the recorder according to the TV type you have connected. { 16:9 } – Select this for wide screen TV (frame ratio 16:9). { 4:3 Letterbox } – Select this for a ‘wide screen’ display with black bands on the upper and lower portions of the TV screen. { 4:3 Panscan } – Select this for a full-height picture with both side trimmed.
English DVD Setup Menu Options (continued) PLAYBACK settings (underlined options are the factory default settings) Show DivX® Registration code Display the DivX® VOD (Video On Demand) registration code that allows you to rent and purchase videos using the DivX® VOD service. For more information, visit us at www.divx.com/vod. 1) Press X to display the registration code. 2) Use the registration code to purchase or rent videos from DivX® VOD service at www.divx.com/vod.
DVD Setup Menu Options (continued) English DVD settings (underlined options are the factory default settings) Some DVDs may have a parental level assigned to the complete disc or to certain scenes on the disc. This feature lets you set a playback limitation level. Parental Rating Level 1) Use ST keys to select { Parental Rating Level } and press OK. 2) Use the numeric keypad 0-9 to enter your four-digit pin code.
CHANNEL SETUP settings Channel Search Setup Menu - Channel Setup Search Channel Search Modify Channel Information Edit Sort Channels Sort This option automatically scans all the receivable analogue local TV channels and stores these channels on the recorder. Press OK on the remote control to start the automatic TV channel search process and replace all previously stored analogue TV channels. This process may take several minutes.
DVD Setup Menu Options (continued) English CHANNEL SETUP settings { NICAM } Channel Name Scan mode Frequency TV System NICAM Audio Decoder Skip Fine-tune P001/Ch003 Frequency 585.26MHz PAL B/G On DUAL A Off No OK – NICAM is a digital sound transmission system. It can transmit either one stereo channel or two separate mono channels. { On } { Off } CANCELOK { Audio } – Improve the sound transmission of the TV channel. – Select this if the reception is poor and the sound is distorted.
CLOCK settings (underlined options are the factory default settings) Date (dd/mm/yy) Use ST keys to change the number and use W X keys to select different entry fields, then press OK to confirm. Time (hh/mm) Use ST keys to change the number and use W X keys to select different entry fields, then press OK to confirm. Date-Time Setting Enable/disable the automatic setting of date and time. This feature is dependent on your local broadcaster.
Other Information English Installing the latest software The software installed in your recorder is continuously being refined for greater stability and compatibility of the set. Periodically, Philips will issue upgrades for the software which you copy onto a CD and install the software of your recorder. Caution! Power supply must not be interrupted during upgrade! A Get the version information of this recorder by pressing the number keypad ‘0009’ and press OK on the remote control.
Specifications Aspect ratio: 4:3, 16:9 D/A converter: 10 bit, 54 MHz A/D converter: 10 bit, 27 MHz Tuner/Reception/Transmission • • English Picture/Display • • • TV system: PAL, SECAM Aerial Input: 75 Ohm coaxial (IEC75) Connectivity Sound • • D/A converter: 24 bit, 192 kHz A/D converter: 24 bit, 96 kHz Video Recording • • • • Recording system: PAL, SECAM Compression formats: MPEG2 Recording modes: High Quality : HQ Standard Play : SP Standard Play Plus : SPP Long Play : LP Extended Play : EP Super
Troubleshooting English WARNING Under no circumstances should you try to repair the system yourself, as this will invalidate the warranty. Do not open the system as there is a risk of electric shock. If a fault occurs, first check the points listed below before taking the system for repair. If you are unable to remedy a problem by following these hints, consult your dealer or Philips for help. Problem (General) Solution No power.
Problem (General) Solution TV channel is fuzzy or distorted. – Check the video connection between the DVD recorder and the TV. – You can further fine-tune the signal of the TV channel. Read chapter on “DVD Setup Menu Options CHANNEL SETUP Settings - Modify Channel Information”. – Press P +/- to search for the same TV channel which may have a clearer picture. Unable to eject disc tray. – Exit from any system or recording setup menu until you see the Philips wallpaper on the screen.
Troubleshooting (continued) English Problem (Playback) Solution Disc does not play. – Insert the disc with the label facing up. – Wrong region code. The DVD must be coded for ALL regions or Region 2 in order to play on this DVD recorder. – There is no recording on the disc or wrong disc type. Read chapter “DVD Playback - Playable discs” for details. – Make sure the disc is not scratched or warped. Clean the disc or replace a new one. – Check if the disc is defective by trying another disc.
Problem (Recording) Solution The wrong TV channel was decoded (recorded) after you programmed a recording using the ShowView® / VIDEO Plus+ system. 1) Press SHOWVIEW (or VIDEO Plus+) on the remote control, enter the programming or Plus code number of the desired TV channel. 2) Press OK to confirm. 3) Check the channel number in the {Program #} input field. If this does not correspond to the desired TV channel, select this entry field and change the channel number. 4) Press OK to confirm.
Frequently Asked Questions English What kind of disc should I use for recording? You can only record on DVD±R, DVD±RW or DVD+R DL discs DVD±R/ ±RW is the most compatible recordable DVD format in the market today. They are fully compatible with most of the existing DVD-Video players and DVDROM drives in computers. What is the capacity of a DVD±R/ +RW disc? 4.7GB, or equivalent to six CDs.
How do I set up Titles and Chapters? The recorder automatically creates a new Title every time you start a new recording. You can then add Chapters to these recordings manually or have them automatically inserted at 5-minute intervals. What is ‘index’ for VHS tape? When you make a recording to a VHS tape, an index is automatically marked on the tape when recording starts. These index markings can help to locate a specific recording quickly and easily.
Glossary English Analogue: Sound that has not been turned into numbers. Analogue sound varies, while digital sound has specific numerical values. These sockets send audio through two channels, the left and right. Aspect ratio: The ratio of vertical and horizontal sizes of a displayed image. The horizontal vs. vertical ratio of conventional TVs. is 4:3, and that of wide-screens is 16:9. AUDIO OUT Sockets: Red and white sockets on the back of the system that send audio to another system (TV, Stereo, etc).
Glossary (continued) English Parental control: Limits disc play according to the age of the users or the limitation level in each country. The limitation varies from disc to disc; when it is activated, playback will be prohibited if the software’s level is higher than the user-set level. Region code: A system allowing discs to be played only in the region designated. This unit will only play discs that have compatible region codes. You can find the region code of your unit by looking on the product label.
Display panel symbols/ messages English The following symbols/ messages may appear on your recorder display: 00:00:00 Multi-function display/ text line – Title/ track number – Total/ elasped/remaining title/track time – Disc/title name – Additional information regarding the disc – TV channel number or source of video – Clock (This is displayed in Standby mode). – TV programme title BLANK There are no recordings in the disc on the tray. FULL Disc is full. There is no more storage space for new recordings.
English
TV System Guide English 72 COUNTRY VHF AFGHANISTAN ALBANIA ALGERIA ANGOLA ARGENTINA AUSTRALIA AUSTRIA AZORES BAHAMAS BAHRAIN BANGLADESH BARBADOS BELGIUM BERMUDA BOLIVIA BOTSWANA BRAZIL BRUNEI BULGARIA BURKINA FASO BURMA BURUNDI CAMBODIA CAMEROON CANADA CANARY ISLANDS CHAD CHILE CHINA COLOMBIA COSTA RICA CROATIA CUBA CYPRUS CZECH REPUBLIC DAHOMEY DENMARK DJIBOUTI DOMINICAN REP ECUADOR EGYPT EL SALVADOR EQUAT.
COUNTRY VHF UHF DVD REGIONS LIBYA LITHUANIA LUXEMBOURG MADAGASCAR MADEIRA MALAGASY MALAWI MALAYSIA MALI MALTA MARTINIQUE MAURITANIA MAURITIUS MEXICO MONACO MONGOLIA MOROCCO MOZAMBIQUE NAMIBIA NEPAL NETHERLANDS NETH. ANTILLES NEW CALEDONIA NEW GUINEA NEW ZEALAND NICARAGUA NIGER NIGERIA NORWAY OMAN PAKISTAN PANAMA PARAGUAY PERU PHILIPPINES POLAND PORTUGAL PUERTO RICO QATAR REUNION RUMANIA RUSSIA RWANDA SABAH/SAWARA ST.
Meet Philips at the Internet http://www.philips.