ADDENDUM DVDR9000H Accessories supplied (page 9) For HDD/DVD Recorder sold in Asia Pacific and Middle East, the following accessories will not be supplied :• Scart cable • G-LINK transmitter Region Codes (page 9) This device will only play Region 3 DVDs or DVDs manufactured to be played in all regions ‘ALL’. DVDs from other regions cannot be played on this recorder. Connectivity (page 21) G-LINK control allows control between the HDD/DVD Recorder and Cable Box / Satellite Receiver.
User Manual Benutzerhandbuch 6 100
Important notes for users in the U.K. Italia DICHIARAZIONE DI CONFORMITA’ Mains plug This apparatus is fitted with an approved 13 Amp plug. To change a fuse in this type of plug proceed as follows: Si dichiara che l’apparecchio DVDR9000H, Philips risponde alle prescrizioni dell’art. 2 comma 1 del D.M. 28 Agosto 1995 n. 548. 1 2 Remove fuse cover and fuse. Fatto a Eindhoven 3 Refit the fuse cover. Fix new fuse which should be a BS1362 5 Amp, A.S.T.A. or BSI approved type.
DK Advarsel: Usynlig laserstråling ved åbning når sikkerhedsafbrydere er ude af funktion. Undgå utsættelse for stråling. Bemærk: Netafbryderen er sekundært indkoblet og ofbryder ikke strømmen fra nettet. Den indbyggede netdel er derfor tilsluttet til lysnettet så længe netstikket sidder i stikkontakten. S Klass 1 laseraparat Varning! Om apparaten används på annat sätt än i denna bruksanvisning specificerats, kan användaren utsättas för osynlig laserstrålning, som överskrider gränsen för laserklass 1.
LASER Type Wave length Output Power Beam divergence Semiconductor laser InGaAlP (DVD) AIGaAs (CD) 658 nm (DVD) 790 nm (CD) 30 mW (DVD+RW write) 1.0 mW (DVD read) 1.0 mW (CD read) 84 degrees (DVD) 61 degrees (CD) ‘CONSUMERS SHOULD NOTE THAT NOT ALL HIGH DEFINITION TELEVISION SETS ARE FULLY COMPATIBLE WITH THIS PRODUCT AND MAY CAUSE ARTIFACTS TO BE DISPLAYED IN THE PICTURE.
English ------------------------------------------6 English Deutsch --------------------------------------100 Deutsch Index This product complies with the radio interference requirements of the European Community.
Table of Contents English General Care and Safety Information .......................................................................................... 8 Setup precautions.................................................................................................................................................8 Cleaning discs ........................................................................................................................................................
Record to Hard Disk or recordable DVD ............................................................. 46~49 Recording from a DV Camcorder .........................................................................................................46~47 Recording from camcorder ............................................................................................................................ 48 Recording from an external device (VCR/DVD player) .............................................................
Care and Safety Information English CAUTION! High voltage! Do not open. You run the risk of getting an electric shock. The machine does not contain any user-serviceable parts. Please leave all maintenance work to qualified personnel. Finding a suitable location – Place the set on a flat, hard and stable surface. Do not place the set on a carpet. – Do not position the set on top of other equipment that might heat it up (e.g., receiver or amplifier). – Do not put anything under the set (e.g.
Introduction This recorder is equipped with a digital tuner (DVB - Digital Video Broadcast) to receive free-to-air digital terrestrial TV signals and an analogue tuner to receive analogue TV channels. It also has a built-in Hard Disk Drive (400 GigaByte) that can record up to 650 hours of video in SEP (super extended play) record mode. This gives you the flexibility to keep recordings on the HDD or copy to a recordable DVD for safekeeping or later viewing. In addition, it has a built-in GUIDE Plus+ system.
Product Information (continued) English Special features Philips provides the best possible connection between your recorder and other home cinema equipment. The recorder is controlled by external devices (for example, receivers and TVs) via Cinema Link and is automatically set to the right system settings. With this function you can align the sequence of the channels on your TV (analogue only) with those on your recorder. Make sure you have connected the TV to the EXT1 TO TV-I/O socket of this recorder.
English Main Unit a STANDBY-ON 2 k – Turns the recorder on or to standby mode. – Starts playback of the selected title/track. b Display panel – Shows information about the current status of the recorder. / – Skips to the previous or next chapter/ track. Hold down the button to make a reverse/forward search. c PIXEL PLUS – Turns on/off the pixel plus picture enhancement. – Stops playback/recording. d HDD BROWSER – Selects the movement direction in the menu.
Remote Control English d INFO m 1 2 3 4 – Displays the Time Shift video bar while in tuner mode. It shows the timing of the TV programmes stored in the temporary HDD storage. – Accesses the programme details in the GUIDE Plus+ system and when viewing digital tuner information. e 5 6 7 8 9 : Cursor buttons for moving to the left/right, or jump backward or forward by a specified length of time in tuner mode.
Remote Control (continued) English n TUNER – Toggles between analogue TV tuner, digital TV tuner and digital radio tuner. o Colour coded buttons – These buttons are used to select the coloured options available in some menu displays on the TV screen. 14 15 16 p GUIDE – Enters/Exits the GUIDE Plus+ system. q (pixel plus) – Turns on/off the pixel plus picture enhancement feature. 17 18 r TV VOL +– Adjusts the volume of the TV (for Philips TV with RC5 code only).
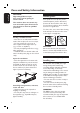
Remote Control (continued) English Using the remote control Using the remote control to operate the system A Aim the remote control directly at the remote sensor (iR) on the front panel. B Select the desired function (for example A Open the battery compartment. B Insert two batteries type R06 or AA, following the indications (+-) inside the compartment. C Close the cover. CAUTION! – Remove batteries if they are exhausted or if the remote control is not to be used for a long time.
Remote Control (continued) This DVD recorder’s remote control has a universal TV control function that enables you to control the basic functions of your TV (Power, Volume and Channel Control), regardless of the TV’s brand. Note: You must be in the TV mode to perform above operations. If not, press SELECT DEVICE to select ‘TV’ mode. Additional control functions for most of the Philips TV TEXT TIMER BACK SYSTEM TUNER A Hold down digit keys {1} and {3} together until the TV LED blinks twice.
Step 1: Basic Recorder Connections English cable satellite antenna B A C TV Connecting the antenna cables These connections enable you to watch and record TV programmes using this recorder. If the antenna signal is connected via a Cable Box or Satellite Receiver, ensure that these devices are turned on in order to watch or record the cable programmes. If you want to connect to a VCR and/or a separate Cable Box/ Satellite Receiver, see page 21~23 for other possible connections.
cable satellite antenna TERRESTRIAL B A C English Step 1: Basic Recorder Connections (continued) TV Option 2: Connecting to the analogue and terrestrial antennas A Connect the existing Antenna/Satellite Receiver/Cable TV signal (labelled as RF OUT or TO TV) to the A-socket on the recorder. B Connect the digital terrestrial antenna to the ANTENNA recorder.
Step 1: Basic Recorder Connections (continued) English OR Option 2 OR Option 3 Option 1 TV Connecting the video cable This connection enables you to view the playback from this recorder. You only need to choose one of the options below to make your video connection. – For a standard TV, follow option 1, 2 or 3. – For a progressive scan TV, follow option 4. – For a HDMI TV, follow option 5.
English Step 1: Basic Recorder Connections (continued) A B TV Option 4: Connecting to a Progressive Scan TV The progressive scan video quality is only available when using Y Pb Pr connection and a progressive scan TV is required. It provides superior picture quality when watching DVD movies.
Step 1: Basic Recorder Connections (continued) English OR OR AV amplifier/receiver Connecting the audio cables This connection enables you to listen to the playback from this recorder. However, this connection is not required if this recorder is connected to the TV using the Scart or HDMI connectors. Option 1: Using the analogue audio sockets You can connect the recorder to a two channel stereo system (mini system, TV) or receiver in order to enjoy the stereo sound system.
(back panel) Cable Box / Satellite Receiver A English Step 2: Optional Connections (front panel) E C D TV B Place this in front of the Cable Box/Satellite Receiver, see E. Connecting to a Cable Box or Satellite Receiver Option 1 If your Cable Box/Satellite Receiver has only an antenna output socket (RF OUT or TO TV), refer to “Connecting the antenna cables” on page 16 for the complete connection to your TV.
Step 2: Optional Connections (continued) English Back of a VCR (example only) VHF/UHF RF IN SCART IN SCART OUT cable satellite antenna VHF/UHF RF OUT E A B C TV D Connecting to a VCR or other similar device C Use the supplied RF coaxial cable to connect the TV socket on the recorder to the antenna input socket (or labelled as VHF/UHF RF IN) on your TV.
G Back of a VCR (example only) English Step 2: Optional Connections (continued) Back of a Satellite Box (example only) A F B C D E Connecting to a VCR and Cable Box/Satellite Receiver A Keep the existing antenna connection to the Cable Box/Satellite Receiver. B Use the supplied RF coaxial cable to connect the antenna output (RF OUT) socket on the Cable Box/Satellite socket Receiver to the ANTENNA on the recorder.
Step 2: Optional Connections (continued) English A OR Connecting to a camcorder You can use the front sockets to copy camcorder recordings. These sockets are located behind the flap on the right hand side which provides convenient connections for a camcorder. Option 1: Using the DV IN socket Use this connection if you have a Digital Video or Digital 8 camcorder. The DV socket conforms to the i.LINK standard. It provides the best picture quality. Use an i.
Step 2: Optional Connections (continued) English Back of a Satellite Box (example only) DIGITAL OUT B A Connecting the digital input for 5.1-channel recording This recorder is equipped with a digital audio input socket that can support 5.1channel recording. It allows you to capture the original sound from digital multi-channel sources such as the Cable Box/Satellite Receiver, when you record a video that produces the full cinema sound experience (Dolby Digital 2.0, 5.
Step 3: Installation and Set-up English The basic installation menu will appear the very first time you turn on this recorder. These settings will help you set up the basic recorder features easily, including TV programme installation, language settings and the GUIDE Plus+ system. IMPORTANT! Complete the basic installation settings before inserting a disc for playback or recording. The disc tray will not open until the basic setup is completed. A Press STANDBY-ON 2 to turn on the recorder.
Step 3: Installation and Set-up (continued) TV. Select { Search channels } in the menu and press OK on the remote control to start analogue channel search. Î It takes a few minutes to complete. CHANNEL SEARCH This will search and install all Analogue and Digital channels and services. Search channels TIME AND DATE Please check the Time (hh:mm) and Date and correct if necessary.
Step 4: Set-up the GUIDE Plus+ system English Your recorder is equipped with the GUIDE Plus+ system. This system offers a free interactive programme guide that lists all the TV programmes available in your area. Before you can enjoy this feature, you have to define your geographic location and your current setup devices in order to receive correct GUIDE Plus+ TV listing data. IMPORTANT! To use the GUIDE Plus+ system, the analogue tuner has to be installed properly.
Step 4: Set-up the GUIDE Plus+ system (continued) { Antenna (RF lead) } Select this if the external receiver is connected via the antenna cable. Enter the programme number which your external receiver is tuned to on your recorder. C If you have connected an external receiver, ensure that the G-LINK transmitter is properly connected and positioned, see page 21. This will allow you to control the tuner of the Satellite Receiver/Cable Box through the GUIDE Plus+ system.
Using the GUIDE Plus+ system English GUIDE Plus+ system introduction Quick access functions After the GUIDE Plus+ setup and data download is completed, you can start to explore the different features and areas of the GUIDE Plus+ system. There are several features integrated in the GUIDE Plus+ system. These functions will be displayed at the top Action Bar C whenever applicable. You can access the function by pressing the matching colour coded button on the remote control.
GUIDE Plus+ menu bar The GUIDE Plus+ system consists of seven areas in the menu bar: Grid Search My TV Info Editor Setup ‘Search’ screen The Search screen allows you to locate the programme listings by category. It enables you to quickly and easily find something of interest to watch or record. Schedule A Press GUIDE on the remote control. The GUIDE Plus+ screen appears. B Press to highlight the menu bar, then press to select a menu bar option and press to access.
Using the GUIDE Plus+ system (continued) English ‘My TV’ screen The My TV screen allows you to set up a personal profile. You can define the profile by channels, categories and/or by keywords. It enables you to quickly and easily find something of interest to watch, or record. A Select { My TV } and press . B Press the Yellow button on the remote control for . C Use keys to select { Channel }, { Categories } or { Keywords }. D Press the Yellow button for .
‘Editor’ screen The Editor screen is the central location for you to manage your channels. Every change in the Editor leads to a change in the Grid. You can assign programme numbers to the TV channels, switch a channel On or Off and select a channel source (Tuner, Digital Terrestrial TunerDTT, External Receiver). ‘Setup’ screen The Setup screen is the central location for you to configure the GUIDE Plus+ system according to your personal situation (Region, TV reception).
Control TV Programmes English Switching on to TV programme For more information about the temporary HDD storage (Time Shift Buffer), see page 36. Pause live TV function A Turn on the TV to the correct programme number for the recorder (e.g. ‘EXT’, ‘0’, ‘AV’). B Press STANDBY-ON 2 to turn on Sometimes, you might be interrupted when watching your favourite TV programme or match. Now, you can pause the show by pressing Å (PAUSE) on the remote control and press (PLAY) to resume playback.
English Control TV Programmes (continued) Watching digital TV/radio broadcast Viewing digital text service (MHEG) This DVD recorder is able to receive free-to-air DVB-T (Digital Video Broadcast-Terrestrial) and radio stations. As new services are added over time, make sure to regularly update and install new channels, see page 83. (for UK only) Many digital TV channels broadcast information via their text service.
Before Recording English About temporary HDD storage/Time Shift video bar The current TV programme will be stored in the temporary hard disk storage called ‘TSB’ (Time Shift Buffer) once the recorder is turned on. It will continuously store up to 6 (six) hours of TV programmes. The Time Shift video bar will appear on the TV. It indicates the status and timing of the TV programmes stored in the temporary HDD storage.
Default recording settings You can preset your recording settings in the recording setup menu. D Use keys to select the setting you wish to change and press NEXTÉ to access its options. Instructions and explanations of the options are provided in the following pages. If the selection in the menu is greyed out, that means the feature is not available or not possible to change at the current state. E To exit, press SYSTEM.
Before Recording (continued) English Recordings (underlined options are the factory default settings) Record mode The recording mode defines the picture quality of recordings and the maximum recording time on the HDD (hard disk drive), see page 37 on ‘Recording Mode Setting Chart’. Important! When copying from HDD to a recordable DVD, the recording mode of the selected recording in the HDD will automatically be transferred. Selecting another recording mode is not possible.
IMPORTANT! Unrecordable contents Contents with copy protection cannot be recorded on this recorder. When the recorder receives a copy guard signal, it will continue to record. However, during playback, only blank or grey picture will be displayed. English Record to Hard Disk BACK Press (RECORD) again will set the recording time length. Each subsequent press increases the recording time by 30minute, up to a maximum of 6 (six) hours.
Record to Hard Disk (continued) English Simultaneous record and play function While recording the TV programme to the HDD is in progress, you can play a previously recorded title from the HDD, or play a DVD video disc, or watch the playback from other connected devices. Playback from DVD Press OPEN CLOSE on the recorder’s front panel and load in a disc to start playback. Playback from other device This is only possible if this recorder is connected to the TV using the EXT1 TO TV-I/O socket.
Direct recording from TV If you have connected this recorder to your TV using a scart cable, you can immediately start recording the programme (analogue TV channels only), which is currently being shown on the TV while the recorder is in standby mode. A Ensure that the { Direct rec. } mode in the recording setting is turned on (see page 38). B While watching the TV programme, press (RECORD) on the remote control to start recording. C To stop recording, press (STOP).
Record to Hard Disk (continued) English About timer recording Use the timer recording to automatically start and stop a recording at a later date/ time. This recorder will tune to the right programme channel and begin recording at the specified time. With this recorder, you can schedule up to 25 recordings at a time and up to 6 (six) hours for each recording. During timer recording, changing the recorder’s channel is not possible.
Timer recording (ShowView / VIDEO Plus+ system) This is a simple timer programming system. To use it, enter the ShowView programming number / VIDEO Plus+ PlusCode® programming number associated with your television programme. You can find this number in your TV listings magazine. D Use the alphanumeric keypad 0-9 to enter the ShowView / VIDEO Plus+ programming number and press OK to confirm. (e.g. 5-312-4 or 5,312 4, key in ‘53124’).
Record to Hard Disk (continued) English Timer recording (manually) A Turn on the TV to the correct programme number for the recorder (e.g. ‘EXT’, ‘0’, ‘AV’). B Turn on the recorder and press TIMER on the remote control. The GUIDE Plus+ schedule screen appears. F Press the Green button to confirm and go to the next parameter. A virtual keyboard appears on the TV for entering the title name. G Once complete, store the setting by pressing the Green button for .
Record to Hard Disk (continued) A Turn on the TV to the correct programme number for the recorder (e.g. ‘EXT’, ‘0’, ‘AV’). B Turn on the recorder and press TIMER on the remote control. The GUIDE Plus+ schedule screen appears. To delete the timer programme Press the Red button on the remote control for . English Changing/Deleting a timer recording To edit the timer programme Press the Green button on the remote control for , and follow the instructions on the TV to make the necessary changes/entry.
Record to Hard Disk or recordable DVD English Recording from a DV Camcorder When you connect a DV camcorder to the DV IN socket of this recorder, you can control both the camcorder and this recorder using the recorder’s remote control. Furthermore, the smart chaptering feature ensures the chapter markers are created at each break in the images. Before you start... – Mark the contents in the temporary HDD storage (time shift buffer) for which you wish to record to the HDD, see page 36.
F Press the Blue button on the remote control for { AUTO REC }. Auto Record of DV input to hard disk Record only new DV updates Record entire DV tape Cancel Note: The { AUTO REC } option can only be activated while in camcorder play or pause mode. To copy the entire DV tape Select { Record entire DV tape } in the menu and press OK to confirm. The camcorder will rewind the tape and start recording from the beginning.
Record to Hard Disk or recordable DVD (continued) English Recording from camcorder When you connect the camcorder to the VIDEO or S-VIDEO socket at the front panel of this recorder or the EXT1 or EXT2 socket at the back panel, follow the steps below to make the camcorder recording. Before you start... Mark the contents in the temporary HDD storage (time shift buffer) for which you wish to record to the HDD, see page 36. Otherwise, all the contents will be cleared when you start camcorder recording.
Recording from an external device (VCR/DVD player) You can record from an external device which is connected to this recorder’s input socket. Copy-protected material cannot be recorded on this recorder. IMPORTANT! It is not possible to record the disc playback from this recorder to its HDD. D To continue, select to record to { Hard Disk } or { Recordable DVD } in the menu and press OK to confirm. All the contents in the temporary HDD storage will be cleared except for the ‘marked’ recordings.
Copy from Hard Disk to recordable DVD English IMPORTANT! – It is not possible to record the TV programmes or the scheduled timer programmes directly to a recordable DVD. You can only record it to the HDD and then copy to a recordable DVD. – Copy protected (Copy-Once or Copy-Never) movies and DVD Videos cannot be copied to the HDD. About copying You can copy a recorded title from the HDD (hard disk drive) to a recordable DVD.
Copying to a recordable DVD You can copy any recordings from the HDD to a recordable DVD. The storage capacity of the disc depends on the recording mode that was selected for the recordings in the HDD, see page 38. Before you start... Be sure that no other recording is to be carried out while copying (e.g. timer recording). A Turn on the TV to the correct programme number for the recorder (e.g. ‘EXT’, ‘0’, ‘AV’). B Insert a recordable DVD into the recorder. C Press HDD-BROWSER on the remote control.
Using the Disc Library English The Disc Library is an integrated database in this recorder. It gives you a quick and easy access to the recordings you have made onto the recordable DVDs. The Disc Library keeps the information on which video is recorded on which disc, length of recording and remaining disc space. Finding a recorded title To do this, the recorded disc data must have been stored in the Disc Library. The appropriate disc does not have to be in the recorder.
Playback from Hard Disk Each recording stored on the HDD is displayed in the HDD browser with an index picture. A Press HDD-BROWSER on the remote control. The content menu appears. B Press NEXTÉ repeatedly until the W REPLAY / NEXT X – jump backward/forward by a fixed time period, see page 79. English Basic operation INFO m – display the title information. Å (PAUSE) – view a still picture. (STOP) – stop playback. { TITLES } and { INFO } menus appear. HDD TITLES 2/2 INFO ABC 28.02.
Playback from Hard Disk (continued) English Sorting the titles display order Delete/Protect a title in the HDD You may organise the titles in a specific order according to certain criteria for easy locating the recordings. This order will remain until you exit the content menu. A number of editing options are displayed at the bottom of the HDD content menu. They can be accessed via the matching colour coded buttons on the remote control.
Playable discs Using this recorder, you can play and record on the following discs: Recording and Playback DVD±RW (DVD Rewritable); can be recorded on over and over and can only be played back when the recording was made in ‘video mode’. DVD±R (DVD Recordable); Starting disc playback once the disc is full or finalised, you cannot record any more on the disc. It can only be played back when the recording was made in ‘video mode’ and finalised. A Press STANDBY-ON 2 to turn on the recorder.
Playback from Disc (continued) English Playing a DVD video disc Normally the DVD disc contains a disc menu. You may have to make your selection (e.g., subtitle or audio language) within the disc menu. A Insert a DVD. A Insert a (Super) Video CD. If the disc menu appears, use the alphanumeric keypad 0-9 to input your selection or use keys to select a play option and press OK to confirm.
Playing an MP3 CD MP3 (MPEG1 Audio Layer-3) files are highly compressed music files. The MP3 format lets you store about ten times more data (music, pictures) on a single CD-ROM than a regular CD. A Insert an MP3 CD. Playing a JPEG image file (slide show) You can display JPEG pictures in the selected roll automatically one after the other at adjustable intervals. A Insert a JPEG photo CD (CD, DVD±RW, DVD±R). The content menu appears. The content menu appears.
Playback from Disc (continued) English During playback, the available playback settings are displayed at the bottom of the screen. Photo [EDIT] = Exit ZOOM REPEAT SPEED DOWN SPEED UP { ZOOM } Red button – Select this to activate zoom mode. The slideshow playback will pause. – { ZOOM IN } Blue button: enlarge the picture. – { ZOOM OUT } Yellow button: revert to the actual size. – { END } Red button: exit zoom mode and continue slideshow playback.
Creating a slideshow playlist (album) Adding photos to an album A Insert a JPEG photo CD (CD, DVD±RW, DVD±R). The content menu appears. You can customise the JPEG picture slideshow playback within a disc by storing your selection in an album. This recorder can handle up to a maximum of 100 JPEG pictures in one album on a recordable disc, depending on the JPEG file parameters. Otherwise, press HDD-BROWSER and select { Disc Tray } in the menu.
Additional Playback Features (continued) English Edit the album You can re-arrange the picture position in the album in order to create the desired slideshow playback order, or remove the photo(s) from the album. The order and number of the pictures in the ‘PHOTO ROLLS’ remains unchanged. To delete the album Select the album and press the Red button on the remote control for { DELETE }. D Press OK to show the thumbnail pictures overview. Overview Alb0001 A Insert a JPEG photo CD (CD, DVD±RW, DVD±R).
English Additional Playback Features (continued) Searching forwards/ backwards You can fast forward or fast reverse a disc during playback and select a desired search speed. A During playback, hold down (reverse) or (forward) until the search speed status bar (-4X or 4X) appears on the TV. The sound will be muted. B Press the Selecting another title/ chapter/ track (reverse) or (forward) repeatedly to cycle through the different search speed (-4X, -8X, -32X, 4X, 8X, 32X).
Additional Playback Features (continued) English During playback, you can press SYSTEM on the remote control to display the available playback options. These options can be selected by pressing the matching colour coded buttons on the remote control. [PLAY] [EDIT] [OK] = PLAY SCAN SHUFFLE REPEAT A-B Scan disc (for CD, VCD, DVD±R/±RW disc only) This function allows you to preview the first 10 seconds of each track on the disc. A During playback, press the Red button on the remote control.
Using the Toolbar options Changing subtitle language This operation works only on DVDs with multiple subtitle languages. You can change to the language you want while playing DVD. This function can also be accessed via the Green button on the remote control while in disc playback mode. A Press to select { Subtitle } and press to enter its options. B Press repeatedly until the language you want is selected, then press to confirm. The languages may be numbered or abbreviated, such as “En” for English.
Additional Playback Features (continued) English Switching camera angles This option is only available with DVDs that contain sequences recorded from different camera angles. This allows you to view the picture from different angles. A Press to select { Angle } and press NEXTÉ to enter its options. The camera angles available for selection appear. B Use keys to select the camera angle you want to switch to, then press to confirm.
Changing the title name Selecting the genre Some TV channels transmit the name of the programme. In this case, the programme name will automatically be stored when recording to the HDD. Otherwise, only the programme number and date/time of the recording will be stored as title name. You may select the genre type provided in the list for easy and fast searching of a recorded title. A Press HDD-BROWSER on the remote control, then press NEXTÉ repeatedly until the { TITLES } and { INFO } menus appear.
Edit Recordings - Hard Disk (continued) English PAUSE HDD Video editing This recorder allows you to edit the video content after a recording has been made. You can insert/delete chapter markers or hide unwanted scenes. When you play back a recording in video edit mode, the entire recording will be played back including the hidden scenes. 00:01:02 00:00 [EDIT] = Exit NO CHAPTER CHAPTER DIVIDE HIDE Video bar: In the video bar, the record playback head represents the actual position of the playback.
Merge/split a specific chapter within a recording You can create a chapter by inserting chapter marker (using the SPLIT option) or remove a chapter marker (using the MERGE option). { MERGE } Select this to merge the current chapter with the chapter before it. If the chapter before it was a hidden chapter, then the joined chapter will also be hidden. Title A During HDD recording playback, press Chapter 1 Chapter 2 Chapter 3 Chapter 4 EDIT on the remote control.
Edit Recordings - Hard Disk (continued) English Dividing titles You can divide a title into two or more titles. You can use this function to separate and delete undesired portions of a recording, such as commercials. WARNING! Once a title has been divided, it cannot be reversed. A During HDD recording playback, press EDIT on the remote control. PAUSE HDD Hiding unwanted scenes You can choose to hide certain scenes for playback (e.g. skipping a commercial scene) or make the hidden scene visible again.
Showing the hidden scene A During HDD recording playback, press EDIT on the remote control. While in video editing mode, the hidden chapter will play. Deleting all chapter markers During recording, the chapter marker is set automatically at a specific interval if the function is active (see page 38). You can choose to delete all the chapter markers when the recording has finished. PAUSE HDD A During HDD recording playback, press EDIT on the remote control.
Edit Recordings - Recordable DVD English About editing recordable DVDs This recorder offers various disc edit options. You can change the disc content and settings of a recorded DVD from the editing menu. If a DVD±R has been finalised, it cannot be edited. The edited contents may not be available if you play the disc on another DVD player. Index Picture screen The Index Picture screen shows your recordings on a recordable DVD.
Deleting recordings/titles You can delete a specific title from the disc. However, for DVD±R discs, the deleted space cannot be used for further recordings. A Insert a recorded DVD into the recorder. The Index Picture screen appears. Otherwise, press HDD-BROWSER and select { Disc Tray } in the menu, then press NEXTÉ. B Use keys to select a title from the menu.
Edit Recordings - Recordable DVD (continued) English Changing the disc/title name The original disc/title name is generated automatically by the recorder. You can change the disc/title name by following the steps below. A Insert a recorded DVD into the recorder. The Index Picture screen appears. B Press EDIT on the remote control. The editing menu appears. C Use keys to select { Disc name } or { Title name } in the menu.
E Press the matching colour coded buttons Video editing This recorder allows you to edit the video content after a recording has been made. You can add/delete chapter marker or hide unwanted scenes. on the remote control to access the options displayed at the bottom of the menu. Title Chapter Chapter Chapter Chapter chapter markers When you play back a recording in video edit mode, the entire recording will be played back including the hidden scenes. A Insert a recorded DVD into the recorder.
Edit Recordings - Recordable DVD (continued) English { TITLE } Yellow button – Select this to access title editing menu. [EDIT] = Exit NO CHAPTERS DIVIDE CHAPTER TITLE BACK HIDE INDEX PIC. { DIVIDE } - for DVD±RW only Select this to create a new title from the current point of playback. The existing title will be divided into two titles. Warning! Once a title has been divided, it cannot be reversed. { BACK } Select this to return to the previous screen.
Recorder Preferences DV Specials Preferences Date Time see page 76 Sound Preferences Sound mode see page 76 Night mode A Press SYSTEM on the remote control. The system setup menu appears. B Press to select { Preferences } and press NEXTÉ repeatedly to view the available setup options, then press to access. Disc Preferences Adapt menu Recording DV Specials Sound Disc Access Delete all see page 76 Preferences Setup Access Preferences C Select the setting you wish to change and press NEXTÉ.
System Menu Options (continued) English DV Specials settings Set the date and time for DV camcorder recording update functions. Once it has been set, the date and time will be updated automatically after a DV camcorder recording. Date { 00 - 00 - 0000 } – Use keys to set the day, month and year, press NEXTÉ to move to the next digit field. Once complete, press OK. Time { 00 : 00 : 00 } – Use keys to set the hours, minutes and seconds, press NEXTÉ to move to the next digit field.
English System Menu Options (continued) Access settings (underlined options are the factory default settings) You will be prompted to enter the four-digit pin code. – When doing this for the first time, use the alphanumeric keypad 0-9 on the remote control to enter any four-digit pin code you prefer. – If you forget your four-digit pin code, key in ‘1504’. Then enter any four-digit you prefer and enter the same pin code again to confirm it.
System Menu Options (continued) English Recorder Setup System Setup Second RC Before you start... Mark the contents in the temporary HDD storage (time shift buffer) for which you wish to record to the HDD, see page 36. Otherwise, all the contents will be cleared when you access the { Setup } option. OSD Off Full Display Bright Skip interval mm : ss see page 79 Time-date Setup Clock preset Time see page 80 Date Analogue Ch.
English System Menu Options (continued) System settings (underlined options are the factory default settings) Second RC { On } { Off } – Enable control of this recorder with a second remote control (not supplied). – Disable second RC control function. OSD Select the level of On-screen display information. { Full } – Complete information is always displayed during use. { Reduced } – The help text and colour button bar will be removed from the display.
System Menu Options (continued) English Time-Date settings (underlined options are the factory default settings) Clock preset Time Date 80 The time/date can be set automatically on this recorder if the stored TV channel transmits a time signal. { Auto } – The recorder will automatically detect the first available channel which is transmitting the time/date information. { PXX } – Select the TV channel to use for transmitting (preset number) the time/date information.
Analogue Channel settings Analogue Ch. Setup Auto search Follow TV Sort Favourites Although this recorder selects all the available analogue TV channels during basic installation, you may want to repeat the process later if more channels become available in your area or if you are reinstalling the recorder. A Press SYSTEM on the remote control. Select { Setup } in the menu and press NEXTÉ repeatedly to select { Analogue Ch. }.
System Menu Options (continued) English Analogue Channel settings - manual search In some cases, not all of the available TV channels may have been found and stored during basic installation. In this case, you will need to search for and store the missing or coded TV channels manually. Analogue Ch. Setup Entry mode MHz Entry 167.5 MHz Preset P 04 Preset name RTL4 Decoder Off TV system PAL-BG Nicam Off A Press SYSTEM on the remote control.
Digital Channel settings Although this recorder selects all the available digital TV channels during basic installation, you may want to repeat the process later if more channels become available in your area or if you are reinstalling the recorder. It also allows you to adapt the digital TV and radio channels to your personal preference. Digital Ch. Setup Video fav. Radio fav. Sort video Sort radio A Press SYSTEM on the remote control.
System Menu Options (continued) English Video Output settings (underlined options are the factory default settings) TV Shape The picture shape can be adjusted to fit your TV. { 4:3 Letterbox } – For a ‘wide-screen’ display with black bars on the top and bottom. { 4:3 PanScan } – For a full-height picture with the sides trimmed. { 16:9 } – For wide-screen TV (frame ratio 16:9). Black Level Adapts the colour dynamic for NTSC disc. { Normal } – Normal colour contrast.
English System Menu Options (continued) Video Output settings (underlined options are the factory default settings) Video settings for Pixel Plus only Noise red. (reduction) Use keys to set the level of noise reduction and press OK to confirm the setting. Sharpness Use keys to adjust the level of picture sharpness and press OK to confirm the setting. Note: The above two options are not visible unless the Pixel Plus feature is turned on.
System Menu Options (continued) English Audio Input settings (underlined options are the factory default settings) PCM Encoding Select this if the connected device is not capable of decoding multi-channel audio. The system will convert the Dolby Digital and MPEG-2 multichannel signals to PCM (Pulse Code Modulation). { On } – Select this to enable the PCM. All audio signals are downmixed to linear PCM (2-channel). { Off } – Select this to disable the PCM.
Setting up Progressive Scan feature (for Progressive Scan TV only) The progressive scan displays twice the number of frames per second than interlaced scanning (ordinary normal TV system). With nearly double the number of lines, progressive scan offers higher picture resolution and quality. Before you start... – Ensure that you have connected this recorder to a progressive scan TV using the Y Pb Pr connection (see page 19). – Ensure that you have completed the basic installation and set-up.
Frequently Asked Questions English What kind of disc should I use for recording? You can only record on DVD±R, DVD±RW or DVD+R DL discs. DVD±R/±RW is the most compatible recordable DVD format in the market today. They are fully compatible with most of the existing DVD-Video players and DVD-ROM drives in computers. What is the capacity of a DVD±R and DVD±RW? 4.7GB, or equivalent to six CDs.
Some recordings listed on the HDD menu cannot be played or copied to disc. Some TV broadcasts or videos from external device that are recorded to this recorder may contain copy protection signals. Such material cannot be played back from the HDD or copied to a recordable DVD.
Software Upgrade English Installing the latest software Periodically Philips will issue upgrades for the software that was initially installed in your recorder as the software is continuously refined for greater stability and compatibility of the recorder.
Troubleshooting English WARNING! Under no circumstances should you try to repair the system yourself, as this will invalidate the warranty. Do not open the system as there is a risk of electric shock. If a fault occurs, first check the points listed below before taking the system for repair. If you are unable to remedy a problem by following these hints, consult your dealer or Philips for help. Problem (General) Solution No power.
Troubleshooting (continued) English Problem (General) Solution No sound. – Check the recorder audio connection. Read chapter “Basic Recorder Connections - Connecting the audio cables” for details. – Set the Analogue output or Digital output correctly, based on the device you have connected to this recorder. Read chapter “System Menu Options - Audio Output settings” for details. No TV signal received from the recorder. – Have your aerial or cable TV signal checked. – Install the TV channel.
Troubleshooting (continued) Solution English Problem (Playback) Disc will not play. – Insert the disc with the label facing up. – The child lock is on. Read chapter “System Menu Options Access settings - Child lock” for details. – Wrong region code. The DVD must be coded for ALL regions or Region 2 in order to play on this recorder. – There is no recording on the disc or wrong disc type. Read chapter “Playback from Disc - Playable discs” for details. – Make sure the disc is not scratched or warped.
Troubleshooting (continued) English Problem (Recording) Solution The message ‘Insert recordable disc’ appears. – Either no disc was inserted or the disc that was inserted cannot be used for recordings. Insert a recordable DVD (DVD±R, DVD±RW, or DVD+R Double Layer). The message ‘Collision’ appears. – The timer recording overlaps with another timer recording. – If you ignore this warning, the programmed recording with the earlier start time will start first.
Troubleshooting (continued) Solution English Problem (HDMI/EPG) No HDMI audio output. – You will not hear any sound from the HDMI output if the source device is only DVI/HDCP-compatible. – It is not possible to output SACD or copy-controlled DVDAudio sources from the HDMI connection. No HDMI video output. – Make sure that you have activated this recorder as the HDMI input in the settings for the device you are using. See HDMI setting.
Specifications English Disc types • • Recording : DVD+R/-R, DVD+R Double layer, DVD+RW/-RW Playing: DVD-Video, MP3-CD, CD-R/CD-RW, Video CD/SVCD, DVD+R/+RW, DVD-R/-RW, Picture CD, Audio CD Connectivity • Picture/Display • • • D/A Converter: 12 bit, 74.
Analogue: Sound that has not been turned into numbers. Analogue sound varies, while digital sound has specific numerical values. These sockets send audio through two channels, the left and right. JPEG: A very common digital still picture format. A still-picture data compression system proposed by the Joint Photographic Expert Group, which features small decrease in image quality in spite of its high compression ratio. Aspect ratio: The ratio of vertical and horizontal sizes of a displayed image.
Display panel symbols/messages English The following symbols/messages may appear on your recorder display: ! SAT The recorder is prepared for satellite recording. BLOCKED The disc tray cannot be opened or closed due to some mechanical obstruction. CLOSING Disc tray is closing.
FINALIZING DISC PHILIPS The DVD±R disc is being finalised. The progress bar on the LED shows the status of the finalisation process. The recorder has been turned on. INFO DVD Information on the inserted DVD is displayed on the TV. INSTALL After the automatic channel search, the menu for setting the time/date appears on the TV. IS TV ON? PHOTO MMM/NNN Number of the current photo (for Photo mode). MMM represents the order of the current photo, NNN represents the total number of photos in the album.