User Manual
Dear Customer, About this User Manual In purchasing this machine, you have decided on a quality PHILIPS product. Your machine satisfies the full range of requirements for private use or in everyday office and business environments. Your machine is sold with a starter cartridge for a few test pages. You can assign frequently dialled numbers to speed dial keys or short dialling numbers. These functions help you to call these numbers quickly.
Installation guide Paper Separate the paper sheets by fanning them out, then align them by tapping edge of the stack lightly against a flat surface. This will prevent several sheets of paper from being drawn in all at once.
Connecting handset Plug one end of the spiral cable into the socket on the telephone handset. Put the other end into the socket at the device bottom marked with ) symbol. Insert the power cable into the connection located on the rear side of the machine. Connect the power cable to the electrical socket.
3 Remove the cartridge from the packing and remove the protective strips. Initial installation Subsequent initial installation You can start the initial installation at a later point of time using @ and 1 also Printing the menu overview You can print the menu overview using @ and 2. Selecting the language Please make certain that the protective strip has been completely removed. Be careful not to touch the nozzles or contacts.
Overview Overview of the menu functions Calling Ijet 2 menu functions Press @ to open the function menu. Page through / menu entries. Confirm the selected function with Y. Select further functions using @ or Y. Press X to close the menu and return to the starting mode. / — RECEPTION MODE — Y u — AUTOMATIC u — TAD/FAX u — MANUAL u — PHONE/FAX Empfangsmodus IPF 335-365 / — TX FROM MEMORY Berichtsausdruck / — PRINT OUT REPORT — Y u — LAST TX REPORT u — LAST BROAD. REP.
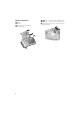
Machine Overview ‚ Handset ƒ Paper tray „ Document feeder (printed part up) … Panel with display Vorderansicht 8 ‚ C-Socket – connection socket for telephone cord ƒ B-Socket – connection socket for additional devices „ ) -Telephone handset socket – connection socket for the telephone handset Bodenansicht
Panel Short dial key Ijet 2 m – Recalling short dial numbers. Select the entries with u or with the numeric keys q – Recalling speed dial entries.
General Safety Information Your machine has been tested in conformity with standards EN 60950-1 and IEC 60950-1 and should only be operated with telephone networks and power systems that meet these standards. The machine was built exclusively for use in the indicated sales region. Do not make any changes or settings that are not described in this user manual. Setting Up the Machine The machine should rest securely on a stabile, flat surface.
Table of Contents Dear Customer, ......................................................... 3 About this User Manual ............................................ 3 Installation guide .................................... 4 Packing contents ........................................................ Attaching paper tray .................................................. Inserting paper ........................................................... Connecting handset .................................................
1 Telephone functions Link: Additional telephones For information on how to connect additional telephones and which functions are available to you, please refer the chapter on Telephone Connections and Additional Devices, Page. Placing a call to the device No paper in feeder No paper must be present in the paper feeder for the telephone function. Otherwise the device switches to fax operation. Dial the desired number. There are several ways to do this: Then lift the handset.
8 Enter the name. 9 Confirm using Y. 10 Using u select if would like to save further entries or exit the function. 11 Confirm using Y. Deleting a speed dial entry 1 Press @ several times until FAX SET-UP appears on the display. 2 Confirm using Y. 3 Using / select ONE TOUCH DIAL. 4 Confirm using Y. 5 Press the speed dial button (q) whose entry you want to delete. The saved telephone number appears on the display. 6 Press and hold the V button until the telephone number is deleted. 7 Confirm using Y.
2 Answering machine Faxjet Voice (IPF 365) Switching on and off Playing back the outgoing message 1 Press @ several times until PRINT TAD SETUP appears on the display. 2 Confirm using Y. 3 Using / select PLAY OGM #1 or PLAY OGM #2. 4 Confirm using Y. The outgoing message is played back. Switching on the answering machine only with announcement and AM/FAX 1 2 3 The answering machine can be switched on only if an outgoing message has been recorded. The reception mode must be set to TAD/FAX.
Deleting messages Deleting individual messages During the playback of message, press V to delete the current message. Delete further messages using V or exit using X. Deleting all messages 1 Press V. DELETE OLD MSG? appears on the display. 2 Confirm using V. The messages are deleted. Recording Internal Memos Internal Memos You can record voice messages (= memos), which can be played as messages. The limit on duration of recording set for messages applies even to the recording duration of memos.
Control functions Aborting last function: Press 0. Switching off answering machine (reception mode PHONE/FAX): Press #1. Switching on answering machine (reception mode TAD/FAX): Press #2. Switching off forwarding: Press #5. Switching on external memo function (ANNOUNCE ONLY): Press #6. Forwarding messages The device transmits messages to an entered telephone number at a certain time-of-day. If the connection is established a message is played.
3 Fax Loading Documents Do not insert any documents into the machine that ... ... are wet, have been edited with correction fluid, are soiled or have a coated surface. ... are written on with a soft pencil, with paint, chalk or charcoal. ... originate from newspapers or magazines (printing ink). ... are held together with office or notebook staples or with tape or glue. ... are pasted with note papers. ... are creased, crumpled or torn.
8 Press Y. The device transmits the fax message successively to all recipients. Transmission to Multiple Recipients If your machine cannot reach a recipient, the fax message is sent to the other recipients. After the machine has called all recipients, it once again dials the numbers that previously could not be reached. Re-transmission Ijet 2 You can set, if the fax should be removed from the memory if the transmission failed or not.
4 Copier 20 A5/A4 documents Copying a document Use documents with sizes A5 or A4 with 60 to 100 g/m2 weight. You can insert up to 20 documents at a time. Making a copy Inserting the document Creating multiple copies 1 Insert the documents face down into the document feeder. The top most document will be fed in first. Press Y. 1 Using the numeric keys, enter how many copies of the document (max. nine copies) you would like to make. 2 Press Y. The copy is created.
5 SMS Not supported everywhere (Function is not supported in all countries and networks) SMS Requirements CLIP for SMS Your device is preset for using the SMS (Short Messaging Service) services. Caller identification (CLIP) must be activated for the SMS to work. It is possible that you will not be able to send and receive SMS messages from a private branch exchange (depending on the country and network).
Calling the sender of the SMS You can call the sender of the SMS. 1 For the relevant SMS, press Y. 2 Using / select TEL CALL. 3 Confirm using Y. The connection is established. 4 Lift the handset off, when LIFT HANDSET appears on the display. 5 Hang up to end the call. Replying an SMS You can add text to a received SMS and reply to the sender. 1 For the relevant SMS, press Y. 2 Using / select ANSWER. 3 Confirm using Y. 4 You can modify the message, or add text to it. 5 Confirm using Y.
Validity period With this function, you can specify the duration for which the SMS should remain saved on the server of the SMS centre if the recipient is not available. During the preset period the centre tries to forward the SMS to the recipient. If your SMS message cannot be set within the validity period, the SMS is deleted by the server. 1 Press W. 2 Using / select VARIOUS SETTINGS. 3 Confirm using Y. 4 Using / select VALIDITY PERIOD. 5 Confirm using Y. 6 Using u select the validity period.
6 Settings Calling Ijet 2 menu functions Press @ to open the function menu. Page through / menu entries. Confirm the selected function with Y. Select further functions using @ or Y. Press X to close the menu and return to the starting mode. Printing the menu overview You can print the menu overview using @ and 2. Entering the date and time 1 Press @ several times until FAX SET-UP appears on the display. 2 Confirm using Y. 3 Confirm DATE AND TIME with Y. 4 If necessary, change the date format using u.
5 Useu to select from the following settings: CONTRAST:NORMAL – For all types of originals (even white text on black background) CONTRAST:DARK – For darker printouts CONTRAST:LIGHT – For brighter printout 6 Confirm using Y. 7 You can exit with X. Reducing transmission speed Lowering the Transmission Speed The machine adapts the transmission speed to the line quality. This may take some time, especially for overseas connections.
3 Press Y several times until RING COUNT: 02 appears on the display. 4 Confirm using Y. 5 Select the desired number of rings using u. 6 Confirm using Y. 7 You can exit with X. Setting the ring duration For the receiving mode PHONE/FAX you can set how long the device should ring before the device detects that it is a telephone call (no fax). 1 Press @ several times until INSTALLATION appears on the display. 2 Confirm using Y. 3 Press Y several times until, e.g. FAX/TEL TIMER:20 appears on the display.
5 Using u: select TX REPORT:ALWAYS. Transmission report is always printed after each transmission. FAILED TX REPORT Transmission report is printed only after a transmission error TX REPORT: OFF Printing of the transmission report switched off. 6 Confirm using Y. 7 You can exit with X. Printing fax journal Printing settings You can print an overview of all device settings. 1 Press @ several times until FAX SET-UP appears on the display. 2 Confirm using Y. 3 Using / select PRINT OUT SET-UP.
7 Telephone Lines and Additional Devices Configuring Telephone Lines and Services PABX systems Private branch exchanges (PABX) are typical in many offices and some households. You must dial an outside line access code in order to get a connection to the public telephone network (PSTN) from a PABX. External Device Not Extension An additional telephone connected to the machine on a telephone socket is not considered an extension. 1 Press @ several times until INSTALLATION appears on the display.
Using additional telephones (Easylink) Easylink With the Easylink function you can control your device with additional telephones. To use this function, additional telephones must be set to the tone dialling mode (DTMF/MFV tones) (for this purpose see the operating manual of your additional telephone). Starting Fax Reception If you pick up at an additional device and hear that you are receiving a fax (whistling tone or silence), you can start the fax reception by pressing ** on the additional telephone.
8 Service 3 Press the lock in the centre of the holder towards the front and lift the cartridge. Changing the ink cartridge Original Consumable Materials Use only original consumable materials. These are available from a specialised retailer or through our order service. Other consumable materials can cause damage to the machine. For receiving or copying documents, an ink cartridge must be inserted in your device.
8 Close the device by folding the document holder down and swivelling the metal bracket upward. Fixing a document jam 1 Open the control panel, by lifting and folding it up in the centre. Click the control panel completely in place. 2 Carefully pull the paper out. 9 The close the control panel. 10 If a new cartridge is inserted, a test page is printed. 11 If there are no breaks on the numbered scale, press 1 when CHECK PRINT OUT appears on the display. If there are breaks, repeat the process 0.
Cleaning the scanner 1 Open the control panel, by lifting it in the centre and folding it to the front. 4 Confirm using Y. 5 Using u select CLEANING: ON. 6 Confirm using Y. 7 The device prints a test page. If the printing quality is still unsatisfactory, you must manually clean the cartridge. 1 Open the machine and remove the cartridge from the holder. 2 Clean the contacts (A) with a slightly moistened cloth. 2 Gently wipe the scanner glass behind the panel with a cloth (A).
Power Cycling If a problem occurs that cannot be corrected with the instructions in this user manual (see also the help below), follow the steps given here. 1 Pull out the power plug. 2 Wait at least ten seconds, then plug the power plug back into the socket. 3 If the error occurs again, please contact our technical customer service or your retailer. Follow the instructions on the display and on the error report. General Information SET DATE/TIME appears on the display.
9 Appendix Guarantee (UK Terms and Conditions) Technical data Standards Safety............................................................ EN60950-1 Emissions ............................................ EN55022 Class B Immunity to electrical noise ............................ EN55024 Dimensions (L x H x W) ............... 372 × 293 × 198 mm Weight .................................................................. 3.5 kg Power supply ......................... 220 – 240 V~/ 50 – 60 Hz Power consumption....
• supply of new versions of software • work on any equipment or software modified or added without the prior written consent of SAGEM • malfunctions not resulting from the Equipment or from software installed in user workstations for the purpose of use of the equipment • communication problems related to an unsuitable environment, including: - problems related to access and/or connection to the Internet such as interruptions by access networks or malfunction of the line used by the subscriber or his corresp
This user manual was printed on recycled paper bleached without chlorine. This satisfies the highest standards for low environmental impact. The cardboard packaging used and the packaging inserts of paper and cardboard can be disposed of as waste paper. The plastic foil may be submitted for recycling or disposed of with waste not intended for recycling, depending on the requirements in your country. Trademarks: The references mentioned in this manual are trademarks of the respective companies.
Customer Information Hotline Introduction We constantly strive to develop our products according to the highest quality standards and with the greatest possible user-friendliness. In your user manual you will find all the information required to use your machine. If you nevertheless require assistance in addition to the user manual, our call centre is available. Our employees are trained experts who would be happy to answer your questions.