IPF520 IPF525 IPF555 EN User Manual
Dear Customer About this User Manual Introduction Brand Variable EN With the purchase of this device, you have chosen a quality PHILIPS product brand. Their device fulfils the most varied requirements for private use or in your office and business everyday. Your device is delivered with a starter cartridge for a few test pages. You can assign frequently dialled numbers to speed dial keys or short dialling numbers. These functions help you to call these numbers quickly.
Table of Contents Dear Customer ............................................................ 2 About this User Manual .............................................. 2 1 General Safety Information ................ 4 Setting Up the Machine ............................................... Power Supply .............................................................. Repairs ......................................................................... Consumable Materials ..............................................
1 General Safety Information Introduction 3 EN Your device has been tested in conformity with standards EN 60950-1 and IEC 60950-1 and should only be operated with telephone systems and power equipment that meet these standards. The device was built exclusively for use in the indicated sales region. Do not make any changes or settings that are not described in this user manual. Physical injury or damage to the device or loss of data can result from improper handling.
2 Overview Overview of the Menu Functions Calling Ijet 3 Menu Functions Press MENU to open the function menu. Page through [ menu entries. Confirm the selected function with o. Select further functions using [ or o. Press C to return to the previous menu level. Press j to close the menu and return to the starting mode. — RECEPT.
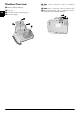
Machine Overview EN ‚ Handset (IPF¦525, IPF¦555) ƒ Paper tray „ Document feeder (writing facing up) … Panel with display ‚ EXT socket—Connection socket for additional devices ƒ LINE socket—Connection socket for telephone cable „ ) Telephone handset socket—Connection socket for the telephone handset (IPF¦525, IPF¦555) Bodenansicht Vorderansicht 6 Philips · IPF 520 · 525 · 555
Panel Telephone Book Entries ljet 3 m—Calling up the telephone book entries. Select the entries with [ or with the numeric keys q—Recalling speed dial entries. Green Lamp _—It flashes whenever an SMS message has arrived or when a document is waiting to be retrieved from the fax memory.
3 Initial Operation EN Packing contents Loading Paper Packing contents Basic Primo Voice Paper Format ‚ Device ƒ Telephone handset (IPF¦525, IPF¦555) „ Spiral cable for telephone handset (IPF¦525, IPF¦555) … Paper tray † Mains cable with plug (country-specific) ‡ Telephone cable with plug (country-specific) ˆ Ink cartridge (black) User manual with installation guide (not depicted) Before you can receive documents or make copies, you must load paper into the device.
Connecting handset Connecting the Mains Cable Type 3 (mit Telefon) Mains Voltage at the Site of Installation (IPF¦525, IPF¦555) Plug one end of the spiral cable into the socket on the telephone handset. Put the other end into the socket at the device bottom marked with ) symbol. CAUTION! Mains Voltage at the Site of Installation! Check whether the mains voltage of your device (indicated on the type label) matches the mains voltage available at the setup location.
3 Remove the cartridge from the packing and remove the protective strips. 7 Then close the control panel. EN CAUTION! Remove the Protection Strip! Please make certain that the protective strip has been completely removed. Be careful not to touch the nozzles or contacts. 4 Insert the cartridge into the holder with the coloured end facing front and the contacts facing down.
Activating the Printing Head 1 Confirm NEW PRINT CART.? using 1 to set the ink level memory to "full“. 2 A test page is printed. 3 Check the print sample for interruptions. 4 If necessary, repeat the printing using 0. 5 You can finish using 1 and j. EN Entering the Date and Time 1 Press MENU. RECEPT. SET-UP appears on the display. 2 Select using [ FAX SET-UP. 3 Confirm with o. 4 Confirm DATE AND TIME with o. 5 Select using [ SET DATE/TIME. 6 Confirm with o. 7 Enter the date (two digits each) e.g.
4 Telephone Functions Link: Additional Telephones EN CLIP Prerequisite For information on how to connect additional telephones and which functions are available to you, please refer the chapter on Telephone Connections and Additional Devices, Page 33. Notice Calling Line Identification (CLIP) For this function to work, the Caller Line Identification (CLIP) must be activated for your telephone connection (country and network dependent).
7 Enter the telephone numbers. 8 Confirm with o. 9 Enter the name. 10 Confirm with o. 11 Select a ring tone using [. 12 Confirm with o. 13 Using [ select if would like to save further entries or exit the function. 14 Confirm with o. Deleting a Speed Dial Entry 1 Press MENU. RECEPT. SET-UP appears on the display. 2 Select using [ PHONE BOOK. 3 Confirm with o. 4 Using [ select DELETE. 5 Confirm with o. 6 Using [ select the entry which you would like to delete.
6 Using [ select the entry which you would like to edit. Notice Navigating in the Telephone Book Enter the initial letters with the numeric keys to quickly navigate through the telephone book. EN 7 Confirm with o. 8 Edit the number. 9 Confirm with o. 10 Edit the name. 11 Confirm with o. 12 Select a ring tone using [. 13 Confirm with o. The changed entry is saved. Calling Line Identification (CLIP) CLIP Definition The number of an incoming call appears on the display.
5 Answering Machine Type 2 (großer Core) (IPF¦555) Switching on and off Switching on the answering machine only with announcement and AM/FAX ljet 3 Notice Switching on the Answering Machine only with Outgoing Message The answering machine can be switched on only if an outgoing message has been recorded. The reception mode must be set to TAD/FAX. 1 Press MENU. RECEPT. SET-UP appears on the display. 2 Press o. 3 Confirm RECEPTION MODE with o. 4 Using [ select TAD/FAX – Answering machine switched on.
Using announcement without recording message EN You can adjust the answering machine so that the caller hears an outgoing message for which no message can be recorded in reply (= external memo). You can read how to record an outgoing message in the “recording outgoing message” section. 1 Press MENU. RECEPT. SET-UP appears on the display. 2 Select using [ TAD SET-UP. 3 Confirm with o. ICM ON SPEAKER appears on the display. 4 Using [ select ANNOUNCE ONLY. 5 Confirm with o.
Remote Control Functions Notice Deleting Access Code You can delete the access code by pressing C. Note that when the access code is deleted, everyone has an access to the stored messages. 9 Confirm with o. 10 You can exit with j. Protecting Answering Machine against Access by Strangers By entering an access code you can prevent other persons from hearing the personal messages, or from changing the settings of the answering machine. 1 Press MENU. RECEPT. SET-UP appears on the display.
Switch on forwarding EN 1 Press MENU. RECEPT. SET-UP appears on the display. 2 Select using [ TAD SET-UP. 3 Confirm with o. ICM ON SPEAKER appears on the display. 4 Using [ select FORWARD MSGS. Notice Modifying or Printing Settings If you already done settings, confirm ALREADY ENTERED using o. Use [ to select whether you would like to modify or delete the settings. 5 Confirm with o.
6 Fax Unsuitable Documents! CAUTION! Unsuitable Documents! Do not insert any documents into the device that ... ... are wet, have been edited with correction fluid, are soiled or have a coated surface. … that are written on with a soft pencil, with paint, chalk or charcoal. … originate from newspapers or magazines (printing ink). … that are held together with office or notebook staples or with tape or glue. … are pasted with note papers. … are creased, crumpled or torn.
EN 1 Enter the desired number using the numeric keypad or select a saved entry. 2 Press @. 3 Enter the direct-inward dialling number or sub address. 4 Press o. The direct-inward dialling number or sub address is dialled only after a short pause. Sending to Multiple Recipients (= Broadcasting) Broadcast Transmissions You can send one fax to multiple recipients in succession. Entering Recipients Individually 1 Insert the document. 2 Press MENU. RECEPT. SET-UP appears on the display.
Fax Reception Assign an Entry Fax Reception 1 Press MENU. RECEPT. SET-UP appears on the display. 2 Confirm with o. RECEPTION MODE appears on the display. 3 Select using [ BLACK LIST. 4 Confirm with o. 5 Select using [ NEW NUMBER. 6 Confirm with o. 7 Enter the telephone number from which you do not wish to receive a fax. 8 Confirm with o. 9 Using [ select if you would like save further entries. 10 You can exit with j. Received faxes are printed out immediately.
7 Copier 20 A5/A4 Documents Use documents with sizes A5 or A4 with 60 to 100 g/m2 weight. You can insert up to 20 documents at a time. EN 8 Using the numeric keys, enter how many copies of the document (max. nine copies) you would like to make. 9 Press o. The copy is created. Inserting Documents 1 Insert the documents face up into the document feeder. The top most document will be fed in first. 2 Press o. 3 Set the desired resolution using f x. TEXT—For documents without special features.
8 SMS Function is not supported in all countries and networks (Function is not supported in all countries and networks) SMS Requirements CLIP for SMS Your device is preset for using the SMS (Short Messaging Service) services. Caller Line Identification (CLIP) must be activated for the SMS to work. It is possible that you will not be able to send and receive SMS messages from a private branch exchange (depending on the country and network).
SMS Messages to Fax Function is not supported in all countries and networks EN (Function is not supported in all countries and networks) You can send SMS messages to a fax number. 1 Press _. 2 Use [ to select FAX TYPE. 3 Confirm with o. 4 Enter the text as described under Sending SMS. 5 Confirm with o. 6 Enter the desired number using the numeric keypad or select a saved entry. 7 Confirm with o. 8 In some countries you can also send SMS messages to an extension number or sub address.
Replying an SMS Deleting SMS You can add text to a received SMS and reply to the sender. 1 For the relevant SMS, press o. 2 Select using [ ANSWER. 3 Confirm with o. 4 You can modify the message, or add text to it. 5 Confirm with o. 6 Using [ select YES to transmit the SMS or NO to edit the SMS. 7 Confirm with o. The SMS is sent back to the sender. SMS Deletion Introduction Composing SMS You can enter and save SMSs without sending them. These SMSs are saved as SMS WRITTEN.
Set the sub address (Terminal ID) of the device Function is not supported in all countries and networks EN (Function is not supported in all countries and networks) If you have several devices with an SMS function connected to one telephone line, you can assign sub-addresses to these devices. You can then send SMS messages to a specific device. You can assign your device it’s own sub address. 1 Press _. 2 Using [ select CONFIGURATION. 3 Confirm with o. 4 Select using [ TERMINAL NO.. 5 Confirm with o.
9 Settings Calling Ijet 3 Menu Functions Press MENU to open the function menu. Page through [ menu entries. Confirm the selected function with o. Select further functions using [ or o. Press C to return to the previous menu level. Press j to close the menu and return to the starting mode. Selecting the Country Setting the Country Correctly CAUTION! Printing the Functions List Notice Printing the Functions List You can print the menu overview using MENU and 2. Entering the Date and Time 1 Press MENU.
EN Entering Number Setting Page Adjustment 1 Press MENU. RECEPT. SET-UP appears on the display. 2 Select using [ INSTALLATION. 3 Confirm with o. 4 Select using [ STATION NUMBER. 5 Confirm with o. 6 Enter your number. Using * you can enter a plus sign for international telephone numbers. 7 Confirm with o. 8 You can exit with j. Incoming faxes will be printed out somewhat reduced in size so that no information is lost. 1 Press MENU. RECEPT. SET-UP appears on the display. 2 Select using [ FAX SET-UP.
Setting the fax switch Type Basic (IPF¦520) The built-in fax switch of your device distinguishes between fax messages and telephone calls. Faxes are received automatically. You can set whether faxes will be received automatically or manually. 1 Press MENU. RECEPT. SET-UP appears on the display. 2 Press o. 3 Confirm RECEPTION MODE with o. 4 Use [ to select from the following settings: AUTOMATIC—Faxes are received automatically. MANUAL—Faxes are received only on additional telephones.
Reception Mode TAD/FAX Changing the Number of Rings Notice For the reception mode AUTOMATIC, PHONE/FAX or TAD/FAX you can set how many times the device is to ring before it picks up. After these many number of rings the fax (AUTOMATIC, PHONE/FAX mode) or the answering machine (TAD/FAX mode) switches on. 1 Press MENU. RECEPT. SET-UP appears on the display. 2 Confirm with o. RECEPTION MODE appears on the display. 3 Select using [ RINGS NUMBER. 4 Confirm with o. 5 Select the desired number of rings using [.
4 Select using [ TEL.LINE SETUP. 5 Confirm with o. LINE TYPE appears on the display. 6 Using [ select SILENCE LAPSE. 7 Confirm with o. 8 Using o select from the displayed values. 9 Confirm with o. 10 You can exit with j. Special Settings Silent Fax Reception For the reception mode PHONE/FAX or TAD/FAX you can set whether the device is to ring before it picks up. This makes it possible for you to receive faxes silently without getting disturbed. 1 Press MENU. RECEPT. SET-UP appears on the display.
Printing Settings EN You can print an overview of all device settings. 1 Press MENU. RECEPT. SET-UP appears on the display. 2 Select using [ FAX SET-UP. 3 Confirm with o. DATE AND TIME appears on the display. 4 Using [ select PRINT SET-UP. 5 Confirm with o. The current settings are printed. 8 Use [ to select from the following settings: AUTOMATIC - the text which exceeds the page length is printed onto a new page, provided it is longer than 8mm. NO - the text which exceeds the page length is not printed.
10 Telephone Lines and Additional Devices Configuring Telephone Lines and Services Voice-Mailbox Type 3 (mit Telefon) In the event that you use a DSL modem: Connect the device to the slot intended for analogue telephones/fax machines! For additional information, please consult the operating manual of your DSL system. Ask your telephone or internet service provider if necessary.
Switch on the Flash Function for the Extension EN For older telephone systems, the outside line access code can be R (= FLASH). Only in this setting can a connection to the public telephone network be made. With the flash function switched on, a flash signal is triggered with the R key. Connection to the Telephone Line Order of Connections In order for the fax switch to function, the device must be first in the series if multiple devices are connected to the same telephone socket.
Using an External Answering Machine Start Automatic Recognition CAUTION! For the best operation, the answering machine must be connected to the EXT socket of the device. Switching of External Answering Machine If you are using an external answering machine, switch this off or disconnect it from the power supply. If the external answering machine is switched on, the recognition of the call signal clock pulse can be disrupted.
11 Service Changing the Ink Cartridge EN 3 Press the lock in the centre of the holder towards the front and lift the cartridge. Use Original Consumable Materials! CAUTION! Use Original Consumable Materials! Use only original consumable materials. These are available from a specialised retailer or through our order service (see back side of this user manual). Other consumable materials can cause damage to the device. For receiving or copying documents, an ink cartridge must be inserted in your device.
8 Close the device by folding the document holder down and swivelling the metal bracket upward. Fixing a Document Jam 1 Open the control panel, by lifting and folding it up in the centre. Click the control panel completely in place. 2 Carefully pull out the paper. 9 Then close the control panel. 10 NEW PRINT CART.? appears on the display. 11 Press the 1 key if a new cartridge was inserted. A test page is printed.
Cleaning the Scanner 1 Open the control panel, by lifting it in the centre and folding it to the front. EN 1 Press MENU. RECEPT. SET-UP appears on the display. 2 Using [ select CART. MAINTEN.. 3 Confirm with o. 4 Using [ select CLEAN CARTRIDGE. 5 Confirm with o. 6 Select using [ YES. 7 The device prints a test page. If the printing quality is still unsatisfactory, you must manually clean the cartridge. Cleaning the Cartridge Manually 1 Open the device and remove the cartridge from the holder.
5 Insert the cartridge and close the device. EN 6 Reconnect the device to the power supply. 7 Enter the date and time. Power Cycling If a problem occurs that cannot be corrected with the instructions in this user manual (see also the help below), follow the steps given here. 1 Pull out the power plug. 2 Wait at least ten seconds, then plug the power plug back into the socket. 3 If the problems repeats, please contact our technical customer service or your retailer.
Troubleshooting General Information EN SET DATE/TIME appears on the display. You have to re-set the time and date after a short power failure. 1 Press MENU and o. 2 Enter the date and time with the numeric keys. 3 Confirm with o. Problems when Faxing or Printing Faxes sent are of poor quality. ß Change the resolution and/or the contrast. ß Clean the scanner. ß Test the device by making a copy of the document. If the copy is in order, the fax machine of the recipient might possibly be defective.
12 Appendix Technical Data Dimensions (L¦×¦H¦×¦W) ...................372¦×¦293¦×¦198¦mm Weight ...................................................................3,5¦kg Mains Connection.................. 220¦–¦240¦V¦~ / 50¦–¦60¦Hz Power Consumption Stand-by Mode..................................................<¦5¦W Transmission ...................................................<¦25¦W Recommended Ambient ....................................5¦–¦35¦ºC Relative Humidity ...............
EN – Failure to properly follow the installation process and instructions for use – An external cause to the equipment (including but not limited to: lightening, fire, shock, vandalism, inappropriate conditions of electrical network or water damage of any nature) – Modifications made without the written approval of Sagem Communications – Unsuitable operating conditions, particularly of temperature and humidity – Repair or maintenance of the equipment by persons not authorized by Sagem Communications •) Wea
Trademarks: The references mentioned in this manual are trademarks of the respective companies. The lack of the trademarks É and Ë does not justify the assumption that these dedicated terminologies are free trademarks. Other product names used herein are for identification purposes only and may be trademarks of their respective owners. Sagem Communications disclaims any and all rights in those marks. The reproduction of certain documents (e.g. by scanning, printing, copying) is prohibited in many countries.
Customer Information Introduction 1 Introduction 1 As part of our continuing quest for total customer satisfaction, all of our products are made with ease-of-use and reliability in mind. In your user manual you will find all the information required to use your machine. If, after consulting your user manual, you still require assistance, you should contact our Call Centre. Our personnel are highly trained specialists who can ensure that you receive the maximum benefit from your product.