HD8651 4219.460.4226.1 PH2000 HD8651 FRONT COVER A5 BW.
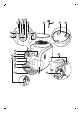
1 10 4 3 6 5 7 26 27 25 8 11 9 12 13 23 14 15 16 17 18 19 20 21 22 24
4 English Contents Introduction___________________________________________________________________________________ Machine overview_____________________________________________________________________________ IMPORTANT SAFETY INSTRUCTIONS________________________________________________________ Caution________________________________________________________________________________________ Instructions for the power supply cord_______________________________________________________ DANGERS__________________
English 5 Introduction Congratulations on buying this fully automatic Philips Xsmall espresso machine! To fully benefit from the support that Philips offers, please register your product at www.philips.com/welcome. This user manual applies to HD8651. The machine is suitable for preparing espresso coffee using whole coffee beans. It can also dispense steam and hot water. In this user manual you find all the information you need to install, use and maintain your machine.
6 English Caution This appliance is for household use only. Any servicing, other than cleaning and user maintenance, should be performed by an authorized service center. Do not immerse machine in water. To reduce the risk of fire or electric shock, do not disassemble the machine. There are no parts inside the machine serviceable by the user. Repair should be done by authorized service personnel only. 1 Check voltage to be sure that the voltage indicated on the nameplate corresponds with your voltage.
English 7 - Check if the voltage indicated on the machine corresponds to the local voltage before you connect the machine - Connect the machine to a grounded wall outlet. - Do not let the power supply cord hang over the edge of a table or counter, or touch hot surfaces. - Never immerse the machine, power plug or power supply cord in water (danger of electrical shock). - Do not pour liquids on the power supply cord connector. - Never direct the hot water jet towards body parts: danger of burns.
8 English - If you are not going to use your coffee machine for a prolonged period (e.g. a holiday), we recommend that you discard any water left inside the tank. Before you use the coffee machine again, clean the water tank and perform a manual rinsing cycle. - Do not put any of the detachable parts of the machine in the dishwasher, except for the milk carafe. - The machine is for household use only.
English 9 Installing the machine 1 Remove all packaging material from the machine. 2 Place the machine on a table or worktop away from the tap, the sink and heat sources. 3 Leave at least 15cm of free space above, behind and on both sides of the machine. 15cm 15cm 15cm 15cm 15cm 4 Insert the small plug into the socket located on the back of the machine. 5 Insert the plug into the wall socket.
10 English Preparing for use Filling the water tank 1 Remove the water tank from the machine. 2 Rinse the water tank under the tap. 3 Fill the water tank with cold tap water up to the MAX indication. Warning: Never fill the water tank with warm, hot or sparkling water, as this may cause damage to the water tank and the machine. 4 Slide the water tank back into the machine. Filling the coffee bean container 1 Fill the coffee bean container with espresso beans. Note: Only use espresso beans.
English 11 1 Place a bowl under the hot water/steam wand or classic milk frother and the coffee spout. Make sure the control dial points to the coffee bean icon. 2 Press the on/off button. 3 When the warning light flashes quickly, turn the control dial to the hot water icon and wait a few seconds. The warning light goes out and some water comes out of the hot water/steam wand or classic milk frother.
12 English 1 Place a bowl under the coffee spout. 2 Make sure the on/off button lights up continuously. 3 Press the regular coffee button. The machine starts to brew a cup of coffee to prepare the inner circuit for use. This coffee is not drinkable. 4 Empty the cup after the brewing cycle is finished. 5 Place a bowl under the hot water/steam wand or classic milk frother. 6 Turn the control dial to the hot water icon. 7 Let the water flow until the water tank is empty.
English 13 9 Fill the water tank with fresh water up to the MAX indication. The machine is ready for use. Note:The first cups of coffee may be a bit watery, this is normal.The machine needs to complete a few brewing cycles to optimise its settings. Installing the Intenza+ water filter We advise you to install the Intenza+ water filter as this prevents scale build-up in your machine. You can buy the Intenza+ water filter separately.
14 English 4 Place the filter in the empty water tank. Press it down until it cannot move any further. 5 Fill the water tank with fresh water up to the MAX indication and slide it into the machine. 6 Let the machine brew hot water until the water tank is empty (see chapter ‘Using the machine’, section ‘Hot water’). 7 Refill the water tank with fresh water up to the MAX indication and slide it back into the machine. - The on/off button lights up continuously. The machine is ready for use.
English 15 - Press the espresso button or regular coffee button twice to brew 2 cups of coffee. The 2-cup light lights up.The machine grinds the required amount of coffee beans for one cup and then fills both cups half.Then the machine grinds coffee beans for one cup again and fills both cups fully. 4 Press the on/off button to switch off the machine. If you only brewed one cup of coffee, the machine briefly rinses the inner circuit before it switches off.
16 English 5 Immerse the hot water/steam wand or classic milk frother in the milk and turn the control dial to the steam icon. Froth the milk by gently swirling the jug and moving it up and down. 6 When the milk froth has the desired consistency, turn the control dial back to the coffee bean icon. After frothing milk, the machine needs to cool down before you can brew coffee. Follow the next steps. 1 Press the espresso button or regular coffee button.
English 17 4 Turn the control dial back to the coffee bean icon when the cup contains the preferred amount of hot water. Adjusting the machine You can adjust the grinding degree and coffee volume to obtain coffee that is perfectly customised to your taste. Adjusting the grinding degree 2 1 You can adjust the grinding degree of the machine.The ceramic coffee grinder guarantees accurate and perfect grinding and coarseness for every cup of coffee.
18 English 2 Press and hold the button of the coffee type you want to adjust. Release the button when the machine starts to grind coffee beans. - The 2-cup light and the on/off button flash slowly. 3 Press the same button again when the cup contains the desired amount of coffee. The machine automatically saves the new setting. Cleaning and maintenance Regular cleaning and descaling prolongs the lifetime of your machine and ensures optimum quality and taste of your coffee.
English 19 - If your machine has a classic milk frother, remove the tube and upper part. 2 Rinse the tube and upper part with fresh water and dry them with a dry cloth. 3 Clean the hot water/steam wand with a wet cloth to remove milk residues. 4 Put the protective handle and classic milk frother (if present) back onto the hot water/steam wand.They are correctly positioned when you hear a click.
20 English 4 Press the PUSH button and pull at the grip of the brew group to remove it from the machine. 1 2 5 Clean the coffee exit duct thoroughly with a spoon handle or another round-tipped kitchen utensil. 6 Clean the inside of the machine with a damp cloth. 7 Rinse the outside of the brew group under a lukewarm tap. Warning: Never use any washing-up liquid or other cleaning agent to clean the brewing unit.
English 21 - To position the hook correctly, push it upwards until it is in uppermost position. Note:The hook is not correctly positioned if it is still in bottommost position. 10 Slide the brew group back into the machine along the guiding rails on the sides until it clicks into position. Warning: Do not press the PUSH button. 11 Close the service door. 12 Slide the coffee grounds container back into the machine.
22 English 3 Apply some lubricant around the shaft in the bottom of the brew group. 4 Apply some lubricant to both sides of the part shown in the illustration. 5 Place the brew group and the coffee ground container back into the machine. Follow steps 7-11 in section ‘Cleaning the brew group’. Descaling Please use Philips descaler only.
English 23 Preparation 1 Switch off the machine. Note: If you do not switch off the machine, you cannot enter the descaling 2 Empty the drip tray and place it back. Remove the classic milk frother (if present). 3 Empty the water tank and remove the Intenza+ water filter (if present). Pour the entire bottle of descaling solution into the water tank. 4 Add water to the descaling solution in the water tank up to the MAX indication. 5 Make sure the control dial is set to the coffee bean icon.
24 English 3 Turn the control dial back to the coffee bean icon. Wait approximately 1 minute to let the descaling solution act. 4 Press the espresso button to brew a cup of espresso. Wait approximately 1 minute to let the descaling solution act. Note: During the descaling process, the coffee grinding function does not work.If you press the espresso button, only water will flow out of the machine. 5 Repeat steps to until the ‘water tank empty’ light lights up continuously.
English 25 7 Remove the drip tray, rinse it and place it back. 8 Reattach the classic milk frother. 9 Remove the water tank and rinse it. 10 Reinstall the Intenza+ water filter (if present). 11 Fill the water tank with fresh tap water up to the MAX indication and slide the water tank back into the machine. 12 Press the on/off button to switch off the machine. When you switch the machine back on, it is ready for use again.
26 English Meaning of light signals - The on/off button light lights up continuously. The machine is ready for use. - The on/off button flashes slowly. The machine is warming up or performing a procedure. - The on/off button flashes quickly. The machine is overheated. Brew a cup of hot water to cool down the machine. - The descaling and on/off button lights light up continuously. You have to descale the machine. Follow the instructions in chapter ‘Descaling the machine’.
English 27 - The 2-cup and on/off button lights flash slowly. The machine is programming the amount of coffee to brew. Follow the instructions in chapter ‘Using the machine’, section ‘Adjusting the coffee volume’. - The 2-cup light lights up continuously and the on/off button flashes slowly. The machine is brewing two cups of coffee. - The water tank empty light lights up continuously.The water level is low. Fill the water tank with fresh water up to the MAX level.
28 English - The warning light flashes quickly. There is no water in the internal circuit. Turn the control dial to the hot water icon and let hot water come out of the machine until the water flows continuously. See chapter ‘Preparing for use’ section ‘Heating up the machine’. Follow steps 3 and 4. - The warning light flashes slowly. The brewing unit is not correctly inserted, the coffee grounds container is not inserted, the service door is open or the control dial is not in the correct position.
English 29 - Maintenance kit (CA6706) Troubleshooting This chapter summarises the most common problems you could encounter with the machine. If you are unable to solve the problem with the information below, visit www.philips.com/support for a list of frequently asked questions or contact the Consumer Care Centre in your country. Problem Solution The machine does not Make sure the small plug is inserted into the socket. Plug in and work. switch on the machine.
30 English Problem Solution If you still cannot place the brew group back. Reinsert the coffee grounds container and leave the brew group out. Close the maintenance door, switch on the machine. The machine prepares for use. Switch off the machine and try to place back the brew group again. The machine grinds the coffee beans but no coffee comes out. Clean the coffee exit duct and set the grinder to a coarser setting. Clean the brew group (see 'Cleaning the brew group'). Fill the water tank with water.
English Technical specifications Description The manufacturer reserves the right to improve the technical specifications of the product. All the preset quantities are approximate. Value Nominal voltage - Power rating - Power supply See data plate on inside of service door Size (w x h x d) 295 x 325 x 420 mm Weight 6.9 kg Material Plastic Power cord length 0.8m - 1.
32 Français (Canada) Table des matières Introduction___________________________________________________________________________________ Vue d’ensemble de la machine_______________________________________________________________ IMPORTANTES CONSIGNES DE SÉCURITÉ___________________________________________________ Attention_______________________________________________________________________________________ Directives pour le cordon d’alimentation_____________________________________________________ DANGER
Français (Canada) 33 Introduction Félicitations pour l’achat de cette machine à espresso Philips Xsmall entièrement automatique! Pour profiter pleinement du soutien offert par Philips, veuillez enregistrer votre produit à l’adresse www.philips.com/welcome. Le présent manuel d’utilisation s’applique au modèle HD8651. Cette machine convient à la préparation de café espresso à partir de grains de café entiers. Elle peut également distribuer de la vapeur et de l’eau chaude.
34 Français (Canada) Attention Cet appareil est destiné à un usage domestique uniquement. Toute maintenance autre que le nettoyage et l’entretien normal devrait être effectuée par un centre de services autorisé. N’immergez pas l’appareil dans l’eau. Afin de réduire les risques d’incendie ou de décharge électrique, ne désassemblez pas l’appareil. Aucune pièce se trouvant à l’intérieur de l’appareil ne peut être entretenue par l’utilisateur.
Français (Canada) 35 - N’insérez jamais des parties du corps ou des objets dans le moulin à café. AVERTISSEMENT Pour réduire tout risque de brûlure, d’électrocution, d’incendie ou de blessure : - Avant de brancher l’appareil, vérifiez si la tension qui y est indiquée correspond à celle du réseau électrique local. - Branchez l’appareil à une prise murale mise à la terre.
36 Français (Canada) - Utilisez l’appareil uniquement selon l’usage décrit dans le guide d’utilisation pour éviter les blessures causées par une mauvaise utilisation. - N’insérez jamais de doigts ou d’autres objets dans le moulin à café. AVERTISSEMENT - Puisque l’eau est destinée à la consommation, il faut utiliser l’eau du réservoir dans les deux jours. - Lorsque vous n’utilisez pas la cafetière pendant une période prolongée (p. ex. une fête), nous recommandons de jeter l’eau qui reste dans le réservoir.
Français (Canada) 37 CONSERVEZ CES INSTRUCTIONS Champs électromagnétiques (CEM) Cet appareil est conforme à toutes les normes et à tous les règlements applicables relatifs à l’exposition aux champs électromagnétiques. Première installation Remarque : Cette machine a été soumise à un essai avec du café. Même si elle a été soigneusement nettoyée, des résidus de café peuvent s’y trouver. Nous garantissons cependant que la machine est tout à fait neuve.
38 Français (Canada) 5 Branchez la fiche dans la prise murale. 6 Retirez l’autocollant de protection du plateau égouttoir et faites glisser le plateau égouttoir dans les rainures à l’avant de la machine. Remarque : Assurez-vous que le plateau égouttoir est entièrement inséré. Avant l’utilisation Remplissage du réservoir 1 Retirez le réservoir d’eau de la machine. 2 Rincez le réservoir d’eau sous le robinet. 3 Remplissez le réservoir d’eau froide jusqu’à l’indication MAX.
Français (Canada) 39 Remplissage du réservoir à grains de café 1 Remplissez le réservoir de grains de café espresso. Remarque : N’utilisez que des grains de café espresso. N’utilisez jamais de café moulu, ni de grains de café non torréfiés, ni de grains de café caramélisés, car cela risque d’endommager la machine. 2 Placez le couvercle sur le récipient à grains de café.
40 Français (Canada) 3 Lorsque le voyant d’avertissement clignote rapidement, tournez le bouton de commande jusqu’à l’icône d’eau chaude et patientez quelques secondes. Le voyant d’avertissement s’éteint et un peu d’eau s’écoule de la buse à eau chaude/vapeur ou du mousseur à lait classique.
Français (Canada) 41 5 Placez un bol sous la buse à eau chaude/vapeur ou sous le mousseur à lait classique. 6 Réglez le bouton de commande sur l’icône d’eau chaude. 7 Laissez l’eau s’écouler jusqu’à ce que le réservoir d’eau soit vide. Le voyant « Réservoir d’eau vide » reste allumé en continu. 8 Réglez le bouton de commande à nouveau sur l’icône de grain de café. 9 Remplissez le réservoir d’eau fraîche jusqu’à jusqu’à atteindre la mesure MAX. La machine est prête à l’emploi.
42 Français (Canada) 1 Retirez le petit filtre blanc du réservoir à eau et rangez-le dans un endroit sec. Remarque : Veuillez conserver le petit filtre blanc pour un usage ultérieur. Vous en aurez besoin pour la procédure de détartrage. 2 Retirez le filtre de son emballage et immergez-le dans de l’eau froide, ouverture vers le haut. Appuyez sur les côtés du filtre doucement pour laisser sortir les bulles d’air.
Français (Canada) 43 Infusion de une ou deux tasses d’espresso ou de café ordinaire 1 Assurez-vous que le bouton marche/arrêt s’allume en vert de manière continue et que le bouton de commande est dirigé vers l’icône de grain de café. 2 Placez une ou deux tasses sur la grille du plateau égouttoir. 3 Appuyez sur le bouton pour espresso ou sur le bouton pour café ordinaire. Remarque : Vous pouvez interrompre le cycle d’infusion à tout moment.
44 Français (Canada) 1 Placez une grande tasse sous la buse à eau chaude/vapeur ou sous le mousseur à lait classique. 2 Réglez le bouton de commande sur l’icône de vapeur. Le bouton marche/arrêt clignote pendant que l’eau chauffe. L’eau chaude s’écoule de la buse à eau chaude/vapeur ou du mousseur à lait classique. 3 Lorsque seule de la vapeur s’échappe de la buse à eau chaude/vapeur ou du mousseur à lait classique, réglez le bouton de commande sur l’icône de grain de café.
Français (Canada) 45 2 Placez un bol sous la buse à eau chaude/vapeur ou sous le mousseur à lait classique et réglez le bouton de commande sur l’icône d’eau chaude. 3 L’eau chaude s’écoule de la buse à eau chaude/vapeur ou du mousseur à lait classique. 4 Attendez que l’eau cesse de s’écouler et que le bouton marche/arrêt reste allumé en continu. 5 Réglez le bouton de commande à nouveau sur l’icône de grain de café. La machine est prête à infuser du café.
46 Français (Canada) Réglage du niveau de mouture du café 2 1 Vous pouvez régler le niveau de mouture de la machine. Le moulin à café en céramique garantit une mouture et une finesse précises et parfaites à chaque tasse de café. Il préserve un arôme intense, pour un goût parfait à chaque tasse. - Appuyez fermement sur le bouton de réglage de la mouture, puis tournez-le d’un cran à la fois. - Vous pouvez choisir parmi cinq réglages de mouture différents. Plus le point est petit, plus le café est intense.
Français (Canada) 47 Ne plongez pas la machine à café dans l’eau ou dans tout autre liquide. N’utilisez jamais de tampons à récurer ni de produits abrasifs ou puissants pour nettoyer la machine. Débranchez toujours la machine et laissez-la refroidir avant de la nettoyer. Remarque : Aucune des parties amovibles ne passe au lave-vaisselle. Rincez-les sous le robinet.
48 Français (Canada) Nettoyage du groupe de percolation Avertissement : Ne mettez pas le groupe de percolation dans le lave-vaisselle et n’utilisez pas de liquide vaisselle ou de détergent pour le nettoyer. Nettoyez le groupe de percolation une fois par semaine. 1 Éteignez la machine et débranchez-la. 2 Retirez le bac à marc de café de la machine. 3 Ouvrez la porte de service. 4 Appuyez sur le bouton PUSH et tirez sur la poignée du groupe de percolation pour retirer le groupe de la machine.
Français (Canada) 49 7 Rincez l’extérieur du groupe de percolation sous l’eau tiède du robinet. Avertissement : N’utilisez jamais de liquide vaisselle ni aucun autre produit de nettoyage pour nettoyer l’unité de percolation. Avertissement : N’essuyez pas le groupe de percolation avec un chiffon pour empêcher que des fibres ne tombent dans l’unité de percolation. Après avoir rincé le groupe de percolation, retirez l’excès d’eau en le secouant ou en le laissant sécher à l’air libre.
50 Français (Canada) 10 Remettez la chambre d’extraction dans l’appareil en suivant les rails de guidage situés sur les côtés jusqu’à ce qu’elle se fixe en place. Avertissement : N’appuyez pas sur le bouton PUSH. 11 Fermez la porte de service. 12 Réinsérez le bac à marc de café dans la machine. Lubrification Pour un rendement optimal de la machine, lubrifiez le groupe de percolation après l’infusion de 500 tasses de café ou une fois tous les trois mois.
Français (Canada) 51 5 Placez le groupe de percolation et le bac à marc de café dans la machine. Suivez les étapes 7 à 11 de la section « Nettoyage du groupe de percolation ». Détartrage Veuillez utiliser uniquement le détartrant Philips. Vous ne devriez en aucun cas utiliser un détartrant à base d’acide sulfurique, d’acide chlorhydrique, d’acide sulfamique ou acétique (vinaigre) puisque cela pourrait endommager le circuit d’eau de votre machine et l’empêcher de dissoudre correctement le calcaire.
52 Français (Canada) 5 Assurez-vous que le bouton de commande est réglé sur l’icône de grain de café. 6 Placez une grande tasse sous la buse à eau chaude/vapeur. Cycle de détartrage 1 Appuyez simultanément sur le bouton pour espresso et le bouton pour café ordinaire pendant environ cinq secondes. Le voyant de détartrage orange clignote lentement pendant tout le cycle de détartrage. 5 sec 2 Réglez le bouton de commande sur l’icône d’eau chaude et versez de l’eau chaude.
Cycle de rinçage Français (Canada) 53 1 Retirez le réservoir d’eau de la machine et rincez-le. 2 Remplissez le réservoir d’eau fraîche du robinet jusqu’à la mesure MAX et replacez le réservoir d’eau dans la machine. 3 Videz la grande tasse et replacez-la sur le plateau égouttoir, sous la buse à eau chaude/vapeur. 4 Appuyez sur le bouton pour espresso pour infuser une tasse d’espresso. Répétez cette étape. 5 Réglez le bouton de commande sur l’icône d’eau chaude.
54 Français (Canada) Interruption du processus de détartrage Si la machine se bloque pendant la procédure de détartrage, vous pouvez appuyer sur le bouton marche/arrêt. Cela vous permet de compléter la procédure de détartrage. Suivez les étapes ci-dessous pour vous assurer que votre machine est de nouveau prête à l’emploi. 1 Appuyez simultanément sur le bouton pour espresso et le bouton pour café ordinaire pendant environ cinq secondes. 2 Retirez le plateau égouttoir, rincez-le et remettez-le en place.
Français (Canada) 55 Signification des voyants - Le voyant du bouton marche/arrêt reste allumé en continu. La machine est prête à l’emploi. - Le bouton marche/arrêt clignote lentement. La machine chauffe ou effectue une procédure. - Le bouton marche/arrêt clignote rapidement. La machine surchauffe. Infusez une tasse d’eau chaude pour faire refroidir la machine. - Les voyants de détartrage et de marche/arrêt restent allumés en continu. La machine doit être détartrée.
56 Français (Canada) - Les voyants 2 tasses et marche/arrêt clignotent lentement. La machine est en train de programmer la quantité de café à infuser. Suivez les instructions du chapitre « Utilisation de la machine », section « Réglage du volume de café ». - Le voyant 2 tasses reste allumé en continu et le voyant marche/arrêt clignote lentement. La machine infuse deux tasses de café. - Le voyant « Réservoir d’eau vide » reste allumé en continu. Le niveau d’eau est bas.
Français (Canada) 57 - Le voyant d’avertissement clignote rapidement. Il n’y a pas d’eau dans le circuit interne. Réglez le bouton de commande sur l’icône d’eau chaude et laissez l’eau chaude sortir de la machine jusqu’à ce que l’eau s’écoule en continu. Veuillez vous reporter au chapitre « Avant utilisation », section « Processus de chauffe de la machine ». Suivez les étapes 3 et 4. - Le voyant d’avertissement clignote lentement.
58 Français (Canada) - Lubrifiant (HD5061) - Solution de détartrage (CA6700) - Trousse d’entretien (CA6706) Résolution des problèmes Ce chapitre récapitule les problèmes les plus courants que vous pouvez rencontrer avec la machine. Si vous ne parvenez pas à résoudre le problème à l’aide des informations ci-dessous, rendezvous sur le site www.philips.com/support et consultez la liste de questions fréquemment posées ou communiquez avec le Centre de service à la clientèle Philips de votre pays.
Français (Canada) 59 Problème Solution Impossible de retirer le groupe de percolation. Retirez le bac à marc de café avant d’ouvrir la porte de service. Si vous ne parvenez toujours pas à retirer le groupe de percolation, suivez les étapes suivantes. Réinsérez le bac à marc de café, fermez la porte de service et allumez la machine. La machine se prépare à l’emploi. Éteignez la machine et essayez de retirer à nouveau le groupe de percolation. Le groupe de percolation ne peut pas être remis en place.
60 Français (Canada) Problème Solution Il n’y a pas assez de café dans ma tasse. Il y a peut-être de l’air dans le circuit interne. Rincez le circuit interne de la machine en réglant le bouton de commande sur l’icône d’eau chaude et en laissant. un peu d’eau s’écouler de la machine. Nettoyez le groupe (voir 'Nettoyage du groupe de percolation') de percolation. Caractéristiques techniques Description Le fabricant se réserve le droit d’améliorer les caractéristiques techniques du produit.
www.philips.com/coffee-care 4219.460.4226.1 PH2000 HD8651 BACK COVER A5 BW.